4 layers45 × 38 mm
MerlynCAM
YeetTheAnson/MerlynCAM
An action camera that records at 1080p@90, 1440p@60 and 4k@20 (With I2S microphone and gyro logging @ 150Hz)
150 parts1

 calebhabesh/doorlink1
Self-hosted ESP32-S3 smart doorbell with a custom PCB, Raspberry Pi gateway, and web dashboard
Smart doorbell is an open-source printed circuit board by calebhabesh, from the calebhabesh/doorlink repository on GitHub, published under the MIT licence. It is a 2-layer board of 59 × 91 mm with 108 parts on 86 nets, routed with 1,576 tracks and 200 vias.
It is built around the ESP32-S3-WROOM-1-N8, TPS63802DLAR and DS8561-15S3, with the SRV05-4, TPS22919DCK and XC6206P282MR among its other parts. Its parts include 40 resistors, 31 capacitors, 9 connectors, 8 ICs and 2 diodes. It belongs with the home automation and IoT boards and the ESP32 boards of this library.


 Doorlink
Living in an apartment without a concierge, you're often left guessing who's at the door, and asking questions like "did my package arrive?". Providing an interface for visitors to notify me of package deliveries and general presence is really convenient.
Doorlink is a self-hosted smart doorbell built around a custom ESP32-S3 board and a Raspberry Pi, with no cloud subscription required. A button press wakes the board, captures a still image, and sends the event to a local gateway. The gateway stores the media, updates the web dashboard, and sends ntfy notifications to household members. The doorbell plays a local chime; when configured, the gateway also sends a Home Assistant webhook to play a chime on all configured smart speakers in the home. Visitor recordings and stored, turn-based voice replies are also supported. A full parts and cost breakdown is in the docs.
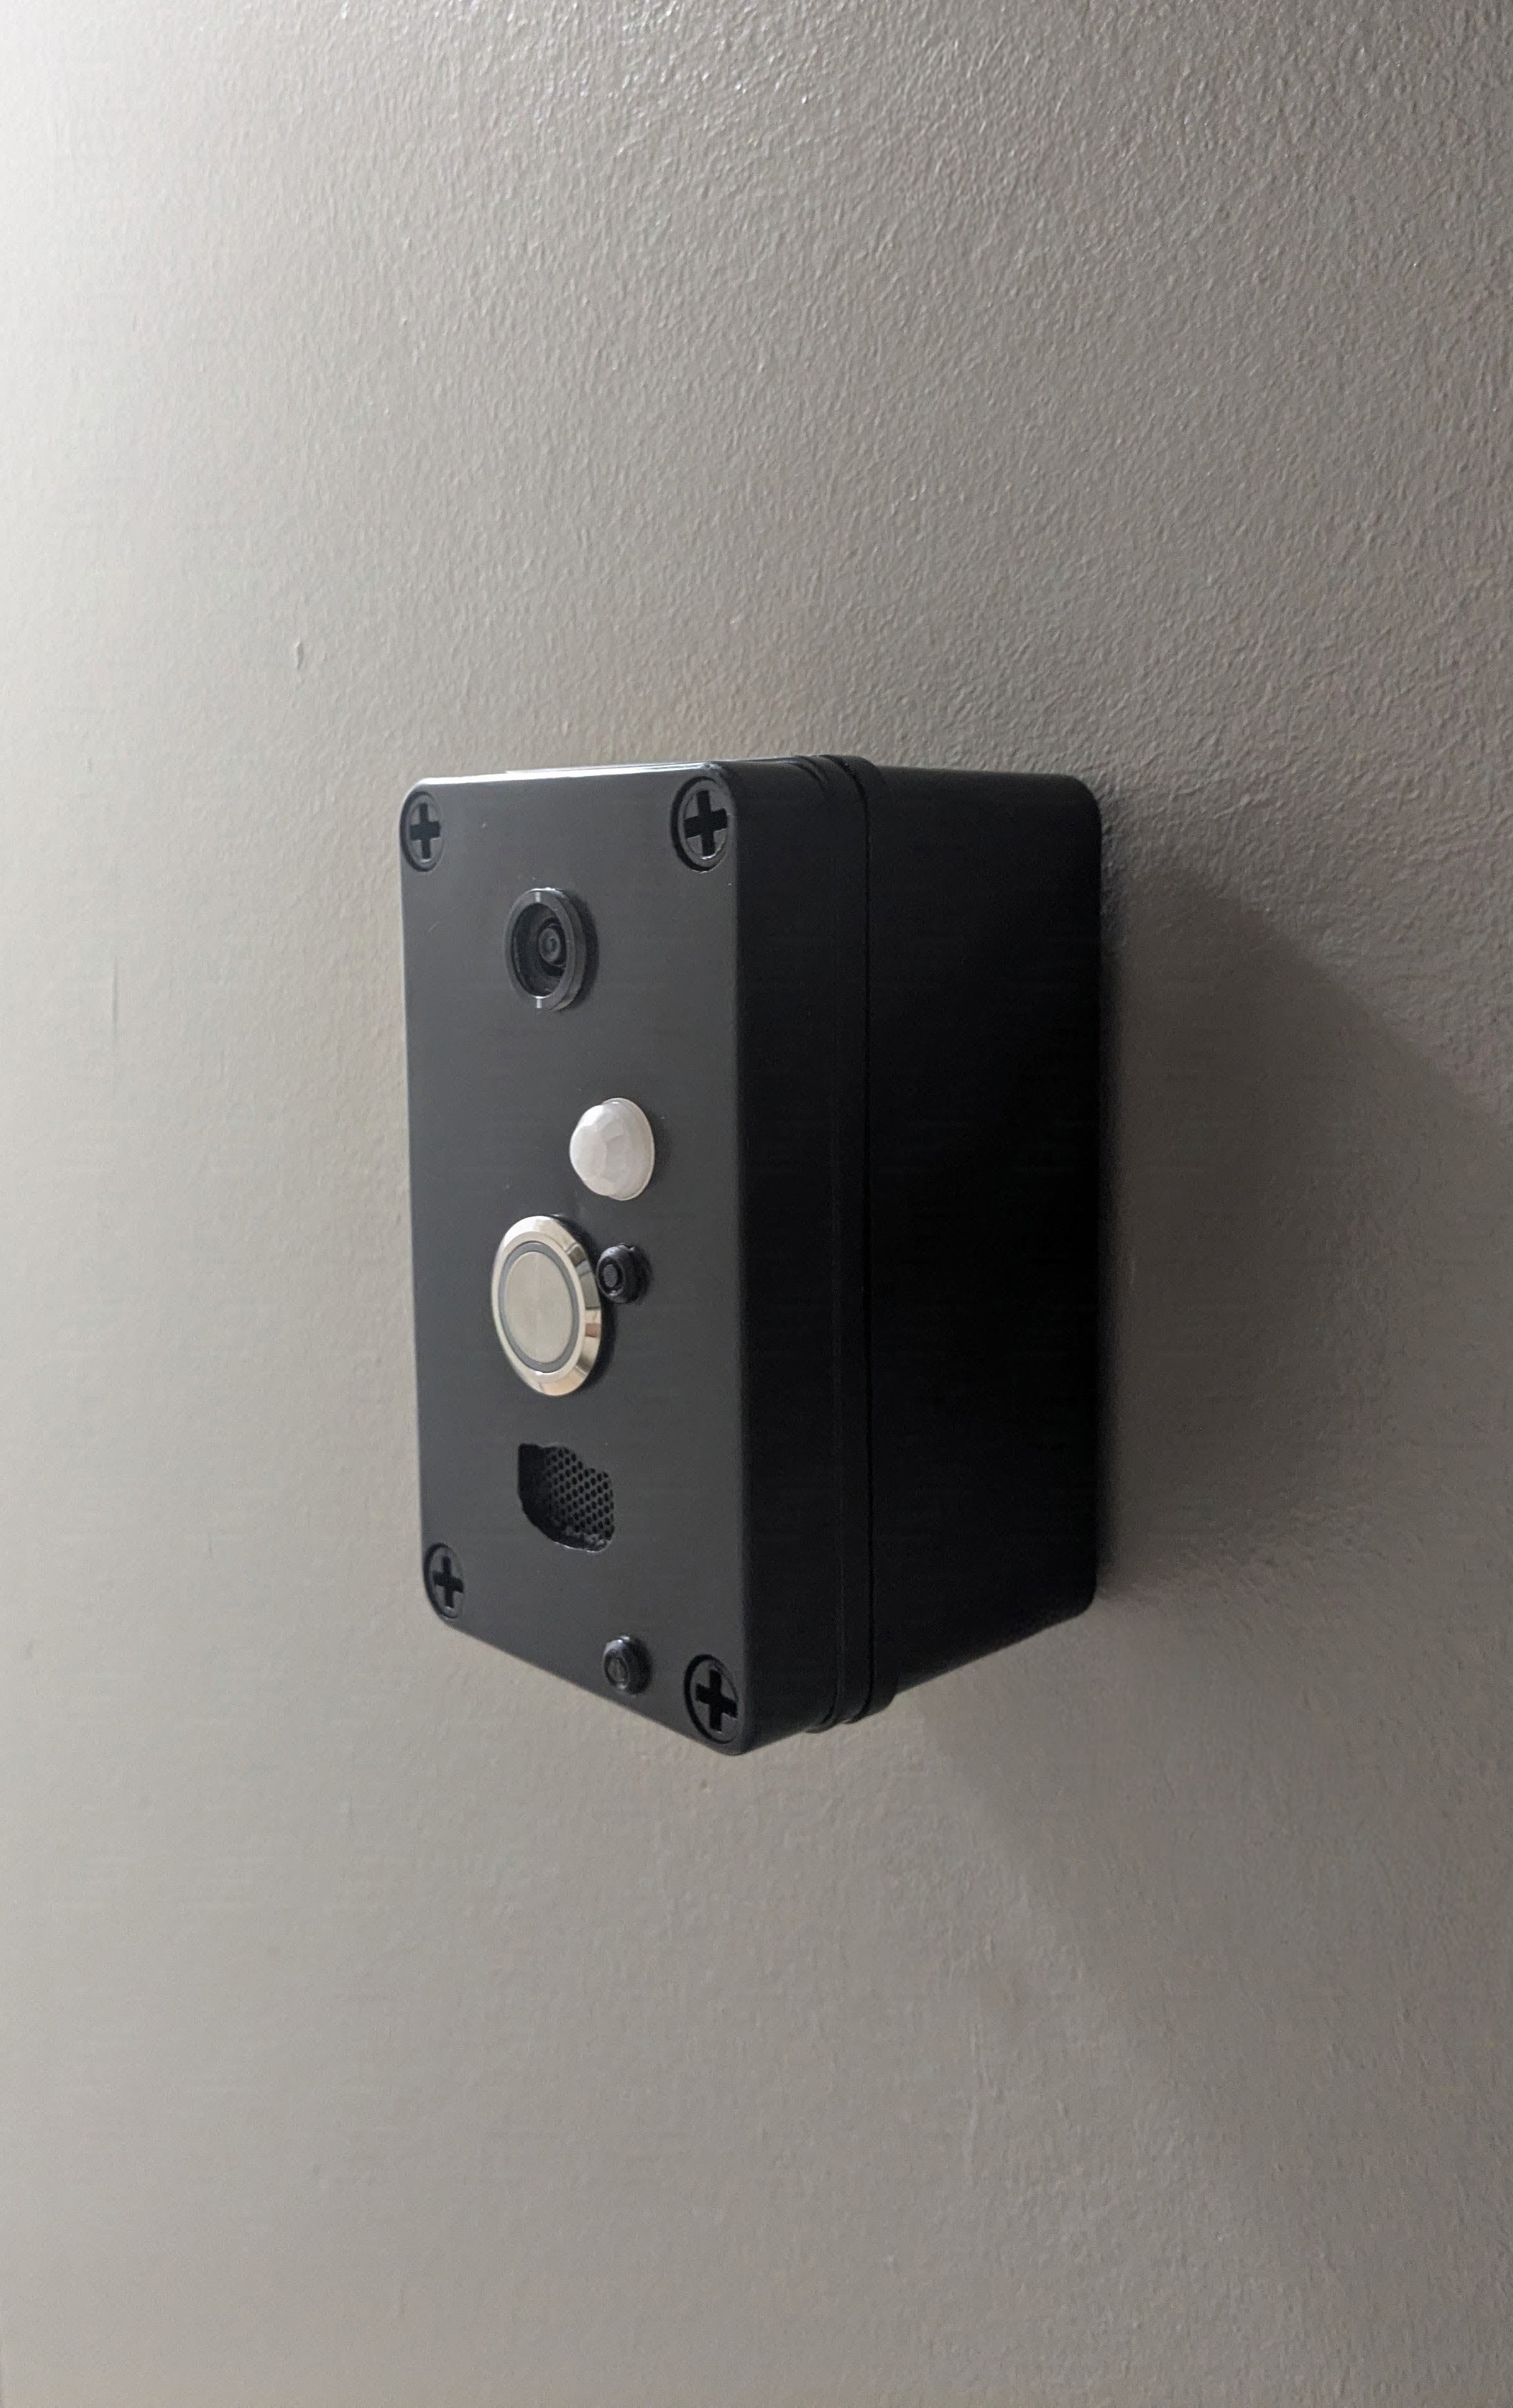
See the labeled front panel.
https://github.com/user-attachments/assets/69bbac34-c78c-457d-b82e-8ea92b961eb2
Recorded at my door on 2026-10-24: phone video of the doorbell beside a screen recording of the dashboard, synced and uncut. Part 1 shows a button press, the photo arriving, the desktop alert, and the Home Assistant chime. Part 2 shows a visitor voice message and a Push to Talk reply played back at the door. Each part ends with step timings from the gateway logs.
The assembled Rev C board is mounted at my door on battery power and in daily use. Each button press wakes the board from deep sleep, captures a QXGA image, uploads it over Wi-Fi, updates the dashboard, sends notifications, and returns to deep sleep. In the 30 days to 2026-10-24, the gateway stored a photo for all 27 presses, with a median of 2.9 s from the press alert reaching the gateway to the photo being stored. The single-cell battery has not been charged since installation: over the first four weeks and 97 presses it fell from roughly 78% to 46%, which projects to an average draw under 1 mA and about 12 weeks per charge. That is an estimate from an approximate starting reading and voltage-based percentages, not a measured current or an observed full-charge runtime. The microphone, speaker, and stored voice-reply path have been exercised on hardware. This is a working prototype, not a qualified outdoor product.
This is my first PCB layout and my first time hand-soldering surface-mount parts, including the ESP32-S3 module and ICS-43434 microphone. It took three revisions to get here: some scope creep, plus a few dumb mistakes that waited until after I ordered the boards to announce themselves.
flowchart LR
    A[Doorbell PCB<br/>ESP32-S3 · camera · audio] -->|Wi-Fi| B[Raspberry Pi gateway<br/>Spring Boot]
    B --> C[(PostgreSQL<br/>events)]
    B --> D[(MinIO<br/>images and audio)]
    B --> E[Next.js dashboard]
    B --> F[ntfy notifications]
    A --> G[Local doorbell chime]
    B -->|Configured webhook| H[Home Assistant]
    H --> I[Smart speaker chimes]
    E -->|Stored voice replies| B
The firmware captures the image before joining Wi-Fi, then powers the camera down. Audio is turn-based: the visitor microphone and doorbell speaker do not run as a full-duplex call. The Raspberry Pi also runs Mosquitto for device commands.
The home installation uses both alert paths. See gateway environment configuration for the Home Assistant webhook and ntfy topic settings. The local development profile disables both integrations.
| KiCad Rev C Board | Rev C Schematic |
|---|---|
 |  |
| PCB Copper Layers (F.Cu and B.Cu) | Rev C Board Before ESP32 and Microphone Soldering |
|---|---|
 |  |
| Front Lid Marked Out Before Cutting | Finished Front Panel |
|---|---|
 |  |
| Bench Bring-Up | Populated PCB | Enclosure Wiring |
|---|---|---|
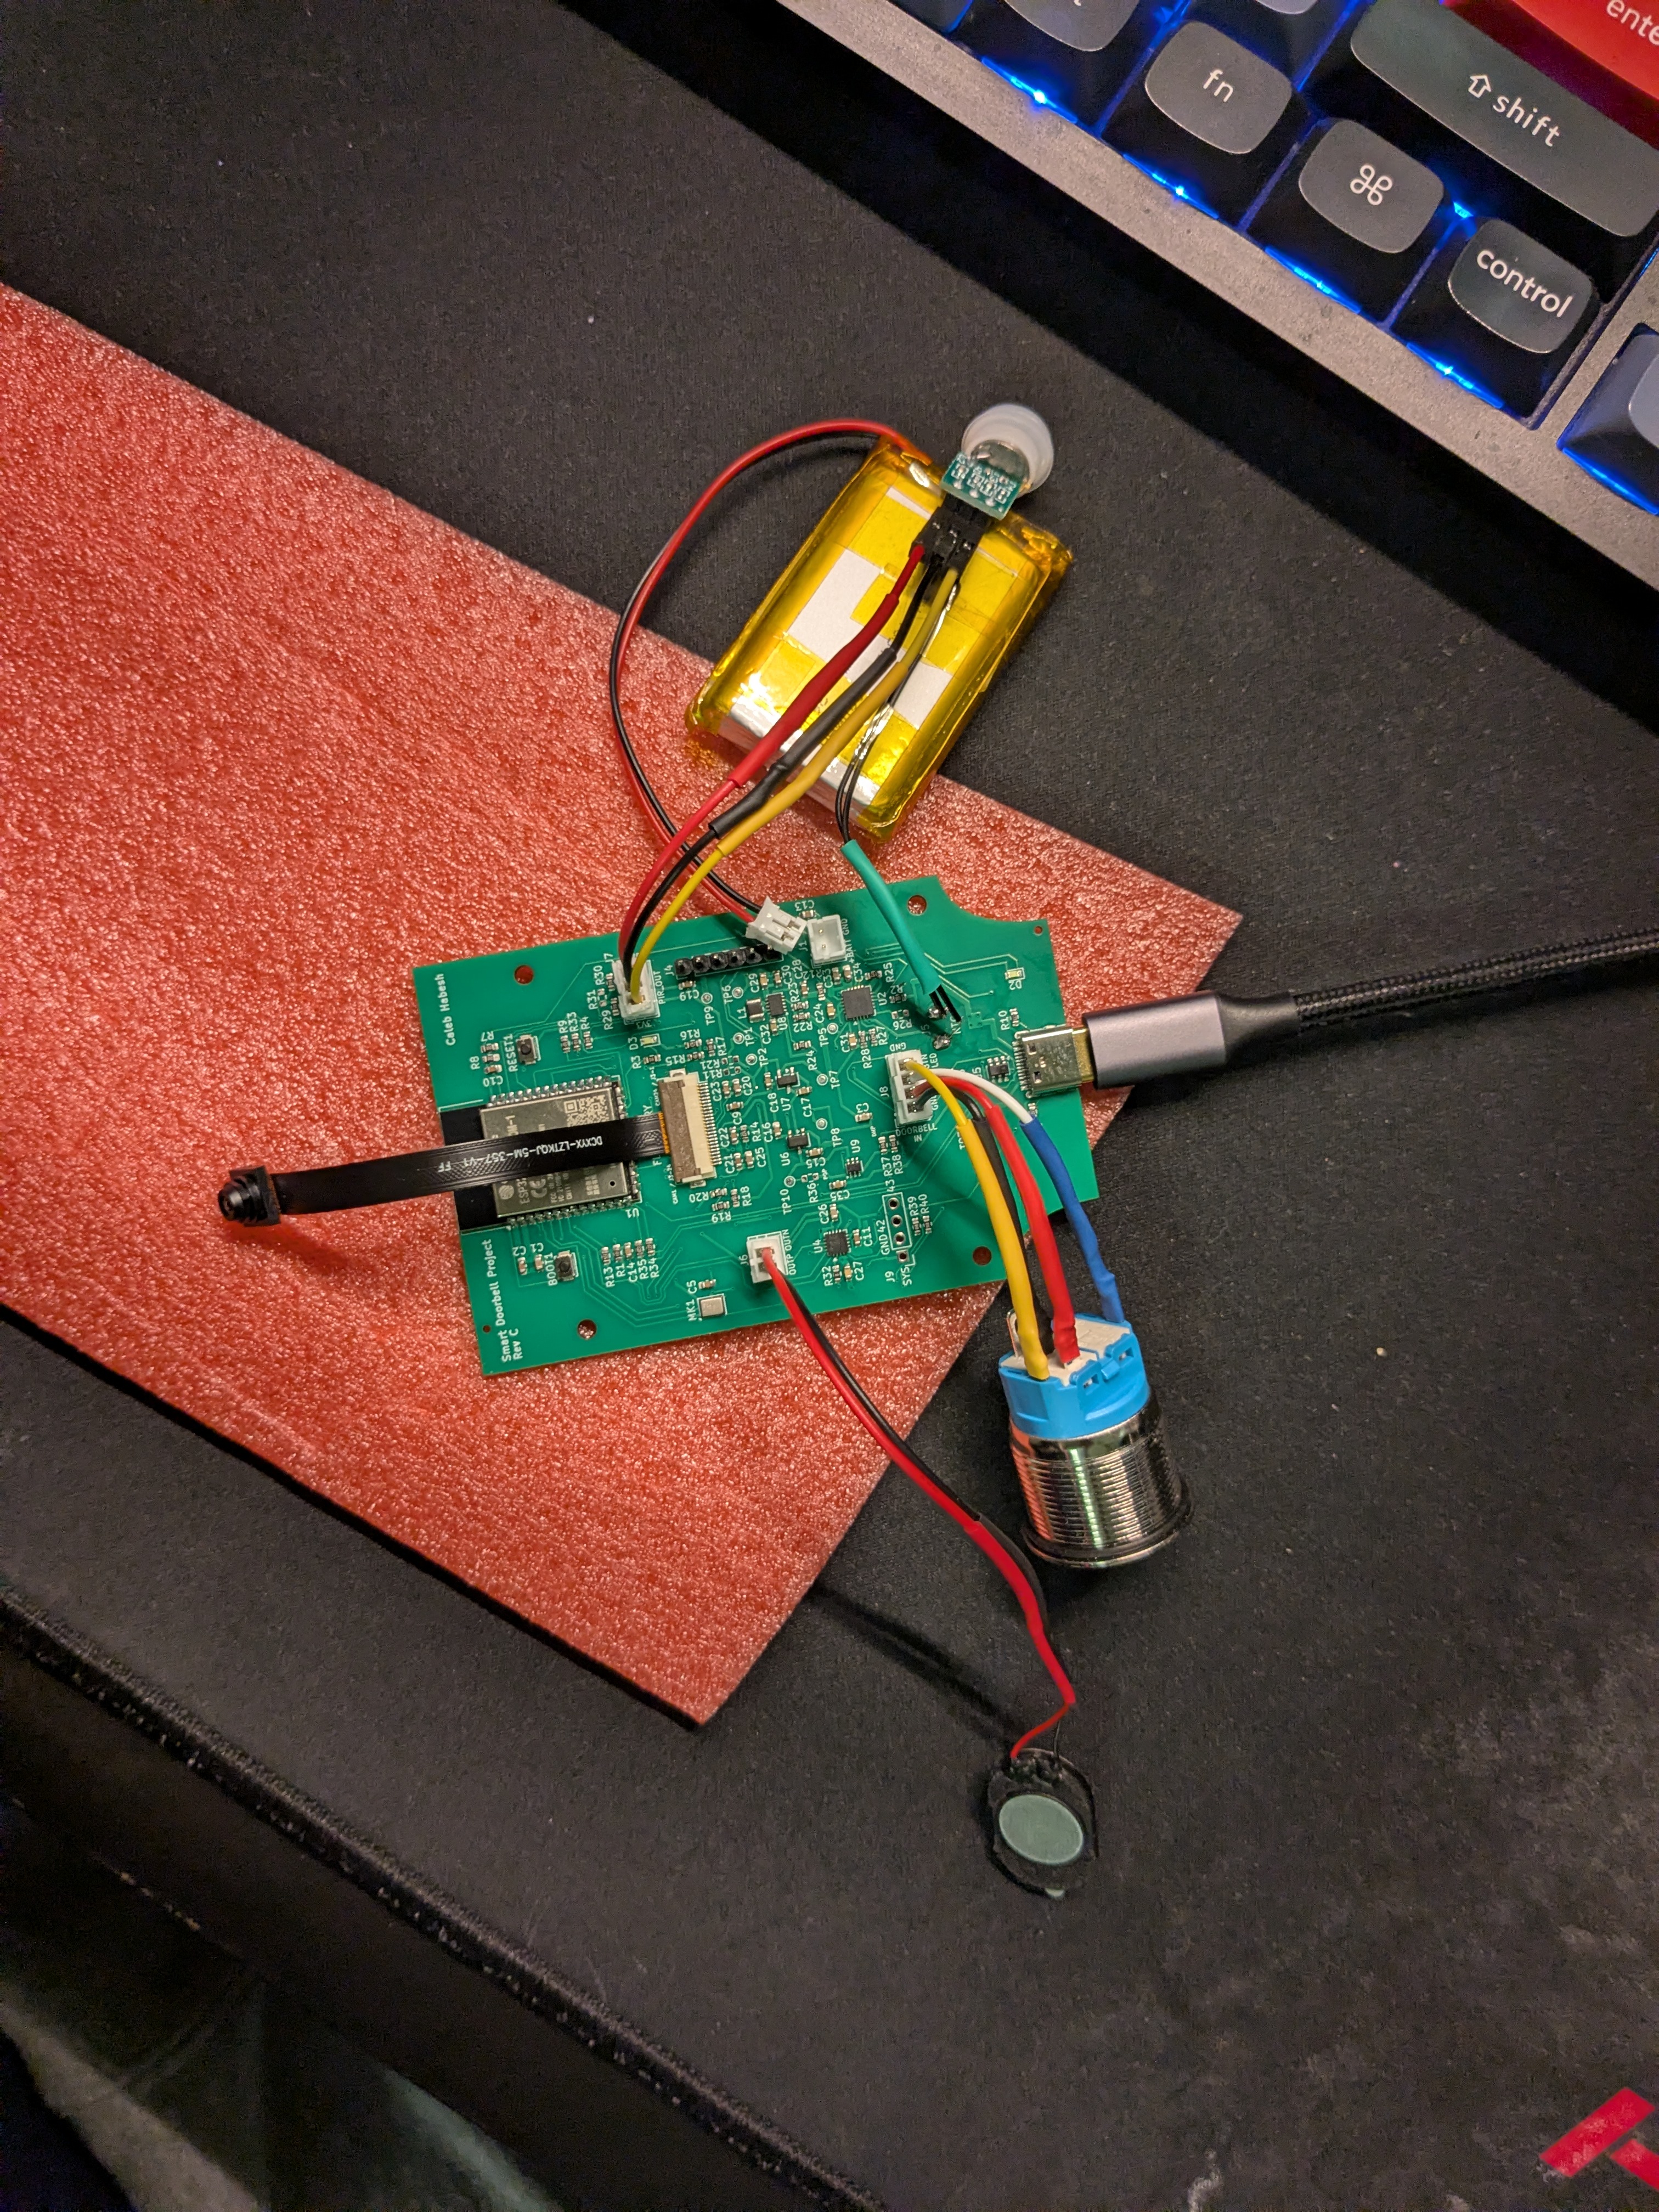 | 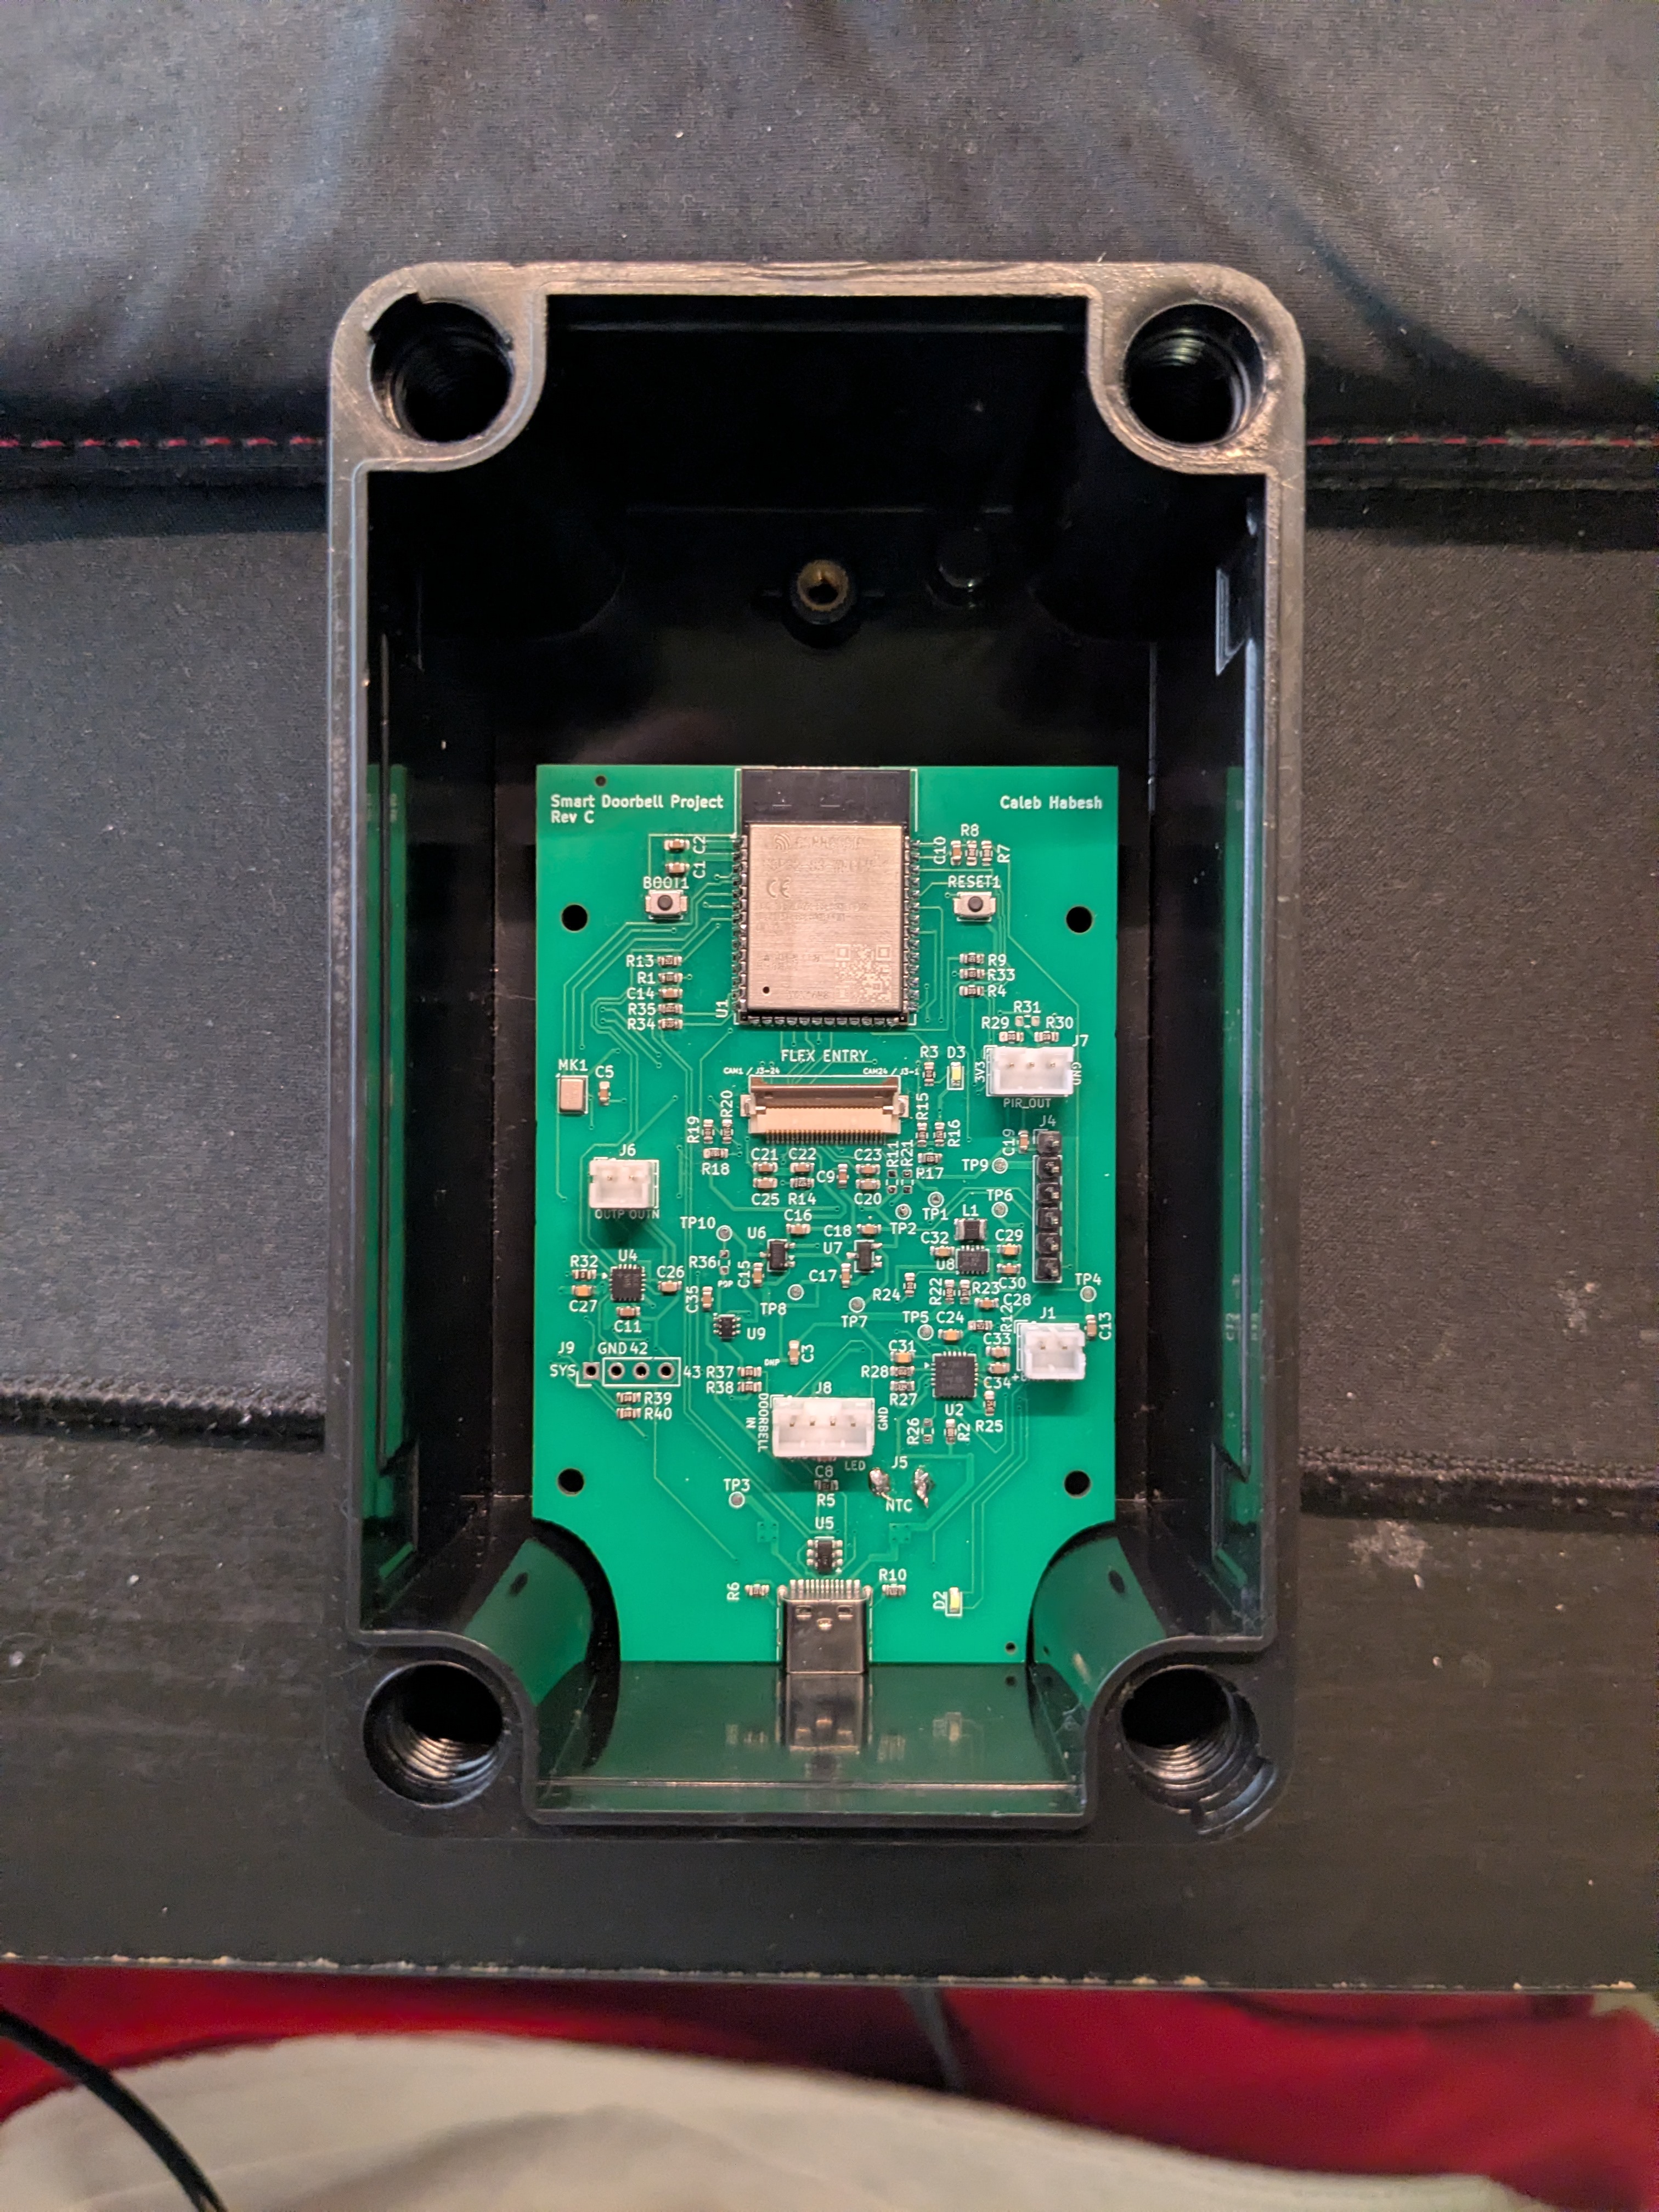 | 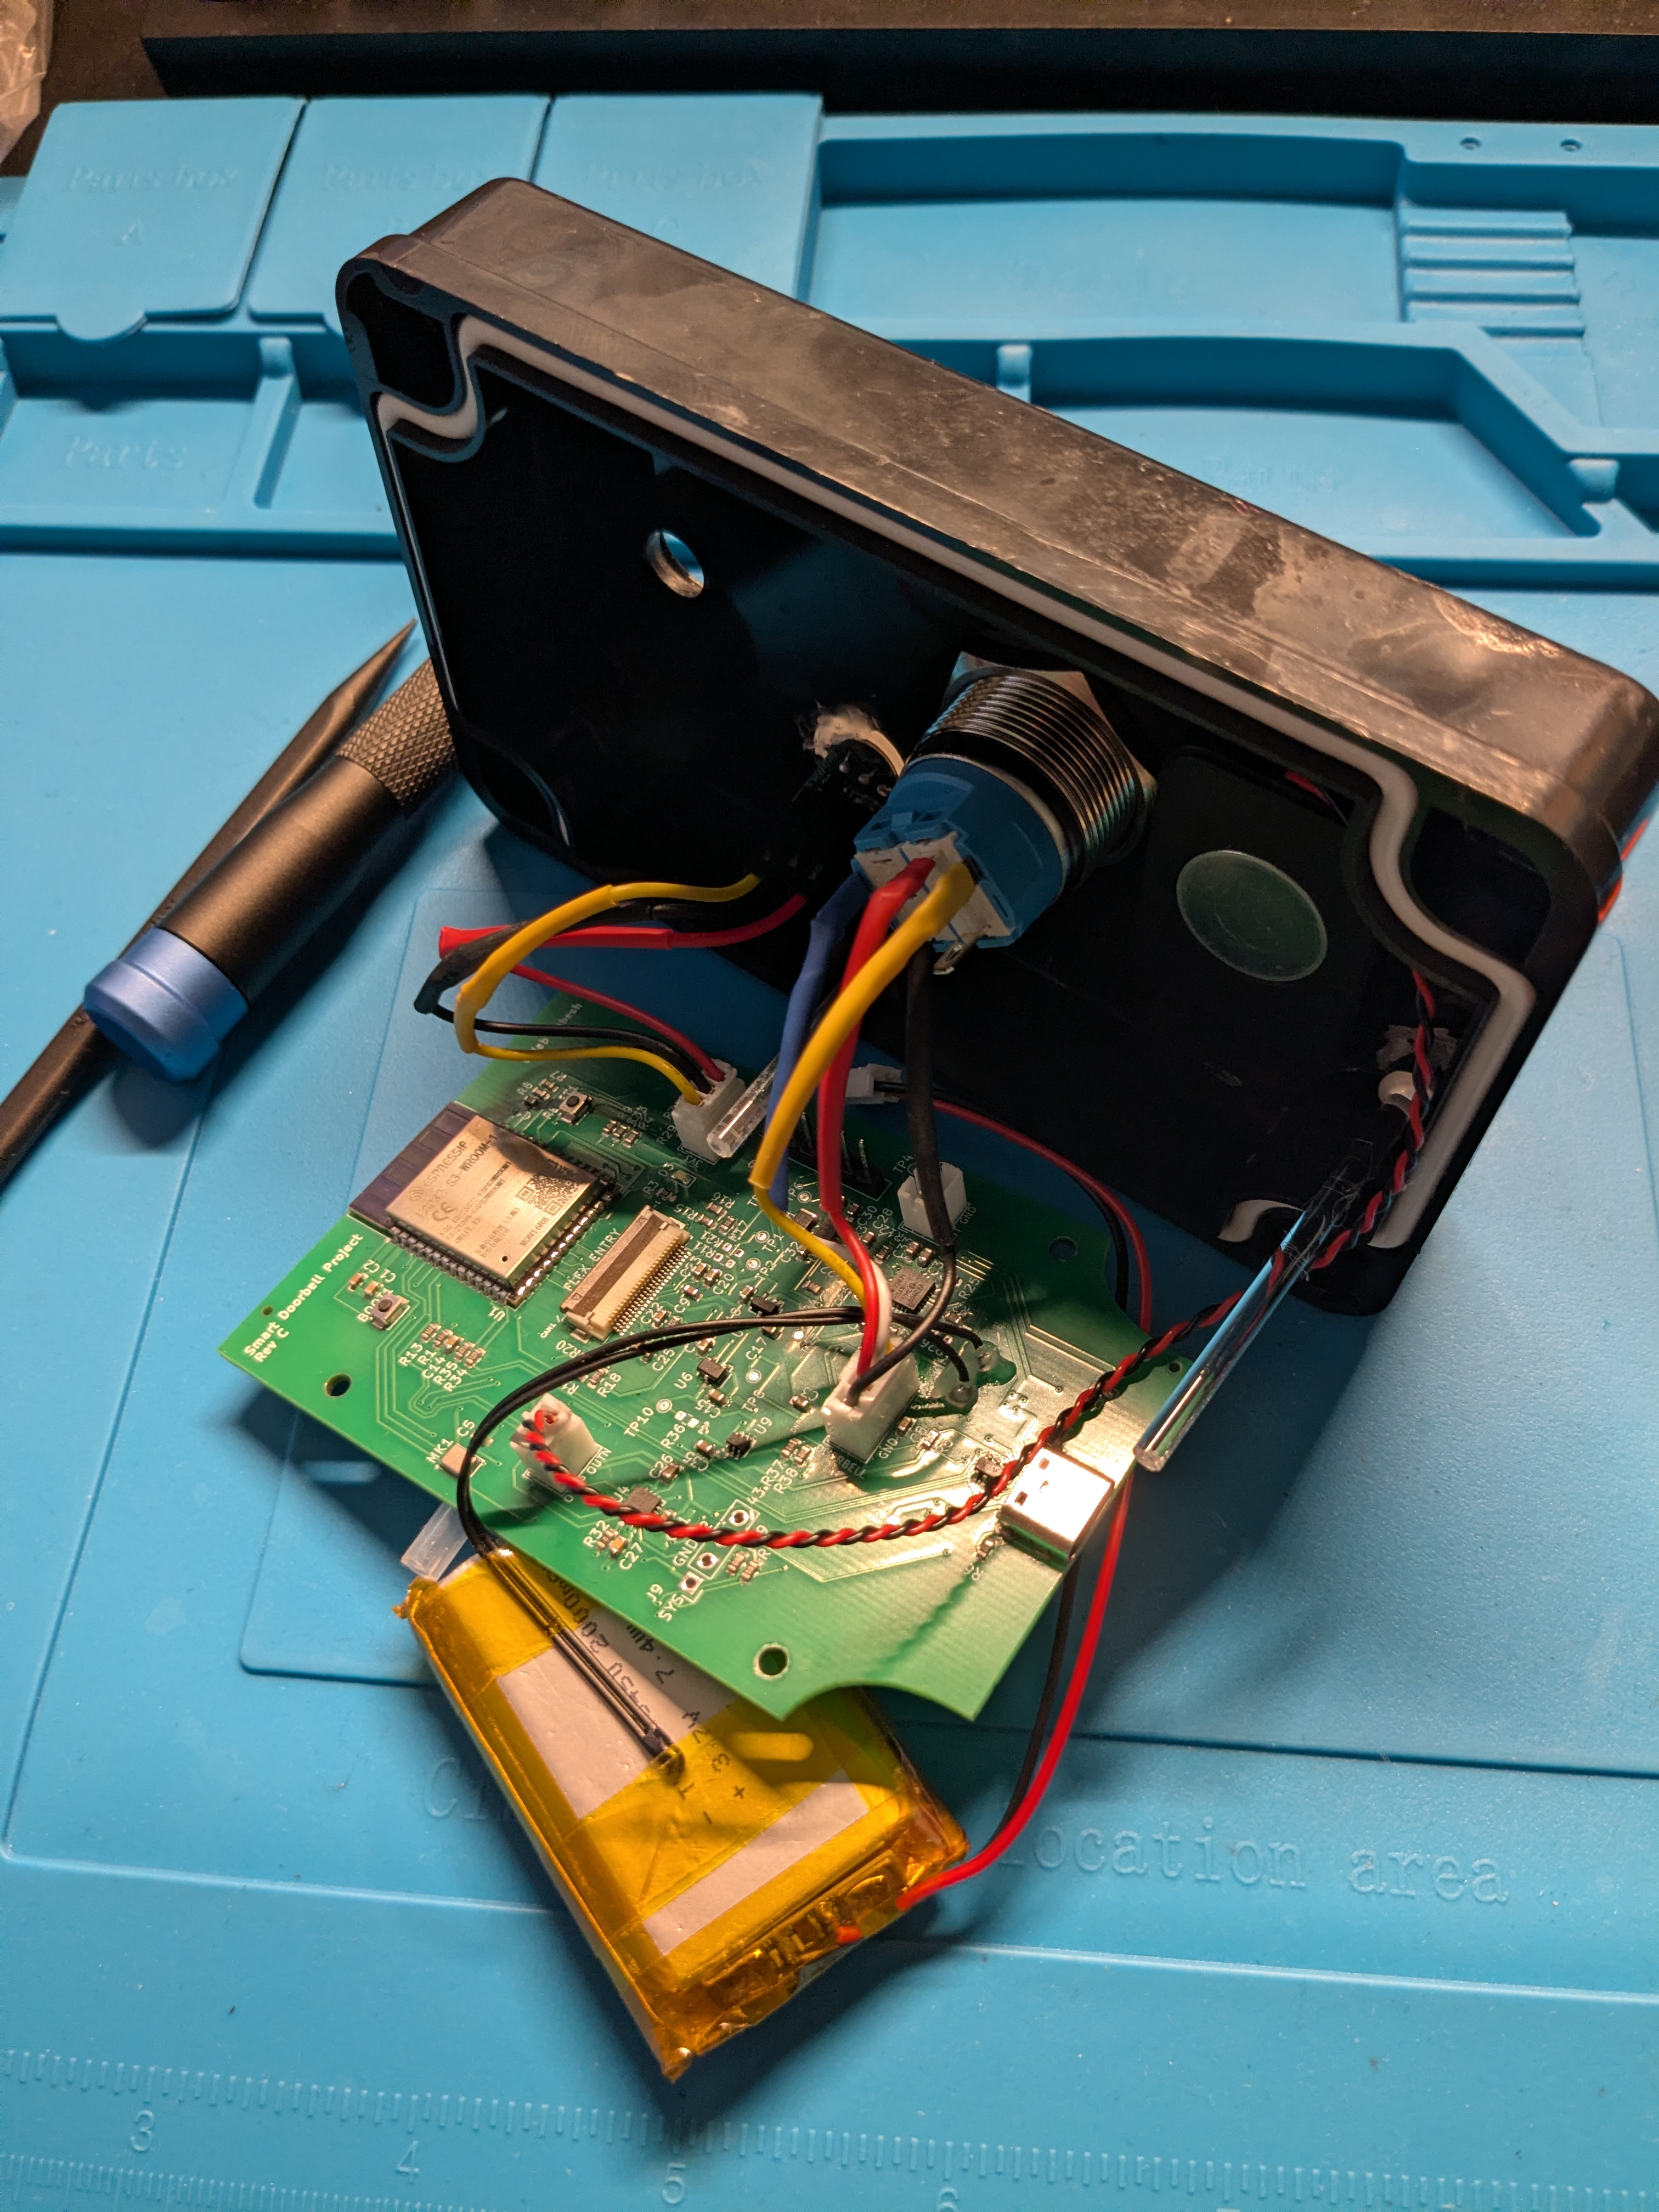 |
The board uses an ESP32-S3-WROOM-1-N16R8, OV5640 camera, ICS-43434 microphone, MAX98357A amplifier, MCP73871 charger, and TPS63802 3.3 V regulator. The PCB overview links the KiCad source and exact Rev C manufacturing files.
| Area | Contents |
|---|---|
main/ | ESP-IDF firmware and routed board pin map |
config/firmware/ | Firmware build presets and archived camera configurations |
gateway/ | Spring Boot event API, persistence, media storage, and notifications |
dashboard/ | Next.js event and intercom interface |
pcb/ | KiCad project and manufacturing records |
docs/parts.md | Main unit parts and CAD cost |
docs/firmware-architecture.md | Firmware flow and validation status |
docs/hardware-bringup.md | Detailed Rev C hardware test record |

This preview uses synthetic session data and a generated doorbell-camera view. My actual dashboard is hosted on a subdomain with authenticated access. The demo shows it in presentation mode, which hides sessions from before the recording.
Install Docker Compose, Java 21, Node.js with npm, and the dashboard dependencies (cd dashboard && npm ci). From the repository root, run ./scripts/run-dev.sh to start the isolated development stack. The gateway uses port 8081 and the dashboard uses localhost:3001. On first run, enter the setup token printed by the launcher. Ctrl+C stops the stack. The local credentials in .env.dev are for development only.
Firmware builds require ESP-IDF. Copy main/config.example.h to the ignored main/config.h, set your Wi-Fi and gateway values, then see firmware architecture for the safe and production build commands. Raspberry Pi deployment is documented in docs/pi-deployment.md.
Software and written documentation: MIT. KiCad hardware designs and manufacturing files under pcb/: CERN-OHL-P-2.0. Project photographs: CC0 1.0.
| Qty | Value | Footprint | References |
|---|---|---|---|
| 12 | 0.1u | Capacitor_SMD:C_0603_1608Metric | C2, C5, C8, C9, C10, C11, C19, C21, C22, C23, C28, C30 |
| 10 | TestPoint | TestPoint:TestPoint_Pad_D1.0mm | TP1, TP2, TP3, TP4, TP5, TP6, TP7, TP8, TP9, TP10 |
| 9 | 10u | Capacitor_SMD:C_0603_1608Metric | C1, C3, C13, C20, C25, C26, C32, C33, C34 |
| 6 | 100k | Resistor_SMD:R_0603_1608Metric | R4, R7, R8, R24, R29, R38 |
| 6 | 10k | Resistor_SMD:R_0603_1608Metric | R1, R5, R17, R19, R26, R33 |
| 6 | 1k | Resistor_SMD:R_0603_1608Metric | R3, R30, R31, R37, R39, R40 |
| 6 | 1u | Capacitor_SMD:C_0603_1608Metric | C14, C15, C16, C17, C18, C35 |
| 4 | 0 | Resistor_SMD:R_0603_1608Metric | R11, R21, R32, R36 |
| 4 | 22u | Capacitor_SMD:C_0603_1608Metric | C24, C27, C29, C31 |
| 4 | MountingHole_2.7mm_M2.5 | MountingHole:MountingHole_2.7mm_M2.5 | H1, H2, H3, H4 |
| 3 | 4.7k | Resistor_SMD:R_0603_1608Metric | R12, R13, R14 |
| 2 | 22 | Resistor_SMD:R_0603_1608Metric | R34, R35 |
| 2 | 5.1k | Resistor_SMD:R_0603_1608Metric | R6, R10 |
| 2 | 56k | Resistor_SMD:R_0603_1608Metric | R18, R20 |
| 2 | Conn_01x02_Pin | Connector_JST:JST_PH_B2B-PH-K_1x02_P2.00mm_Vertical | J1, J6 |
| 2 | LED | LED_SMD:LED_0603_1608Metric | D2, D3 |
| 2 | SW_SPST | Button_Switch_SMD:SW_SPST_B3U-1000P | BOOT1, RESET1 |
| 1 | 0.47u | Inductor_SMD:L_1008_2520Metric | L1 |
| 1 | 110k | Resistor_SMD:R_0603_1608Metric | R28 |
| 1 | 25k | Resistor_SMD:R_0603_1608Metric | R25 |
| 1 | 2k | Resistor_SMD:R_0603_1608Metric | R2 |
| 1 | 3.9k | Resistor_SMD:R_0603_1608Metric | R16 |
| 1 | 330 | Resistor_SMD:R_0603_1608Metric | R9 |
| 1 | 330k | Resistor_SMD:R_0603_1608Metric | R27 |
| 1 | 511k | Resistor_SMD:R_0603_1608Metric | R22 |
| 1 | 680 | Resistor_SMD:R_0603_1608Metric | R15 |
| 1 | 91k | Resistor_SMD:R_0603_1608Metric | R23 |
| 1 | Conn_01x03 | Connector_JST:JST_PH_B3B-PH-K_1x03_P2.00mm_Vertical | J7 |
| 1 | Conn_01x04 | Connector_PinHeader_2.54mm:PinHeader_1x04_P2.54mm_Vertical | J9 |
| 1 | Conn_01x04 | Connector_JST:JST_PH_B4B-PH-K_1x04_P2.00mm_Vertical | J8 |
| 1 | Conn_01x06 | Connector_PinHeader_2.54mm:PinHeader_1x06_P2.54mm_Vertical | J4 |
| 1 | Conn_01x24 | Connector_FFC-FPC:Hirose_FH12-24S-0.5SH_1x24-1MP_P0.50mm_Horizontal | J3 |
| 1 | DS8561-15S3 | Package_TO_SOT_SMD:SOT-23-3 | U6 |
| 1 | ESP32-S3-WROOM-1 | RF_Module:ESP32-S3-WROOM-1 | U1 |
| 1 | ICS-43434 | Sensor_Audio:InvenSense_ICS-43434-6_3.5x2.65mm | MK1 |
| 1 | MAX98357A | smart-doorbell-power:MAX98357A_TQFN-16-1EP_3x3mm_P0.5mm_EP1.23x1.23mm | U4 |
| 1 | MCP73871T-2AAI/ML | Package_DFN_QFN:QFN-20-1EP_4x4mm_P0.5mm_EP2.5x2.5mm | U2 |
| 1 | NTC_OPTION | Connector_Wire:SolderWire-0.25sqmm_1x02_P4.2mm_D0.65mm_OD1.7mm | J5 |
| 1 | SRV05-4 | Package_TO_SOT_SMD:SOT-23-6 | U5 |
| 1 | TPS22919DCK | Package_TO_SOT_SMD:SOT-363_SC-70-6 | U9 |
| 1 | TPS63802DLAR | smart-doorbell-power:TPS63802DLAR_DLA0010A | U8 |
| 1 | USB_C_Receptacle_USB2.0_16P | Connector_USB:USB_C_Receptacle_HRO_TYPE-C-31-M-12 | J2 |
| 1 | XC6206P282MR | Package_TO_SOT_SMD:SOT-23-3 | U7 |
YeetTheAnson/MerlynCAM
An action camera that records at 1080p@90, 1440p@60 and 4k@20 (With I2S microphone and gyro logging @ 150Hz)


prasannan-robots/Energy-Management-using-Surveillance-Camera
This is a project which uses camera to detect the humans and control indoor appliances


tmb5932/fixed-wing-drone
The basics needed to allow a RC plane to be turned autonomous on signal.

Nieko27/Frame-Workshop
A repo for all things steam frame hardware.

It measures 59 × 91 mm and has 2 copper layers, 1.6 mm thick.
108 parts, built around the ESP32-S3-WROOM-1-N8, TPS63802DLAR, DS8561-15S3 and SRV05-4. The full list of its parts is on this page, with links to each part's symbol and footprint where PCBKit's library has them.
From the calebhabesh/doorlink repository on GitHub, at the commit this page was made from: the board is pcb/smart-doorbell/smart-doorbell.kicad_pcb and its schematic pcb/smart-doorbell/smart-doorbell.kicad_sch. PCBKit opens the board in the browser, with nothing to install.
Its repository publishes it under the MIT licence: you may reuse it on that licence's terms (keep the author's notice, and for a copyleft licence share your changes alike).