2 layers81.3 × 33.7 mm
SDRReciever
Dizzerin/Software-Defined-Radio
Quadrature sampling down converter software defined radio
67 parts24

 michalin/easysdr115
Super Simple SDR Receiver
Easysdr is an open-source printed circuit board by michalin, from the michalin/easysdr repository on GitHub, published under the GPL-3.0 licence. It is a 2-layer board of 67.3 × 74.9 mm with 140 parts on 44 nets, routed with 245 tracks and 2 vias.
It is built around the ESP32-DEVKITM-1, LM4562NA and CBT3253D, with the SI5351A-B-GT among its other parts. Its parts include 16 capacitors, 6 resistors, 5 connectors, 4 ICs and 1 crystal. It belongs with the ESP32 boards of this library.


Simple SDR Receiver that can receive frequencies up to approximately 30MHz, if an optional Si5351 clock generator is used. Without this, it receives up to about 20MHz, using the ESP32 clock dividers. The circuit is so simple that it can even be built on a breadboard.
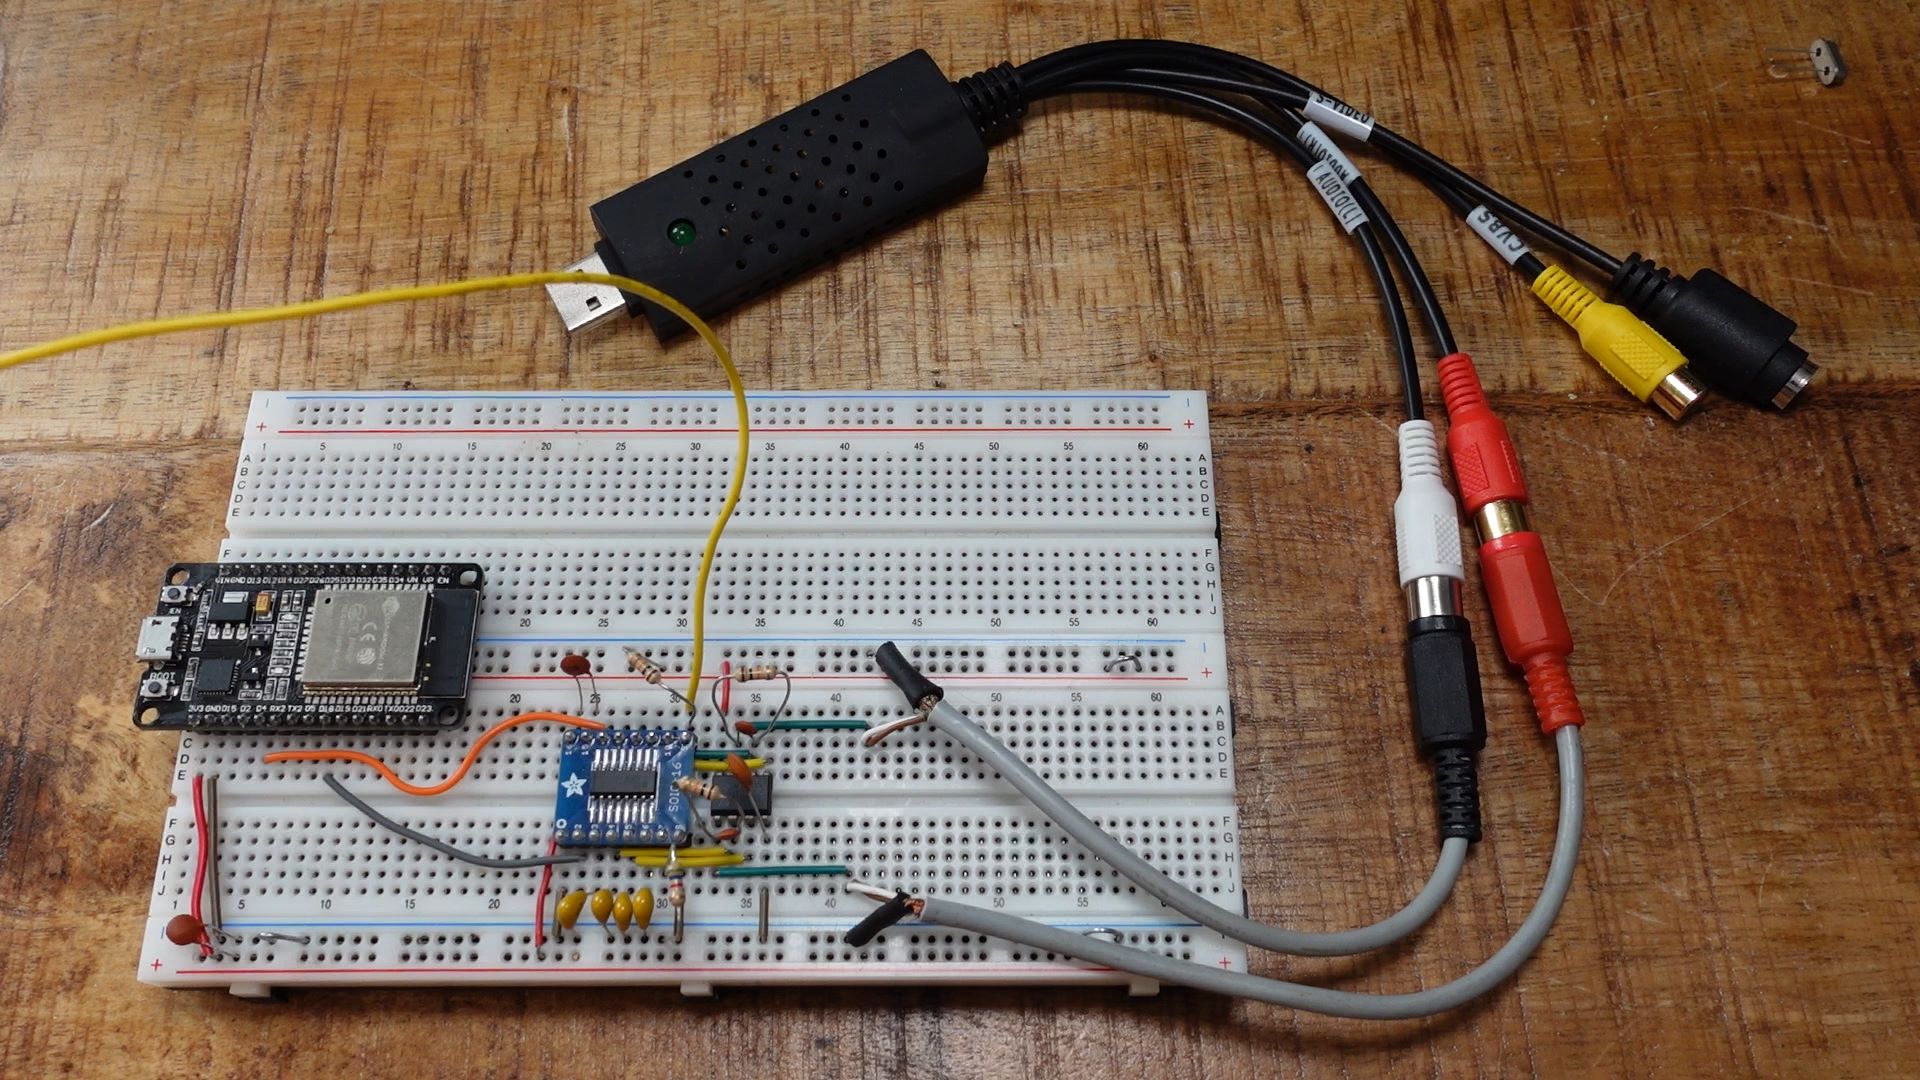 Tayloe Quadrature Detector circuit on a solderless breadboard
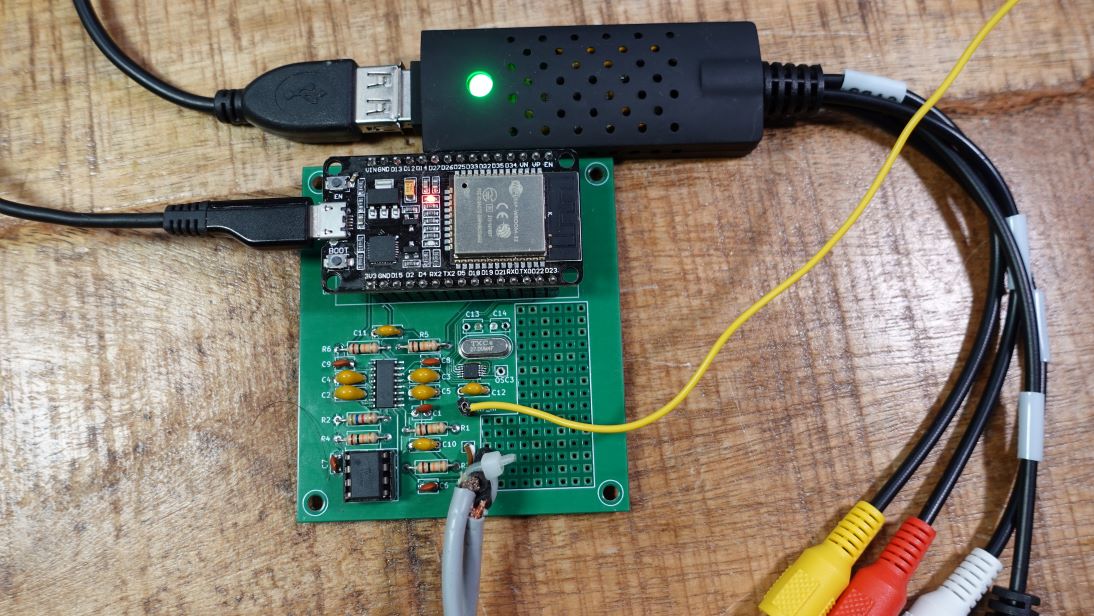 Circuit on a PCB with USB capture device connected
#define USE_SI5351 1 in the ESP32 sketch if you are using an Si5351.sudo apt install python3-tk or pip install tkinteropenradio_serial_port = "/dev/ttyUSB0" on Linux or openradio_serial_port = "COM1" on Windows..quisk_conf.py%APPDATA%\Afreet\Rigs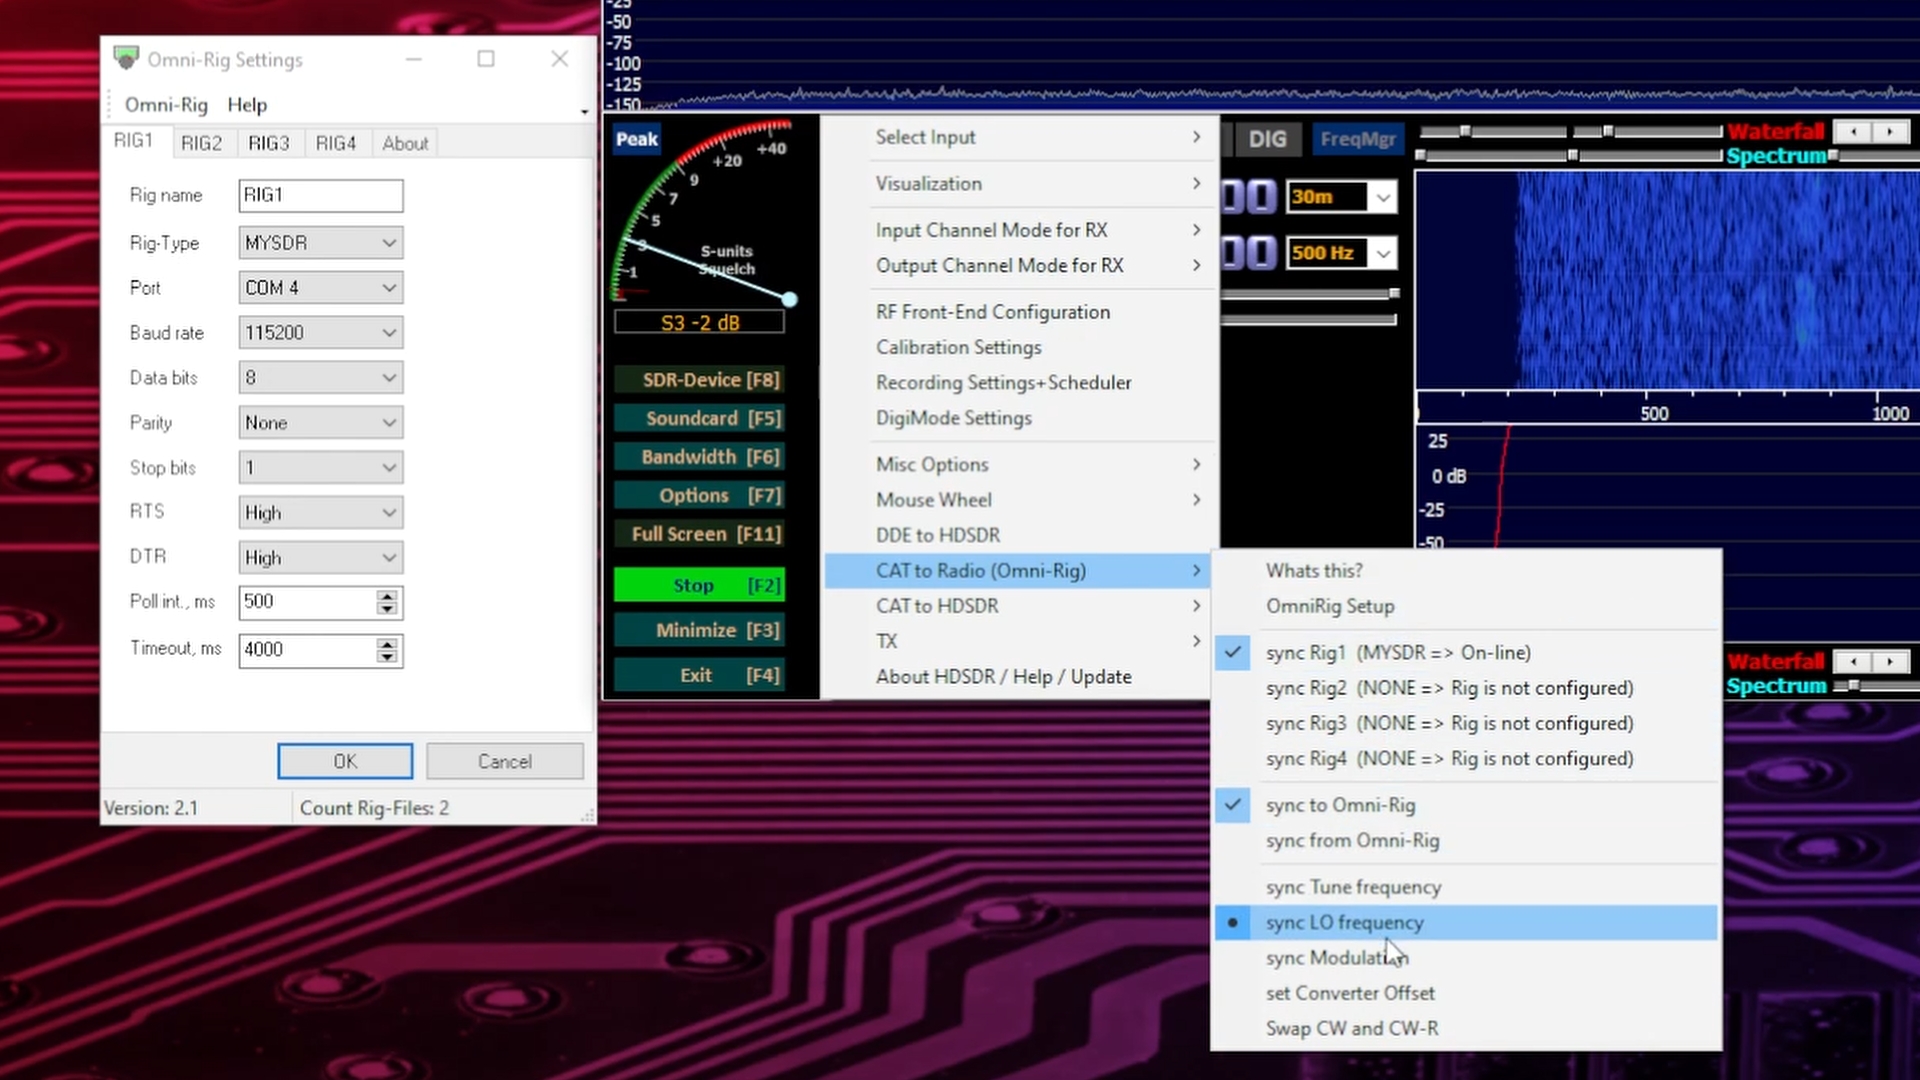
| Qty | Value | Footprint | References |
|---|---|---|---|
| 6 | 10k | Resistor_THT:R_Axial_DIN0207_L6.3mm_D2.5mm_P10.16mm_Horizontal | R1, R2, R3, R4, R5, R6 |
| 4 | 220n | Capacitor_THT:C_Disc_D6.0mm_W2.5mm_P5.00mm | C2, C3, C4, C5 |
| 3 | 100n | Capacitor_THT:C_Disc_D6.0mm_W2.5mm_P5.00mm | C10, C11, C12 |
| 3 | 1n | Capacitor_THT:C_Disc_D3.8mm_W2.6mm_P2.50mm | C1, C8, C9 |
| 2 | 1µ | Capacitor_THT:C_Disc_D6.0mm_W2.5mm_P5.00mm | C15, C16 |
| 2 | 2..20p | Capacitor_THT:C_Disc_D3.8mm_W2.6mm_P2.50mm | C13, C14 |
| 2 | 470p | Capacitor_THT:C_Disc_D3.8mm_W2.6mm_P2.50mm | C6, C7 |
| 1 | +5V | Connector_Pin:Pin_D0.9mm_L10.0mm_W2.4mm_FlatFork | J5 |
| 1 | 25MHz | Crystal:Crystal_HC49-U_Vertical | Y1 |
| 1 | CBT3253 | Package_SO:SO-16_3.9x9.9mm_P1.27mm | U1 |
| 1 | ESP32-DEVKIT | parts:MODULE_ESP32_DEVKIT_V1 | U3 |
| 1 | I | Connector_Pin:Pin_D0.9mm_L10.0mm_W2.4mm_FlatFork | J3 |
| 1 | LM4562 | Package_DIP:DIP-8_W7.62mm_Socket_LongPads | U2 |
| 1 | OSC3 | Connector_Pin:Pin_D0.9mm_L10.0mm_W2.4mm_FlatFork | J2 |
| 1 | Q | Connector_Pin:Pin_D0.9mm_L10.0mm_W2.4mm_FlatFork | J4 |
| 1 | RF_In | Connector_Pin:Pin_D0.9mm_L10.0mm_W2.4mm_FlatFork | J1 |
| 1 | Si5351A-B-GT | Package_SO:MSOP-10_3x3mm_P0.5mm | U4 |
The 32 most common of 140 parts.
It measures 67.3 × 74.9 mm and has 2 copper layers, 1.6 mm thick.
140 parts, built around the ESP32-DEVKITM-1, LM4562NA, CBT3253D and SI5351A-B-GT. The full list of its parts is on this page, with links to each part's symbol and footprint where PCBKit's library has them.
From the michalin/easysdr repository on GitHub, at the commit this page was made from: the board is schematic/schematic.kicad_pcb and its schematic schematic/schematic.kicad_sch. PCBKit opens the board in the browser, with nothing to install.
Its repository publishes it under the GPL-3.0 licence: you may reuse it on that licence's terms (keep the author's notice, and for a copyleft licence share your changes alike).
Dizzerin/Software-Defined-Radio
Quadrature sampling down converter software defined radio

pricna/Software-Defined-Radio-Receiver
Software Defined Radio receiver created for Engineering Electronics II at Walla Walla University.


brucemack/sdr2
This is a homebrew SDR rig with no dependency on external computers/soundcards/etc.


axlan/pcb-map
PCB designs, firmware, and host SW for controlling an interactive map printed onto a PCB board.

badges4dotcom/bsidesperth2025badge
Instructions on how to assemble the physical badge can be found here