2 layers91.4 × 73.7 mm

 I-M-Robotics-Lab/STM32-Quadcopter80
Quadcopter design based on STM32F411CEU Blackpill flight controller. Compatible with INAV 6.0 firmware.
1.Electronics is an open-source printed circuit board by I-M-Robotics-Lab, from the I-M-Robotics-Lab/STM32-Quadcopter repository on GitHub, published under the GPL-3.0 licence. It is a 4-layer board of 70 × 70 mm with 57 parts on 57 nets, routed with 278 tracks and 261 vias.
It is built around the TLV73333PDBV, IRLML6344 and TX 1. Its parts include 13 connectors, 11 resistors, 10 capacitors, 3 ICs and 3 diodes. It belongs with the robots and motor control boards and the STM32 boards of this library.


Website | Documentation | Community Discord | 3D Models & Prints
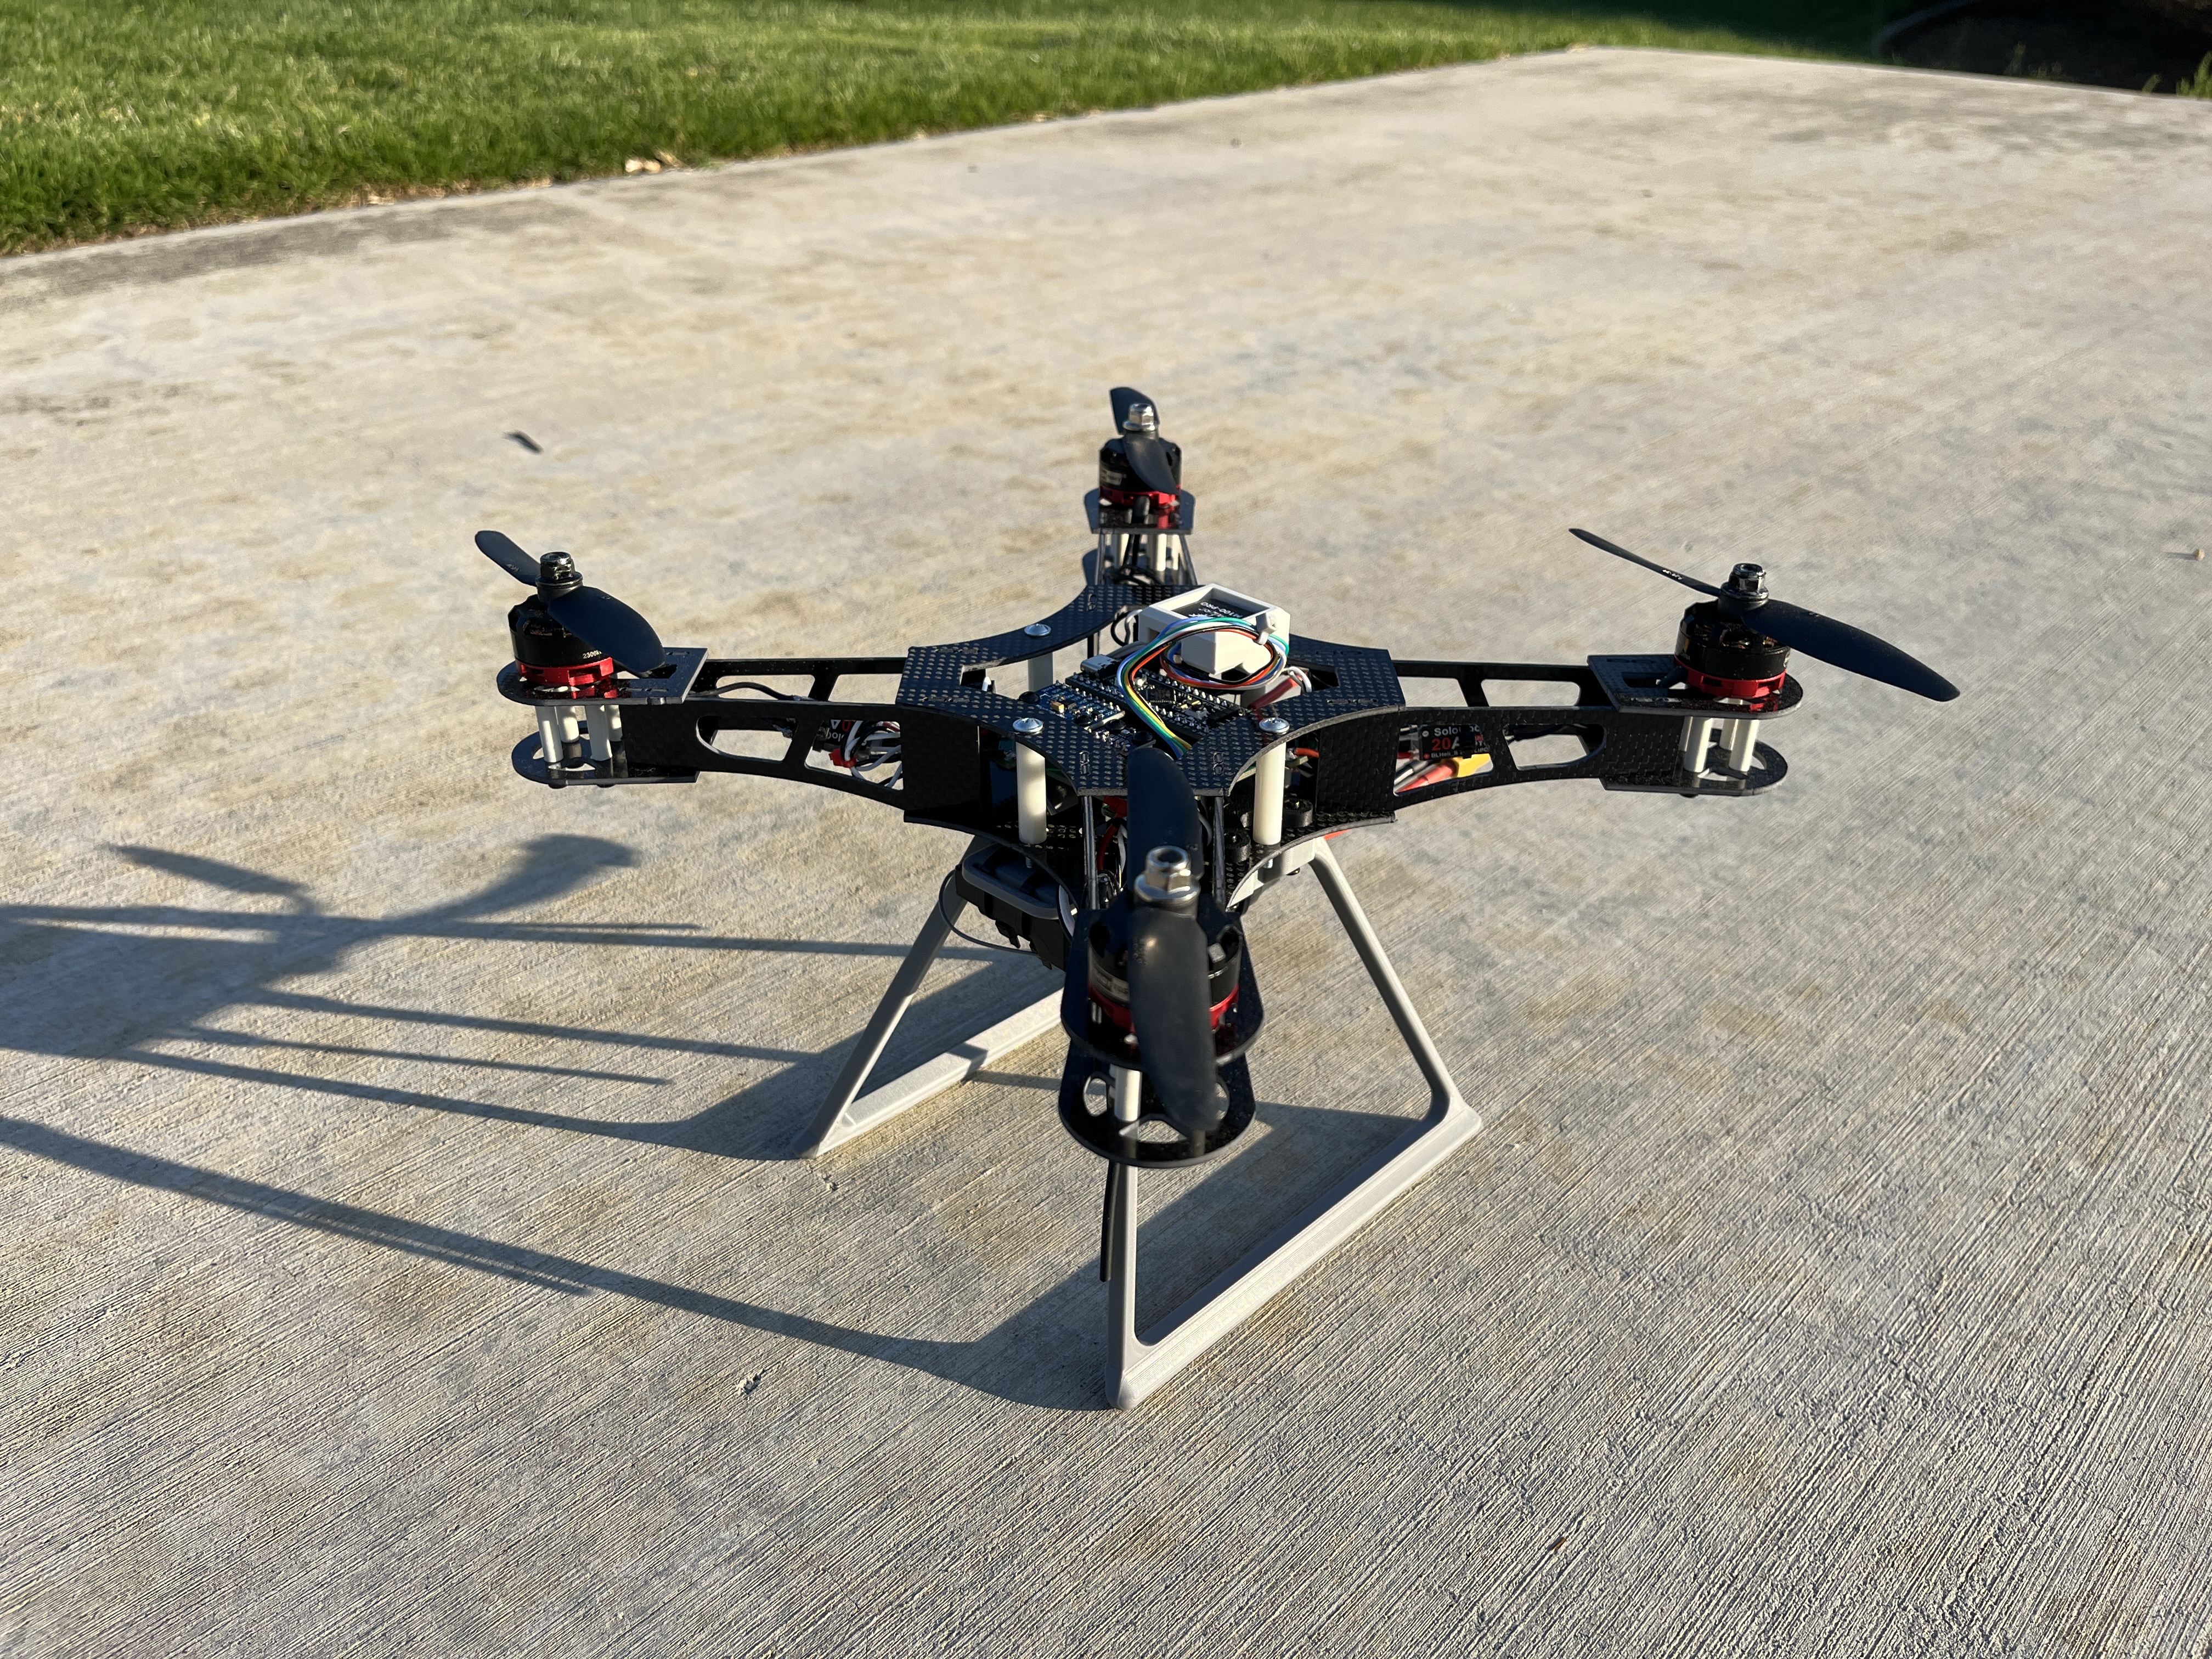
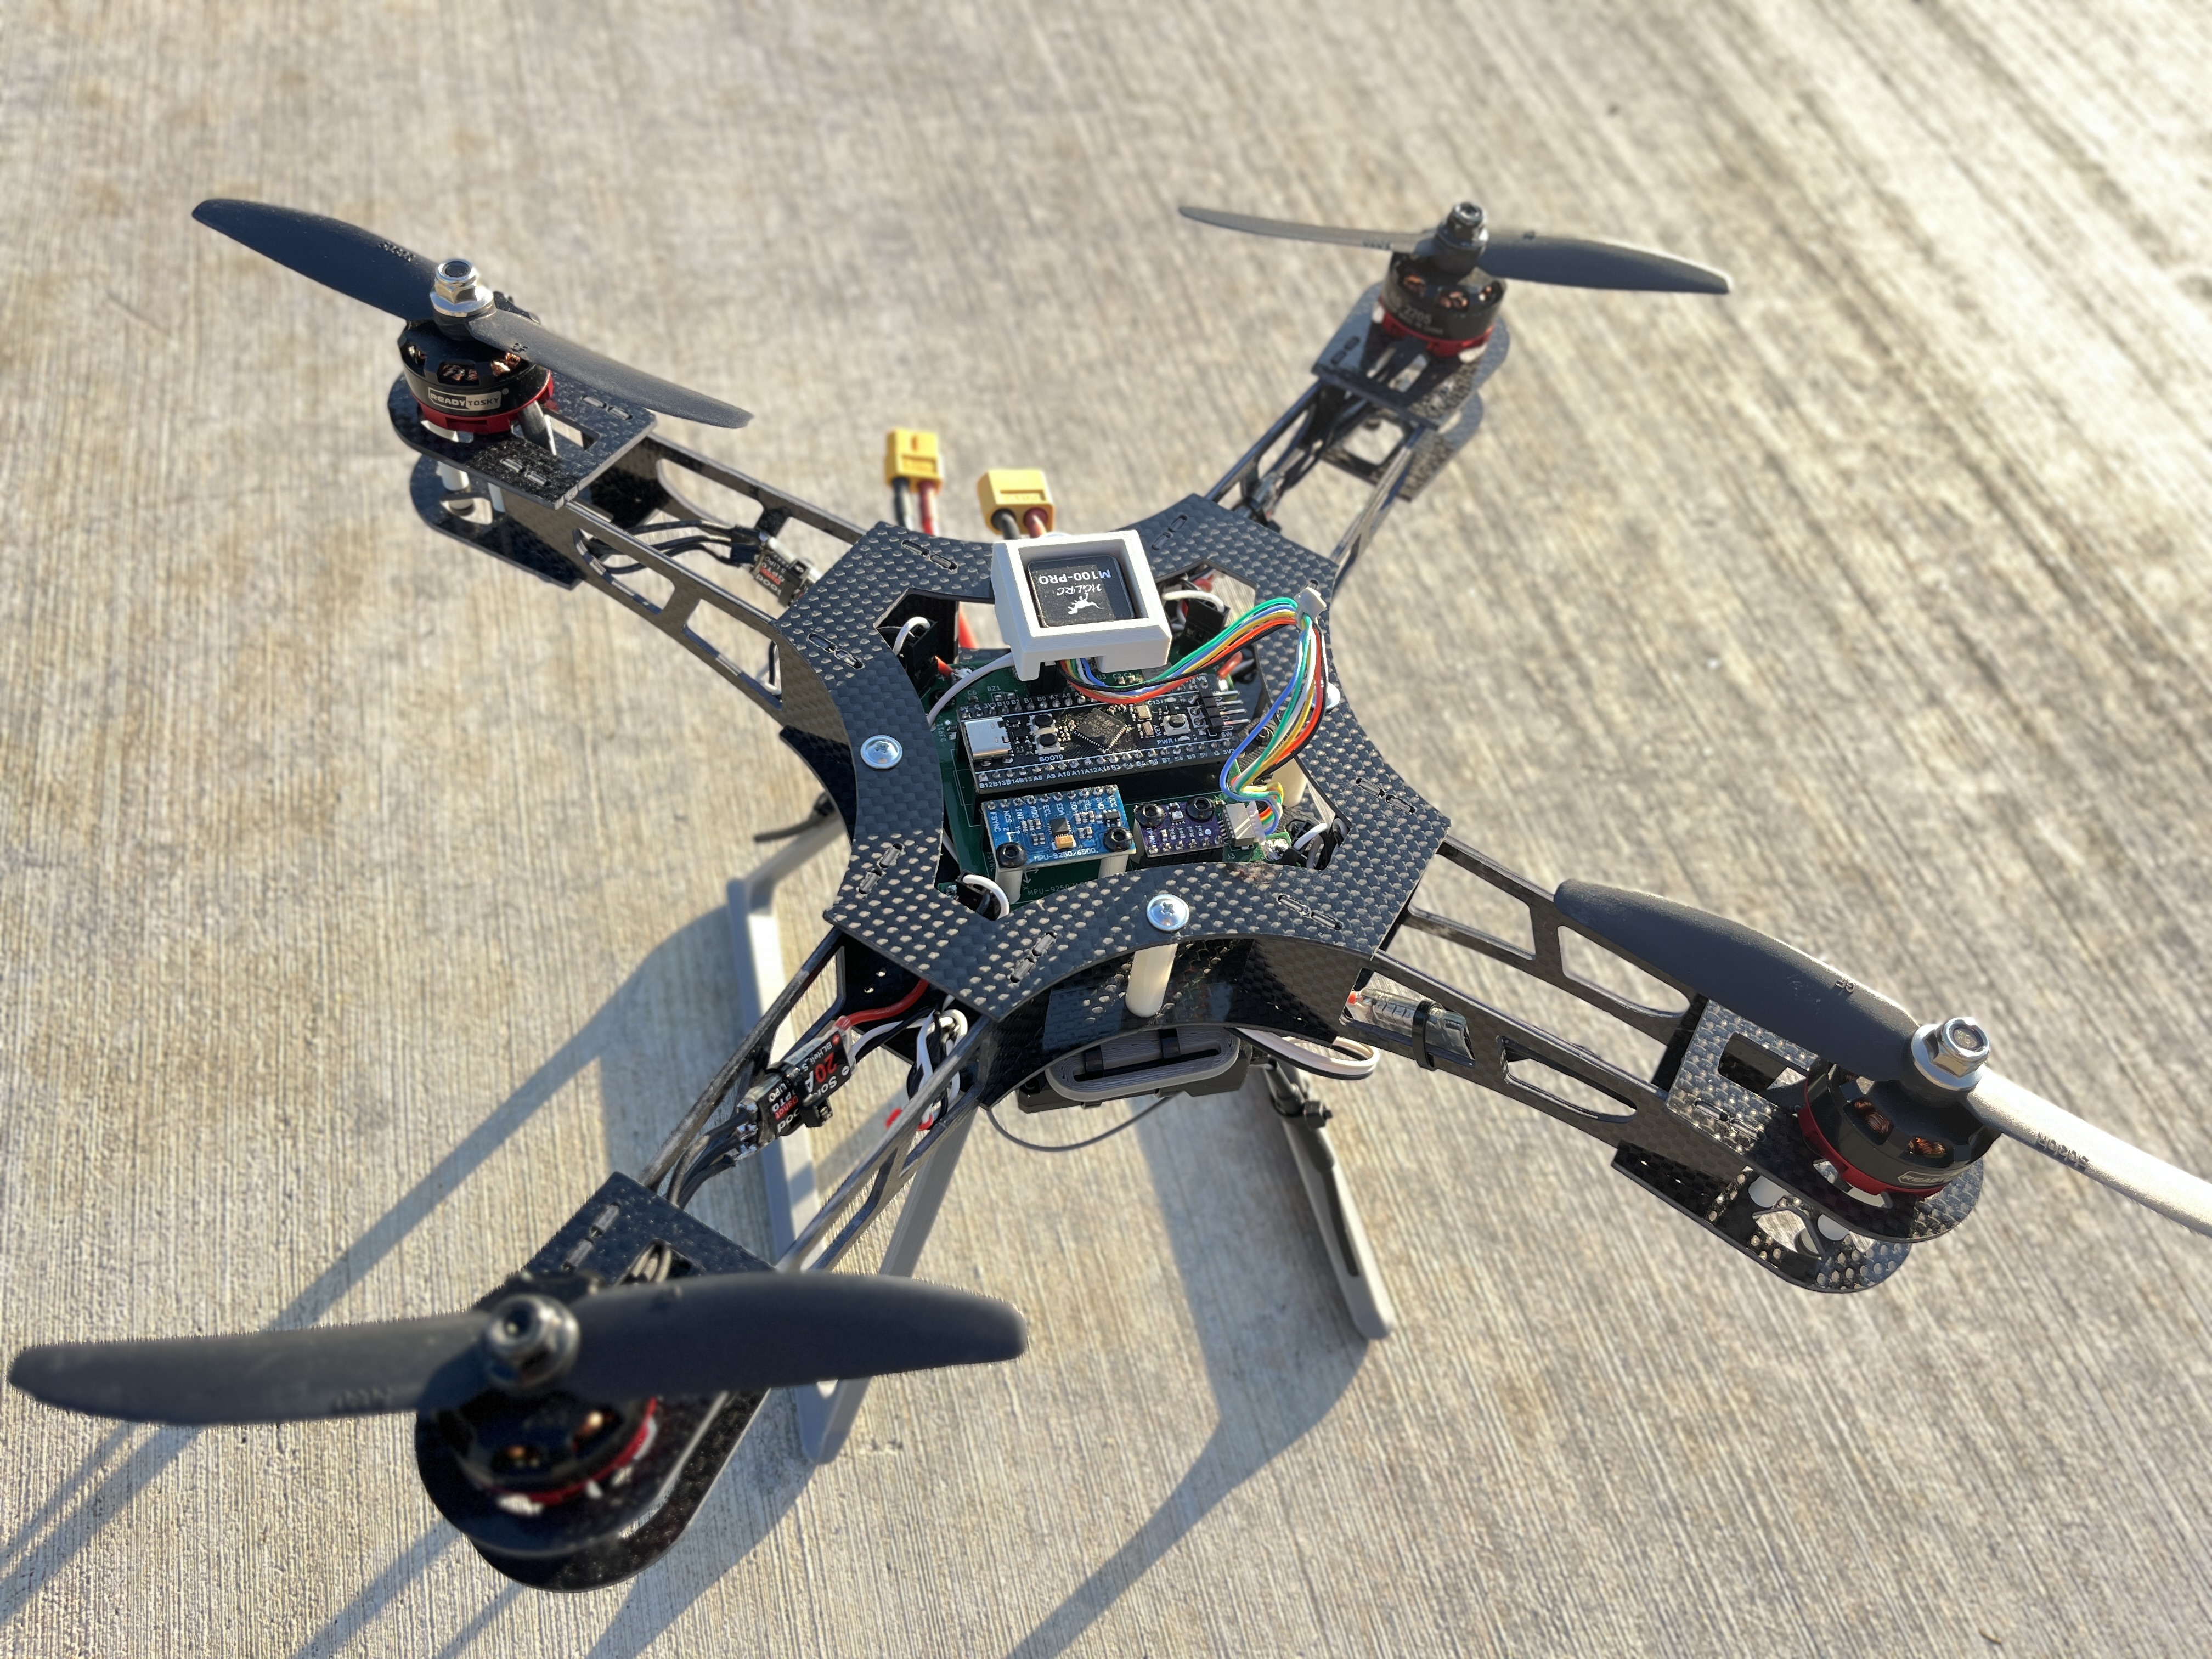
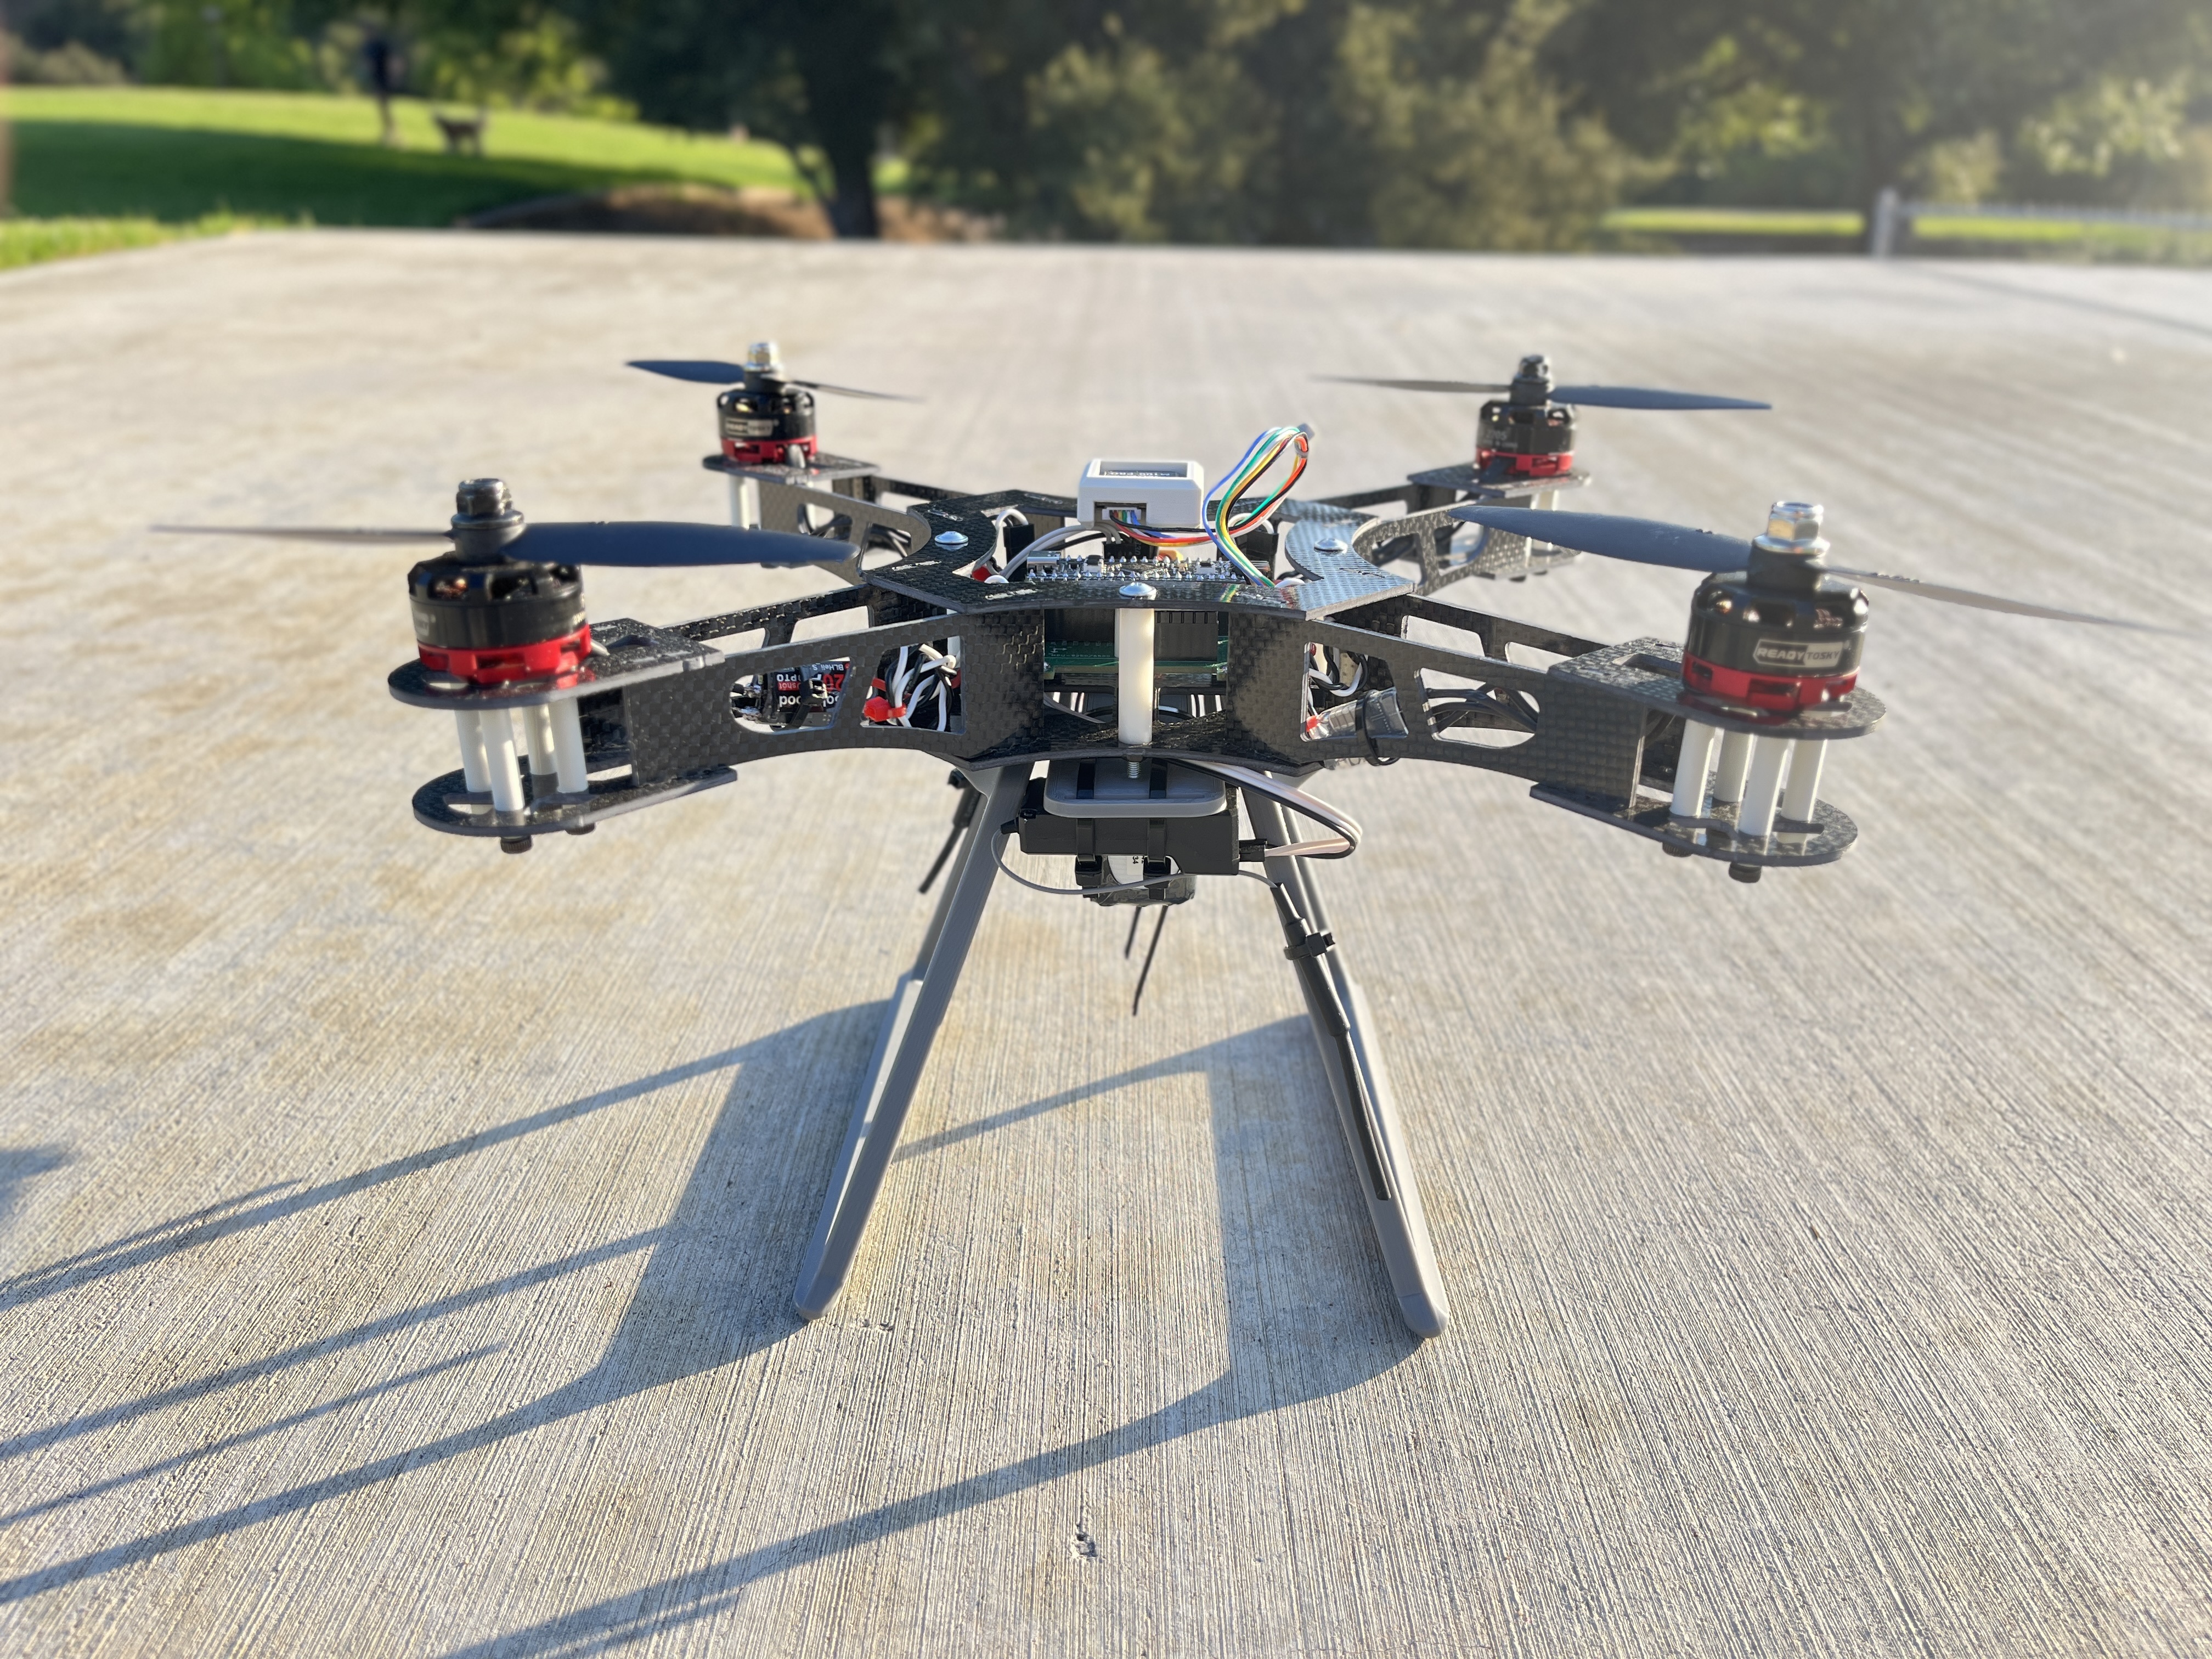
This is a quadcopter design based on the STM32F411CEU Blackpill flight controller. The flight controller is compatible with INAV 6.0 firmware. The flight controller uses an MPU6500 for inertial measurements and a BMP280 for altitude sensing, and also supports an optional GPS and magnetometer module.
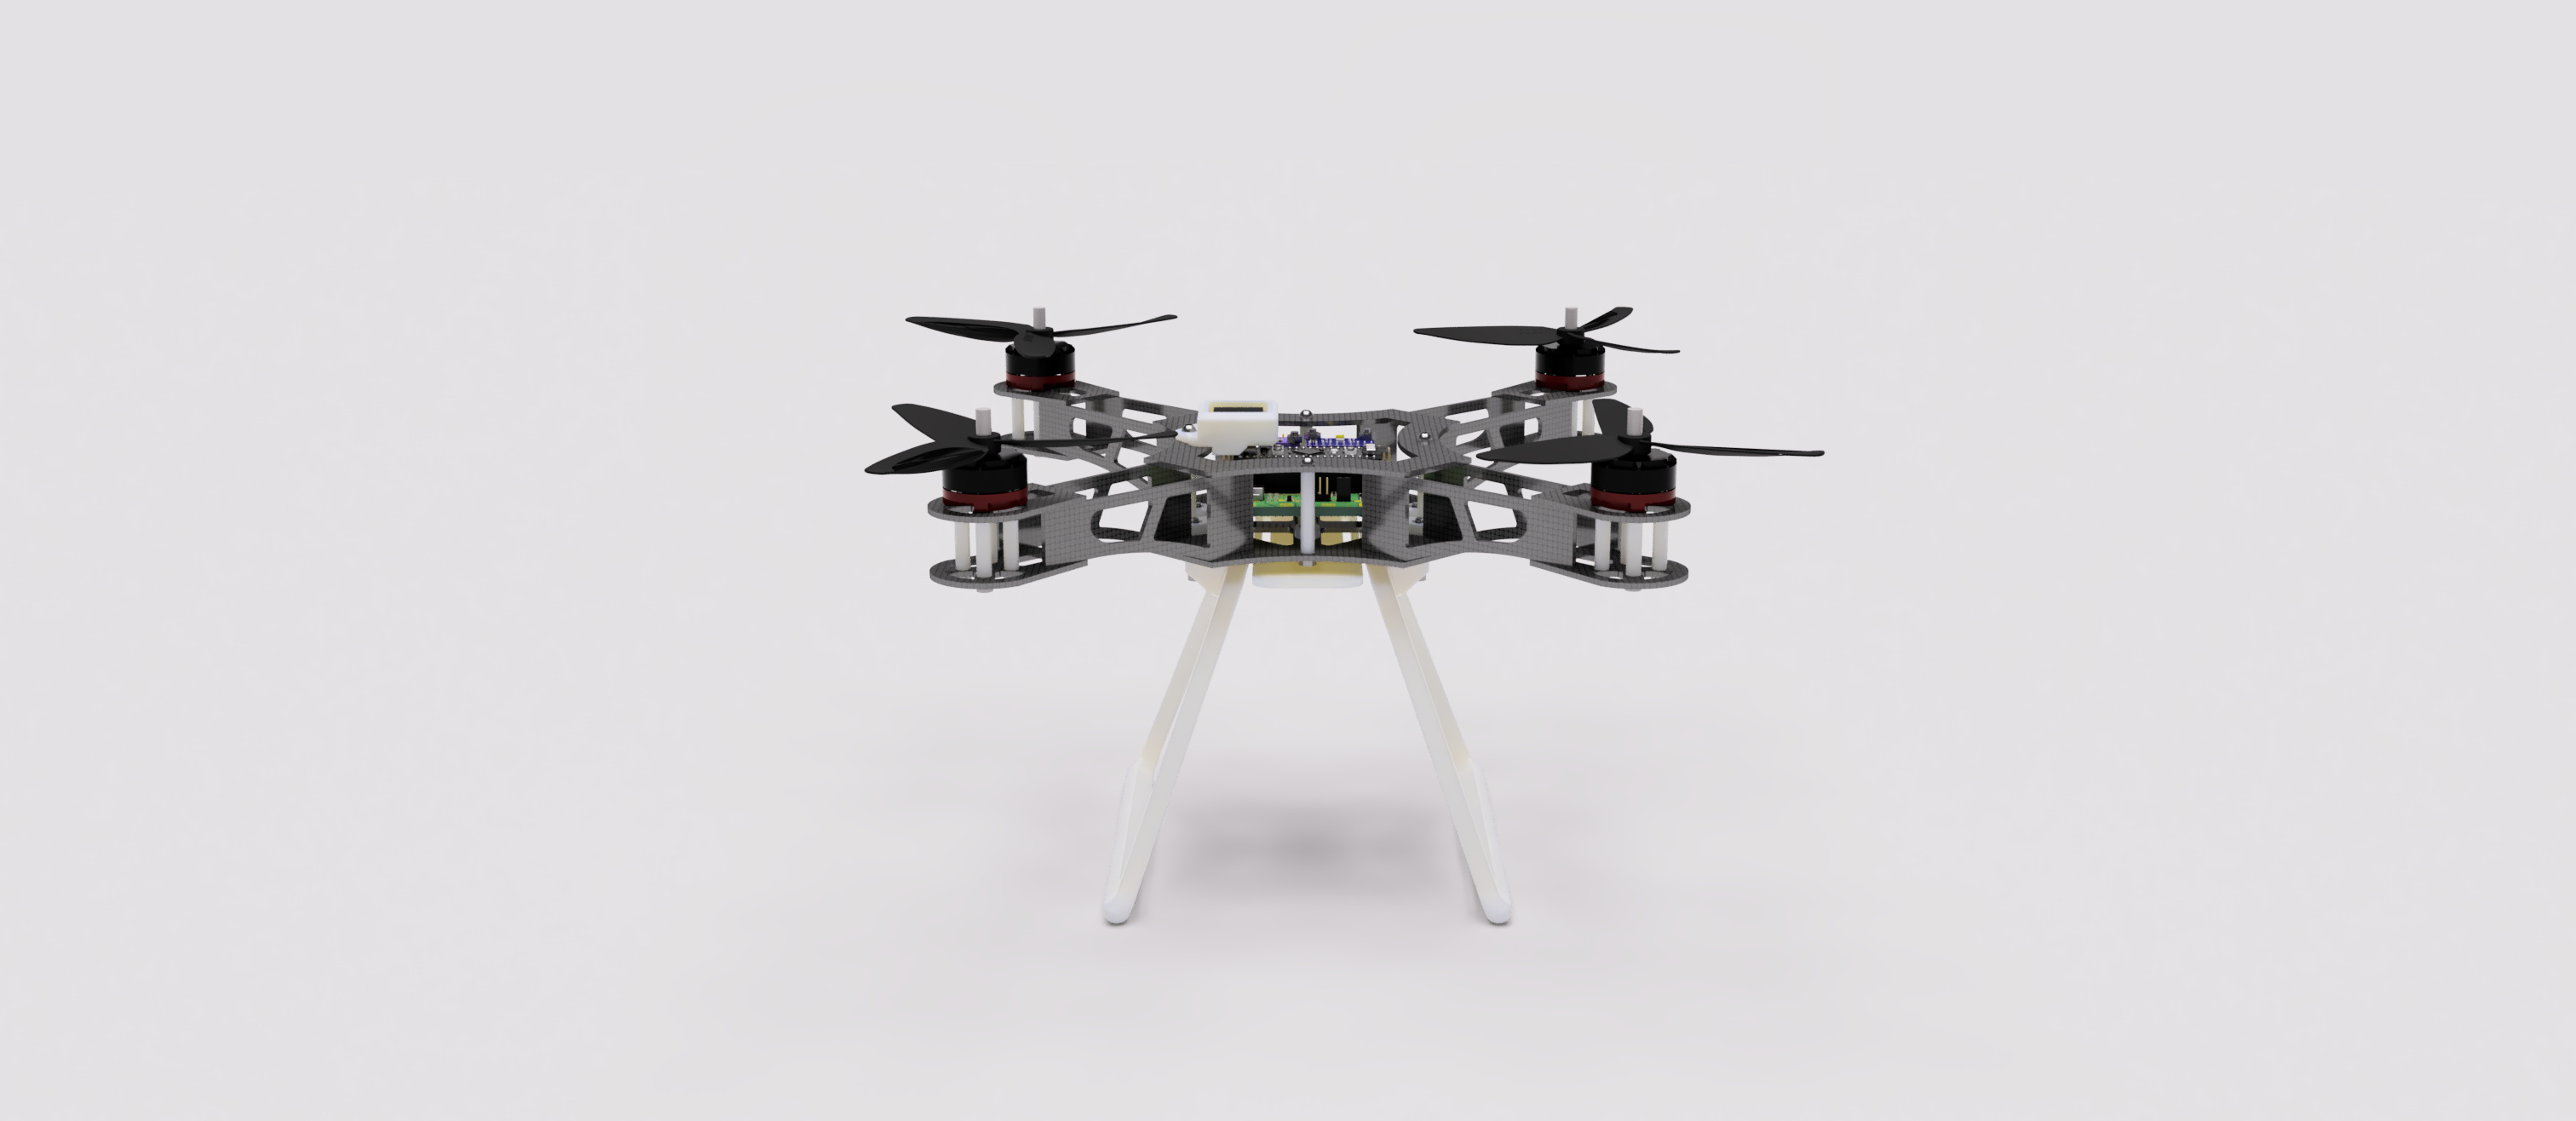
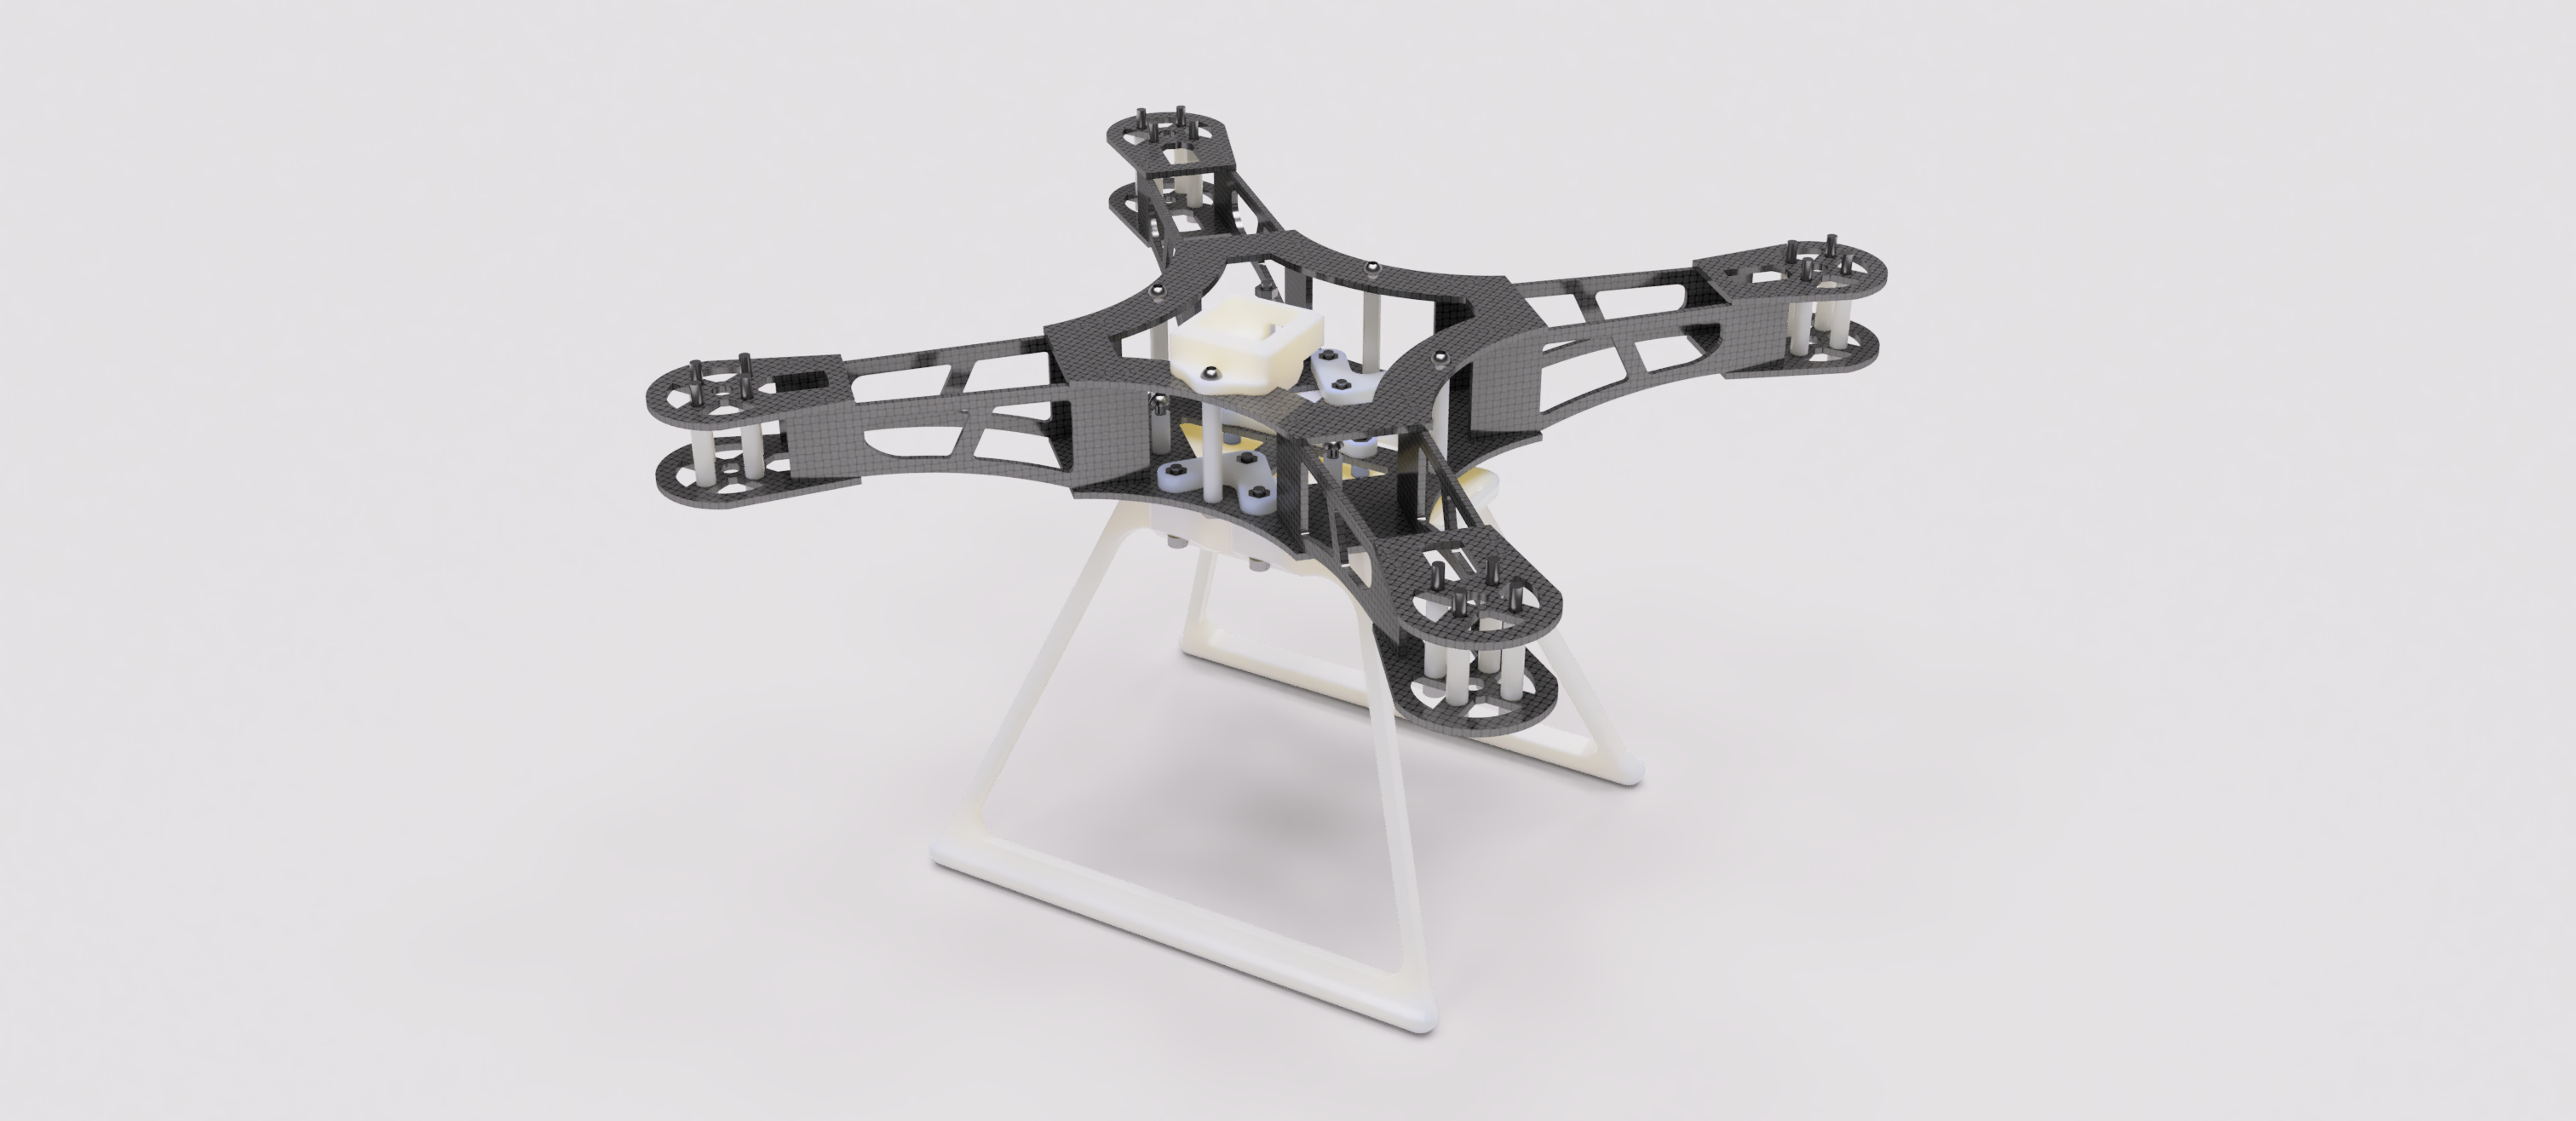
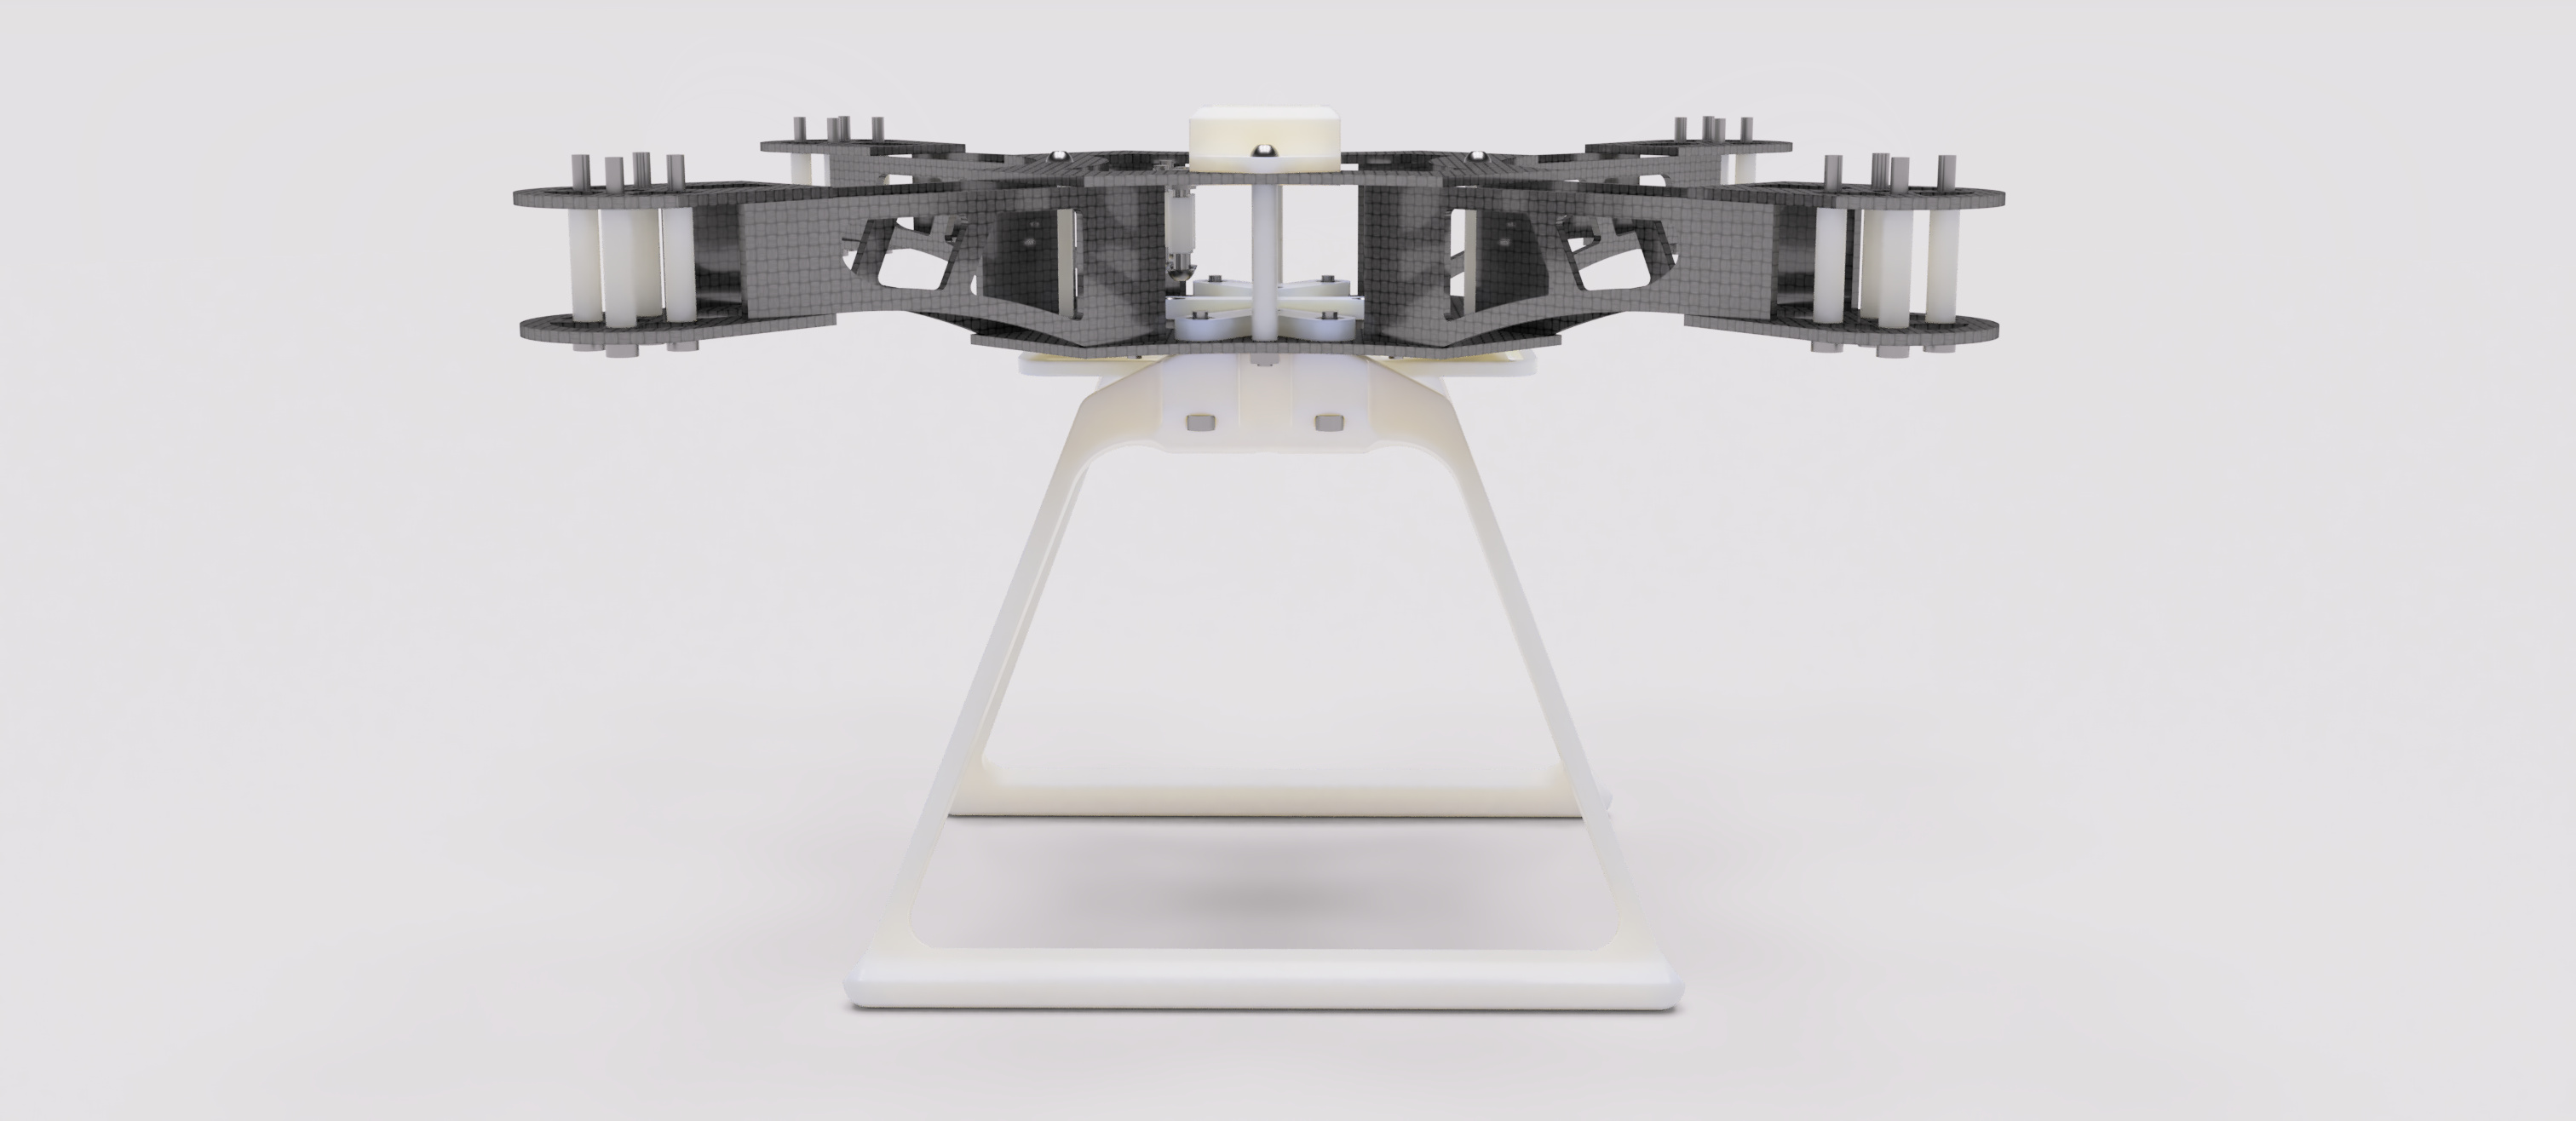
The frame is composed mostly of 2D parts cut from carbon-fiber sheets. Alternatively, you can 3D-print parts in carbon-fiber-reinforced filaments (PET-CF, PAHT-CF, PA6-CF, PPS-CF), with less-critical components in ABS.
 |
|---|
 |  |
|---|
 |  |
|---|
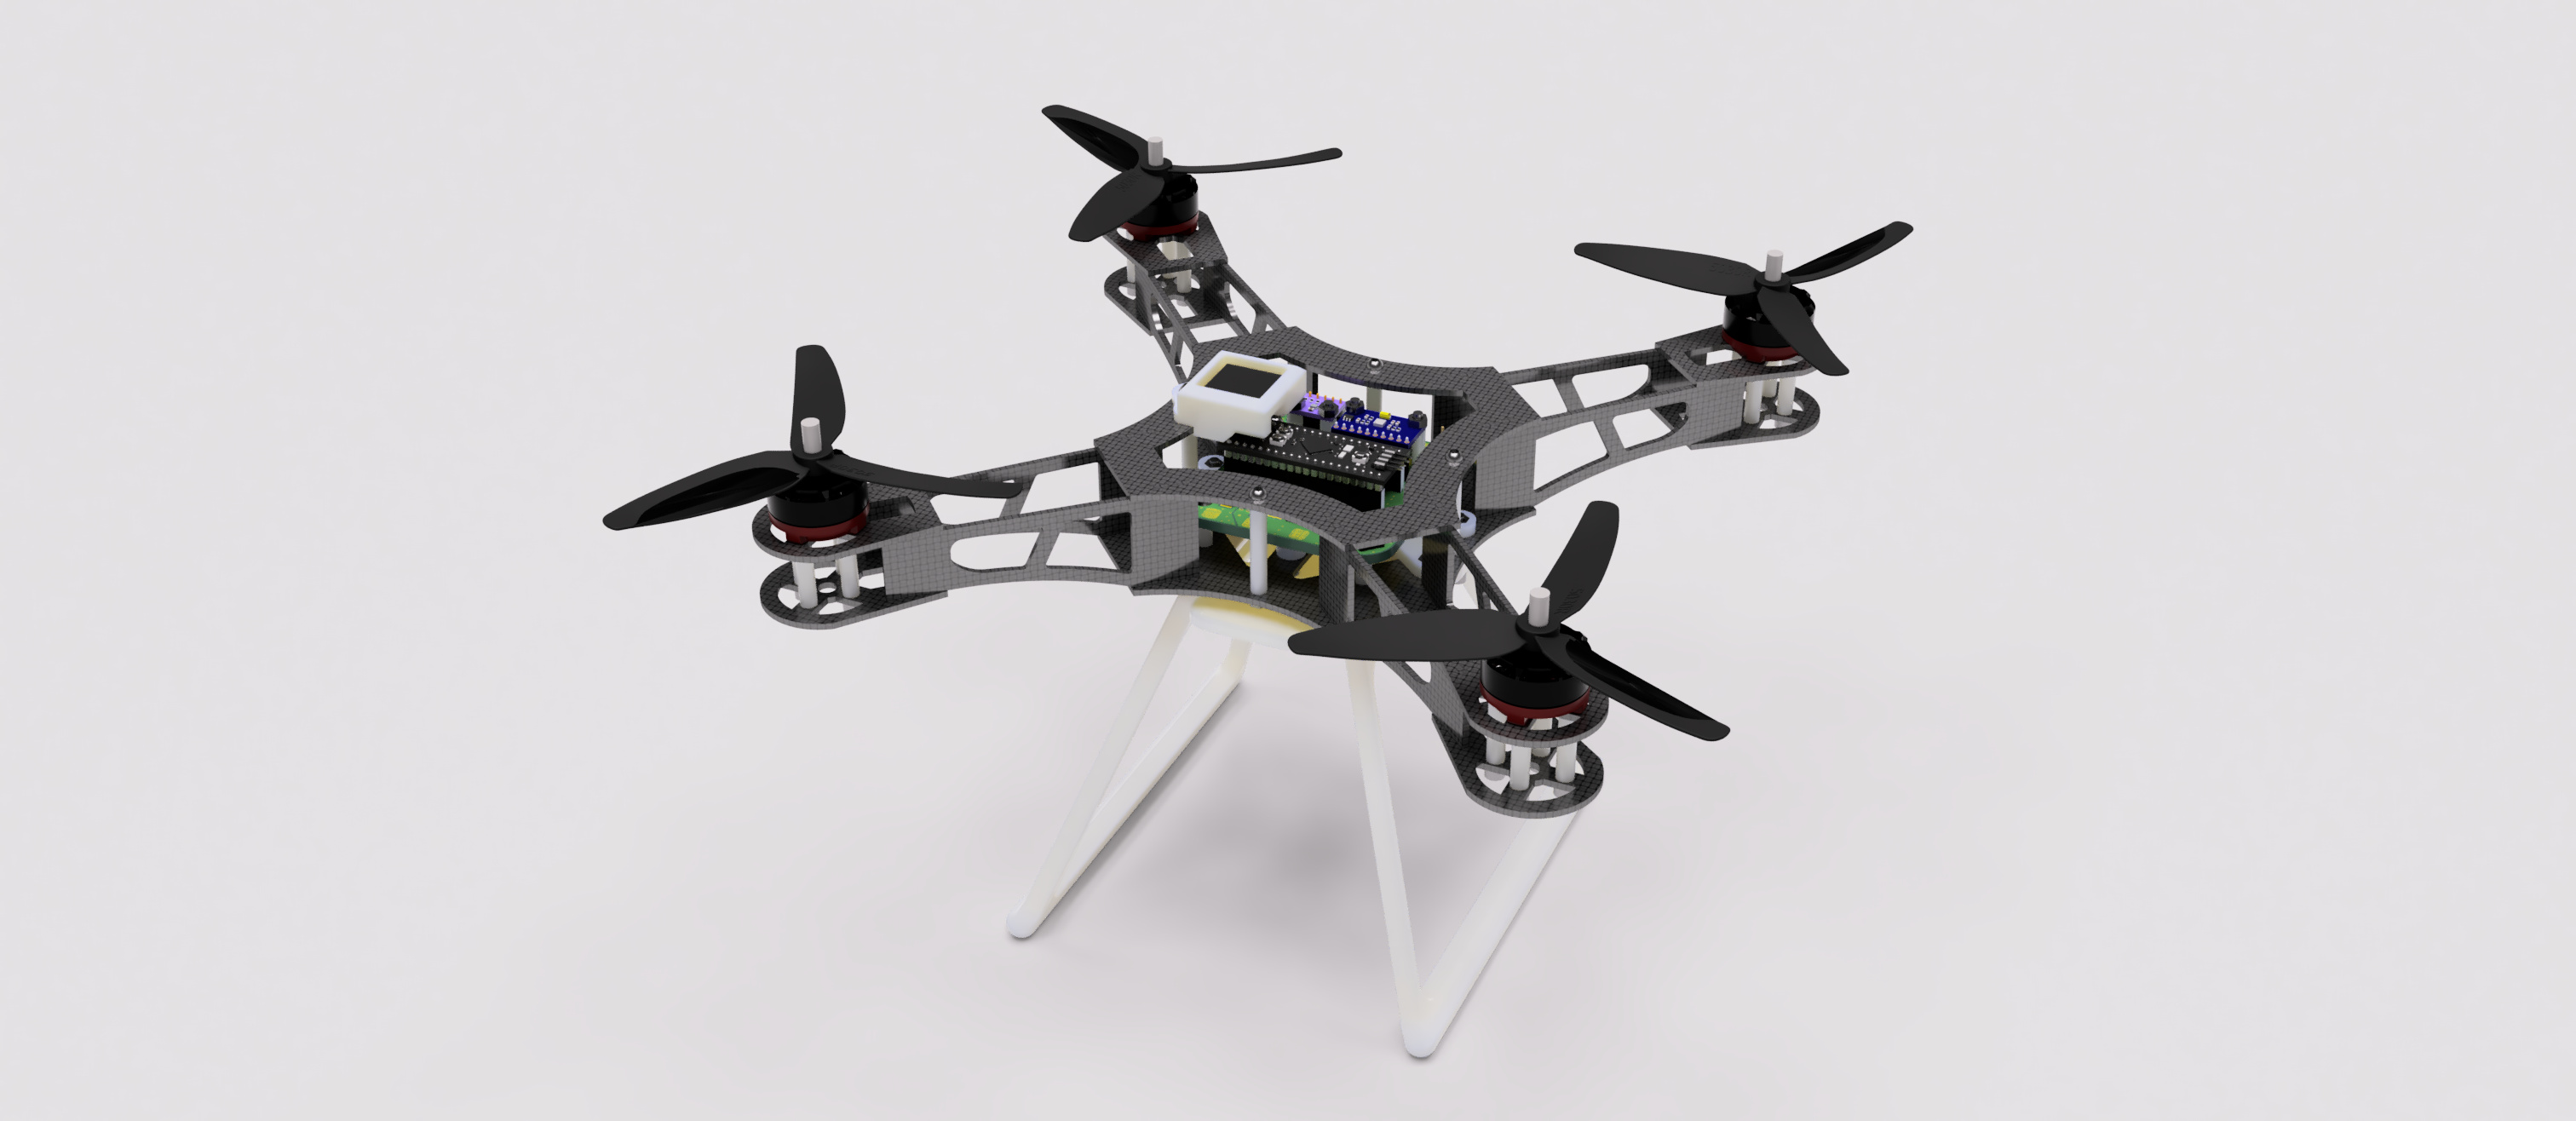
Use the assembled CAD model in the 3.Models/ folder as a reference to build.
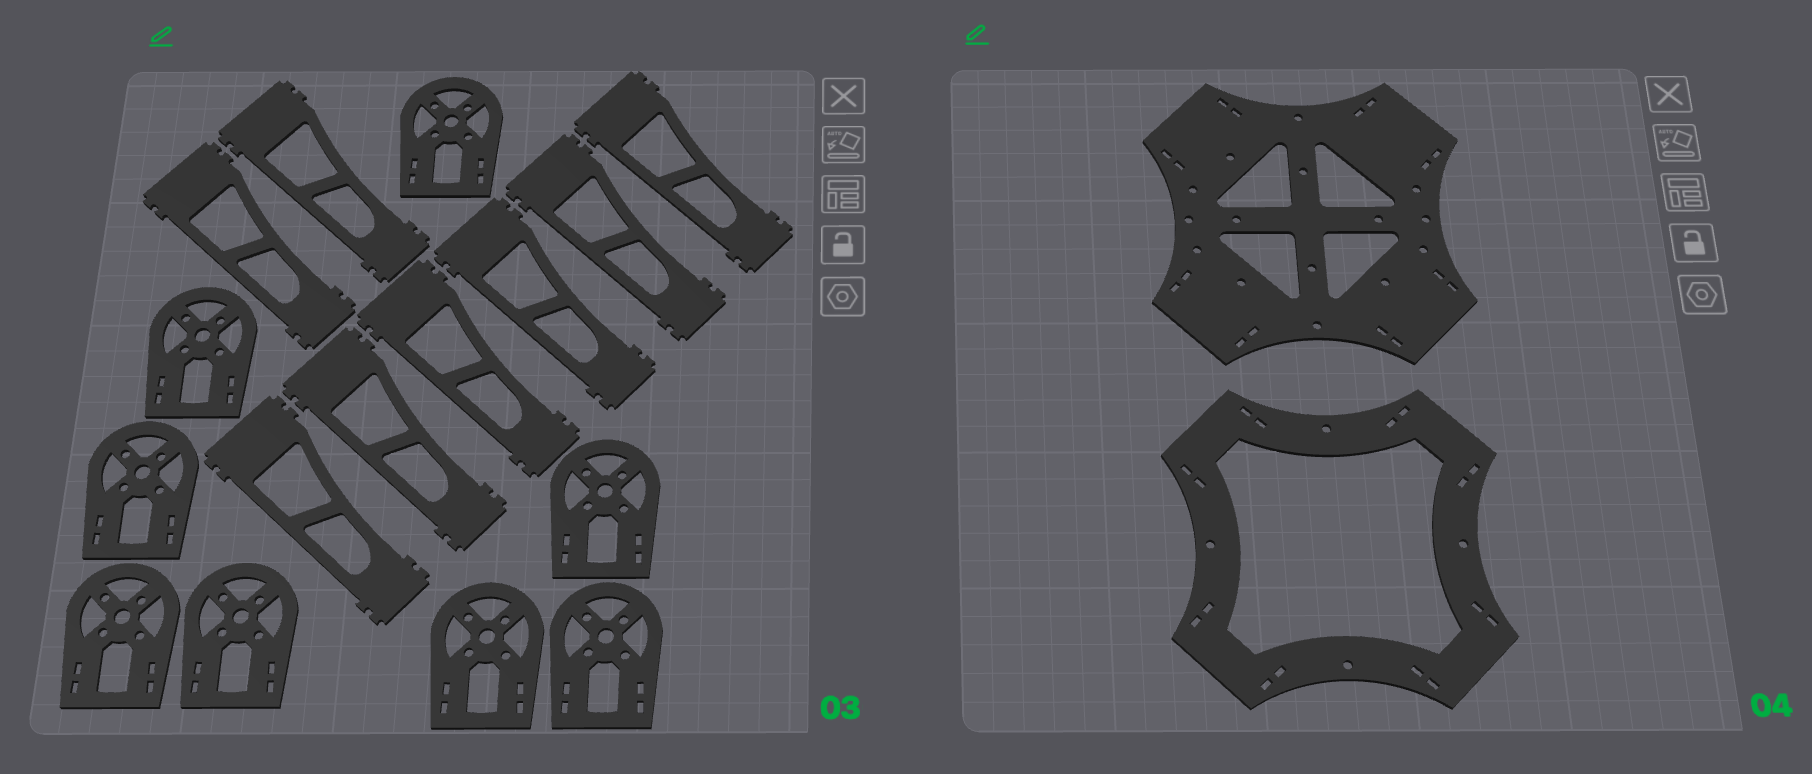
All files are under 3.Models/. Add dogbones and tolerances for manufacturability.
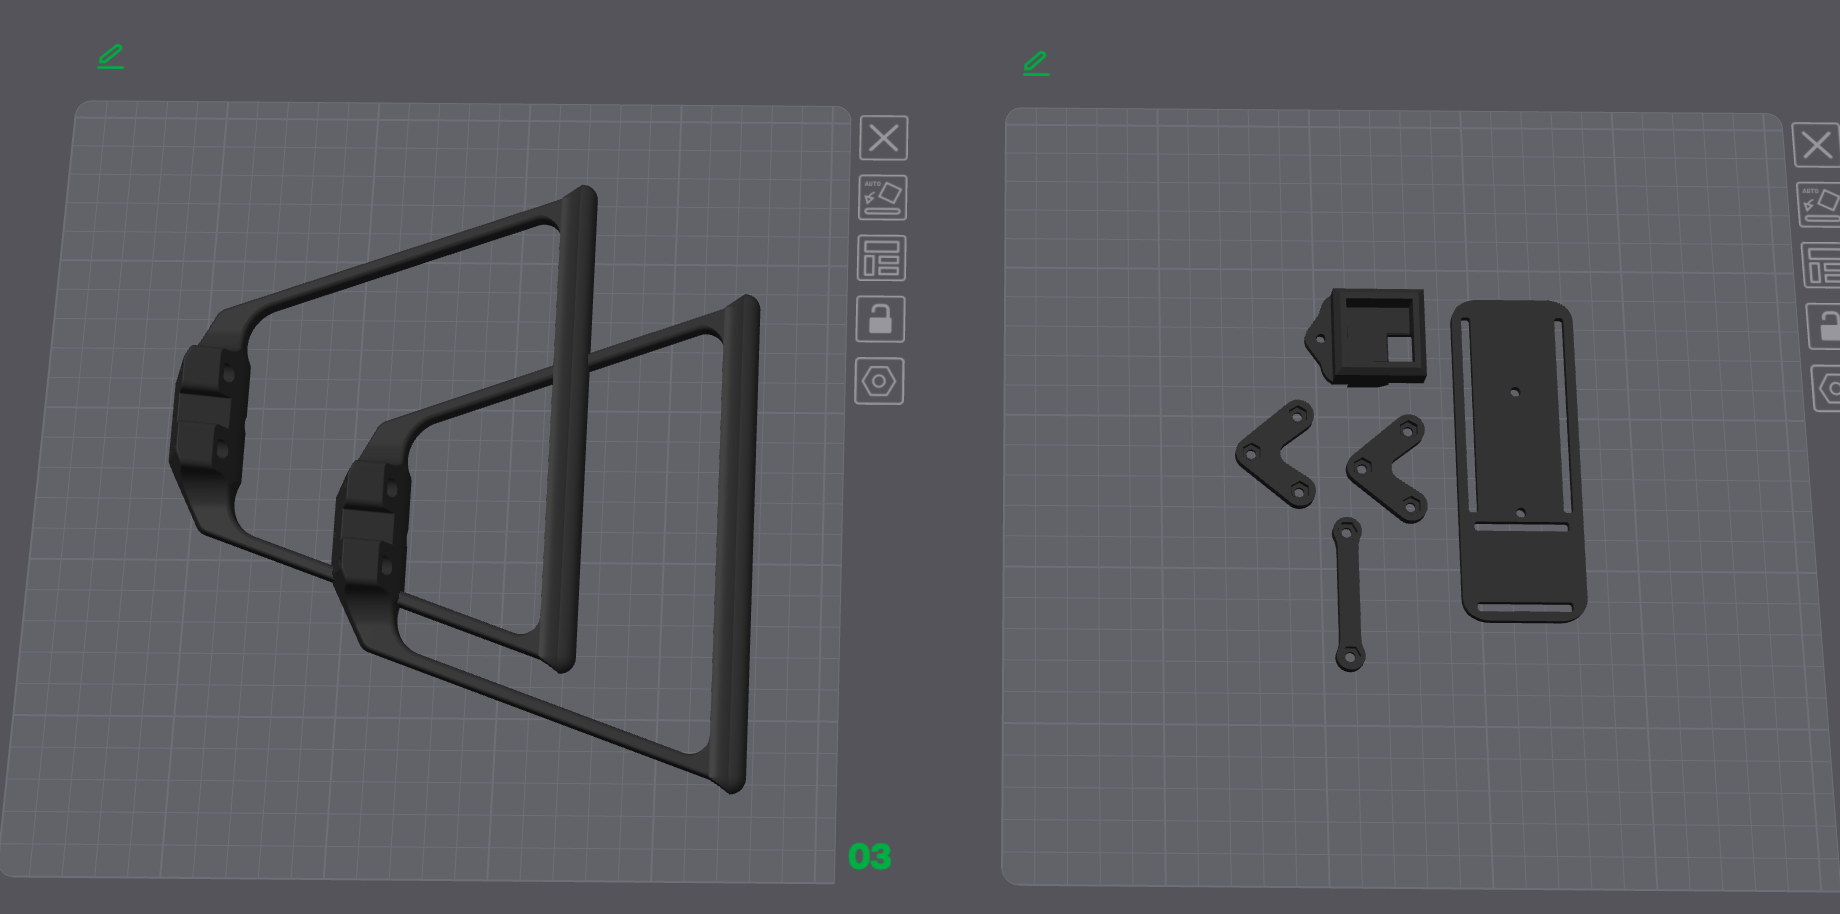
Recommend using a 0.4 mm or 0.6 mm high-strength print profile.
Mechanical Components BOM
| Item Name | Qty |
|---|---|
| M3 Hex Nut | 19 |
| M3 x 12mm Button Head Bolt | 2 |
| M3 x 20mm Button Head Bolt | 7 |
| M3 x 20mm Socket Head Bolt | 6 |
| M3 x 30mm Socket Head Bolt | 16 |
| M3 x 35mm Button Head Bolt | 3 |
| M3 x 40mm Button Head Bolt | 1 |
| Nylon Spacer 3-5-11.2 | 8 |
| Nylon Spacer 3-5-20 | 16 |
| Nylon Spacer 3-5-30 | 4 |
| Nylon Spacer 3-5-5 | 2 |
Structure
1. Electronics/
  ├── Extra/
  │   ├── *.step
  │   └── ...
  ├── Hardware-backups/
  │   └── ...
  ├── Production/           ← Gerber output for fabrication
  │   ├── Hardware-B_Cu.gbl
  │   └── ...
  ├── Hardware.kicad_pcb    ← KiCAD PCB file
  ├── Hardware.kicad_sch    ← KiCAD Schematics file
  ├── Hardware.kicad_pro    ← KiCAD project
  ├── JLCPCB.kicad_dru      ← Rules for JLCPCB manufacturing
  ├── Production.zip        ← Gerber
└── Schematics.pdf ← Schematics| Component | Qty |
|---|---|
| RS2205 BLDC Motor | 4 |
| BLHeli_S 20A ESC | 4 |
| 5030R Propeller | 2 |
| STM32F411CEU6 “Blackpill” | 1 |
| MPU6500 / MPU9250 Module | 1 |
| BMP280 Module | 1 |
| 330 µF @ 50 V Capacitor | 1 |
| FS-iA6B Receiver | 1 |
| FS-iA6B Transmitter | 1 |
| Ovonic 1500 mAh 120C 3s Battery | 1 |
| XT60 Connector | 1 |
Gerber files and BOM are available under the electronics folder.
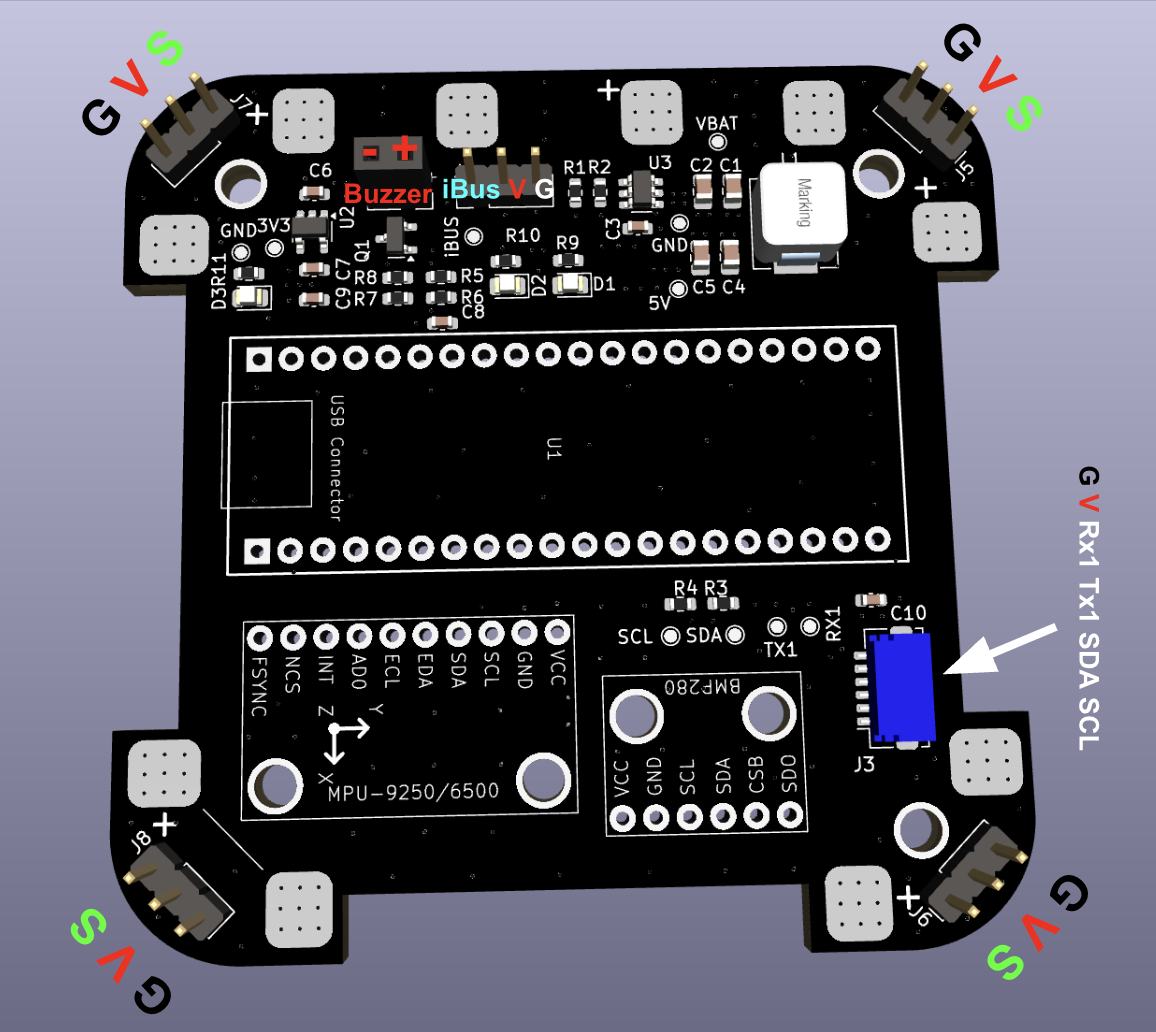
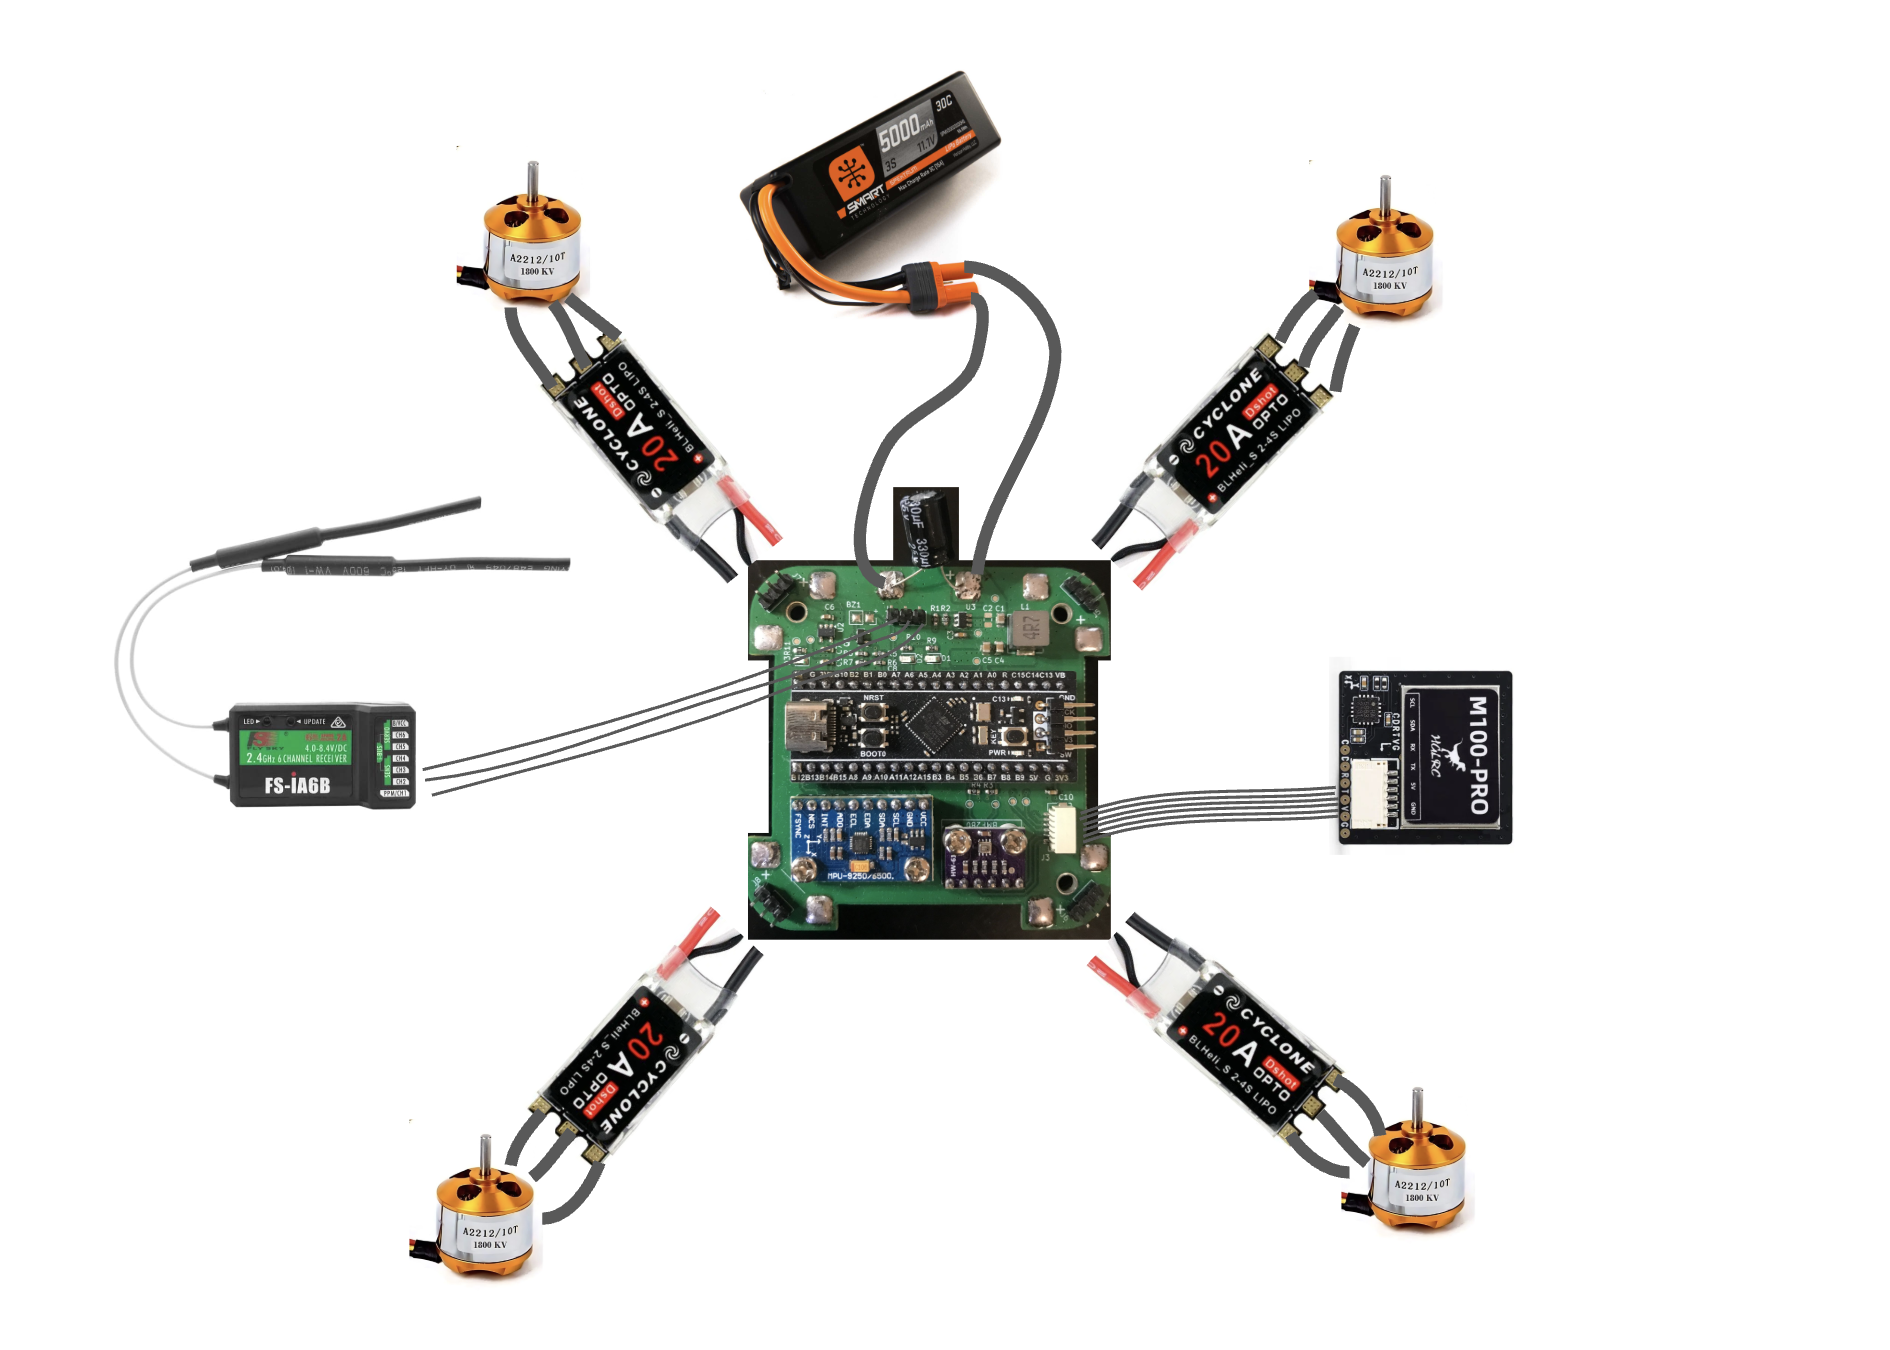
Diagram only; not actual wiring. Please follow the strict pin assignments.
Ensure connectors are wired correctly according to the pinout. Note that RX should connect to TX: RX1 → GPS TX, TX1 → GPS RX.
One or more bulk electrolytic capacitor is recommended to protect against voltage spikes. Use an electrolytic capacitor such as 330 µF @ 50 V and place it between VBAT and GND near the input. For extra protection, a TVS diode clampeing at ~12 V is ideal.
The firmware used is INAV v6.0.0 (github link). This project does not support INAV v7+ currently due to USB issue. If one wants to modify the target file or other configurations of the firmware, they must rebuild the binary. Follow this guide to build:
Prerequisites
Clone INAV
git clone https://github.com/iNavFlight/inav.git
cd inav
git checkout 6.0
Add Target
Copy the entire 2.Firmware/GYW_BLACKPILL_F411 folder into the local INAV repository under src/main/target/ so that it ends up as:
inav/
└── src/
    └── main/
        └── target/
            ├──  GYW_BLACKPILL_F411/
            └── ...
Patch Code
INAV 6.0 doesn’t support a 25 MHz HSE clock by default, so if your board (like the Blackpill F411) uses a 25 MHz crystal, you must update the PLL setup in src/main/target/system_stm32f4xx.c as follows:
In system_stm32f4xx.c, locate the PLL setup region and modify it as follows:
#if defined(STM32F40_41xxx) || defined(STM32F427_437xx) || defined(STM32F429_439xx) || defined(STM32F401xx) || defined(STM32F469_479xx) || defined(STM32F446xx) || defined(STM32F410xx) || defined(STM32F411xE)
+   #if HSE_VALUE == 25000000
+       #define PLL_M   25
+   #elif HSE_VALUE == 24000000
-   #if HSE_VALUE == 24000000
        #define PLL_M   24
    #elif HSE_VALUE == 16000000
        #define PLL_M   16
    #elif HSE_VALUE == 8000000
        #define PLL_M   8
    #else
        #error Invalid HSE_VALUE
    #endif
#else
    #error Undefined CPU
#endif
Build
Ensure that you have installed all dependencies. Inside the inav root repository execute:
mkdir -p build && cd build
cmake .. -G Ninja \
  -DBOARD=GYW_BLACKPILL_F411 \
  -DCMAKE_TOOLCHAIN_FILE=../tools/cmake/toolchain-arm-none-eabi.cmake
ninja
The firmware binary should be at build/inav_6.0.0_GYW_BLACKPILL_F411.hex.
First, download the INAV Configurator v6.0.0 from this link. Once installed, launch INAV Configurator and connect to the Blackpill via USB. Cut the red wire in the USB cable to prevent it from powering the Blackpill. Instead, power the flight controller using an external 3S battery.
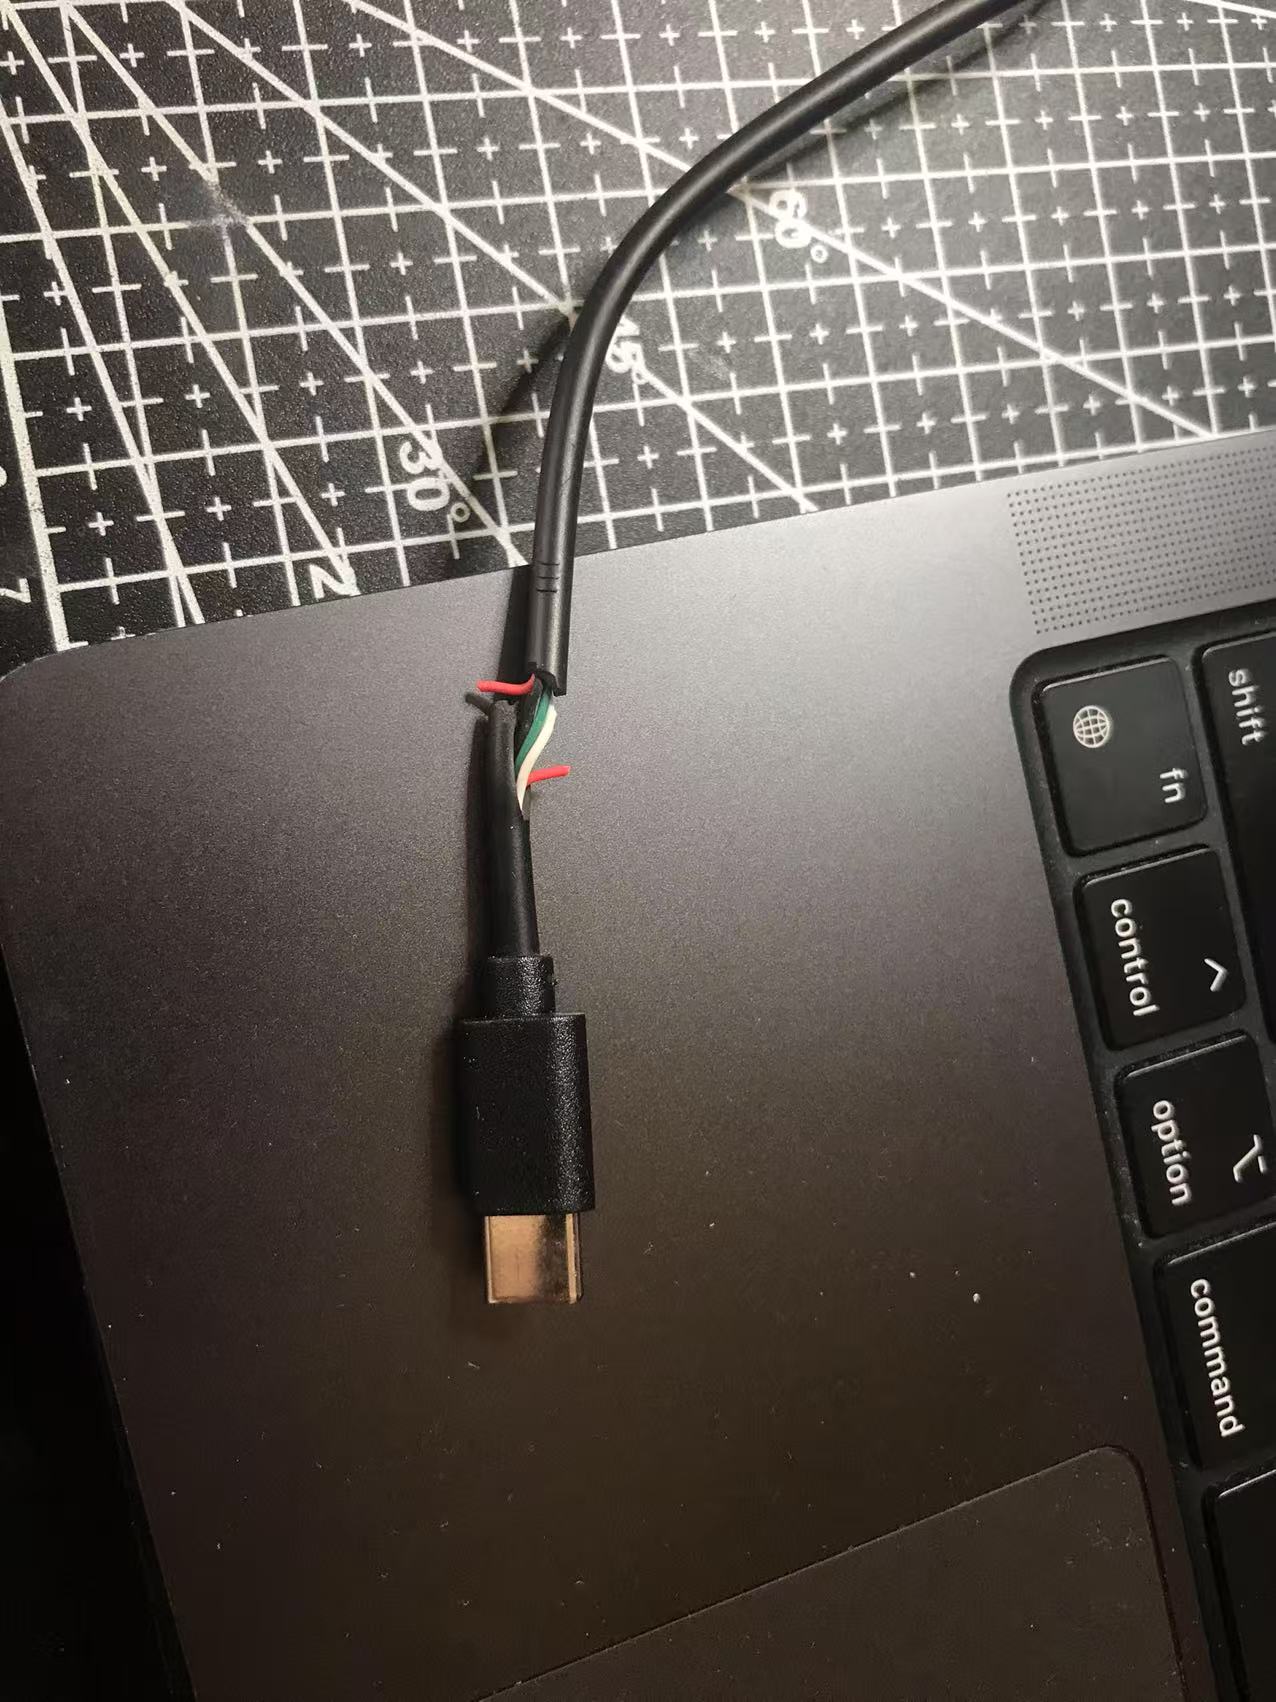
To enter DFU mode, hold the BOOT button on the Blackpill while powering it on. Alternatively, you can press RESET while holding the BOOT button. When in DFU mode, the blue LED on the Blackpill will be off, and the board should appear in the INAV Configurator’s drop-down menu as a DFU device. Move to the Firmware Flasher tab on the left. Click Load Firmware, select the file inav_6.0.0_GYW_BLACKPILL_F411.hex (found in the firmware folder), then click Flash Firmware.
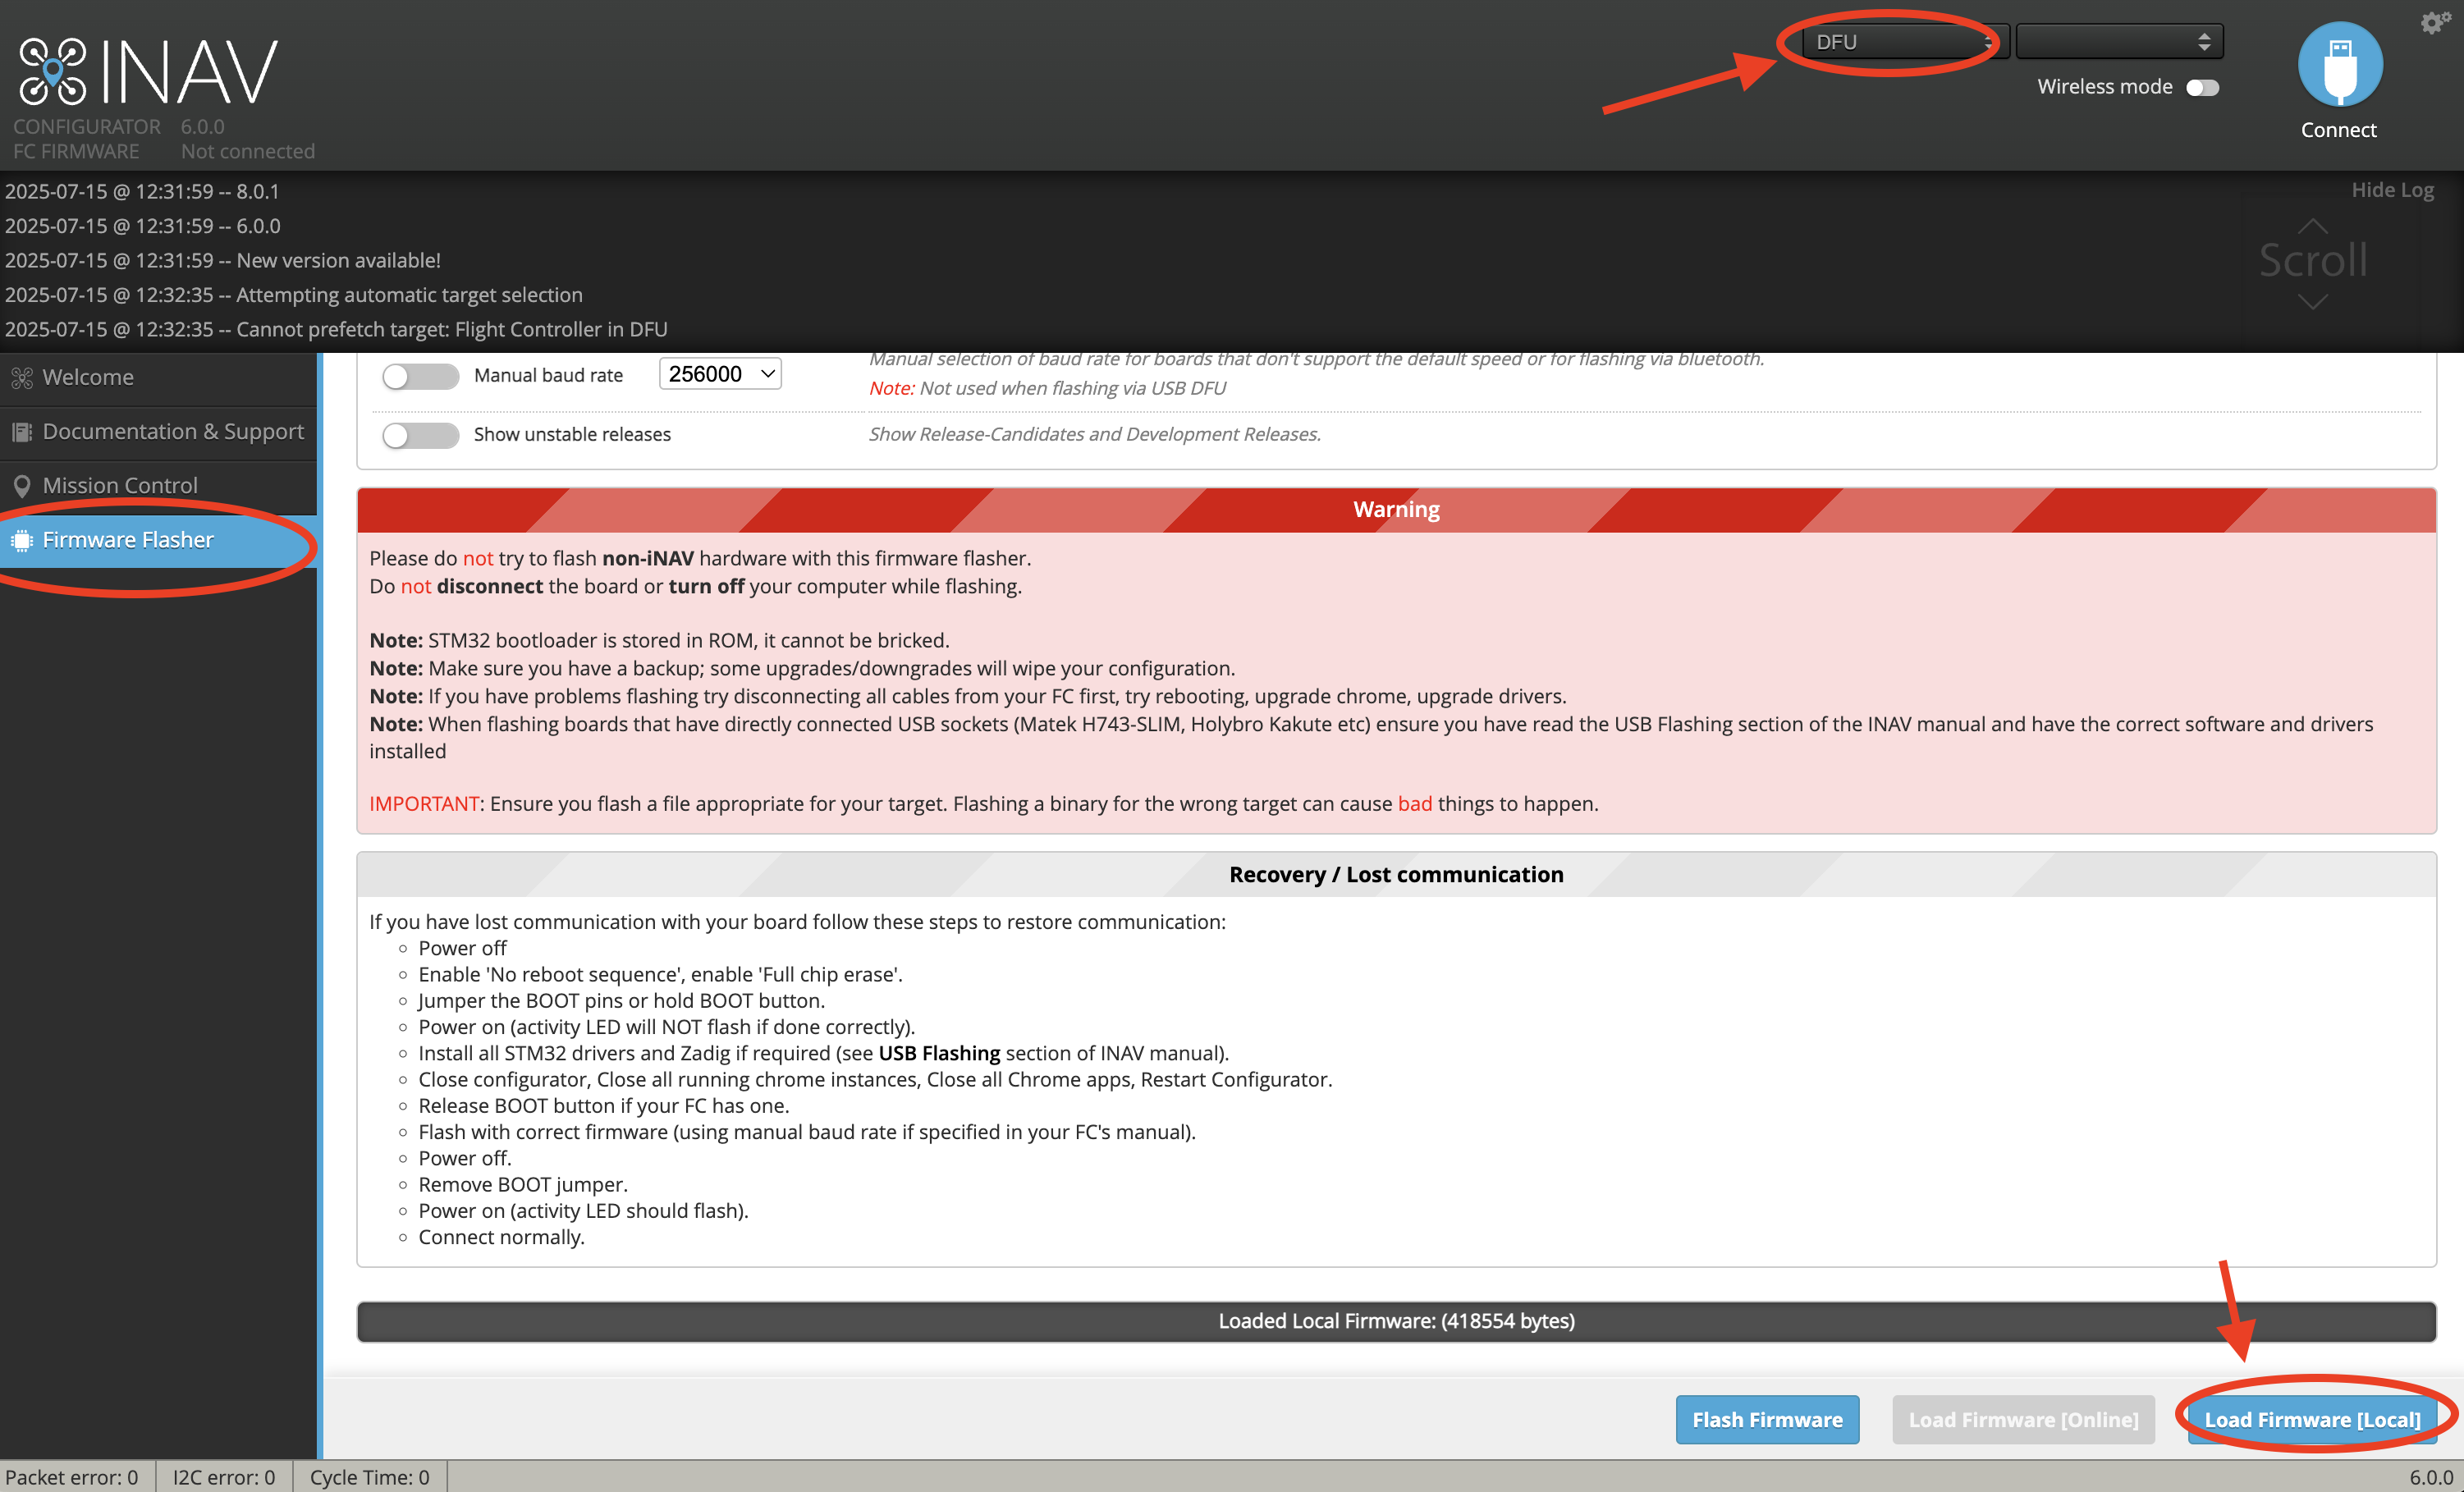
A progress bar will appear during firmware flash.

When the firmware is successfully flashed, click connect. The configuration menu should show up.
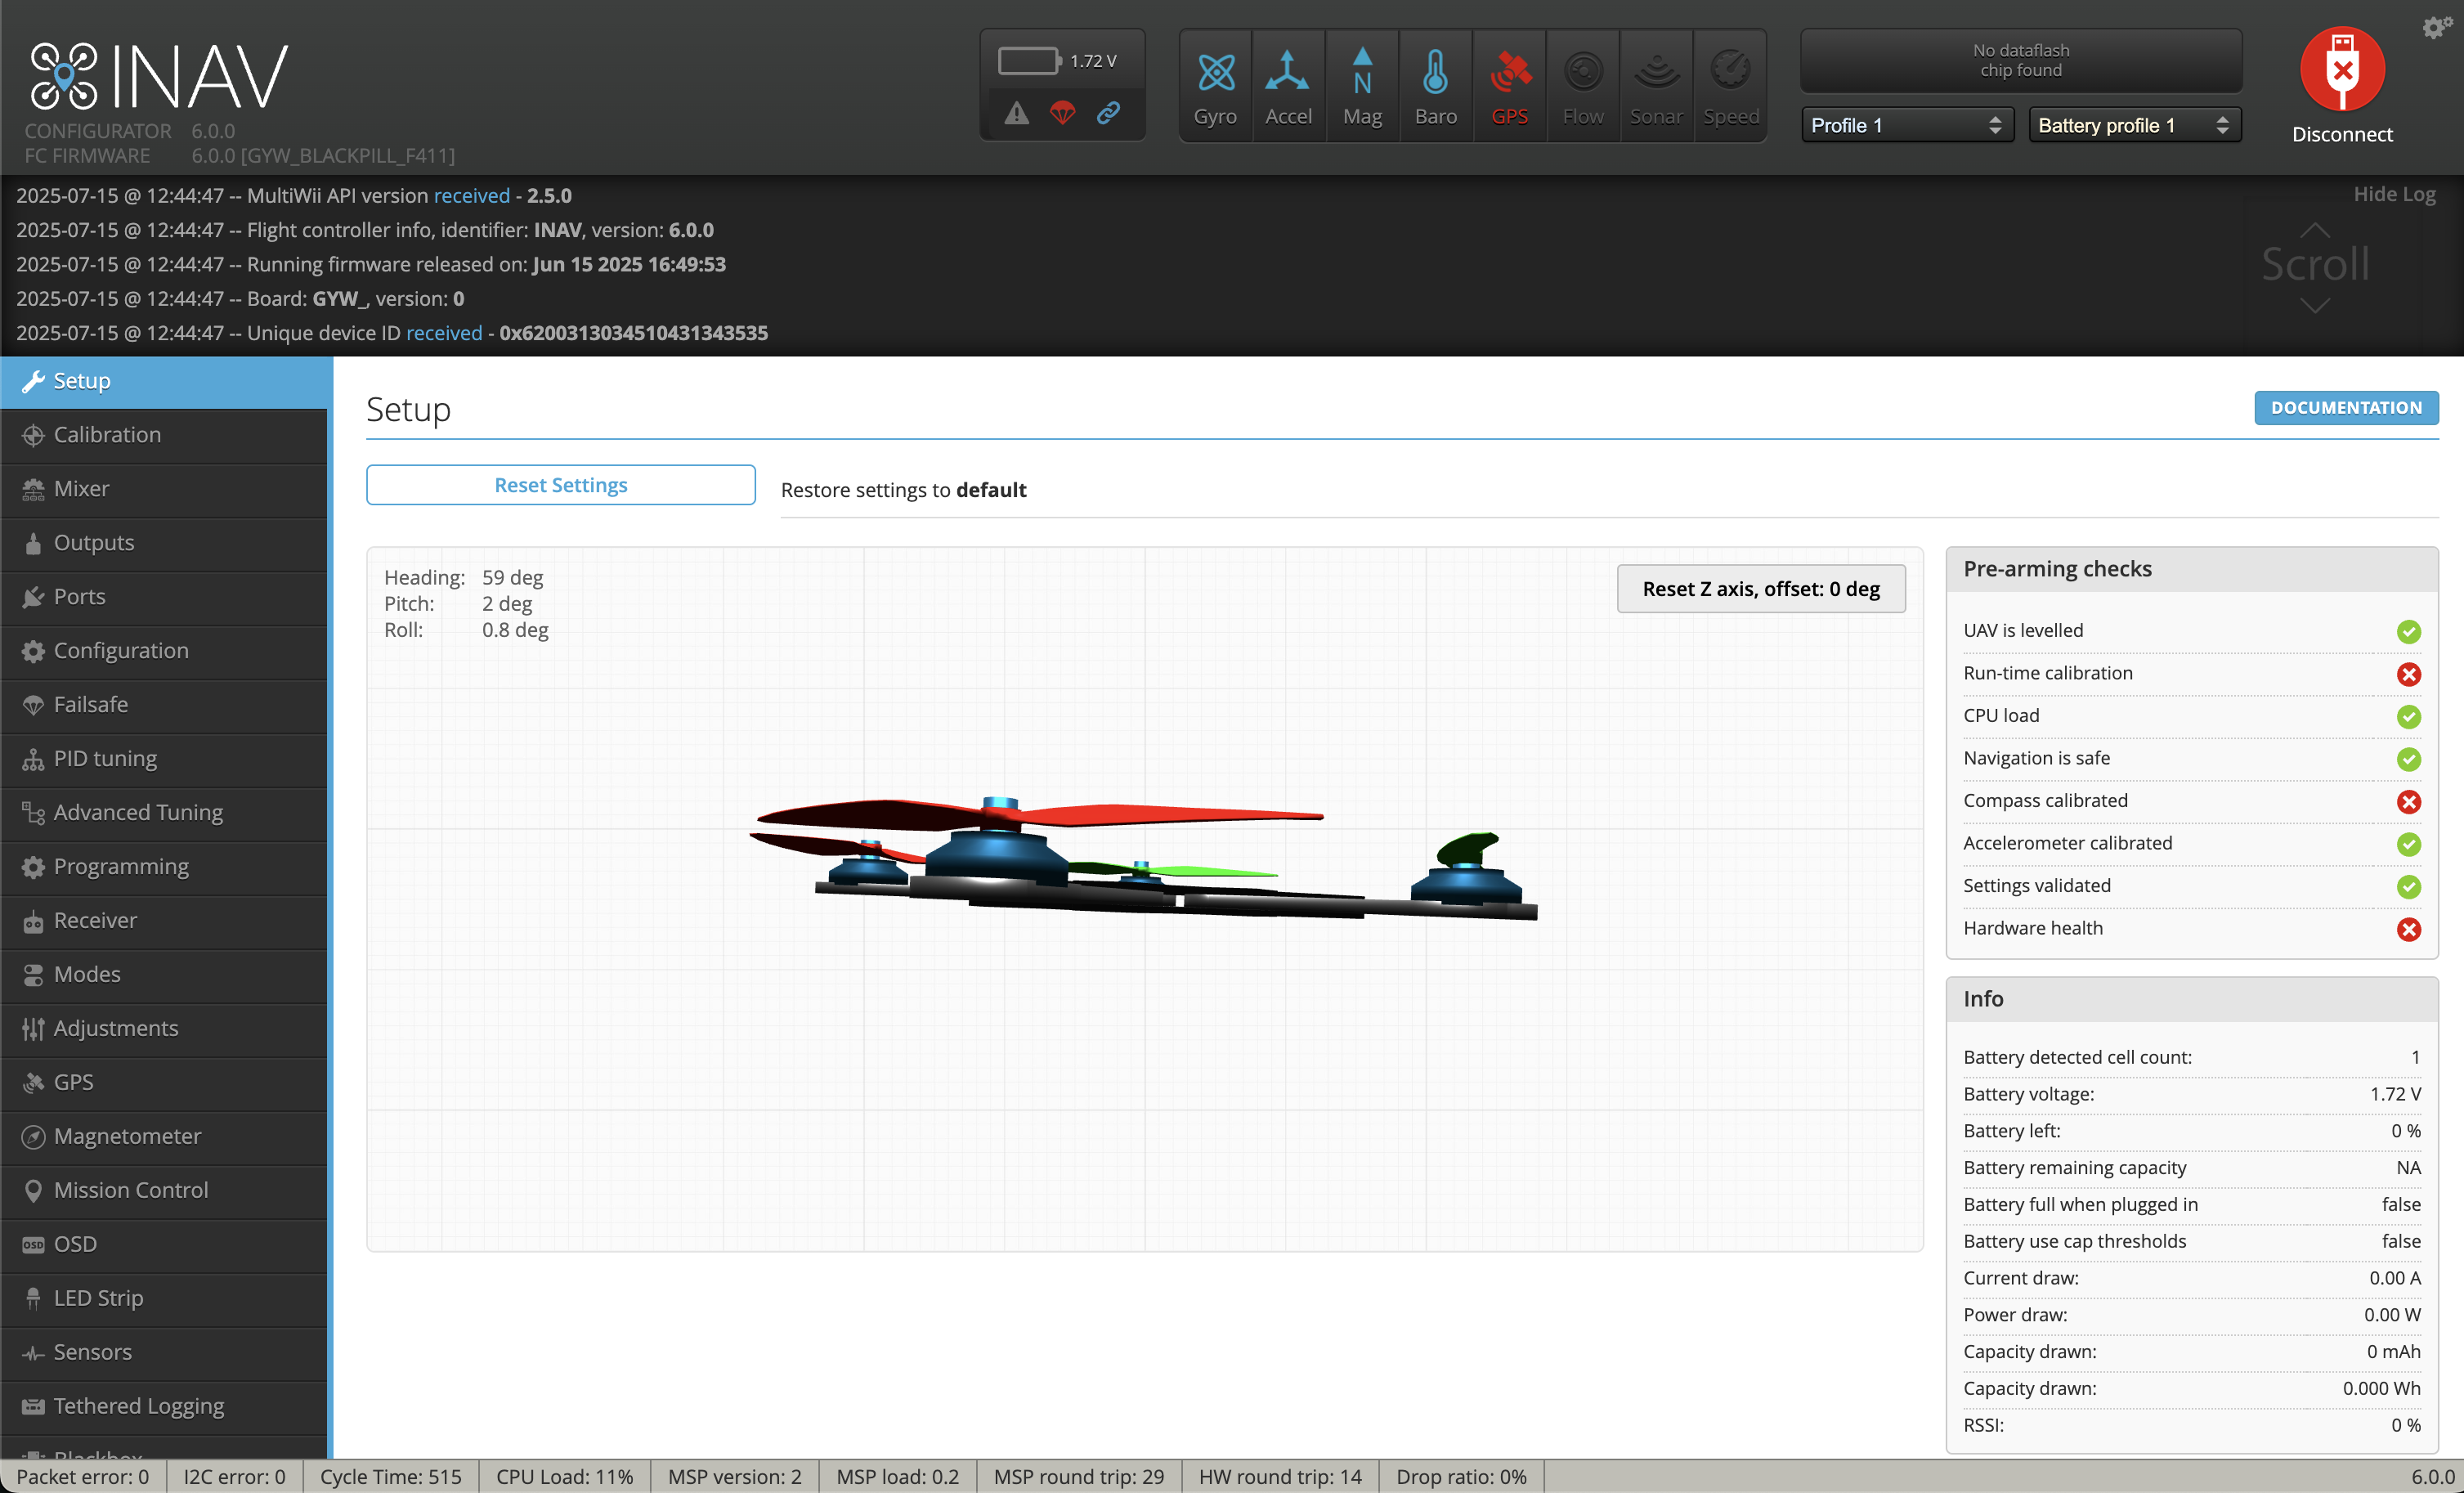
If you are using a MPU9250 module, you may encounter the problem that INAV does not recognize the accelerometer. This is due to many boards labeled MPU9250 actually house only an MPU6500 (omitting or substituting the magnetometer). Since drones often use an external magnetometer, this usually isn’t critical if your accelerometer and gyro (MPU6500) work.
To identify your chip, read the WHO_AM_I register (0x75) via I²C (use an Arduino or something similar to do this part). Example Arduino code:
#include <Wire.h>
const uint8_t MPU_ADDR     = 0x68; // I²C address
const uint8_t WHO_AM_I_REG = 0x75;
void setup() {
  Serial.begin(115200);
  Wire.begin();
  delay(100);
  Wire.beginTransmission(MPU_ADDR);
  Wire.write(WHO_AM_I_REG);
  if (Wire.endTransmission(false) != 0) {
    Serial.println(F("no device found")); while (1);
  }
  Wire.requestFrom(MPU_ADDR, (uint8_t)1);
  if (Wire.available()) {
    uint8_t id = Wire.read();
    Serial.print(F("WHO_AM_I = 0x"));
    Serial.println(id, HEX);
  } else {
    Serial.println(F("no data returned"));
  }
}
If it prints 0x71, it’s MPU6500; 0x73 indicates MPU9250.
The current binary file and target is configured for MPU6500. To use MPU9250, comment out the block for MPU6500 and uncomment the MPU9250 block in the target file. Rebuild the binary and flash. It looks like this:
#define USE_IMU_MPU9250
#define IMU_MPU9250_ALIGN   CW0_DEG
#define MPU9250_CS_PIN      PB12
#define MPU9250_SPI_BUS BUS_SPI2Follow standard inav configuration procedures.
| Qty | Value | Footprint | References |
|---|---|---|---|
| 4 | 0.1u 10V | Capacitor_SMD:C_0603_1608Metric | C3, C8, C9, C10 |
| 3 | 10k | Resistor_SMD:R_0603_1608Metric | R2, R6, R8 |
| 3 | 470 | Resistor_SMD:R_0603_1608Metric | R9, R10, R11 |
| 2 | 1uF 10V | Capacitor_SMD:C_0603_1608Metric | C6, C7 |
| 2 | 4.7k | Resistor_SMD:R_0603_1608Metric | R3, R4 |
| 2 | GND | TestPoint:TestPoint_Pad_D1.0mm | TP4, TP6 |
| 1 | 0.1u 25V | Capacitor_SMD:C_0805_2012Metric | C2 |
| 1 | 100 | Resistor_SMD:R_0603_1608Metric | R7 |
| 1 | 10u 25V | Capacitor_SMD:C_0805_2012Metric | C1 |
| 1 | 22u 16V | Capacitor_SMD:C_0805_2012Metric | C4 |
| 1 | 22u 16V | Capacitor_SMD:C_0805_2012Metric | C5 |
| 1 | 33k | Resistor_SMD:R_0603_1608Metric | R5 |
| 1 | 3V3 | TestPoint:TestPoint_Pad_D1.0mm | TP5 |
| 1 | 4.7u | Inductor_SMD_Wurth:L_Wurth_WE-LHMI-7050 | L1 |
| 1 | 54.9k | Resistor_SMD:R_0603_1608Metric | R1 |
| 1 | 5V | TestPoint:TestPoint_Pad_D1.0mm | TP3 |
| 1 | BLUE | LED_SMD:LED_0805_2012Metric | D3 |
| 1 | BMP280_Breakout | 1_my_custom:BMP280_Mod | J2 |
| 1 | Buzzer | Connector_PinSocket_2.54mm:PinSocket_1x02_P2.54mm_Vertical | BZ1 |
| 1 | GPS_Mag | Connector_JST:JST_SHL_SM06B-SHLS-TF_1x06-1MP_P1.00mm_Horizontal | J3 |
| 1 | GREEN | LED_SMD:LED_0805_2012Metric | D2 |
| 1 | IRLML6344 | Package_TO_SOT_SMD:SOT-23 | Q1 |
| 1 | M1 | 1_my_custom:PAD_1x02_5mm | J9 |
| 1 | M2 | 1_my_custom:PAD_1x02_5mm | J10 |
| 1 | M3 | 1_my_custom:PAD_1x02_5mm | J11 |
| 1 | M4 | 1_my_custom:PAD_1x02_5mm | J12 |
| 1 | MPU9250_Breakout | 1_my_custom:MPU9250_Mod | J1 |
| 1 | PWM1 | Connector_PinHeader_2.54mm:PinHeader_1x03_P2.54mm_Vertical | J5 |
| 1 | PWM2 | Connector_PinHeader_2.54mm:PinHeader_1x03_P2.54mm_Vertical | J6 |
| 1 | PWM3 | Connector_PinHeader_2.54mm:PinHeader_1x03_P2.54mm_Vertical | J7 |
| 1 | PWM4 | Connector_PinHeader_2.54mm:PinHeader_1x03_P2.54mm_Vertical | J8 |
| 1 | RED | LED_SMD:LED_0805_2012Metric | D1 |
| 1 | RX1 | TestPoint:TestPoint_Pad_D1.0mm | TP8 |
| 1 | Receiver | Connector_PinHeader_2.54mm:PinHeader_1x03_P2.54mm_Vertical | J4 |
| 1 | S1 | TestPoint:TestPoint_Pad_D1.0mm | TP10 |
| 1 | S2 | TestPoint:TestPoint_Pad_D1.0mm | TP11 |
| 1 | S3 | TestPoint:TestPoint_Pad_D1.0mm | TP12 |
| 1 | S4 | TestPoint:TestPoint_Pad_D1.0mm | TP13 |
| 1 | SCL | TestPoint:TestPoint_Pad_D1.0mm | TP2 |
| 1 | SDA | TestPoint:TestPoint_Pad_D1.0mm | TP1 |
| 1 | STM32F411CEU1 | 1_my_custom:Stm32f411ceu_module | U1 |
| 1 | TLV73333P | Package_TO_SOT_SMD:SOT-23-5 | U2 |
| 1 | TPS563200 | Package_TO_SOT_SMD:SOT-23-6 | U3 |
| 1 | TX1 | TestPoint:TestPoint_Pad_D1.0mm | TP7 |
| 1 | VBAT | TestPoint:TestPoint_Pad_D1.0mm | TP14 |
| 1 | VBAT | 1_my_custom:PAD_1x02_5mm | J13 |
| 1 | iBUS | TestPoint:TestPoint_Pad_D1.0mm | TP9 |

Cinetronix/fpv-video-in-v1
KiCad hardware design for an HDMI-to-MIPI CSI bridge board, designed for FPV camera systems.


xpix/XMOTO_TINYAVR
This code is designed for a motor controller and has merged the PID code of Josh Kopel with the code of the Makerbot servo-controller board. This code can be used on some boards by changing some values.

hcmusthinhcode2k2/WeatherStation_Thesis
Graduation thesis topic is the design of a weather monitoring station using NB-IoT technology


jrowe88/ecoport-bridge
CTA-2045 (EcoPort) bridge for a Rinnai REHP65 heat pump water heater
It measures 70 × 70 mm and has 4 copper layers, 1.6 mm thick.
57 parts, built around the TLV73333PDBV, IRLML6344 and TX 1. The full list of its parts is on this page, with links to each part's symbol and footprint where PCBKit's library has them.
From the I-M-Robotics-Lab/STM32-Quadcopter repository on GitHub, at the commit this page was made from: the board is 1.Electronics/Hardware.kicad_pcb and its schematic 1.Electronics/Hardware.kicad_sch. PCBKit opens the board in the browser, with nothing to install.
Its repository publishes it under the GPL-3.0 licence: you may reuse it on that licence's terms (keep the author's notice, and for a copyleft licence share your changes alike).