2 layers82.5 × 140 mm
QCamPCR
GaudiLabs/qPocketPCR
Quantitative PCR machine detecting fluorescence using a camera
113 parts22GPL-3.0

 RaulRv007/physics-game
This repository contains a physics-driven, multiplayer platformer game built with p5.js and Matter.js, targeting the Grade 11/12 ICS2/3x Programming curriculum. Key features include:
Accesibility is an open-source printed circuit board by RaulRv007, from the RaulRv007/physics-game repository on GitHub. It is a 2-layer board of 160 × 80 mm with 6 parts on 40 nets, routed with 36 tracks and 1 via.
It is built around the ESP32-S2-WROVER-I(4M). Its parts include 5 switches and 1 IC. It belongs with the ESP32 boards of this library.
This repository contains a physics-driven, multiplayer platformer game built with p5.js and Matter.js, targeting the Grade 11/12 ICS2/3x Programming curriculum. Key features include:
Before writing code, the following steps were completed:
Sketches ✏️: Hand-drawn layouts showing:
Specifications:
Pseudocode: High-level representations of core algorithms (see section below).
Clone the repo:
git clone https://github.com/username/physics-platformer.git
cd physics-platformer
Serve with a local HTTP server (required for p5.js assets):
npx http-server .Open http://localhost:8080 in your browser.
Make sure the assets/ folder is alongside index.html.
Keyboard (default):
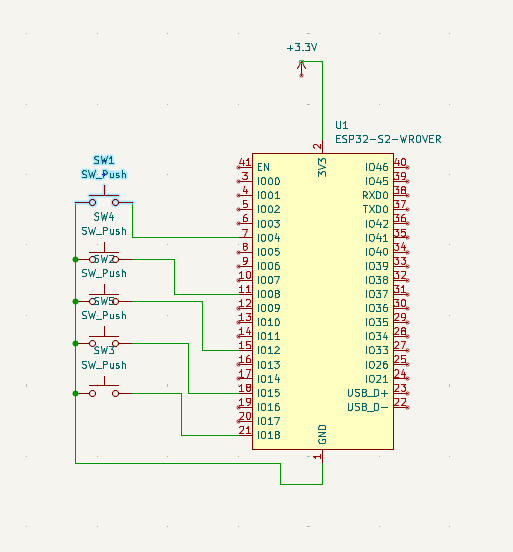
ESP32 BLE Keyboard (alternative accessibility): 5 buttons mapped to jump/left/right for one player via BLE HID. Ideally everybody would have a different keyboard, but for testing we only produced one
/src
├── mySketch.js      # Main p5.js sketch and game loop
├── Chunks.js         # Procedural chunk definitions
├── MapGenerator.js  # Sequencing and world creation
├── Player.js        # Player class: physics body, controls, stamina
├── Button.js        # HUD buttons
├── Piece.js         # class that controls the stolne piece
├── DigitalTimer.js  # Countdown timer logic
└── BLEControl.ino   # ESP32 BLE Keyboard firmware
/assets # Sprites, sounds and fonts#createBodies() methods for each type (flat, stairs-up/down, pit-platforms, swing, climb, end).Chunk objects at startX + n * chunkWidth.millis() to compute and display remaining time.function chunkSequence(numChunks):
sequence = ['flat']
for i in 1..numChunks:
last = sequence.last()
if last in ['flat', 'stairs-up', 'pit-platforms']:
nextType = random(['climb','stairs-down','pit-platforms','swing'])
else:
nextType = random(['climb','stairs-up','pit-platforms','swing'])
sequence.append(nextType)
sequence.append('end')
return sequencecurrentX = startX
for each type in chunkSequence:
hasStairs = (peekNext == 'stairs-down')
chunk = new Chunk(type, currentX, startY, chunkWidth, hasStairs)
chunk.addToWorld(world)
chunks.push(chunk)
currentX += chunkWidth
# add final end chunkcontrols = {id: {up,key, left,key, right,key}, ...}
for each player:
if keyIsDown(controls[id].up) and stamina>=min:
applyForce(0, jumpForce)
reduceStamina()
if keyIsDown(left): applyForce(-force,0)
if keyIsDown(right): applyForce(force,0)elapsed = (millis() - startTime)/1000
remaining = max(0, totalSeconds - elapsed)
minutes = floor(remaining/60)
seconds = remaining % 60
if remaining==0: finished = true; onFinishCallback()To support players with limited mobility, a custom BLE keyboard was designed:
BleKeyboard.h.assistive_button.ino maps button presses to HID key codes (W, Q, E, etc.).Plug in the ESP32 and pair it with your computer/game device. Buttons emulate a keyboard—no extra drivers needed.
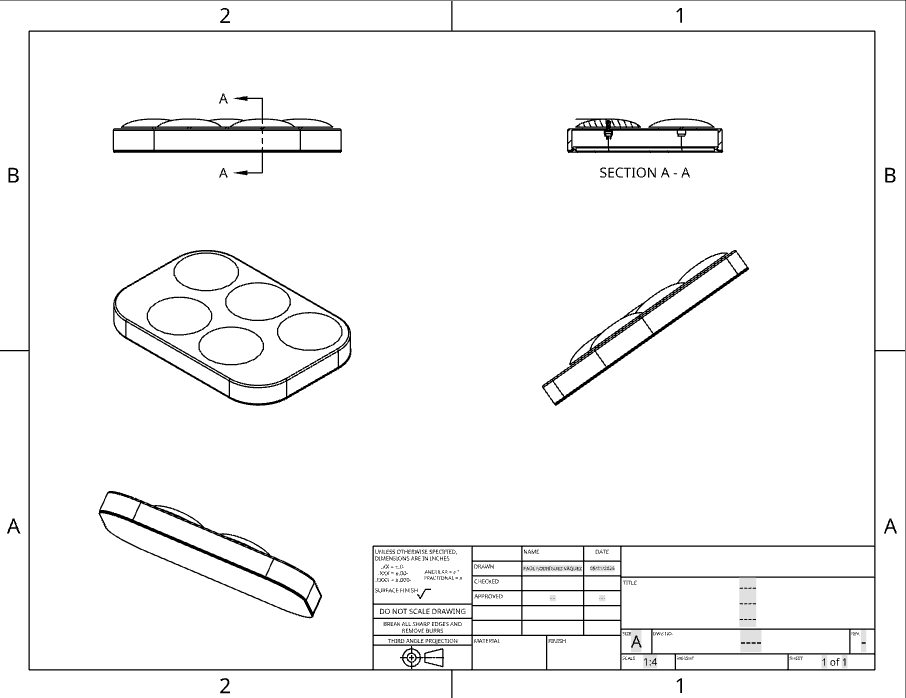
The decision for this setup is that in total it would be really cheap to produce. and it has a high reproducibility. It is not the best design by far, the push buttons are too small that the user gets almost not haptic feedback when the button is pressed. However talking with the group, this was the easiest and cheapest solution that we came out with. Also as it uses a 3D printed cage, everybody can recreate it easily at home.
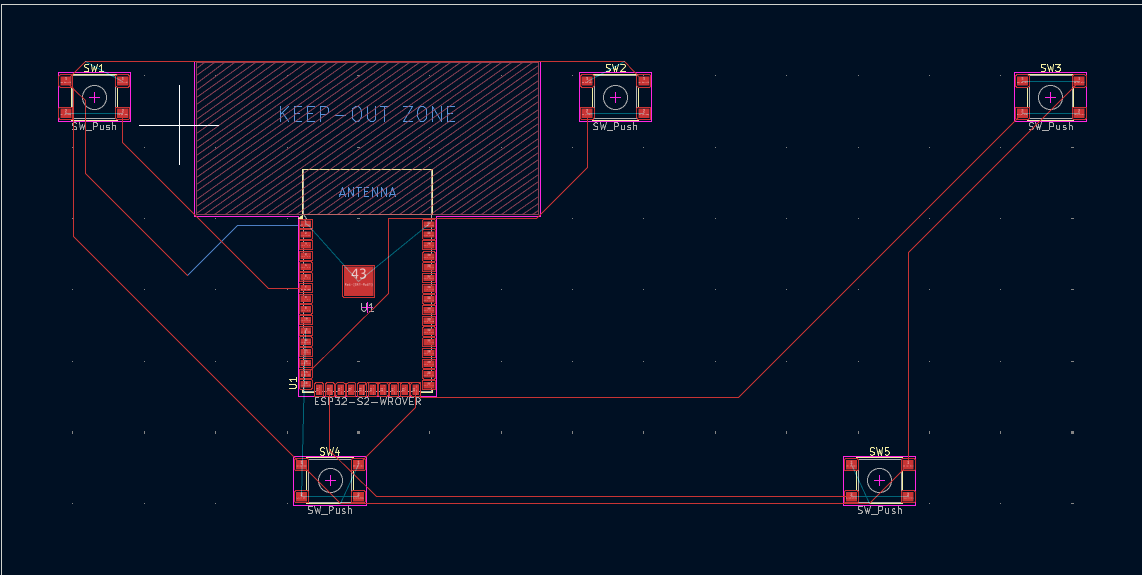
A custom PCB hosts the ESP32 module and buttons:
/pcb/gerbers/.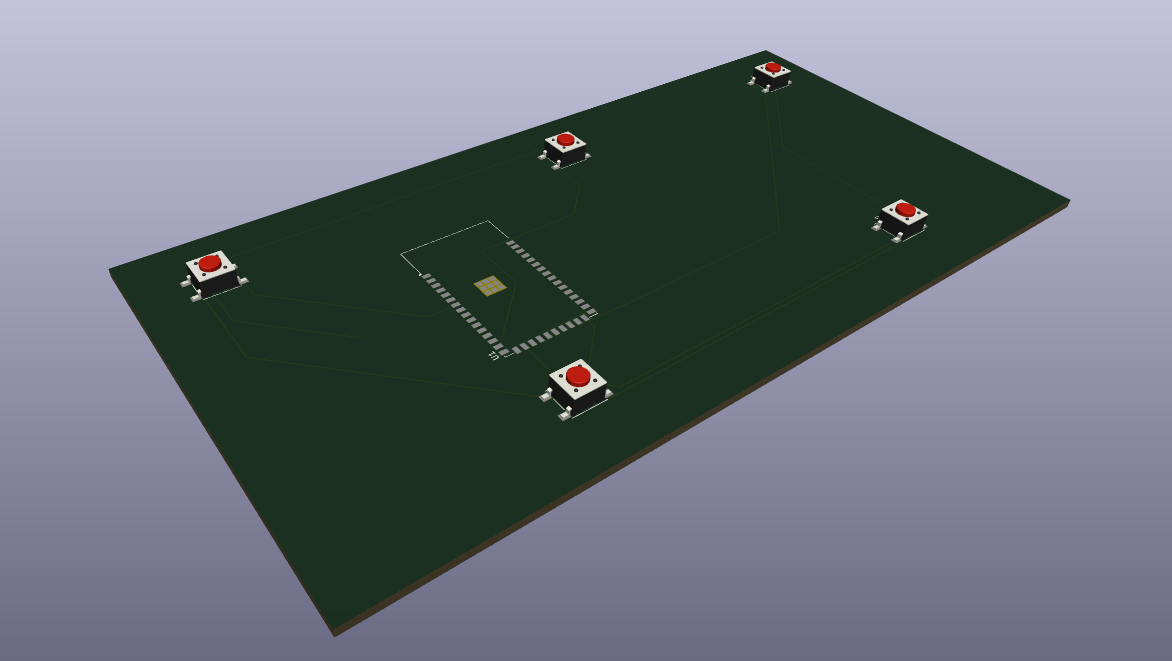
BleKeyboard library examplesGood luck and have fun playing! 🎉
| Qty | Value | Footprint | References |
|---|---|---|---|
| 5 | SW_Push | Button_Switch_SMD:SW_SPST_PTS645 | SW1, SW2, SW3, SW4, SW5 |
| 1 | ESP32-S2-WROVER | RF_Module:ESP32-S2-WROVER | U1 |
It measures 160 × 80 mm and has 2 copper layers, 1.6 mm thick.
6 parts, built around the ESP32-S2-WROVER-I(4M). The full list of its parts is on this page, with links to each part's symbol and footprint where PCBKit's library has them.
From the RaulRv007/physics-game repository on GitHub, at the commit this page was made from: the board is accesibility/pcb/pcb.kicad_pcb and its schematic accesibility/pcb/pcb.kicad_sch. PCBKit opens the board in the browser, with nothing to install.
Its repository states no licence, so its author keeps all rights: ask RaulRv007 before reusing the design.
GaudiLabs/qPocketPCR
Quantitative PCR machine detecting fluorescence using a camera

gcormier/alarmbuddy
The output current for sensors is limited to a few milliamps.


DevKiDCosmo/SATELLITE-EDGE-MODULE
A satellite edge module ready for competition


HexaBitsEdu/ESP32-MiniDrone
this project is a drone based on esp32 microcontroller and coreless DC motor

jildertviet/ESP32S2_MIDI_controller
ESP32S2 based MIDI controller with 5 sliders
