2 layers51 × 71 mm

 Phunkafizer/RFM-gateway1
Hard- and software for the RFM-gateway, a universal platform for integrating sub-GHz radio into your WiFi network
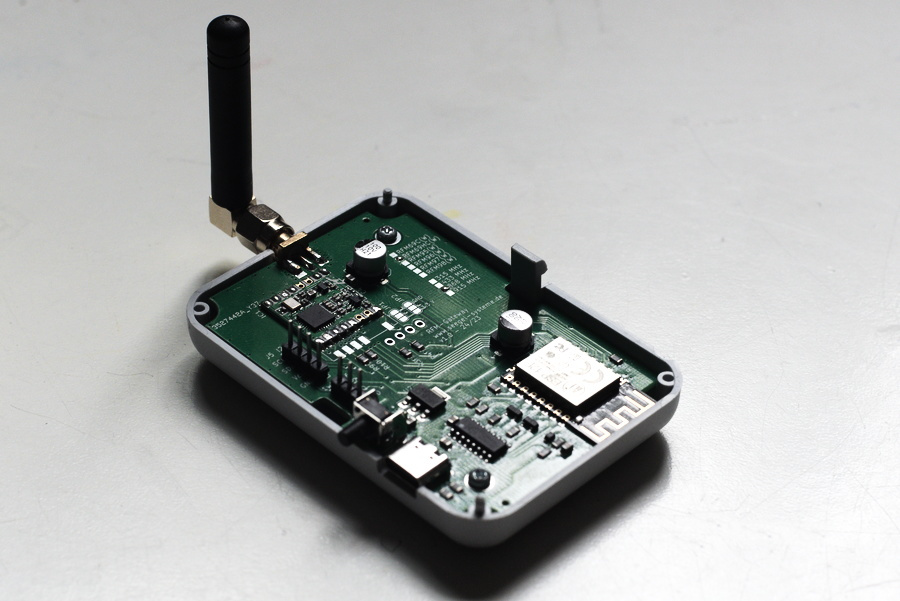
Esp rfm is an open-source printed circuit board by Phunkafizer, from the Phunkafizer/RFM-gateway repository on GitHub, published under the MIT licence. It is a 2-layer board of 51.5 × 76.5 mm with 47 parts on 55 nets, routed with 446 tracks and 110 vias.
It is built around the CH340C, ESP-12F and AMS1117-3.3, with the USBLC6-2SC6, BC847 and 1N4148WS among its other parts. Its parts include 16 resistors, 9 capacitors, 5 ICs, 3 connectors and 2 diodes. It belongs with the radio and wireless and home automation and IoT boards and the ESP8266 boards of this library.




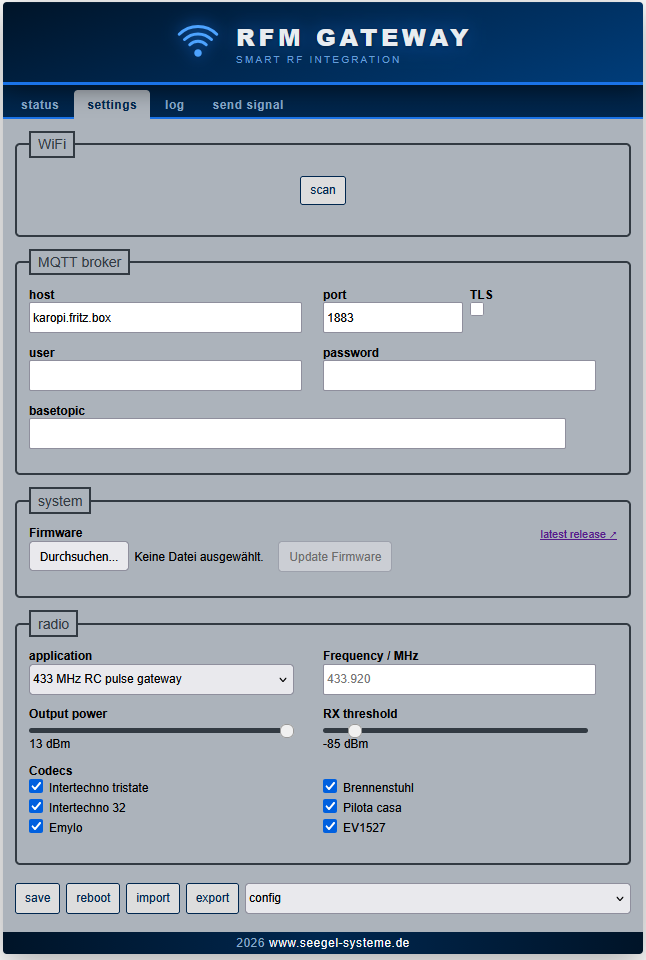
RFM Gateway is a radio-to-WiFi bridge that connects HopeRF radio modules to an ESP8266. It can receive RF data and forward it to your WiFi network, and it can also send RF commands from HTTP or MQTT inputs.
Project description: https://www.seegel-systeme.de/2023/09/15/rfm-wifi-gateway-a-radio-to-wifi-bridge/
Home Assistant forum: https://community.home-assistant.io/t/rfm-gateway-a-sub-ghz-bridge-to-home-assistant/982886
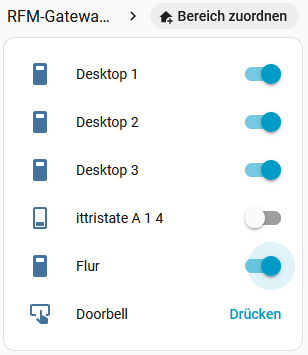
The RFM Gateway integration connects Home Assistant directly to the gateway's local HTTP API and provides a radio frequency transmitter. MQTT is not required for this integration.
GET /api/rf/capabilities and POST /api/rf/transmit
(implemented by the RC pulse application in this repository)Compatibility depends on the firmware's RF API, not only its version number.
Check http://<gateway-host>/api/rf/capabilities for a JSON response containing
supported_frequency_ranges and supported_modulations. Replace
<gateway-host> with the gateway's hostname or IP address; include the port if
it is not 80.
The repository can be added by link; being listed in the default catalog is not required.
Home Assistant 2026.11 and newer (Marketplace):
https://github.com/Phunkafizer/RFM-gateway.Home Assistant 2026.5 through 2026.10 (HACS):
https://github.com/Phunkafizer/RFM-gateway with category Integration.Manual installation:
<config>/custom_components/rfm_gateway/, where <config> is
the Home Assistant configuration directory.When installing a release, make sure it contains the root-level
custom_components/rfm_gateway/ folder and hacs.json. Older firmware-only
releases may not contain this layout.
Gateways advertising the matching _http._tcp.local. service and RF API
properties can be discovered automatically. Open Settings > Devices &
services, select the discovered gateway, and confirm setup.
For manual setup, enter:
| Setting | Description |
|---|---|
| Host | Gateway hostname or IP address, without http:// or an API path |
| Port | HTTP API port; defaults to 80 |
Setup queries the gateway's capabilities before creating the integration. No MQTT credentials or HTTP authentication settings are required.
For integration errors, check Home Assistant's logs under Settings > System > Logs and report problems in the issue tracker.
Install integration updates through Marketplace or HACS and restart Home Assistant when prompted. For manual installations, replace the integration folder with the new version and restart.
To remove a gateway, open its entry under Settings > Devices & services and
delete it. To remove the integration's files, also uninstall it in Marketplace
or HACS, or delete <config>/custom_components/rfm_gateway/ for a manual
installation, then restart Home Assistant.
This repository uses a split-license model:
| Qty | Value | Footprint | References |
|---|---|---|---|
| 7 | 3k3 | Resistor_SMD:R_0805_2012Metric | R3, R4, R7, R9, R10, R11, R15 |
| 5 | 10k | Resistor_SMD:R_0805_2012Metric | R5, R6, R8, R12, R13 |
| 3 | 10µ | Capacitor_SMD:C_0805_2012Metric | C1, C2, C3 |
| 3 | ~ | Fiducial:Fiducial_1mm_Mask2mm | FID1, FID2, FID3 |
| 2 | 100n | Capacitor_SMD:C_0805_2012Metric | C6, C7 |
| 2 | 100µ | Capacitor_SMD:CP_Elec_6.3x5.4 | C5, C8 |
| 2 | 5k1 | Resistor_SMD:R_0805_2012Metric | R1, R2 |
| 2 | BC847 | Package_TO_SOT_SMD:SOT-23 | Q1, Q2 |
| 2 | MountingHole | MountingHole:MountingHole_2.5mm_Pad | H1, H2 |
| 2 | SolderJumper_3_Open | Jumper:SolderJumper-3_P1.3mm_Open_RoundedPad1.0x1.5mm | JP1, JP2 |
| 1 | 1N4148WS | Diode_SMD:D_SOD-323 | D1 |
| 1 | 330 | Resistor_SMD:R_0805_2012Metric | R33 |
| 1 | 33k | Resistor_SMD:R_0805_2012Metric | R14 |
| 1 | 470pF | Capacitor_SMD:C_0805_2012Metric | C9 |
| 1 | 4µ7 | Capacitor_SMD:C_0805_2012Metric | C4 |
| 1 | AMS1117-3.3 | Package_TO_SOT_SMD:SOT-223-3_TabPin2 | U2 |
| 1 | CH340C | Package_SO:SOIC-16_3.9x9.9mm_P1.27mm | U3 |
| 1 | Conn_Coaxial | User:SMA_H | J3 |
| 1 | ESP-12F | RF_Module:ESP-12E | U1 |
| 1 | PTVS3V3S1UR,115 | Diode_SMD:D_SOD-123 | D3 |
| 1 | RFM69_9X | User:RFM69_9X | IC1 |
| 1 | RST/CONFIG | Button_Switch_THT:SW_Tactile_SPST_Angled_PTS645Vx39-2LFS | SW1 |
| 1 | SSD1306 | SSD1306:128x64OLED | Brd1 |
| 1 | USBLC6-2SC6 | Package_TO_SOT_SMD:SOT-23-6 | U4 |
| 1 | USB_C_Receptacle_USB2.0 | Connector_USB:USB_C_Receptacle_G-Switch_GT-USB-7010ASV | J4 |
| 1 | ~ | Inductor_SMD:L_0603_1608Metric | FB5 |
| 1 | ~ | Connector_PinHeader_2.54mm:PinHeader_1x07_P2.54mm_Vertical | J1 |
It measures 51.5 × 76.5 mm and has 2 copper layers, 1.6 mm thick.
47 parts, built around the CH340C, ESP-12F, AMS1117-3.3 and USBLC6-2SC6. The full list of its parts is on this page, with links to each part's symbol and footprint where PCBKit's library has them.
From the Phunkafizer/RFM-gateway repository on GitHub, at the commit this page was made from: the board is PCB/esp-rfm.kicad_pcb and its schematic PCB/esp-rfm.kicad_sch. PCBKit opens the board in the browser, with nothing to install.
Its repository publishes it under the MIT licence: you may reuse it on that licence's terms (keep the author's notice, and for a copyleft licence share your changes alike).


rdhrobotics/RF-Hunter
A compact, standalone wireless security research device. Three tools in one — RF jammer, Wi-Fi deauther, and captive portal

renatocampoy/Twitch-LED-Bot
Este projeto permite que você controle um strip de LED NeoPixel via comandos no chat da Twitch, utilizando a placa ESP8266.

greenMikeEU/shrdzm
SHRDZM (just a name, not an acronym) is an ESP8285/ESP8266 based sensor and actor integration platform.