OPSUM - The Open PSU Meter project
OPSUM is a DC voltmeter and ammeter board with 4mm banana socket inputs, that enables measuring and logging voltage, current and power, even when using a bench PSU that has no builtin telemetry feature. Communication between the board and the host happens via UART protocol over a dedicated USB port that is galvanically isolated from the PSU/DUT (power supply unit and device under test) side of the PCB, in order to protect the host-side (PC) from potentially destructive shorts or spikes happening on the DUT side.
This repository is structured as a monorepo: hardware design files, enclosure CAD files, firmware, host-side GUI tools, release binaries, communication protocol documentation, and third-party GUIs are kept together so you can build, flash, and evolve the project starting from a single source of truth.
Features
Current
- Real-time voltage, current, and power monitoring based on the INA226 monitor IC and the ESP32-S3 SoC.
- Kelvin-sensed shunt layout and full noise filtering (as per TI's datasheet, chapter 6.4.2 "Filtering and Input Considerations") for improved measurement accuracy.
- Reverse-polarity, overvoltage, and negative-voltage protection circuitry.
- PMOS input protection stage with zener-clamped gate drive.
- TVS + Schottky protected INA VBUS input.
- Galvanic isolation protecting the host-side USB port from the PSU/DUT side.
- Handles up to 36 V bus voltage and 20 A current.
- Compact, low-cost, fully open source hardware, firmware and software project.
Planned
- I2C display showing real time telemetry from the board (I2C pin header for the display is already present on the PCB, only needs designing the enclosure lid opening and in-firmware support)
Images
| Enclosure render (outside) | Enclosure render (inside) |
|---|
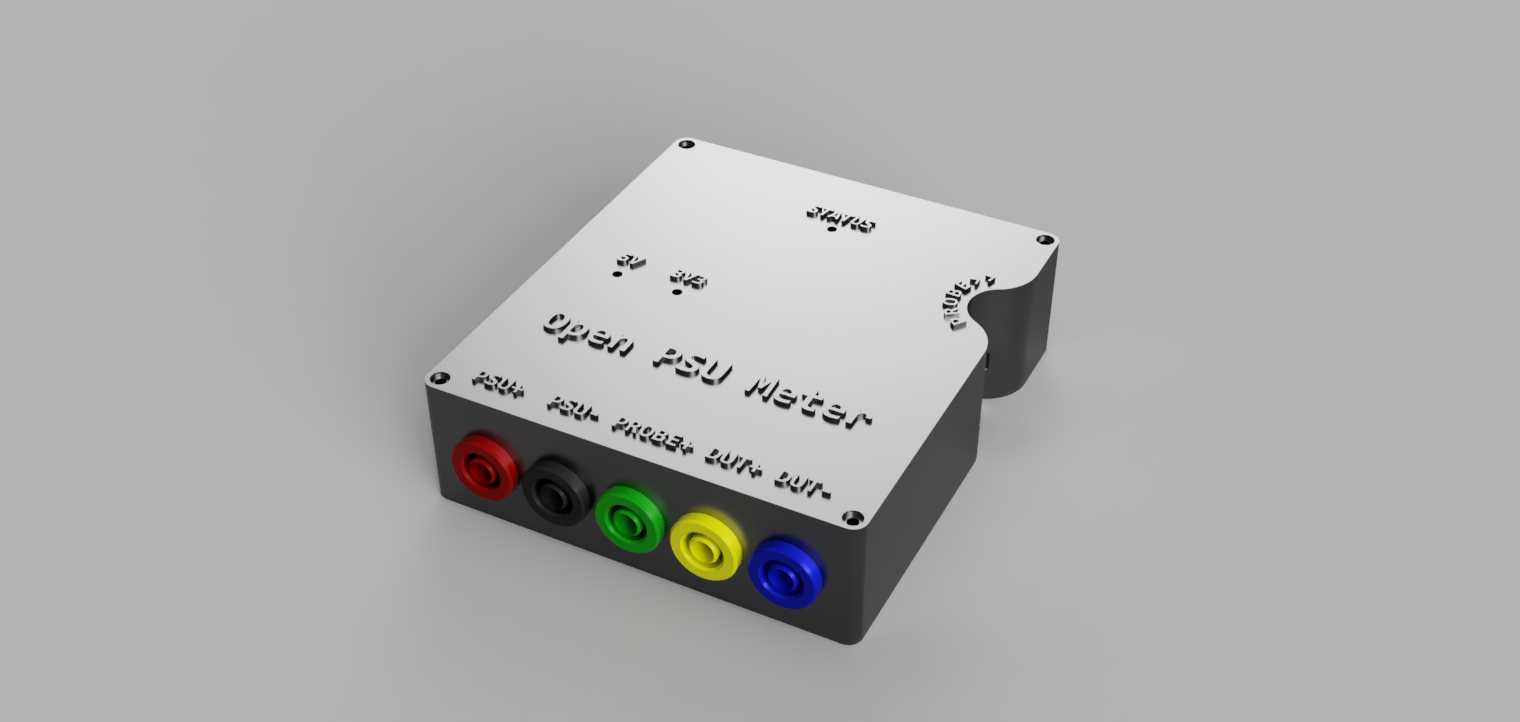 | 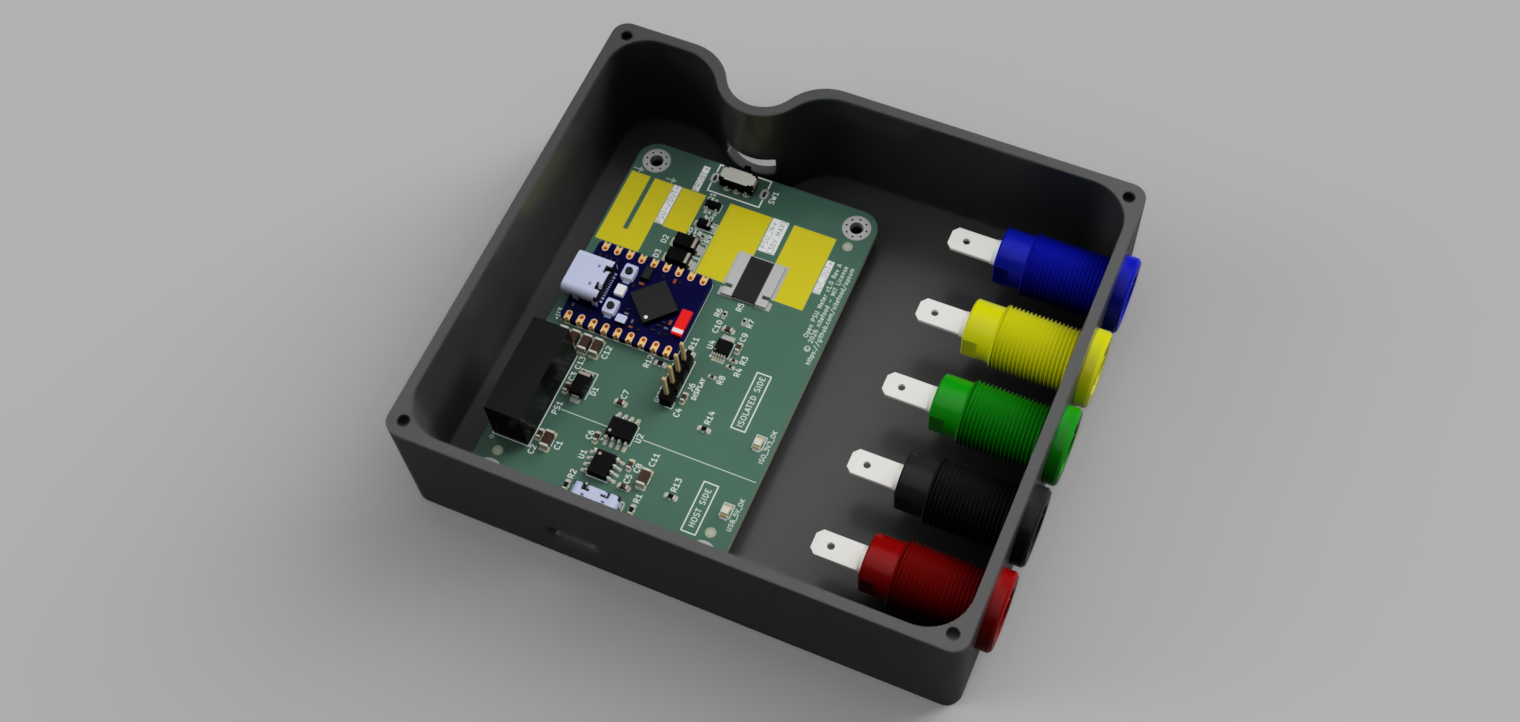 |
| PCB Layout | PCB 3D View |
|---|
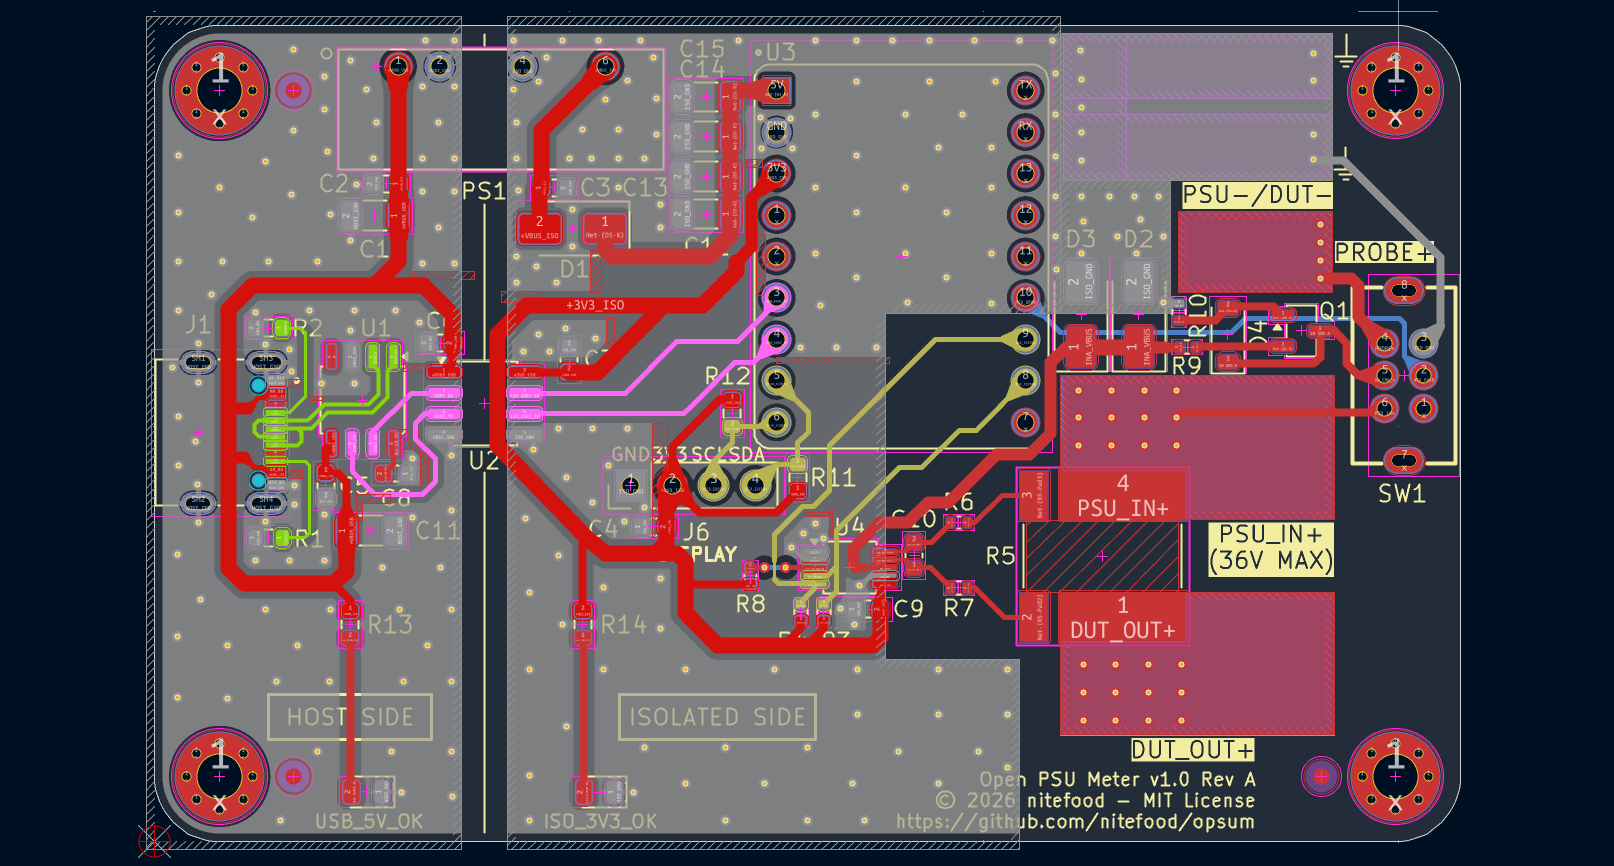 | 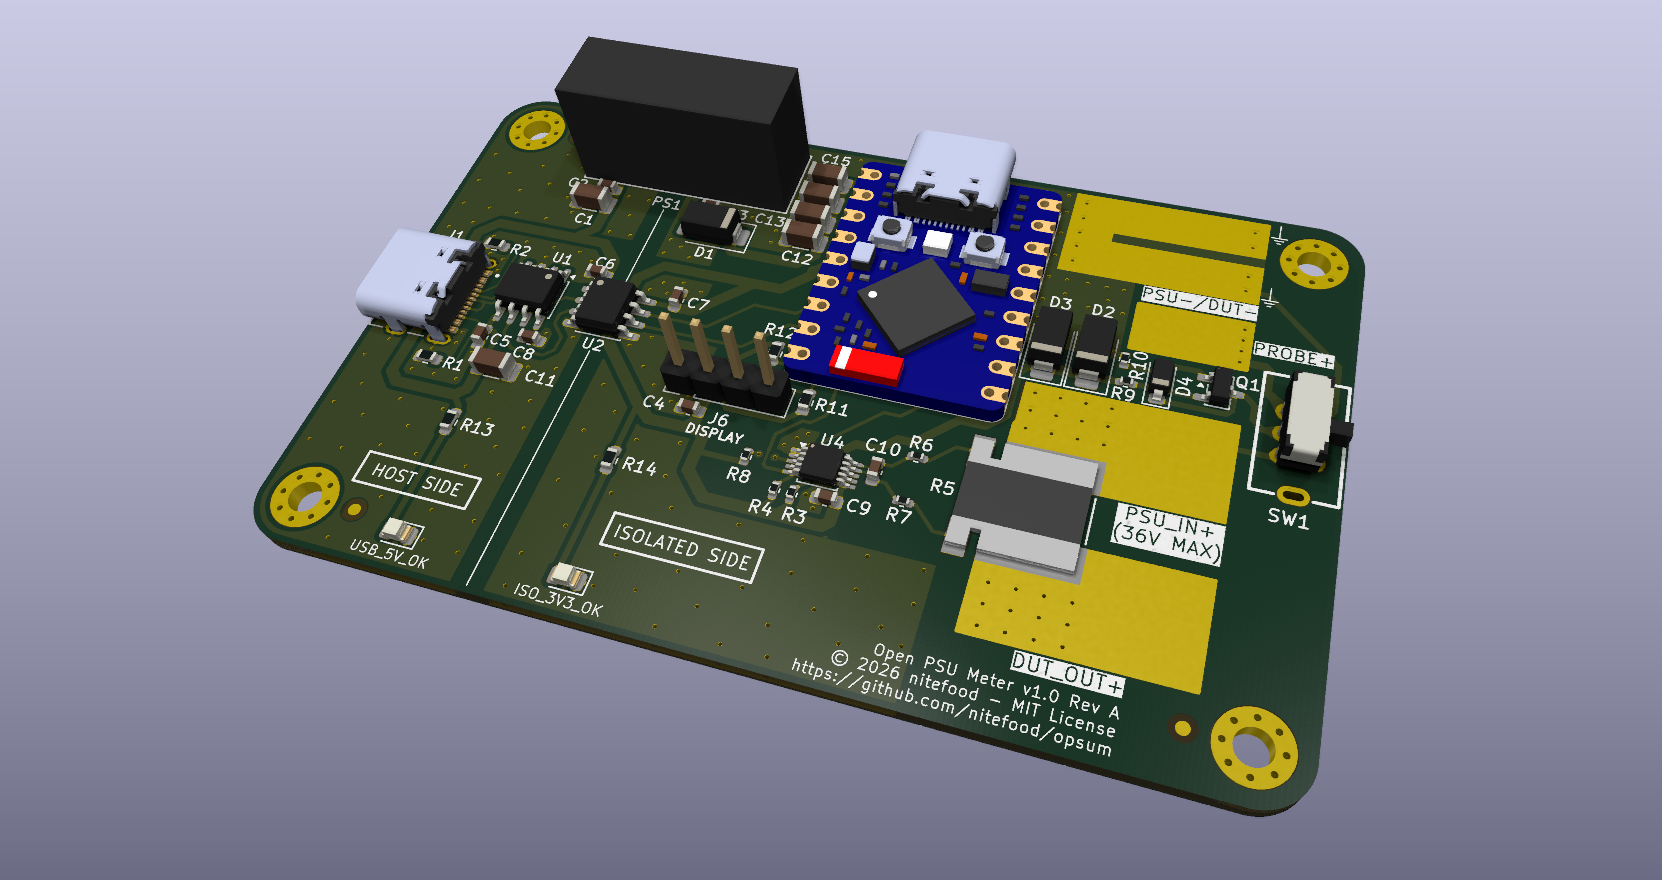 |
| 3D printed enclosure (top view) | 3D printed enclosure (sockets visible) |
|---|
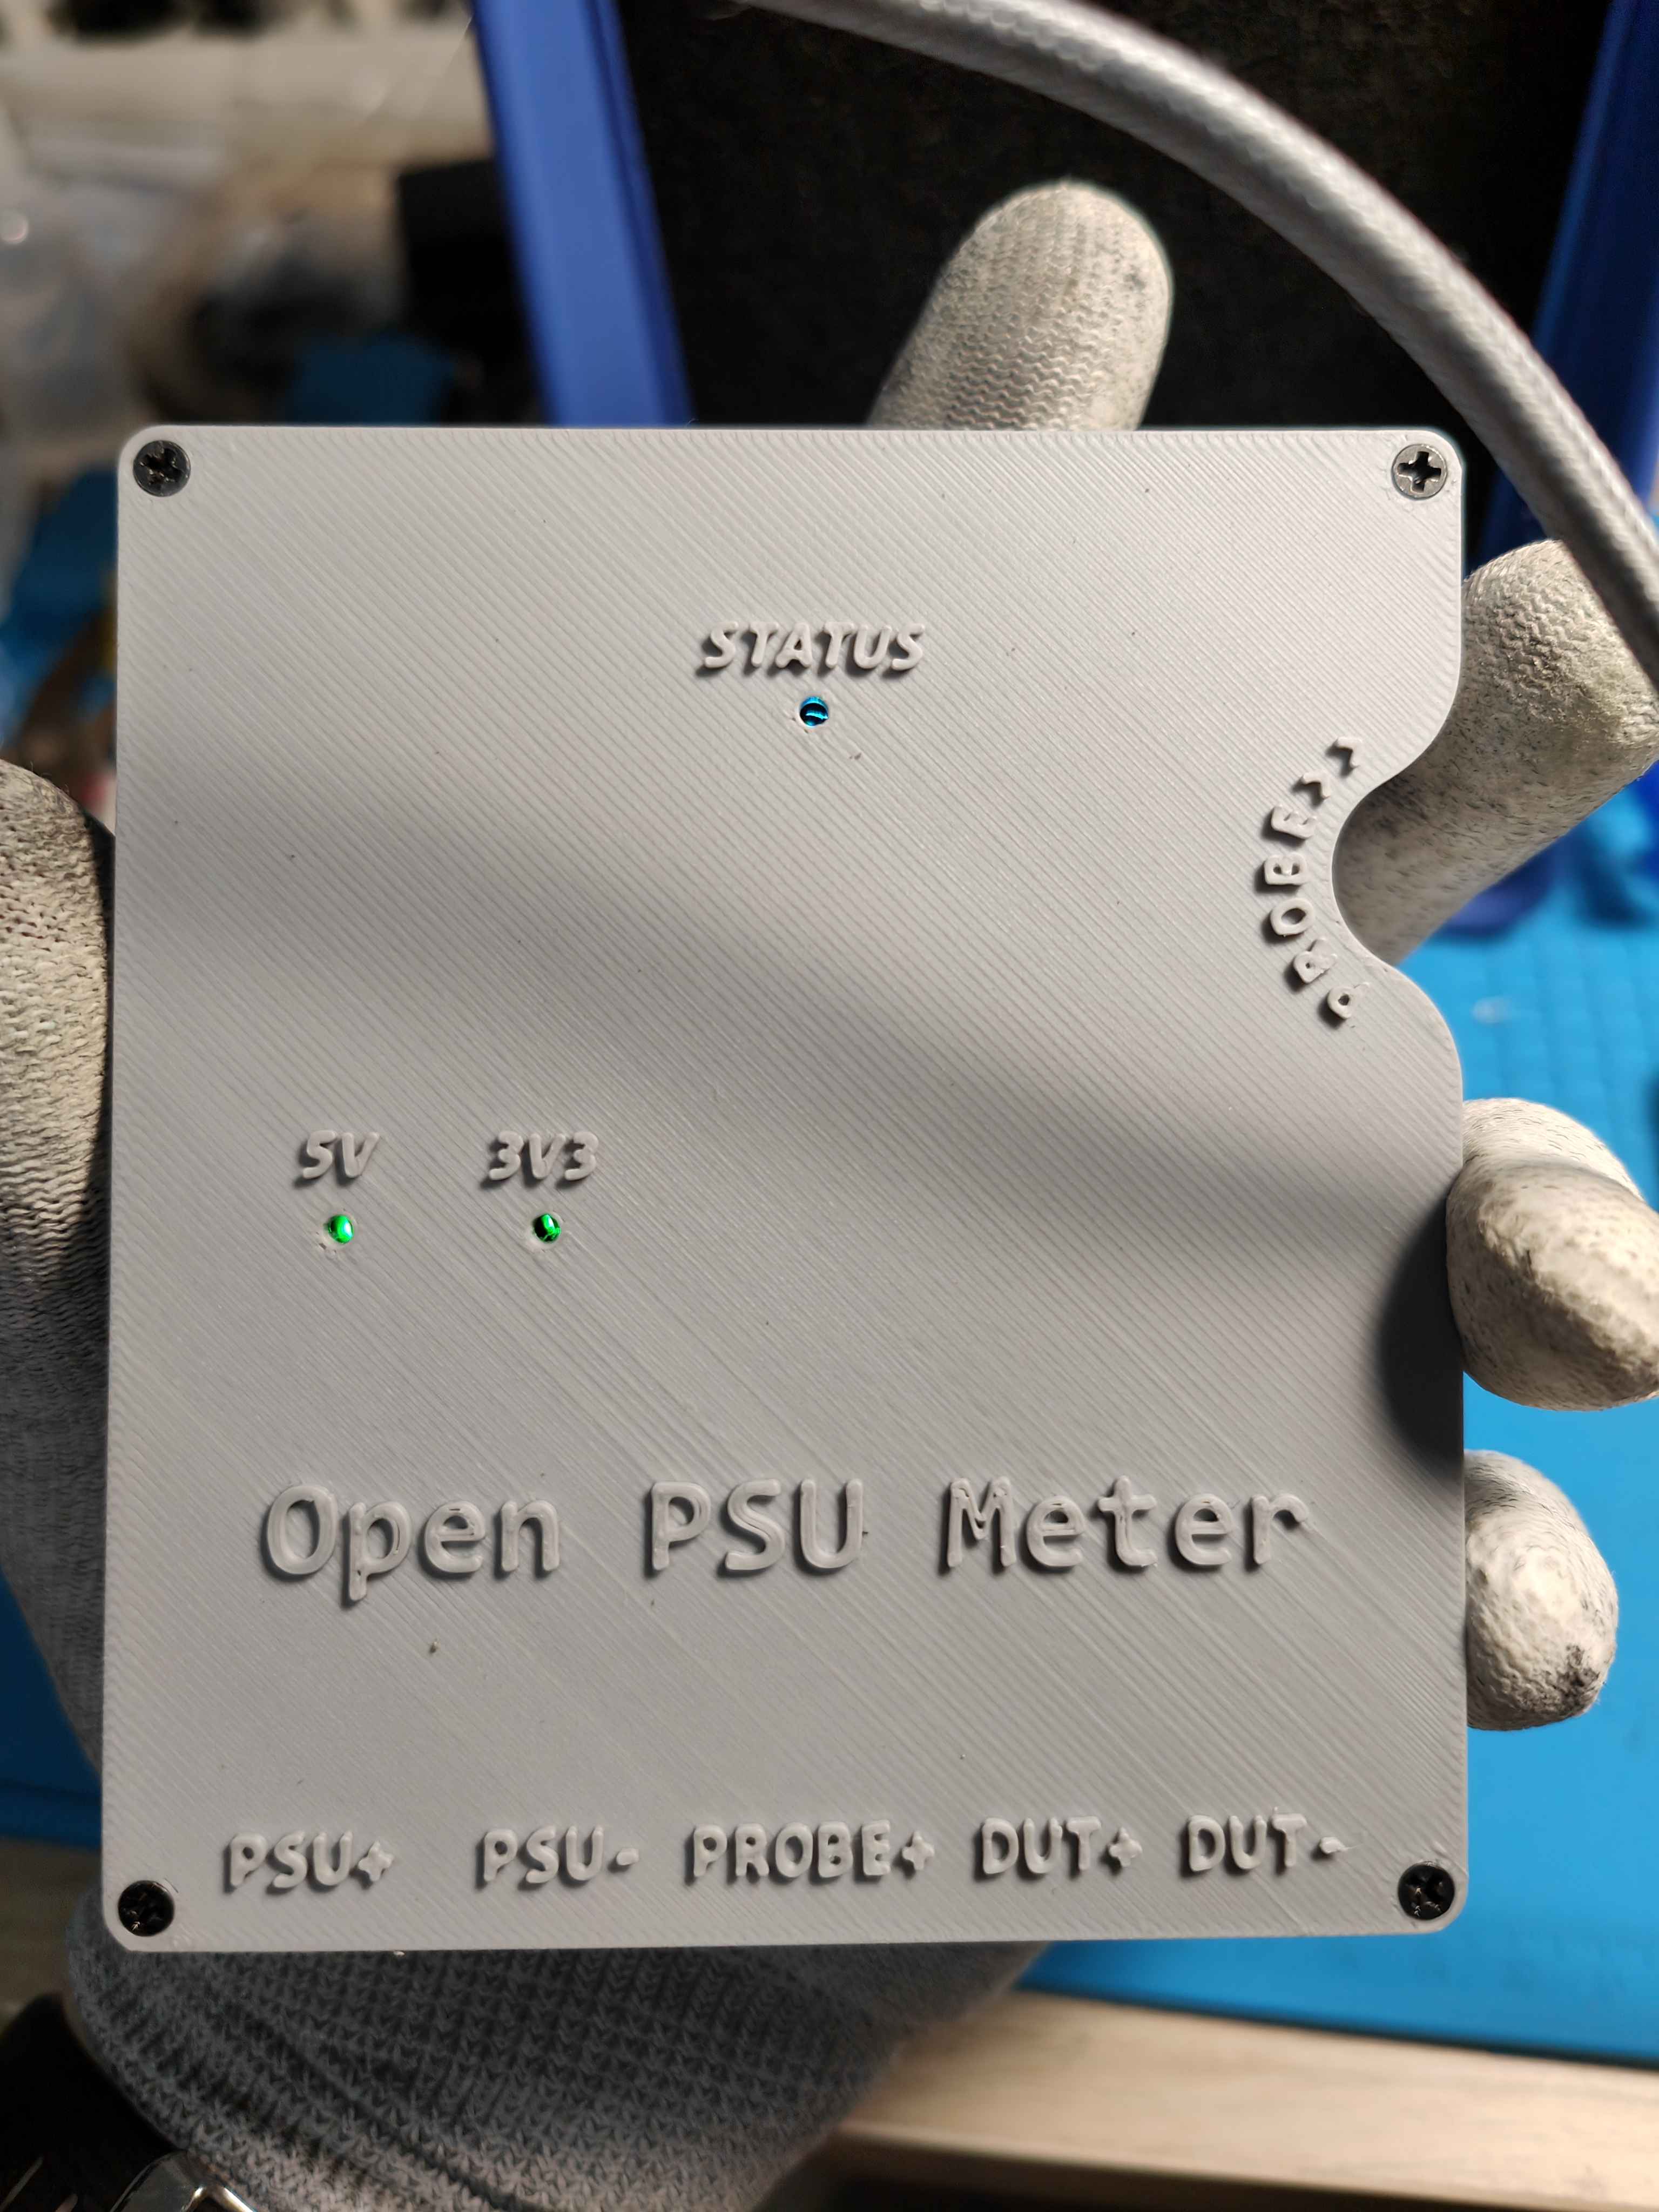 | 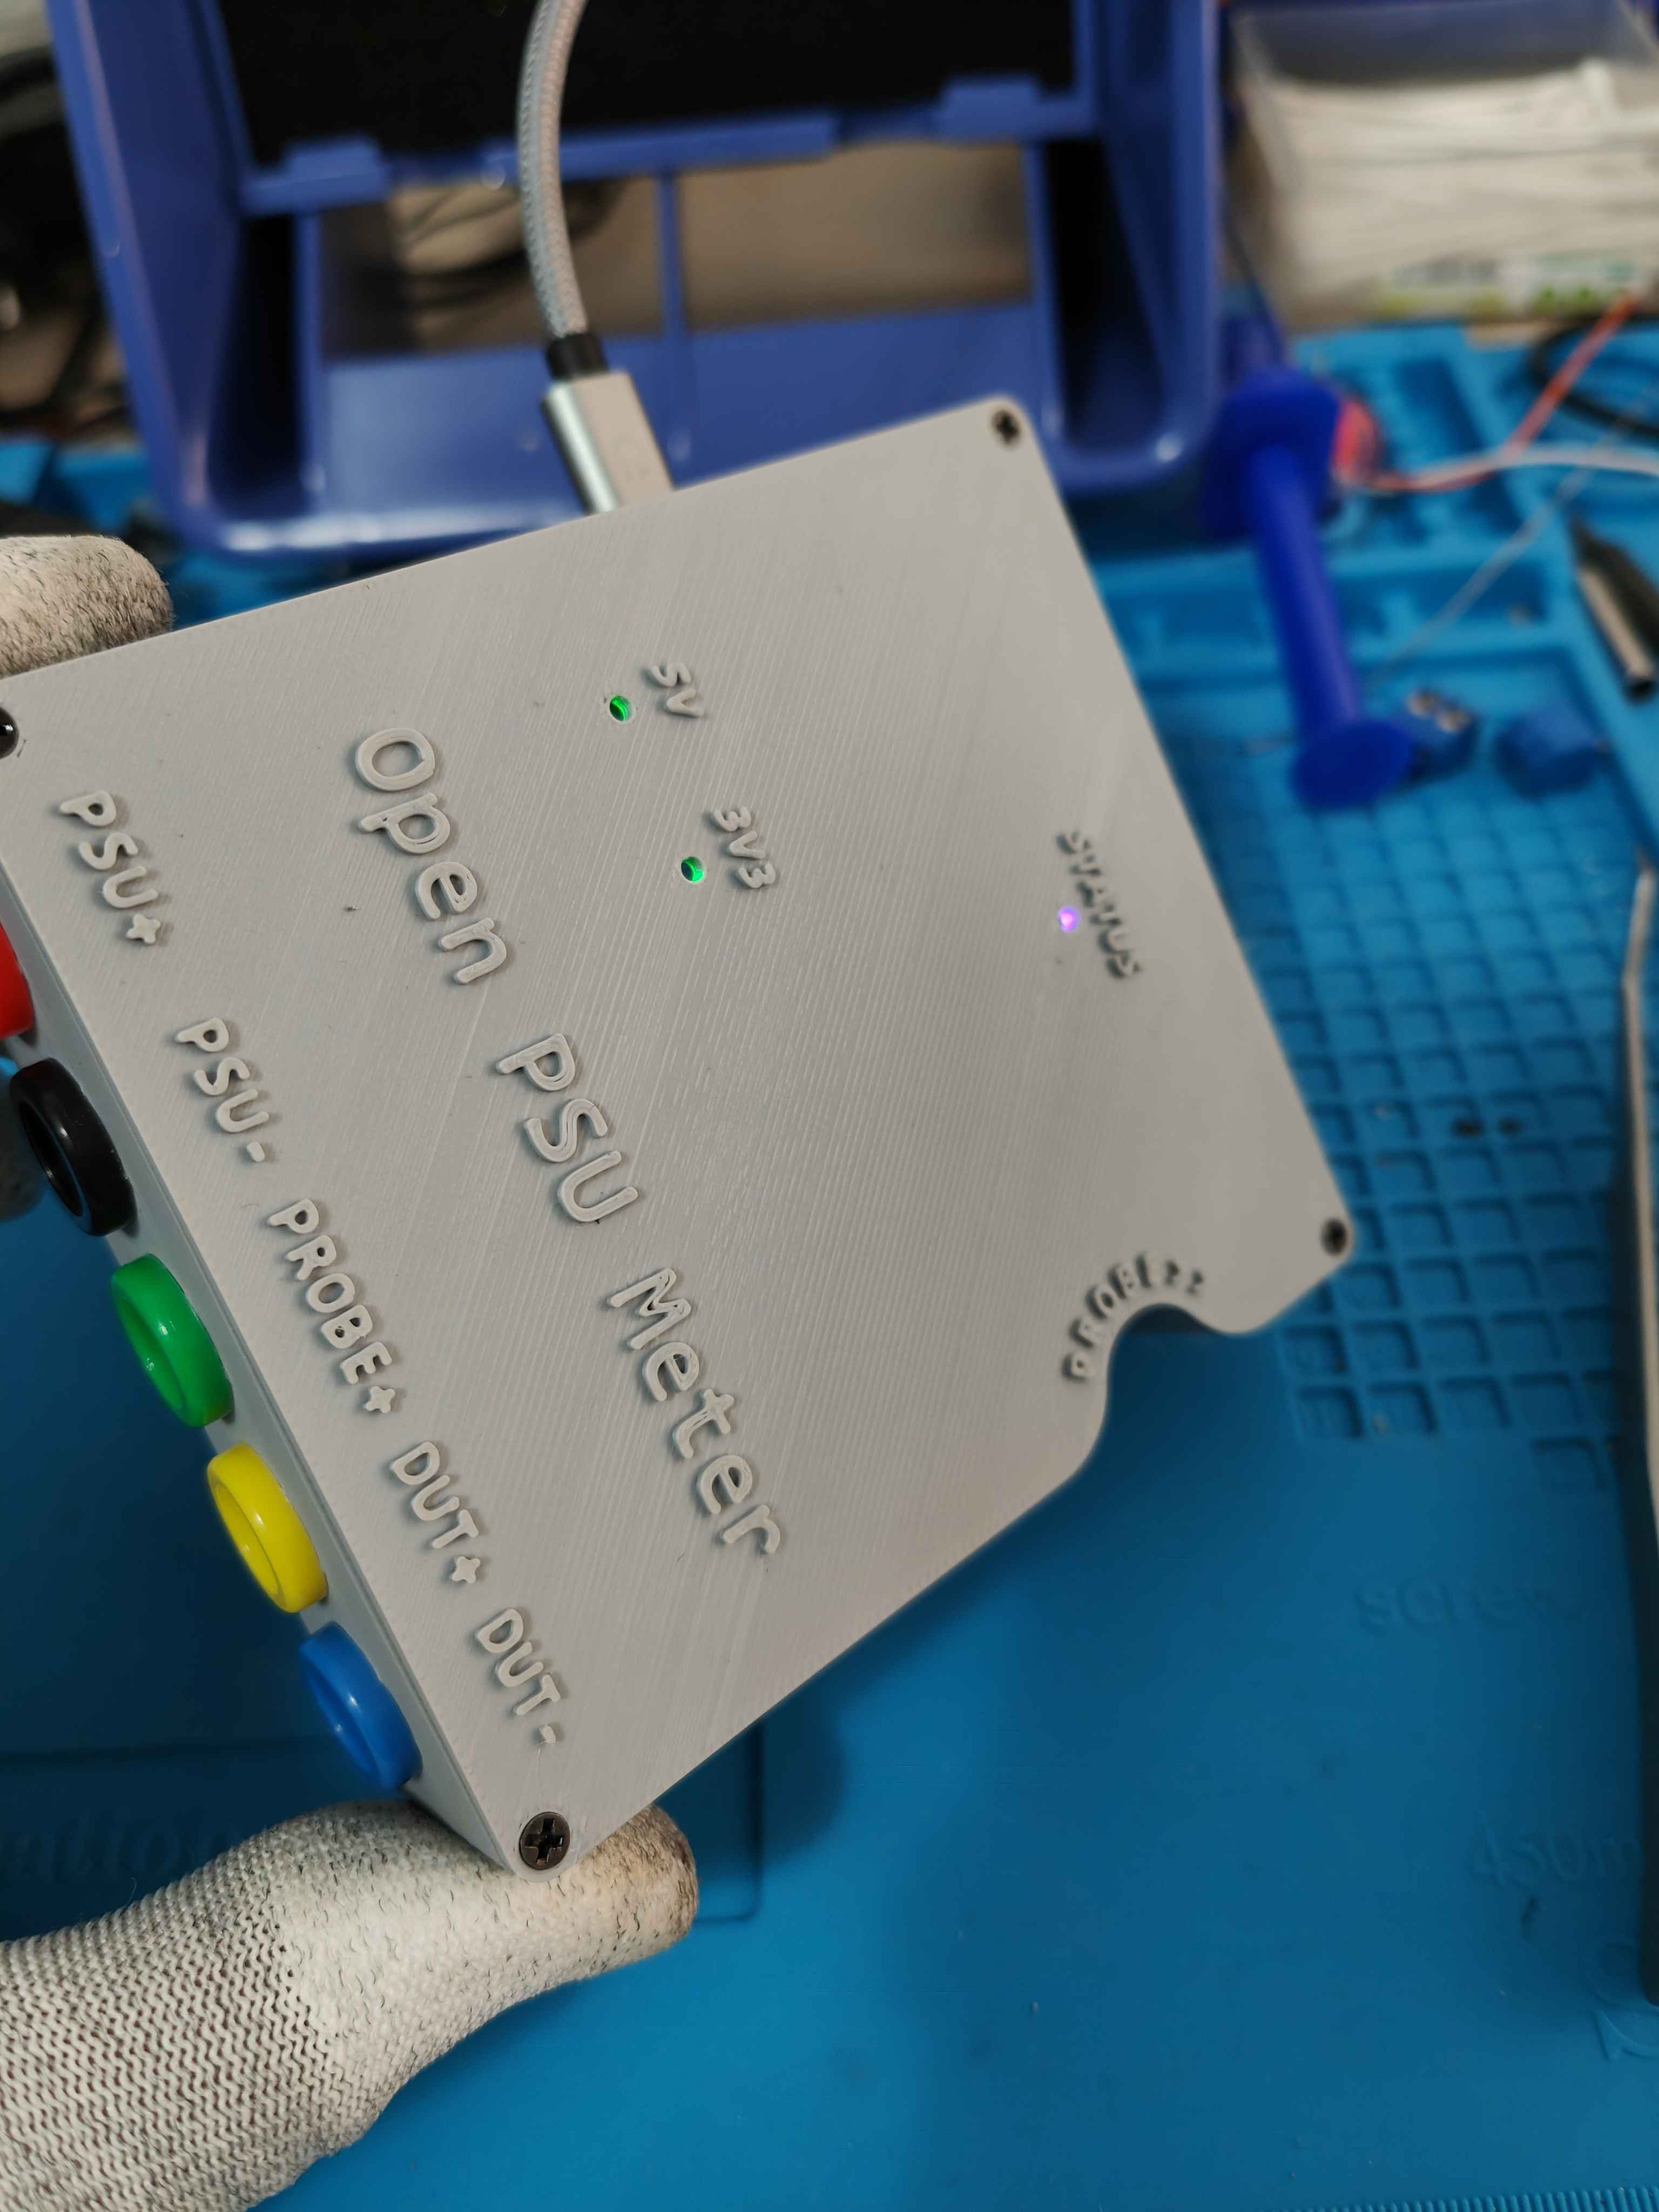 |
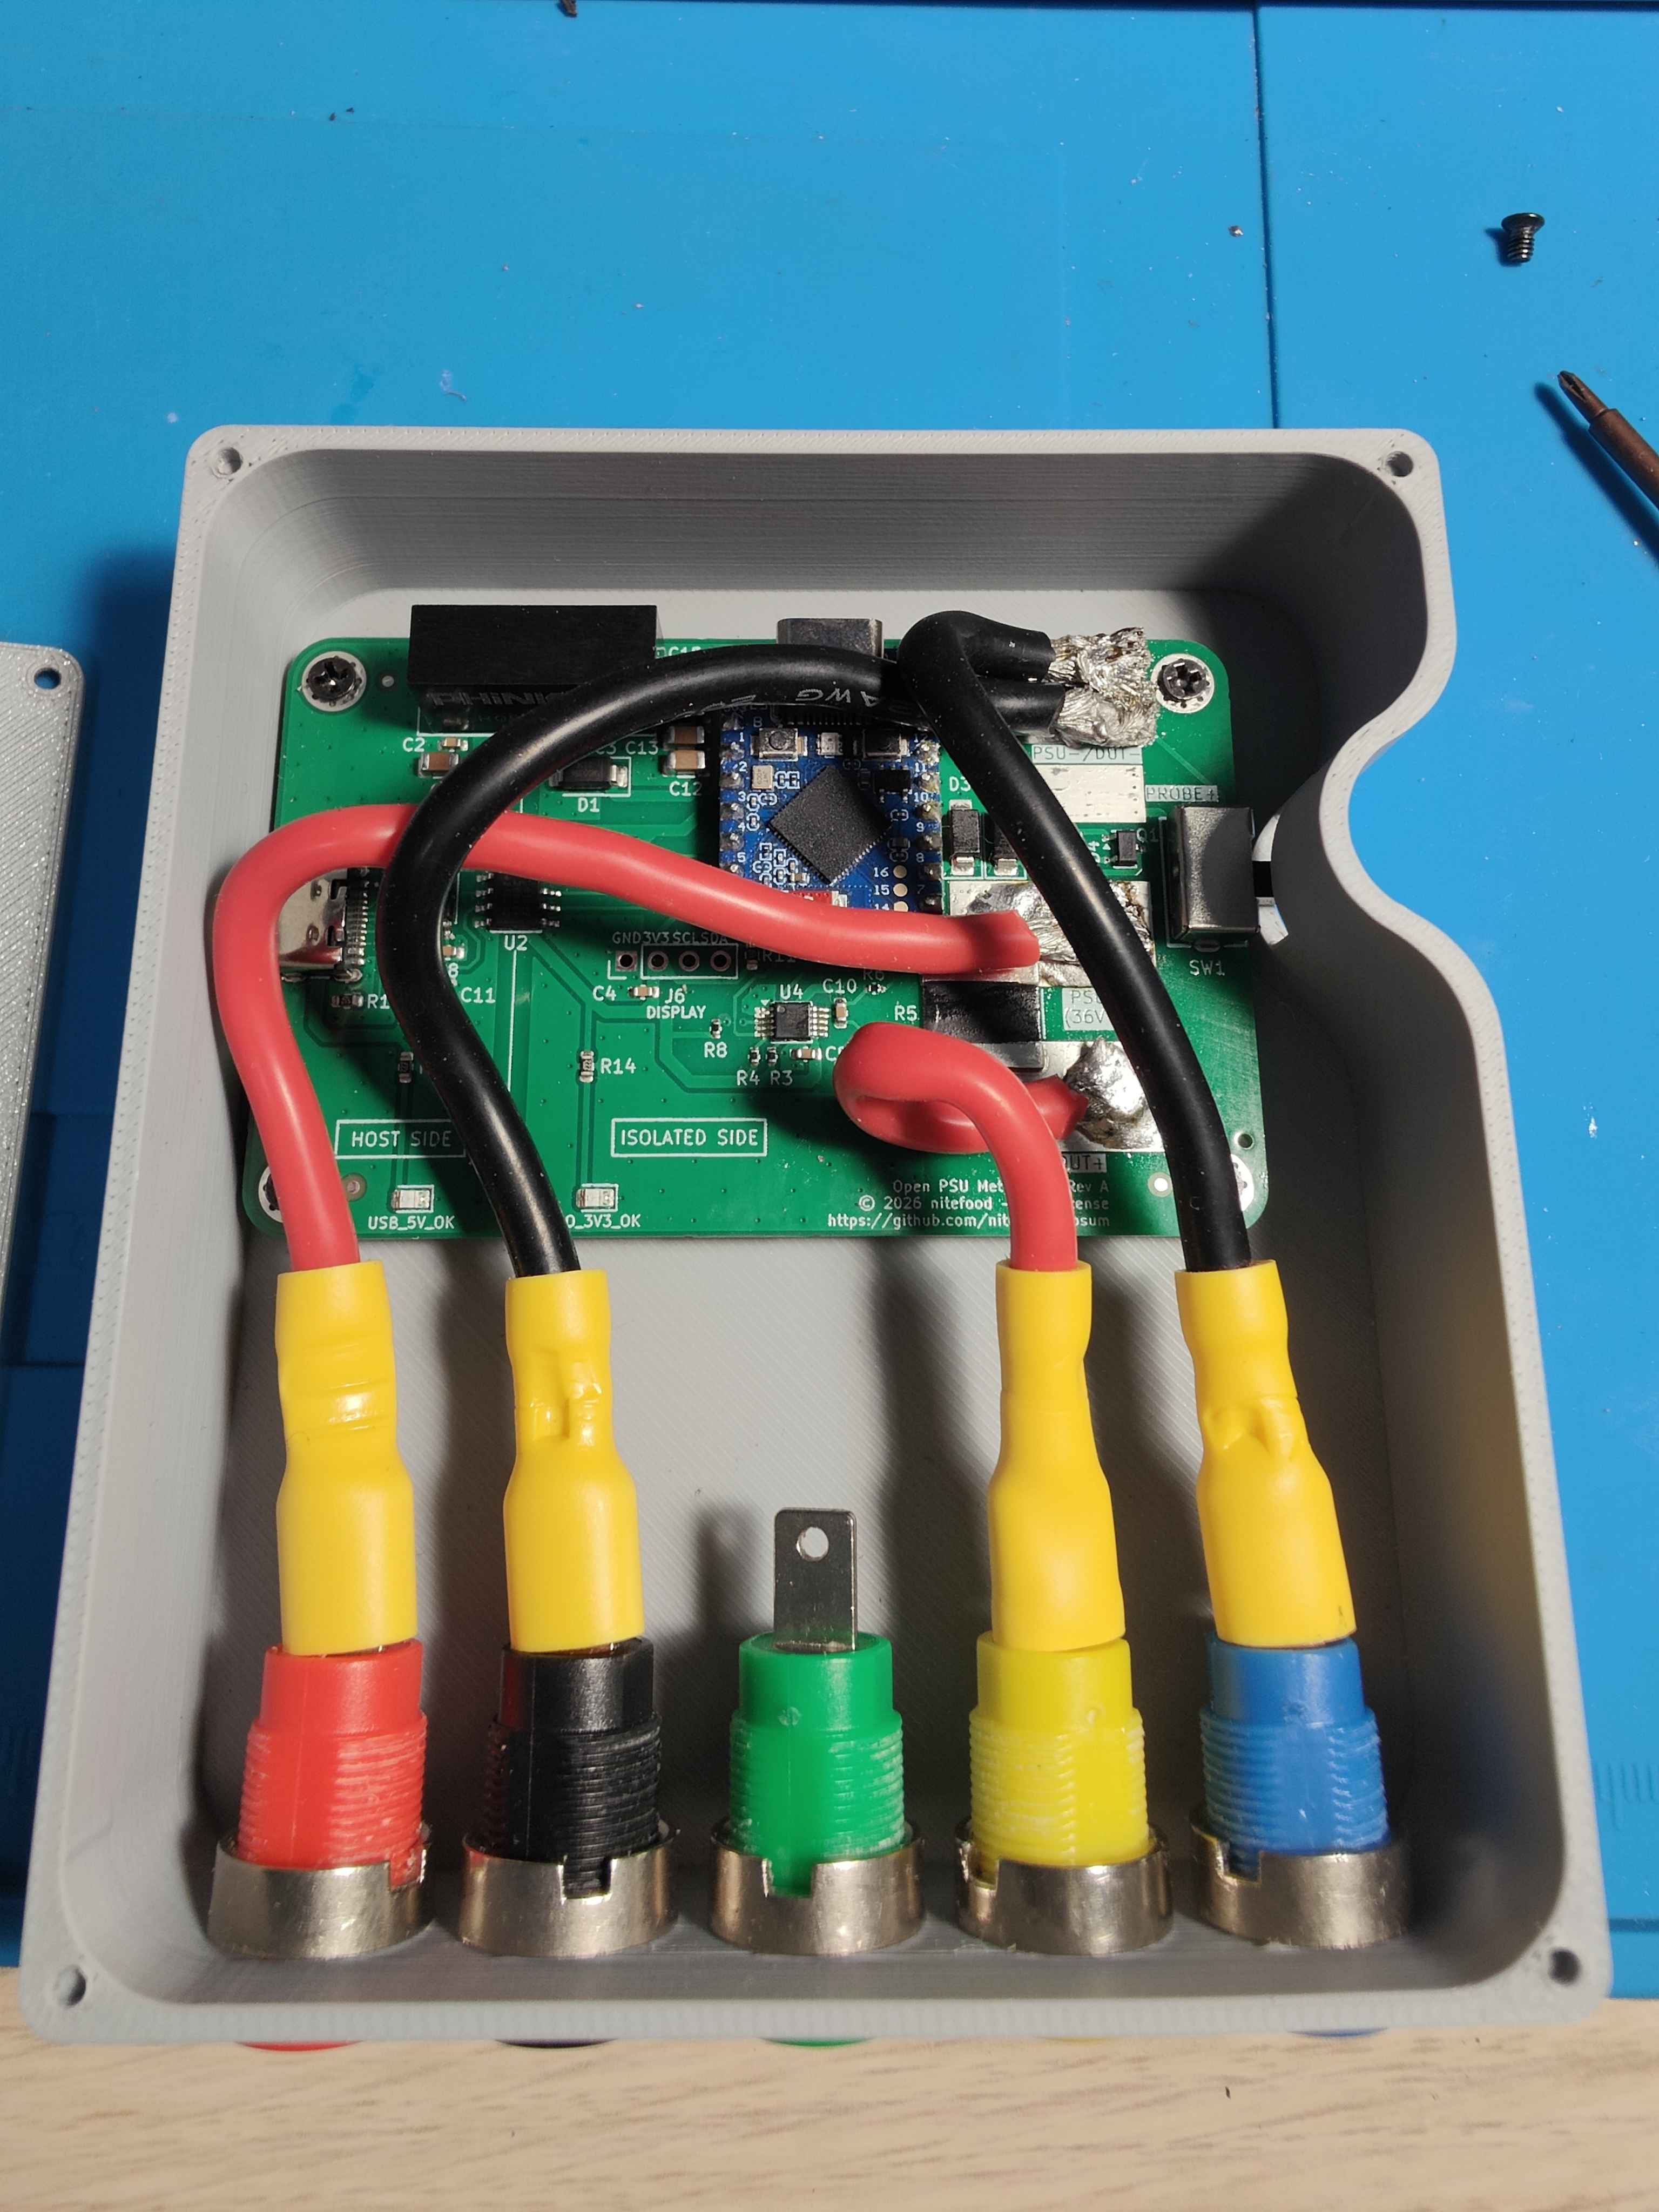
3D printed enclosure (internal 12AWG wiring)
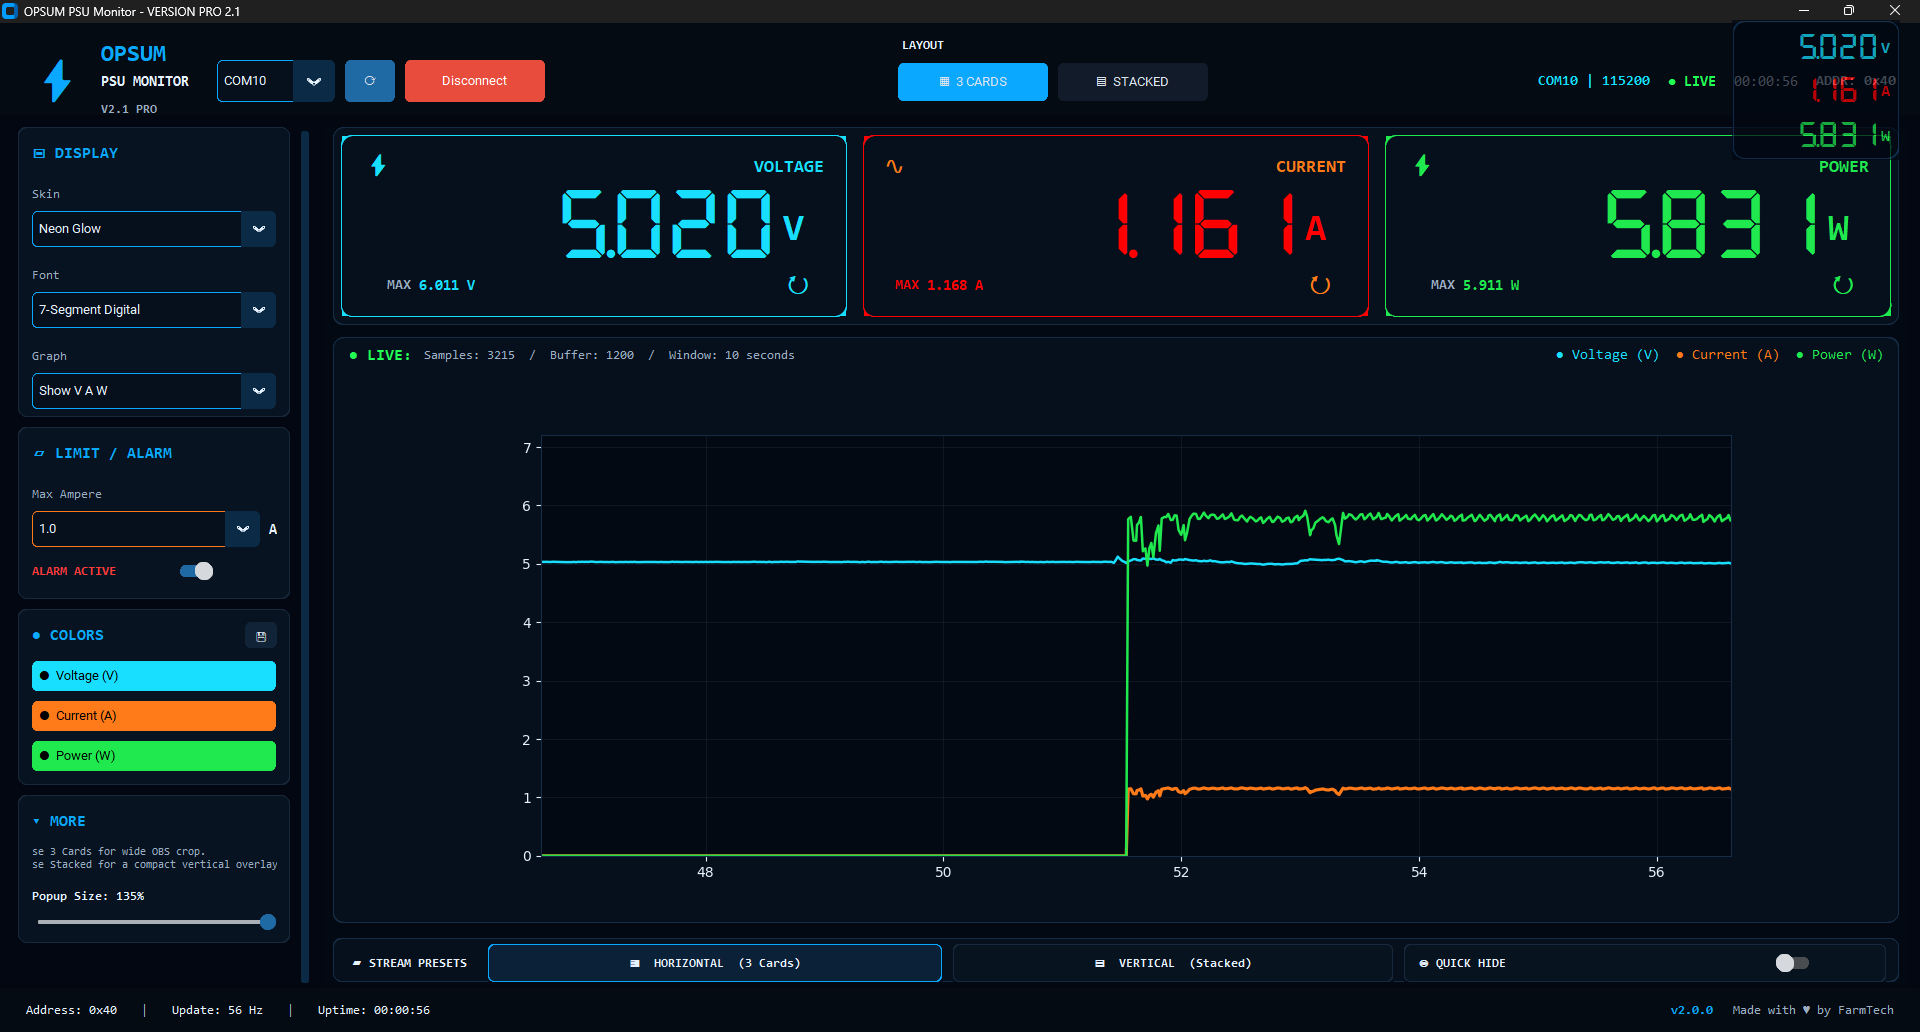
Farmtech's PSU monitor displaying telemetry coming from a live OPSUM board
Quick Start
If you want to build the project yourself, the step-by-step approach is:
- Manufacture the board using a third party PCB fab house (I've used JLCPCB with great results, so tolerances and specs are guaranteed to comply with their capabilities, but any fab house should be easily capable to manufacture this board). Gerbers, BOM and CPL files alongside required production settings and instructions for PCB manufacturing and assembly are all in the hardware section.
Disclaimer: the JLCPCB link above is a referral URL, I get a little kickback if you use it to subscribe or buy from them. Thanks for your support!
- Solder the remaining through-hole components on the PCB using the instruction under howto-build. I've included a bill of material for THT and hand-assembly components required to complete the project, complete with links to AliExpress to source them.
- First-flash the new ESP32-S3 board with the
-FULL image (using esptool). Prebuilt binaries and usage instructions for esptool are in the dist section.
- 3D print the enclosure and assemble the finished product. Instructions are under enclosure.
- Connect the USB port to your PC and use a client-side program to interface with the OPSUM board and receve its readings. I've included a minimal GUI, alongside with fully featured third party tools compatibile with OPSUM's core firmware protocol.
If you want to flash a different firmware, or update/reflash the core firmware in the future, there is no need to disassemble the board to access the native MCU USB port. Just use the isolated USB port with the included flash tool, and reflash the board using a -OTA image. OPSUM's main firmware OTA image is packaged under dist as well.
Open Tooling Approach
This repository includes everything, ranging from the basic OPSUM GUI plus third-party client-side tools that support the Core firmware communication protocol, to enclosure CAD models, PCB layout design files, assembly guides and protocol specification documentation.
You are free to use whichever compatible client (or firmware) matches your needs.
Repository Layout
| Folder | Contents |
|---|
| dist/ | release binaries + compilation and flash instructions |
| protocol-specs/ | DFU (flashing) and UART (runtime communication with the host) protocol specs |
| src/Firmware/ | Core (main) and DFU (flash update mode) firmware source code |
| src/GUI/ | host-side GUI tools source code root folder |
| src/GUI/flash-tool/ | desktop DFU flashing GUI source code |
| src/GUI/opsum-gui/ | minimal OPSUM runtime GUI frontend source code |
| third_party_tools/ | bundled alternative host-side tools and board-side firmware binaries |
| hardware/ | schematic, PCB layout, BOM, CPL, Gerbers and manufacturing guide |
| enclosure/ | CAD files for the OPSUM case |
| howto-build/ | Manual assembly and soldering step-by-step instructions for the OPSUM board project |
Contributing
OPSUM is inteded as an open, community driven project. Anyone is welcome to contribute to it by creating or improving client-side tools, firmware, enclosure, PCB design, protocol specs or documentation!
Acknowledgements
This project was born out of the desire to improve my PCB design skills, and to document a complete DIY approach to getting a full featured ammeter from scratch, instead of buying one.
In this endeavor, I've received a lot of precious support and ideas from the JFIXX community. If you want to join us to say hello, his discord server is a welcoming and friendly place, full of very skilled and amazing techs!
Supporting the project
If you like this project and want to support it, you can do so by clicking the button below. Thank you! <3