2 layers191 × 151 mm
Follow The Line
billtsol/Follow-The-Line
This project is an example of how to use an Arduino board, QTR reflectance sensor, and a motor driver shield to create a simple follow-the-line robot.
23 parts1

 billtsol/Maze2
This project demonstrates how to use an Arduino board, IR sensors, and a motor driver shield to create a maze-solving robot.
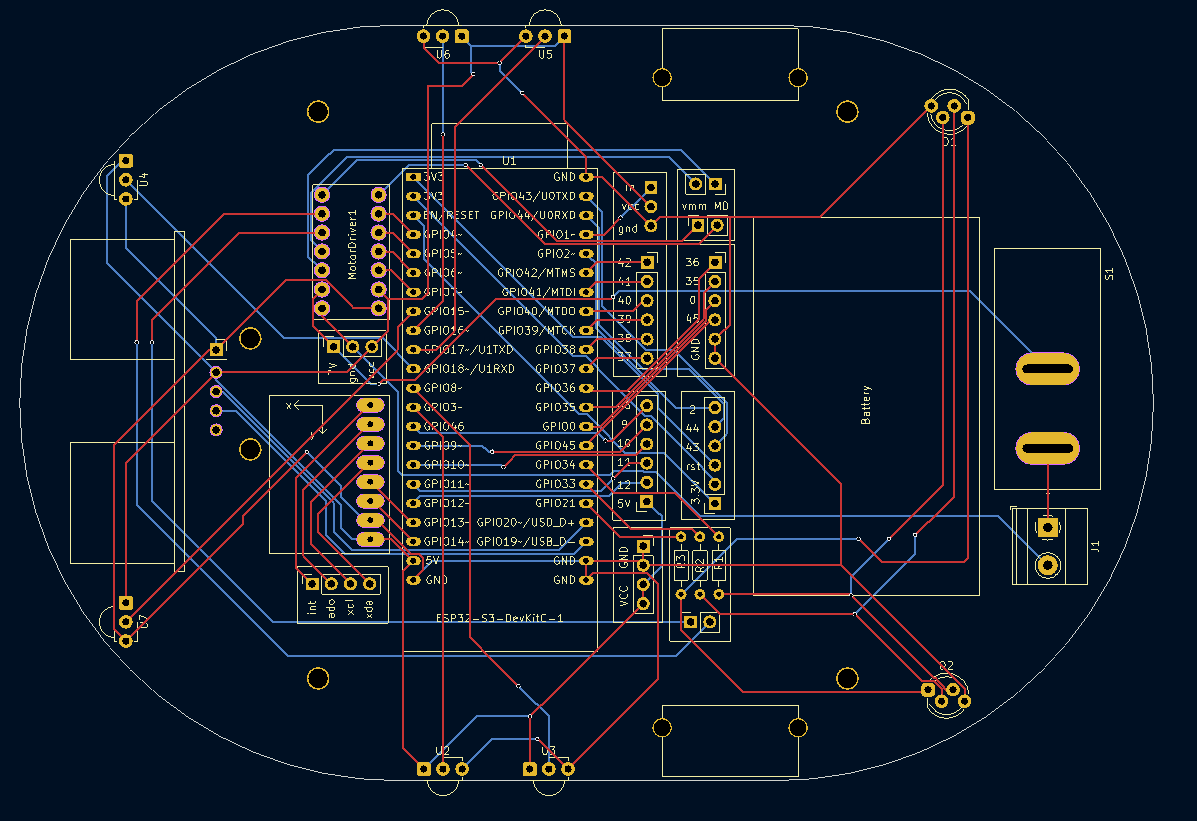
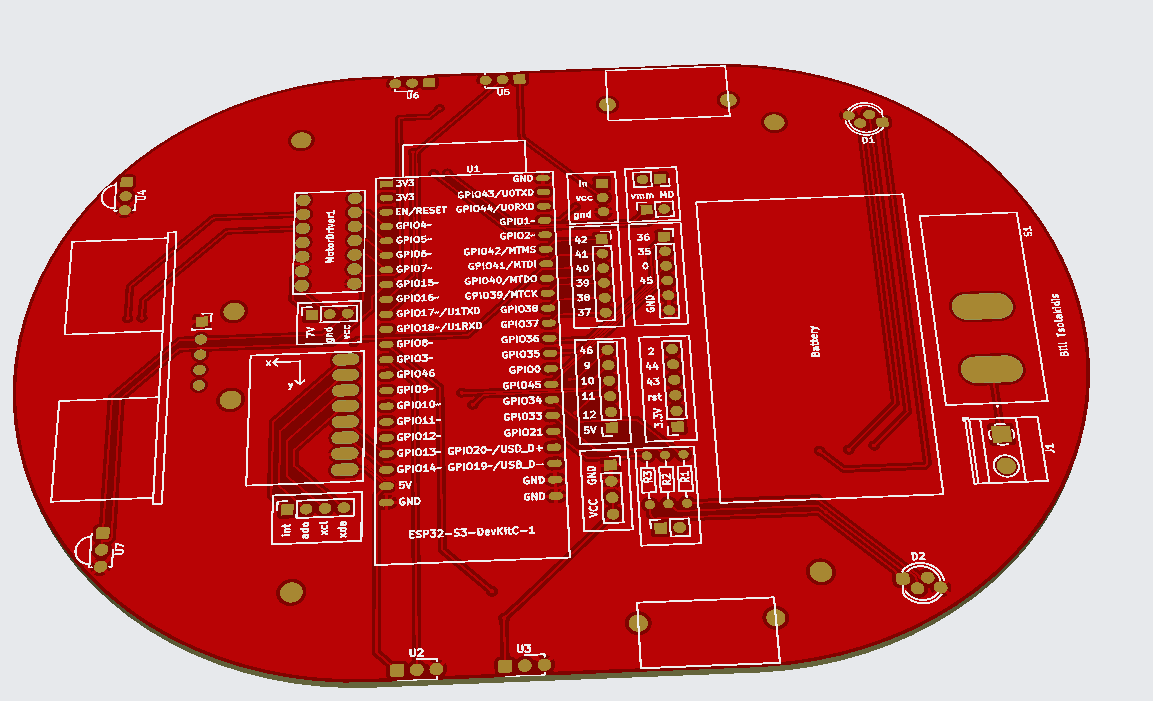
Maze kiCad is an open-source printed circuit board by billtsol, from the billtsol/Maze repository on GitHub. It is a 2-layer board of 150 × 100 mm with 39 parts on 58 nets, routed with 388 tracks and 24 vias.
It is built around the ESP32-S3-DEVKITC-1-N8, DRV8835DSS and TCRT5000, with the HC-SR04 and RB141C1100 among its other parts. Its parts include 12 connectors, 10 ICs, 3 resistors, 2 diodes and 1 switch. It belongs with the robots and motor control boards and the ESP32 boards of this library.


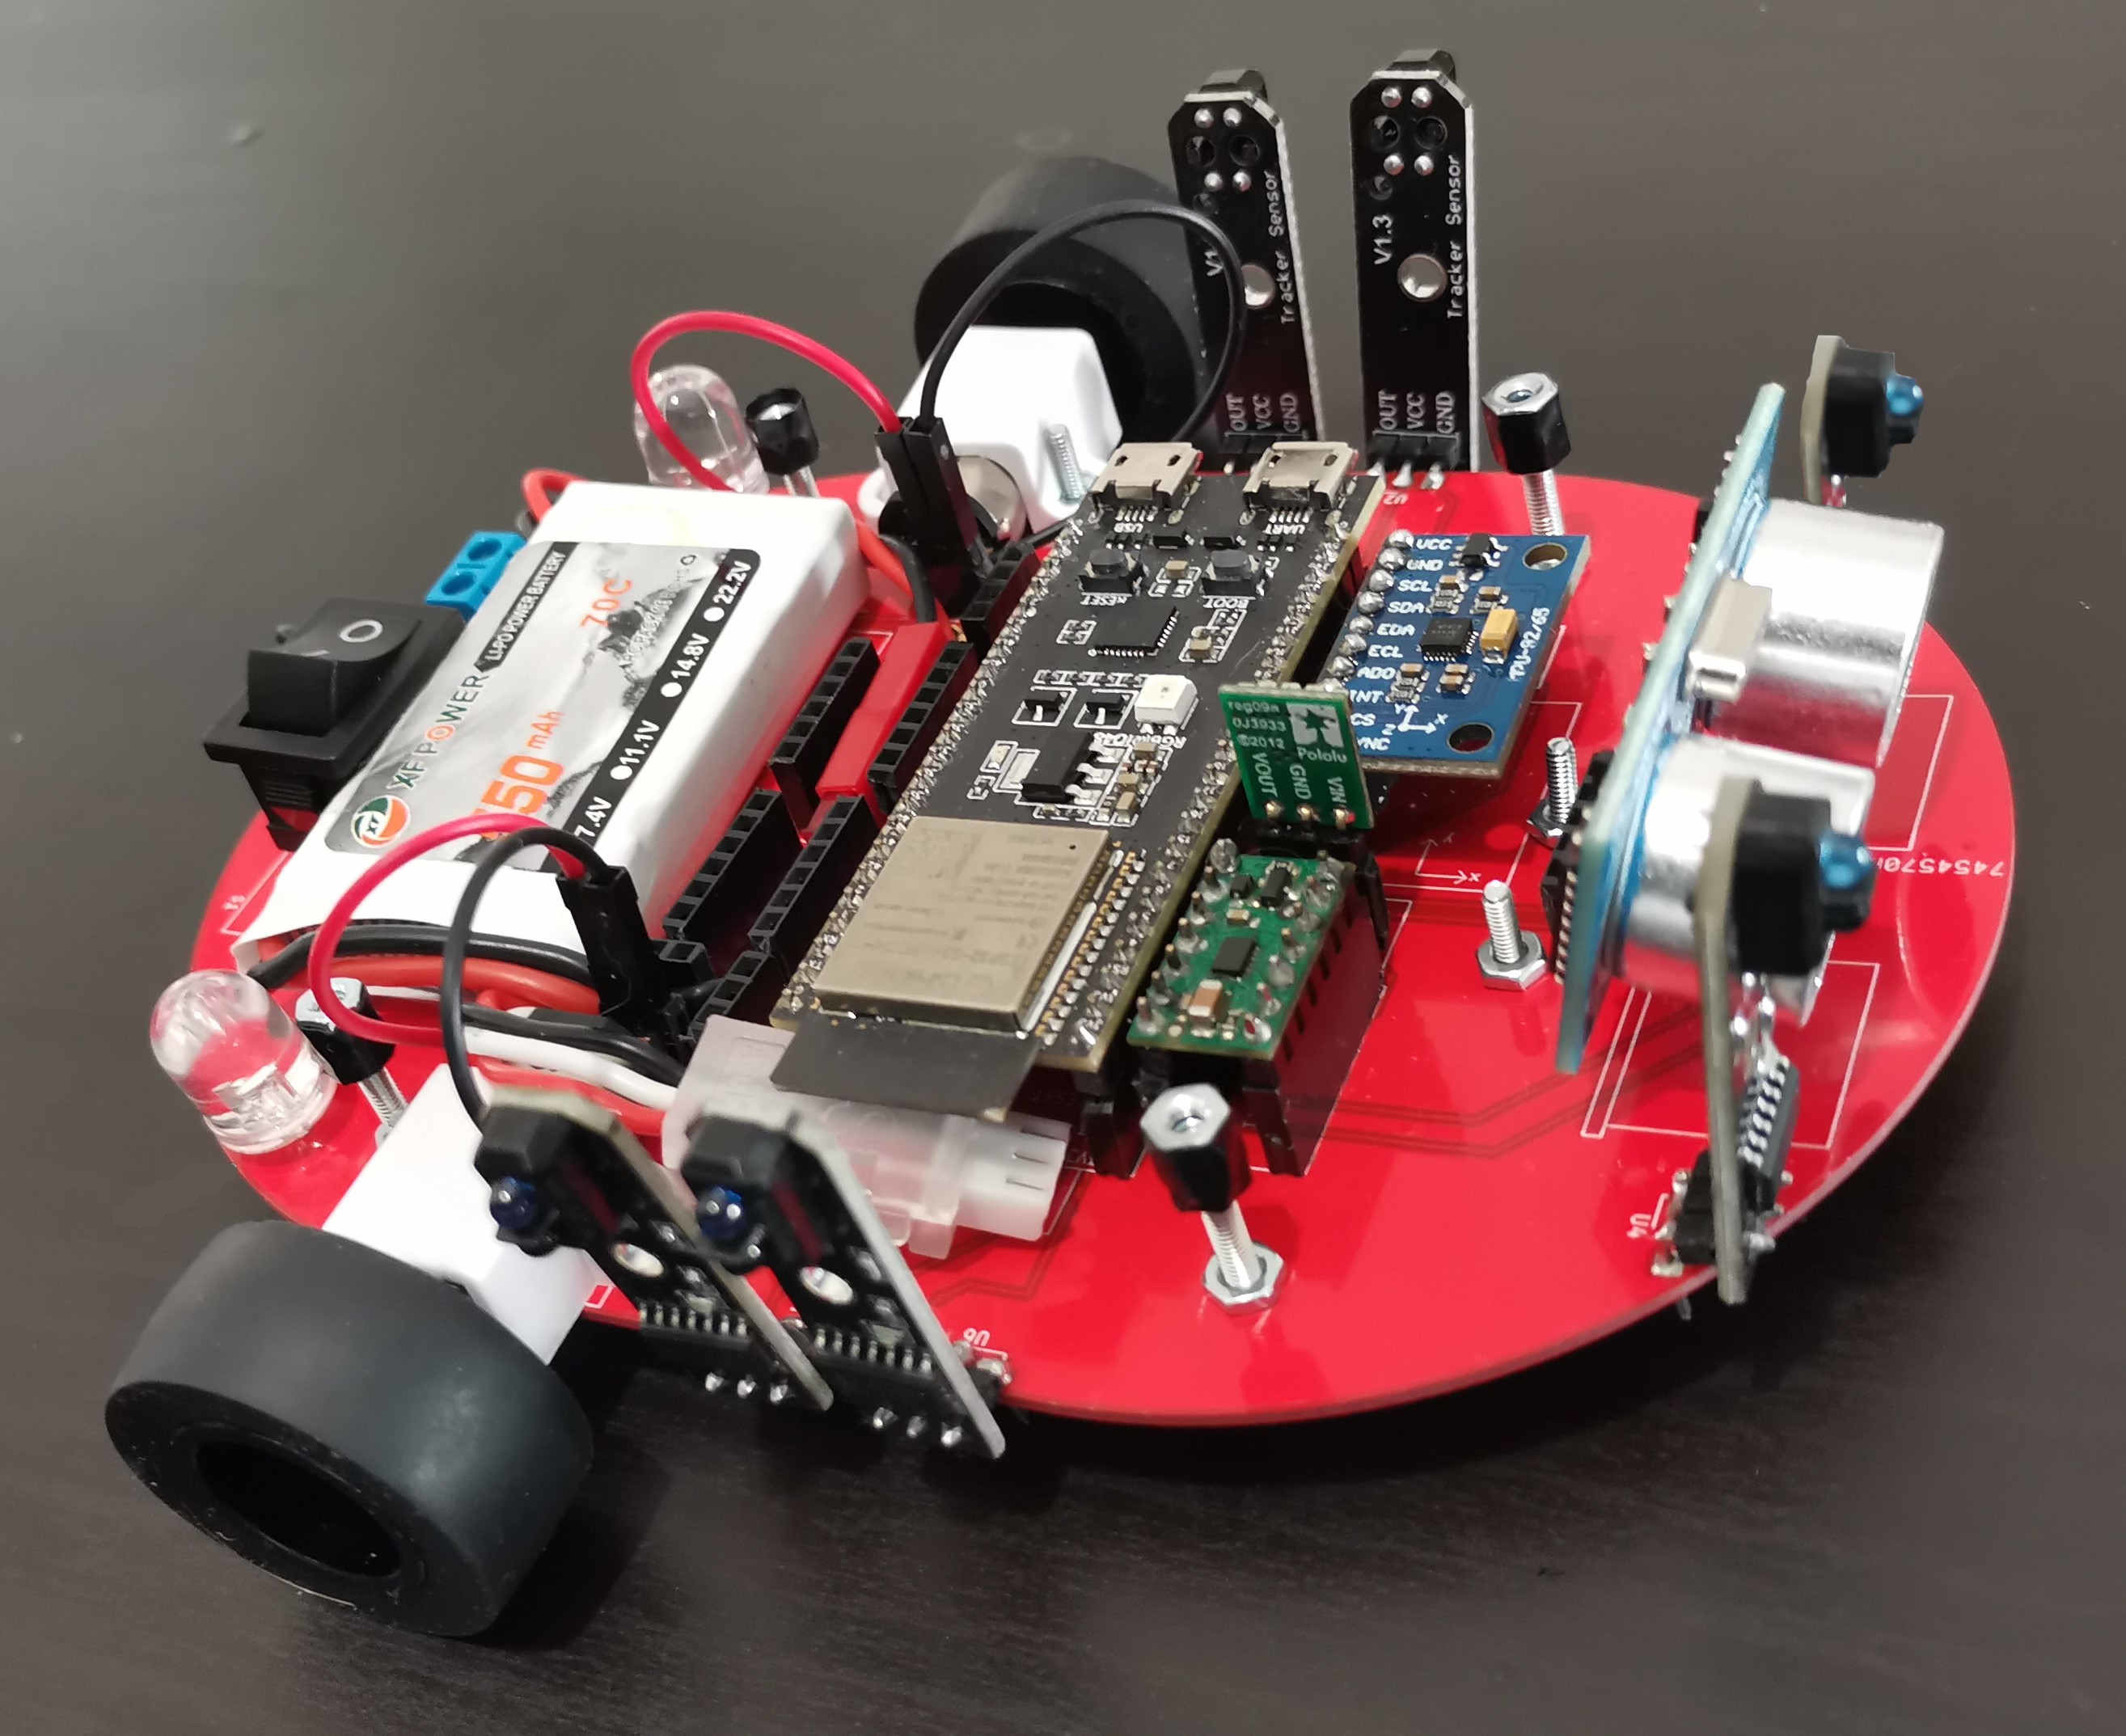
This project demonstrates how to use an Arduino board, IR sensors, and a motor driver shield to create a maze-solving robot. The robot is designed to navigate mazes by detecting, using sensors to make decisions at intersections.
To build this project, you will need the following components:
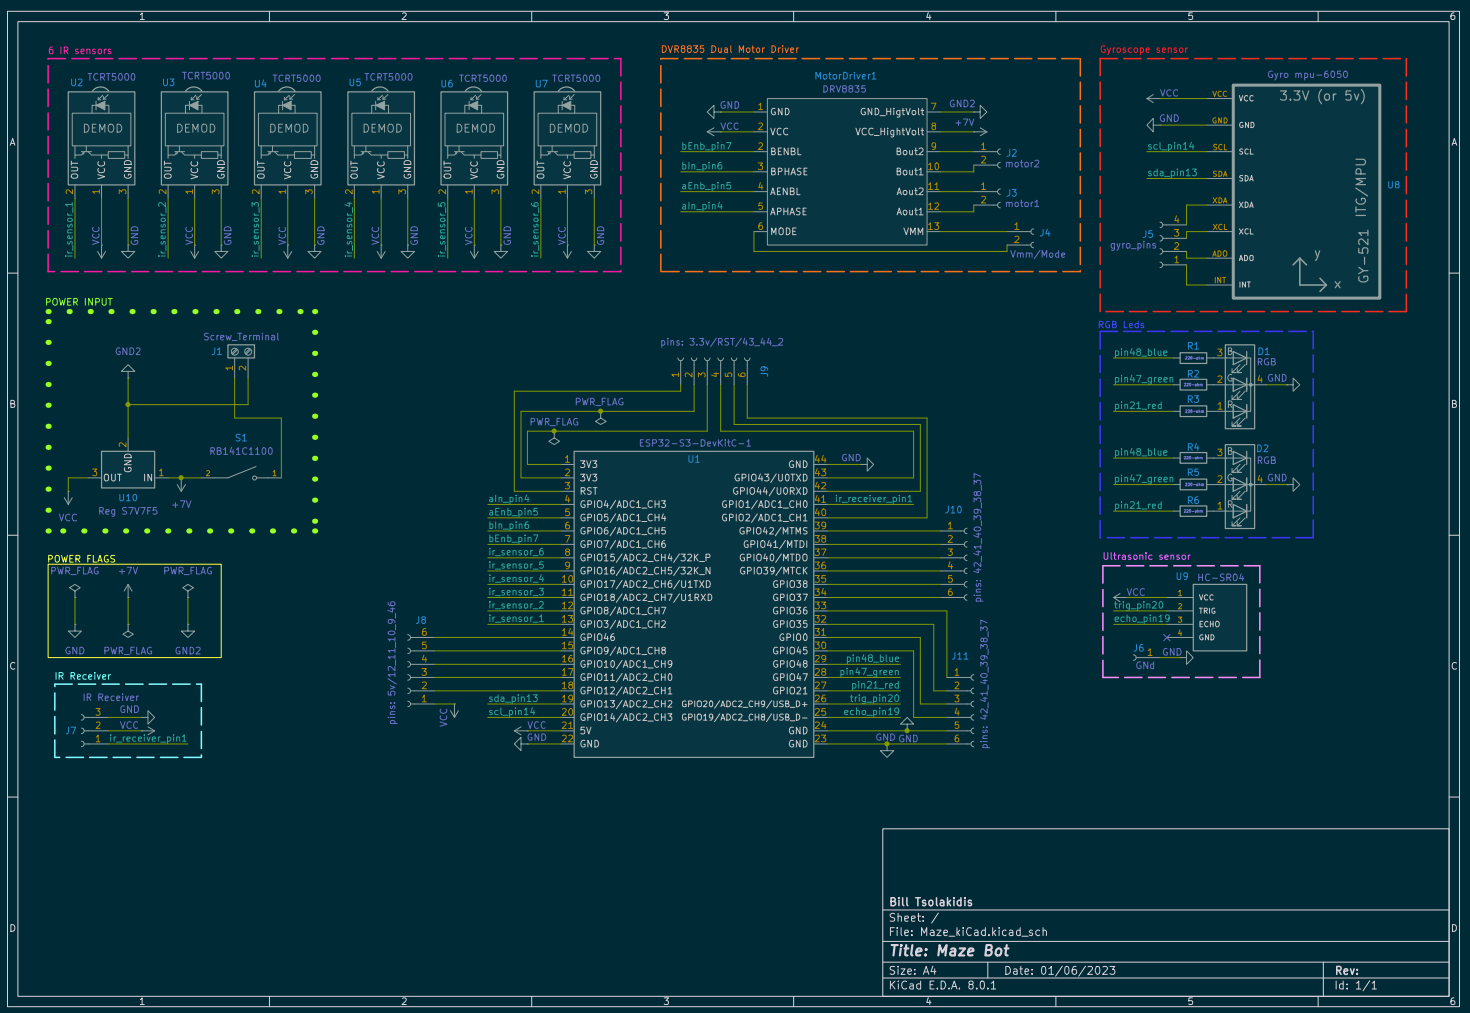
The code for this project is available in the Maze.ino file.
Increased Size and Payload Capacity: The robot's size can be increased to carry larger loads. This allows the robot to be used for more demanding applications, such as transporting packages or tools in industrial environments.
Improved Navigation in Challenging Terrain: The robot can be upgraded with enhanced drive systems to handle rough terrain. This feature enables the robot to navigate through more difficult environments, making it suitable for outdoor and emergency response applications.
3D Mapping with LiDAR: Adding LiDAR sensors to the robot allows it to create detailed 3D maps of its surroundings. This improves its maze-solving capabilities and makes it more versatile for tasks like underground exploration or hazardous area inspections. You can integrate LiDAR with software like ROS (Robot Operating System) and SLAM algorithms to create and visualize the 3D maps.
Communication with Server using Raspberry Pi: The robot can be connected to a server via a Raspberry Pi, enabling remote monitoring and control. This feature allows for real-time updates on the robot's progress through the maze and the ability to send and receive commands.
| Qty | Value | Footprint | References |
|---|---|---|---|
| 10 | , , , , , , , , , | ||
| 6 | TCRT5000 | OptoDevice:Vishay_MINICAST-3Pin | U2, U3, U4, U5, U6, U7 |
| 3 | 220-ohm | Resistor_THT:R_Axial_DIN0204_L3.6mm_D1.6mm_P7.62mm_Horizontal | R1, R2, R3 |
| 2 | RGB | LED_THT:LED_D5.0mm-4_RGB_Staggered_Pins | D1, D2 |
| 1 | DRV8835 | drv8835:drv8835 | MotorDriver1 |
| 1 | ESP32-S3-DevKitC-1 | PCM_Espressif:ESP32-S2-DevKitC-1 | U1 |
| 1 | GND | Connector_PinSocket_2.54mm:PinSocket_1x01_P2.54mm_Vertical | J6 |
| 1 | Gyro mpu-6050 | mpu6050:GY-521 | U8 |
| 1 | HC-SR04 | ultrasonic:XCVR_HC-SR04 | U9 |
| 1 | INT/ADO/XCL/XDA | Connector_PinSocket_2.54mm:PinSocket_1x04_P2.54mm_Vertical | J5 |
| 1 | IR Receiver | Connector_PinSocket_2.54mm:PinSocket_1x03_P2.54mm_Vertical | J7 |
| 1 | RB141C1100 | RB141C1100:SW_RB141C1100 | S1 |
| 1 | Reg S7V7F5 | Connector_PinSocket_2.54mm:PinSocket_1x03_P2.54mm_Vertical | U10 |
| 1 | Screw_Terminal | TerminalBlock_Phoenix:TerminalBlock_Phoenix_MKDS-1,5-2_1x02_P5.00mm_Horizontal | J1 |
| 1 | Vcc/Gnd | Connector_PinSocket_2.54mm:PinSocket_1x04_P2.54mm_Vertical | J12 |
| 1 | Vmm/Mode | Connector_PinSocket_2.54mm:PinSocket_1x02_P2.54mm_Vertical | J4 |
| 1 | gnd_gnd_45_0_35_36 | Connector_PinSocket_2.54mm:PinSocket_1x06_P2.54mm_Vertical | J11 |
| 1 | motor1 | Connector_PinSocket_2.54mm:PinSocket_1x02_P2.54mm_Vertical | J3 |
| 1 | motor2 | Connector_PinSocket_2.54mm:PinSocket_1x02_P2.54mm_Vertical | J2 |
| 1 | pins: 3.3v/RST/43_44_2 | Connector_PinSocket_2.54mm:PinSocket_1x06_P2.54mm_Vertical | J9 |
| 1 | pins: 42_41_40_39_38_37 | Connector_PinSocket_2.54mm:PinSocket_1x06_P2.54mm_Vertical | J10 |
| 1 | pins: 5v/12_11_10_9_46 | Connector_PinSocket_2.54mm:PinSocket_1x06_P2.54mm_Vertical | J8 |
It measures 150 × 100 mm and has 2 copper layers, 1.6 mm thick.
39 parts, built around the ESP32-S3-DEVKITC-1-N8, DRV8835DSS, TCRT5000 and HC-SR04. The full list of its parts is on this page, with links to each part's symbol and footprint where PCBKit's library has them.
From the billtsol/Maze repository on GitHub, at the commit this page was made from: the board is Maze_kiCad/Maze_kiCad.kicad_pcb and its schematic Maze_kiCad/Maze_kiCad.kicad_sch. PCBKit opens the board in the browser, with nothing to install.
Its repository states no licence, so its author keeps all rights: ask billtsol before reusing the design.
billtsol/Follow-The-Line
This project is an example of how to use an Arduino board, QTR reflectance sensor, and a motor driver shield to create a simple follow-the-line robot.


edantoni96/NomobotSK
NomobotSK is a educational robot for kids to learn programming and robotics.


vmfachini/Lumibot
Desenvolvimento de um Hardware Livre, com uso de energia limpa, baseado no micro:bit para criar robôs móveis acessíveis, promovendo ensino de robótica, pensamento computacional e sustentabilidade no Brasil.


benja47012/Robot-de-seguridad
Robot de seguridad con diversas funciones, planteado con un protocolo I2C.

louisonmalinge/Projet-Velux
Dans ce Git, vous trouverez les fichiers ayant permis de réaliser le projet Velux, avec ses différentes versions.