
2 layers177.8 × 130.8 mm

 SukkoPera/ReBlast6
8-Bit DAC/ADC Add-On for Commodore 16/Plus4 SIDcards
ReBlast is an open-source printed circuit board by SukkoPera, from the SukkoPera/ReBlast repository on GitHub. It is a 2-layer board of 52.3 × 51.8 mm with 27 parts on 52 nets, routed with 340 tracks and 10 vias.
It is built around the ADC0804LCN, TLC272CD and 74HC139D, with the 74HC20D among its other parts. Its parts include 10 capacitors, 6 ICs, 5 resistors, 1 diode and 1 connector. It belongs with the retro computing and games boards of this library.


ReBlast is an 8-bit Digital-to-Analog + Analog-to-Digital converter add-on for Commodore 16, 116 and Plus/4 SIDcards.
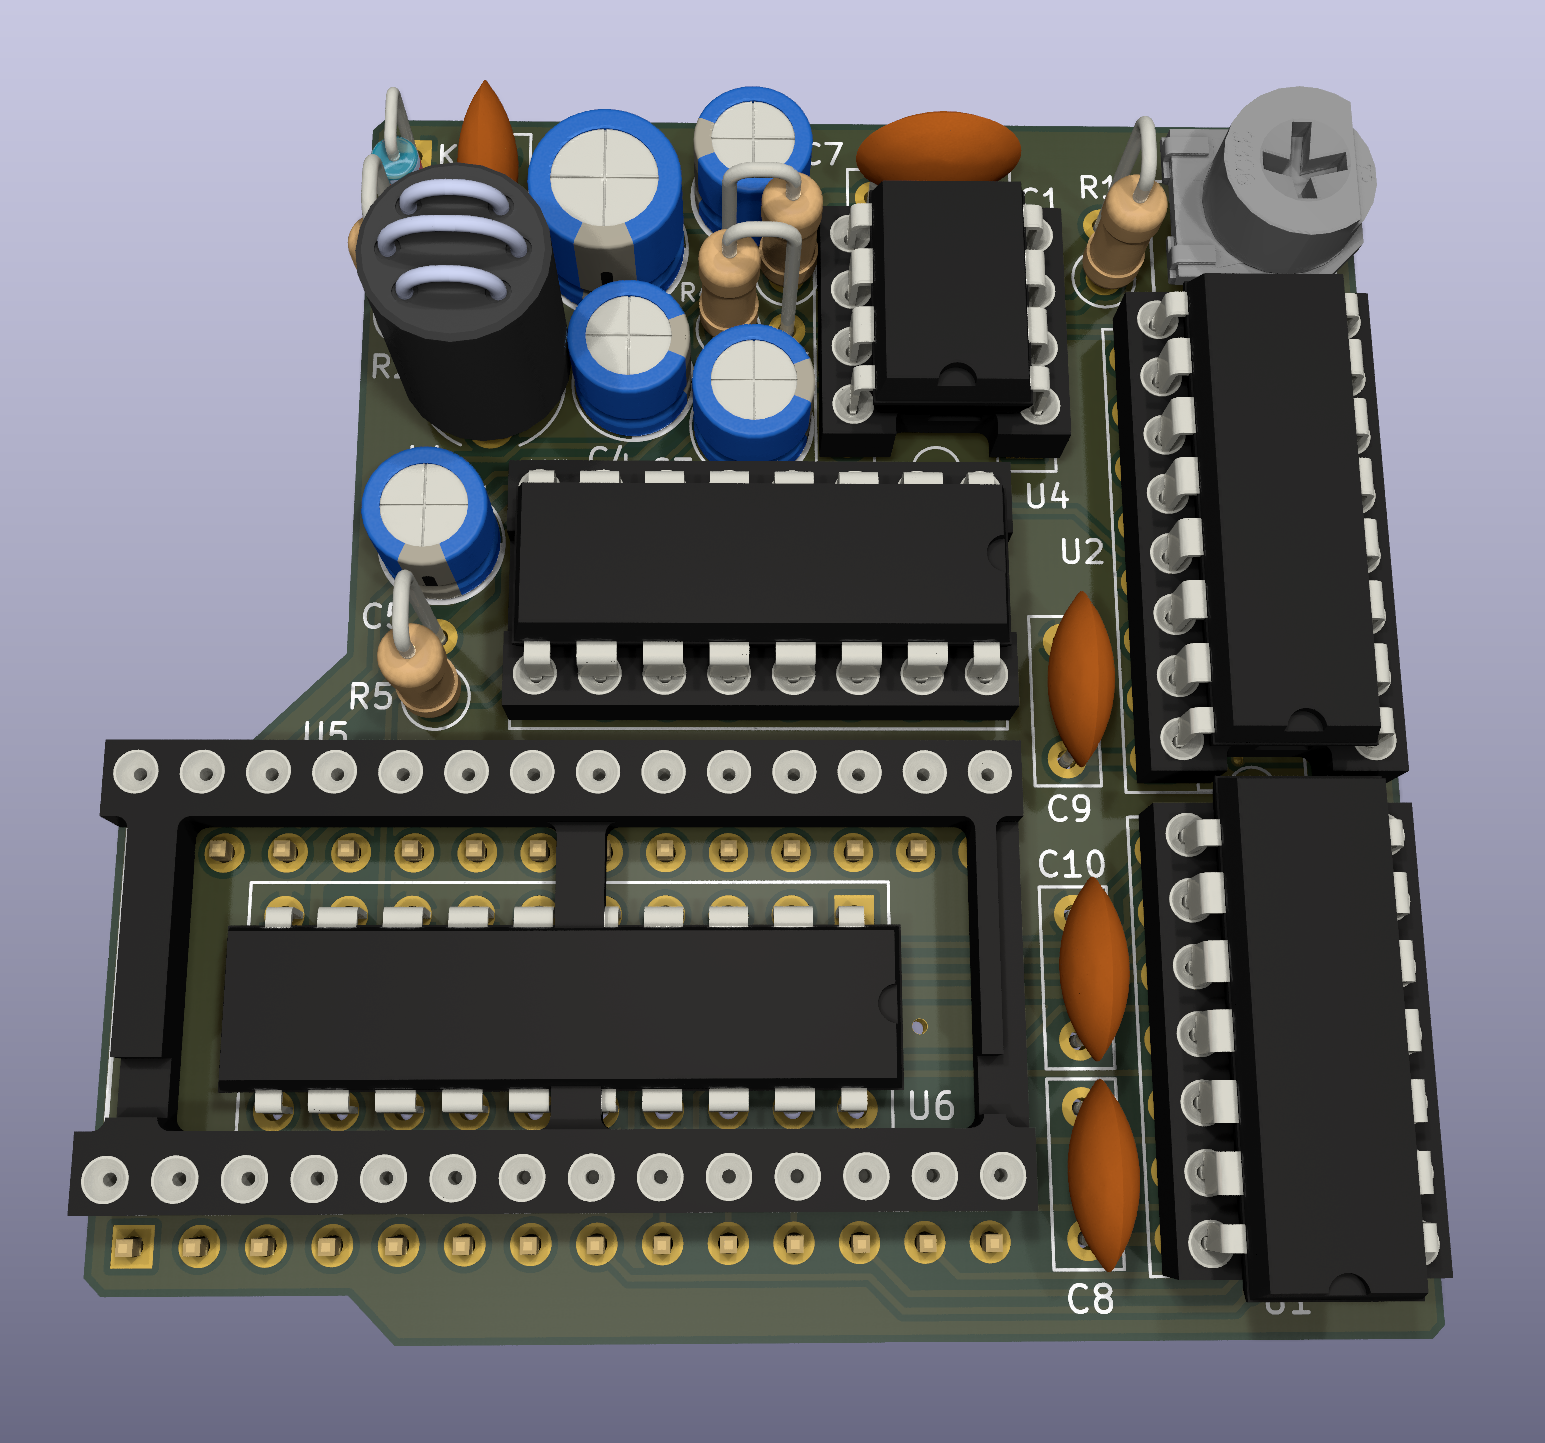
ReBlast is basically a replica of Solder of Synergy's Digi-Blaster. It uses the ZN428 DAC originally made by Ferranti and the ADC0804 ADC by Signetics. Both these chips are old-fashioned and out of production, but they can still be found relatively easily and cheaply.
ReBlast was sized and shaped so that it fits perfectly on a ReSeed card.
The DAC feeds its output into the SID's EXT_IN pin, which means that you will hear it mixed with the computer audio or on the output jack of the ReSeed card. Similarly, the ADC takes its input from the ReSeed input jack.
The DAC part of ReBlast is compatible with ReVox, but ReBlast can also take advantage of the SID to apply filters to the audio signal.
APOS's Digital Composing Kit 2.0 or the older version can be used to sample, compose and edit samples.
Installation is very easy, in particular if your ReSeed card was build with the DC-DC step-up converter and no regulator at U6:
If your ReSeed was built with the TL497 and/or with a linear regulator at U6, you will probably need to use a few chip sockets as "spacers" in order for the board to rise enough over the other components. If you really want to use a linear regulator, it is probably best to use an L78L09/L78L12 since they are much less tall than the LM7809/LM7812.
When plugging ReSeed into your computer, it might feel like ReBlast is preventing it from being completely inserted, but the card should actually slide in enough to work correctly.
ReBlast has not yet been tested on a LittleSixteen board, but there is no reason why it should not work, except for physical fitting issues. Probably the usage of additional spacer sockets is necessary, as well as using smaller voltage regulators.
I suggest to use WavePlay-SD, a great piece of software that plays music with superb quality. Enter the Setup menu with CTRL+S and select INT. INTL DGB:0 using the MOD button.
More software for the card can be found here.
The DAC is exposed at address $FD5E or $FE9E.
ReVox has no buffer, which means it must be fed audio samples in real-time. This is not a trivial task and existing software should be analyzed in order to learn the best techniques to do so.
Keep in mind that since the DAC feeds its output into the SID's EXT_IN pin, so the volume for that must be set through $FD58. This also opens interesting possibilities since the SID can apply filters to the audio coming in through that pin. See Second Mod for an example of that.
Detailed information, including code, can be found on the ReVox Wiki.
The ADC is exposed at $FD5F or $FE9F (64863 decimal). First of all, it needs calibration. This can easily be done with the following BASIC line:
DO : POKE 64863,0 : PRINT PEEK(64863) : LOOPThen use a screwdriver to turn the pot on the board until the displayed value is mostly stable around 128.
Writing any value to the register starts the sampling process. Then at least 48 clock cycles must elapse before the sampled value can be read from the same register. Since the conversion is directly linked to the clock of the Plus/4, this means that the smallest timer value for timer 1 is 48.
If you want to get this board produced, you are recommended to get the latest release rather than the current git version, as the latter might be under development and is not guaranteed to be working.
Every release is accompanied by its Bill Of Materials (BOM) file and any relevant notes about it, which you are recommended to read carefully.
The ReBlast documentation, including the design itself, is copyright © SukkoPera 2024 and is licensed under the Creative Commons Attribution-NonCommercial-ShareAlike 4.0 International License.
This documentation is distributed as is and WITHOUT ANY EXPRESS OR IMPLIED WARRANTIES whatsoever with respect to its functionality, operability or use, including, without limitation, any implied warranties OF MERCHANTABILITY, SATISFACTORY QUALITY, FITNESS FOR A PARTICULAR PURPOSE or infringement. We expressly disclaim any liability whatsoever for any direct, indirect, consequential, incidental or special damages, including, without limitation, lost revenues, lost profits, losses resulting from business interruption or loss of data, regardless of the form of action or legal theory under which the liability may be asserted, even if advised of the possibility or likelihood of such damages.
If you want to get some boards manufactured, you can get them from PCBWay through this link:

You get my gratitude and cheap, professionally-made and good quality PCBs, I get some credit that will help with this and other projects. You won't even have to worry about the various PCB options, it's all pre-configured for you!
Also, if you still have to register, you can use this link to get some bonus initial credit (and yield me some more).
You can also buy me a coffee if you want:

| Qty | Value | Footprint | References |
|---|---|---|---|
| 5 | 100n | Capacitor_THT:C_Disc_D7.0mm_W2.5mm_P5.00mm | C1, C2, C8, C9, C10 |
| 3 | 1u | Capacitor_THT:CP_Radial_D5.0mm_P2.00mm | C4, C5, C7 |
| 1 | 100 | Inductor_THT:L_Radial_D6.0mm_P4.00mm | L1 |
| 1 | 100K | ReBlast:Pot_Bourns_3306P | RV1 |
| 1 | 100k | Resistor_THT:R_Axial_DIN0207_L6.3mm_D2.5mm_P2.54mm_Vertical | R4 |
| 1 | 1n4148 | Diode_THT:D_DO-35_SOD27_P2.54mm_Vertical_KathodeUp | D1 |
| 1 | 330k | Resistor_THT:R_Axial_DIN0207_L6.3mm_D2.5mm_P2.54mm_Vertical | R3 |
| 1 | 390 | Resistor_THT:R_Axial_DIN0207_L6.3mm_D2.5mm_P2.54mm_Vertical | R5 |
| 1 | 4.7k | Resistor_THT:R_Axial_DIN0207_L6.3mm_D2.5mm_P2.54mm_Vertical | R2 |
| 1 | 4.7u | Capacitor_THT:CP_Radial_D5.0mm_P2.00mm | C3 |
| 1 | 470k | Resistor_THT:R_Axial_DIN0207_L6.3mm_D2.5mm_P2.54mm_Vertical | R1 |
| 1 | 47u | Capacitor_THT:CP_Radial_D6.3mm_P2.50mm | C6 |
| 1 | 74HC139 | Package_DIP:DIP-16_W7.62mm_Socket_LongPads | U2 |
| 1 | 74HC20 | Package_DIP:DIP-14_W7.62mm_Socket_LongPads | U1 |
| 1 | ADC0804 | Package_DIP:DIP-20_W7.62mm_Socket | U6 |
| 1 | LICENSE | ReBlast:cc_by_nc_sa_small | V1 |
| 1 | LOGO | ReBlast:logo | V0 |
| 1 | MOS_8580 | Package_DIP:DIP-28_W15.24mm_Socket | U5 |
| 1 | MOS_8580_Socket | ReBlast:DIP-28_W15.24mm_Socket | J1 |
| 1 | TLC272 | Package_DIP:DIP-8_W7.62mm_Socket | U4 |
| 1 | ZN428E-8 | Package_DIP:DIP-16_W7.62mm_Socket | U3 |
It measures 52.3 × 51.8 mm and has 2 copper layers, 1.6 mm thick.
27 parts, built around the ADC0804LCN, TLC272CD, 74HC139D and 74HC20D. The full list of its parts is on this page, with links to each part's symbol and footprint where PCBKit's library has them.
From the SukkoPera/ReBlast repository on GitHub, at the commit this page was made from: the board is ReBlast.kicad_pcb. PCBKit opens the board in the browser, with nothing to install.
Its repository states no licence, so its author keeps all rights: ask SukkoPera before reusing the design.


ponchick/FC-UNROM512-PRGRAM
UNROM512 + PRG RAM Famicom cartridge PCB


bml3mk5/L3S1VirtualFloppy
Virtual Floppy Card for HITACHI Basic Master Level3 / MB-S1

PrinceYadav78/Single-Board-Computer
A single board computer which can run OS written in C

transistorfet/retroverse
A collection of VME-based hardware and software for modular computers
