
2 layers96.6 × 82.8 mm

 Senvor/Starbie2
A tiny motion-controlled digital pet with RGB mood lighting, basically a pocket-sized Tamagotchi. Totally not a Starboy.
Starbie is an open-source printed circuit board by Senvor, from the Senvor/Starbie repository on GitHub. It is a 2-layer board of 105 × 87 mm with 17 parts on 25 nets, routed with 106 tracks and 24 vias.
It is built around the DHT11. Its parts include 4 resistors, 2 ICs, 2 connectors, 2 switches and 1 diode. It belongs with the lEDs and displays boards and the ESP32 and RISC-V boards of this library.
A tiny motion-controlled digital pet, basically a desktop Tamagotchi. Totally not a Starboy.
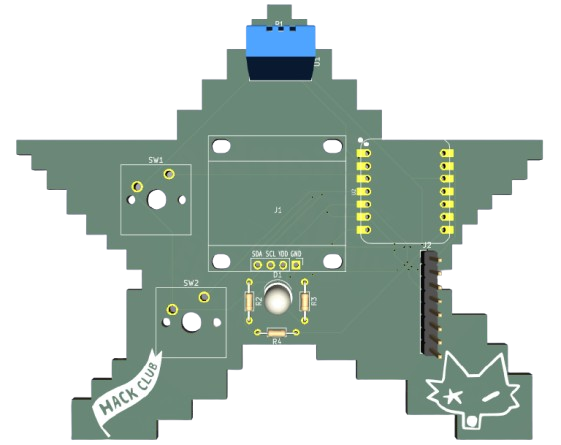
Starbie is a small interactive device built around the XIAO ESP32-C3. It uses a bunch of sensors and other components to make it actually do stuff.
Some of the things packed into it:
I made Starbie for HalfLife, following their Week 1 PCB design tutorial.
Since this is my second hardware project, I wanted to build something a bit more interesting than my first one. Starbie is a tiny motion-controlled digital pet, basically a desktop Tamagotchi (totally not a Starboy).
And yeah, I'm also trying to get that 3D printer prize lol. HalfLife gives me a reason to actually design, build and document my projects instead of leaving them as ideas.
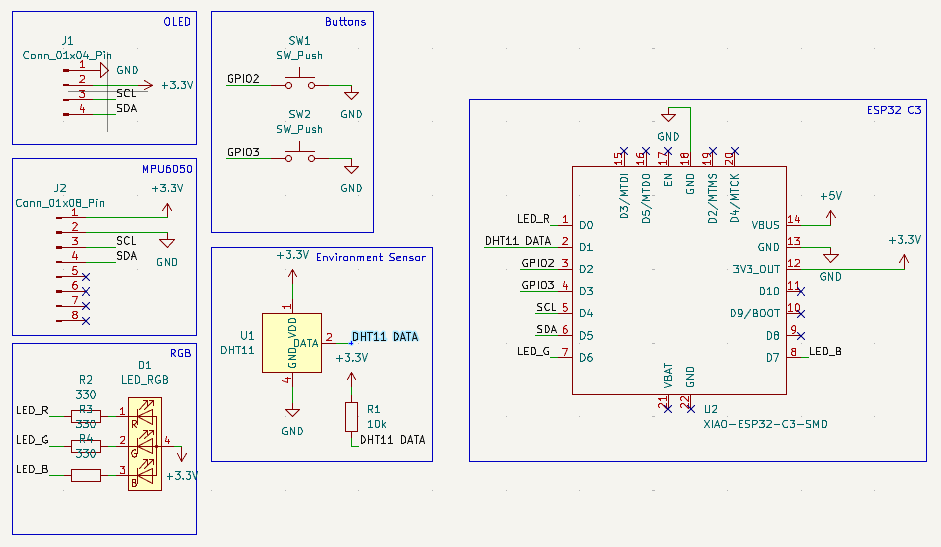
The schematic was made in KiCad and shows how all the components are connected to the XIAO ESP32-C3.
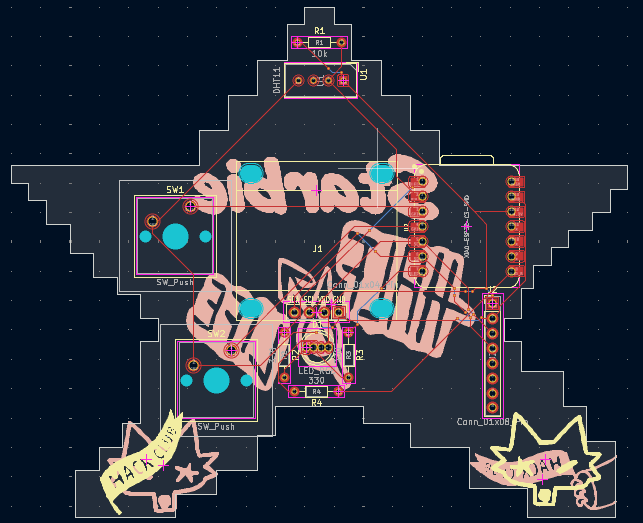
I designed the board using KiCad, with a custom shape and footprints for the components.
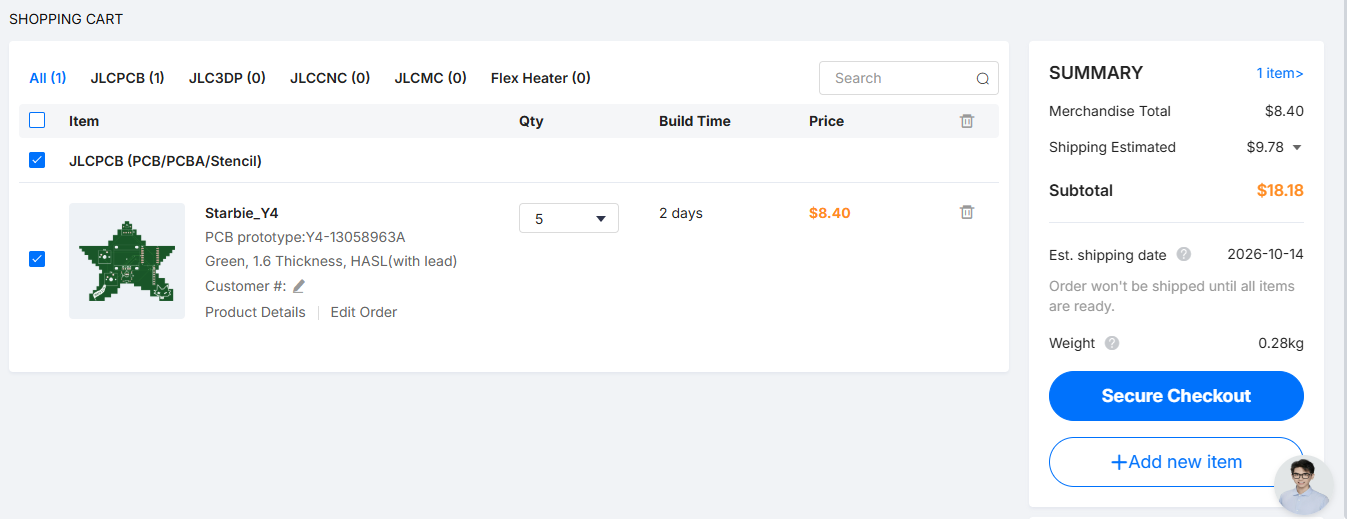
Here's the final manufacturing quote and preview from JLCPCB before it becomes reality:
The firmware is written for the XIAO ESP32-C3 and handles Starbie's sensors, display, RGB LED and buttons. It reads movement data from the MPU6050 and temperature and humidity from the DHT11, with the OLED used to display information.
Starbie has two buttons.
| Button | Pin | What it does |
|---|---|---|
| Button 1 (SW1) | GPIO2 (XIAO D2) | Opens the radial menu. While the menu is open, it confirms the highlighted action. |
| Button 2 (SW2) | GPIO3 (XIAO D3) | Shows or hides the stats screen. It never changes the pet. |
Both buttons are debounced in software (30 ms).
Which physical tilt direction moves the ball to which sector depends on how the MPU6050 is mounted. If the ball moves the wrong way, change SWAP_MPU_AXES, MENU_X_DIRECTION or MENU_Y_DIRECTION at the top of Starbie.ino.
Each action changes the pet's three stats (each stays between 0 and 100):
| Action | Joy | Energy | Fullness | What you see |
|---|---|---|---|---|
| NAP | +1 | +18 | −4 | Starbie stops and sleeps with floating Zs for 48 seconds |
| PLAY | +12 | −9 | −5 | Two fast laps across the screen with hearts |
| FEED | +3 | +2 | +18 | A small wiggle, then a jump |
| PET | +7 | 0 | 0 | A small wiggle, a jump, and hearts |
Shake: on the pet screen, shaking Starbie gives +5 joy, −2 energy and −1 fullness, wakes a sleeping pet, and has a 0.65 second cooldown. Shaking does nothing while the menu or stats screen is open.
Stats are saved to flash after every action and every shake, so Starbie remembers them after a reset. Stats do not drain over time; they only change when you use the menu or shake Starbie.
The RGB LED shows Starbie's mood. The firmware checks the stats in this order and shows the first one that matches:
| Colour | Condition | Meaning |
|---|---|---|
| Yellow | Fullness is 25 or below | Hungry |
| Blue | Energy is 25 or below | Tired |
| Red | Joy is 25 or below | Needs play |
| Green | None of the above (all three stats are above 25) | Happy |
If more than one stat is low, the first row that matches wins (yellow, then blue, then red). The LED is on/off only (no dimming or colour mixing), and yellow is red and green on together.
Press Button 2 to see Starbie's JOY, ENERGY and FULL bars with their numbers, plus the room temperature (°C) and humidity (%) from the DHT11. If the DHT11 has not produced a reading yet, the screen shows --. The temperature and humidity are display-only; they do not affect the pet or the LED.
| Qty | Value | Footprint | References |
|---|---|---|---|
| 6 | LOGO | LOGO | G***, G***, G***, G***, G***, G*** |
| 3 | 330 | Resistor_THT:R_Axial_DIN0204_L3.6mm_D1.6mm_P7.62mm_Horizontal | R2, R3, R4 |
| 2 | SW_Push | Button_Switch_Keyboard:SW_Cherry_MX_1.00u_PCB | SW1, SW2 |
| 1 | 10k | Resistor_THT:R_Axial_DIN0204_L3.6mm_D1.6mm_P7.62mm_Horizontal | R1 |
| 1 | Conn_01x04_Pin | Imported Parts:Display_128x64_096_I2C | J1 |
| 1 | Conn_01x08_Pin | Connector_PinHeader_2.54mm:PinHeader_1x08_P2.54mm_Vertical | J2 |
| 1 | DHT11 | Sensor:Aosong_DHT11_5.5x12.0_P2.54mm | U1 |
| 1 | LED_RGB | LED_THT:LED_D5.0mm-4_RGB | D1 |
| 1 | XIAO-ESP32-C3-SMD | Imported Parts:XIAO-ESP32-C6-DIP | U2 |
It measures 105 × 87 mm and has 2 copper layers, 1.6 mm thick.
17 parts, built around the DHT11. The full list of its parts is on this page, with links to each part's symbol and footprint where PCBKit's library has them.
From the Senvor/Starbie repository on GitHub, at the commit this page was made from: the board is pcb/Starbie.kicad_pcb and its schematic pcb/Starbie.kicad_sch. PCBKit opens the board in the browser, with nothing to install.
Its repository states no licence, so its author keeps all rights: ask Senvor before reusing the design.

lansidev/conveyor-belt
Miniature 3D printed conveyor belt for simulation and fun working with sensors, all controllable with Raspberry Pi


ebrithiljonas/OMG_PCB
All in One PCB for the OpenMQTTGateway Project

GeorgK/SniffingTrinket
A room climate monitor using the Adafruit Trinket Pro

bhaskar9980/Guardian
Guardian is an advanced, fully automated hydroponics system designed to optimize plant growth and maximize yield.

Twistx77/Firefly
Open WIFI-enabled RGB lamp with temperature, humidity, suspended air particles and eCO2 sensors.

unla-investigacion-desarrollo/ecosistema-iot
Antes de desarrollar el sistema final, realizamos una etapa de exploración donde investigamos y experimentamos con las siguientes tecnologías: