
2 layers100 × 93 mm
Pico breadboard
rustemsevik/pico-Breadboard-Kit
This is a Raspberry Pi Pico breadboard kit designed for students to learn and experiment with basic electronics and microcontroller programming.
24 parts1MIT

 rustemsevik/pico-Breadboard-Kit1
This is a Raspberry Pi Pico breadboard kit designed for students to learn and experiment with basic electronics and microcontroller programming.
Pico breadboard is an open-source printed circuit board by rustemsevik, from the rustemsevik/pico-Breadboard-Kit repository on GitHub, published under the MIT licence. It is a 2-layer board of 100 × 100 mm with 48 parts on 52 nets, routed with 242 tracks and 109 vias.
It is built around the BC817. Its parts include 13 connectors, 5 resistors, 5 switches, 4 diodes and 2 ICs. It belongs with the RP2040 boards of this library.
This is a Raspberry Pi Pico breadboard kit designed for students to learn and experiment with basic electronics and microcontroller programming.
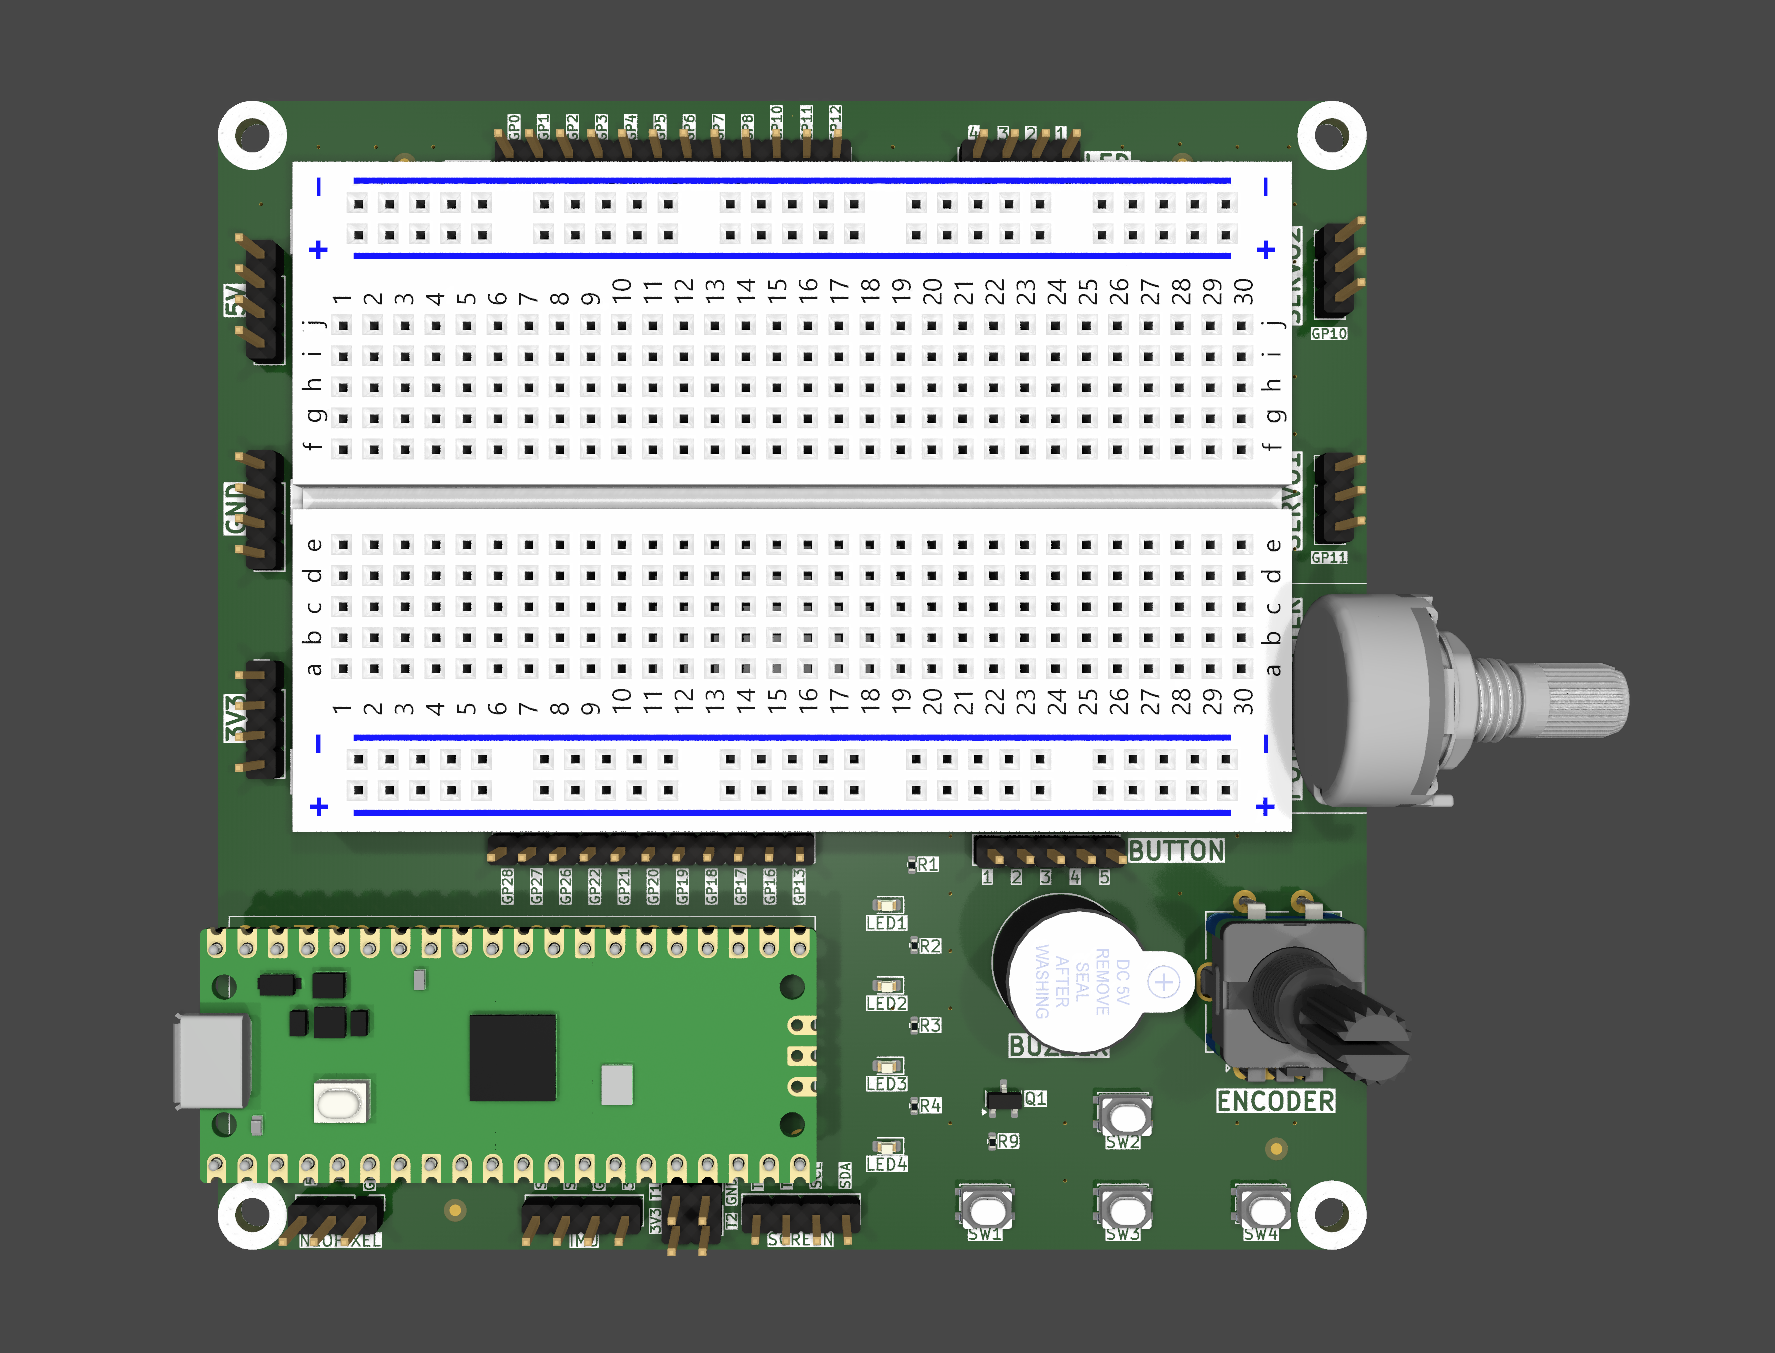
See the included v2/pico-breadboard.pdf for the detailed wiring.
This kit is ideal for beginner to intermediate-level microcontroller projects, robotics experiments, and educational settings.
| Qty | Value | Footprint | References |
|---|---|---|---|
| 6 | LOGO | Library:LOGO | G***, G***, G***, G***, G***, G*** |
| 4 | Fiducial | Library:Fiducial_1mm_Mask2mm | FID1, FID2, FID3, FID4 |
| 4 | LED | Library:LED_0603_1608Metric | LED1, LED2, LED3, LED4 |
| 4 | MountingHole | Library:MountingHole_3mm | H1, H2, H3, H4 |
| 4 | R_US | Library:R_0402_1005Metric | R1, R2, R3, R4 |
| 4 | SW_SPST | Library:SW_SPST_PTS810 | SW1, SW2, SW3, SW4 |
| 3 | Conn_01x03 | Library:PinHeader_1x03_P2.54mm_Vertical | J9, J11, J12 |
| 1 | 1K | Library:R_0402_1005Metric | R9 |
| 1 | 3.3V CONNECTOR | Library:PinHeader_1x04_P2.54mm_Vertical | J5 |
| 1 | 5V CONNECTOR | Library:PinHeader_1x04_P2.54mm_Vertical | J3 |
| 1 | BC817 | Library:SOT-23 | Q1 |
| 1 | BREADBOARD | Library:Breadboard | U2 |
| 1 | Buzzer | Library:Buzzer_12mm7.6 | BZ1 |
| 1 | Conn_01x05 | Library:PinHeader_1x05_P2.54mm_Vertical | J1 |
| 1 | Conn_01x11 | Library:PinHeader_1x11_P2.54mm_Vertical | J7 |
| 1 | Conn_01x12 | Library:PinHeader_1x12_P2.54mm_Vertical | J6 |
| 1 | GND CONNECTOR | Library:PinHeader_1x04_P2.54mm_Vertical | J4 |
| 1 | LED | Library:PinHeader_1x04_P2.54mm_Vertical | J2 |
| 1 | MPU6050 CONNECTOR | Library:PinHeader_1x04_P2.54mm_Vertical | J10 |
| 1 | Pico | Library:RPi_Pico_SMD_TH | U1 |
| 1 | Polarity Select | Connector_PinHeader_2.54mm:PinHeader_2x02_P2.54mm_Vertical | J13 |
| 1 | R_Potentiometer | Library:Potentiometer_Omeg_PC16BU_Horizontal | RV1 |
| 1 | RotaryEncoder_Switch_MP | Library:RotaryEncoder_Alps_EC11E-Switch_Vertical_H20mm | SW5 |
| 1 | SCREEN CONNECTOR | Library:PinHeader_1x04_P2.54mm_Vertical | J8 |
The 46 most common of 48 parts.
rustemsevik/pico-Breadboard-Kit
This is a Raspberry Pi Pico breadboard kit designed for students to learn and experiment with basic electronics and microcontroller programming.

W0rthlessS0ul/nRF24_jammer
The nRF24 jammer is a powerful tool that requires an ESP32 and configurable numbers of NRF24 modules to assemble.

Ardumower/ardumower
Develop an open source robotic lawn mower (HW+SW reference platform)

qbancoffee/imac_g3_ivad_board_init
iMac G3 IVAD board initialization with an arduino


BitDogLab/BitDogLab
Open-source educational hardware for embedded systems, programming, electronics, and physical computing.


It measures 100 × 100 mm and has 2 copper layers, 1.6 mm thick.
48 parts, built around the BC817. The full list of its parts is on this page, with links to each part's symbol and footprint where PCBKit's library has them.
From the rustemsevik/pico-Breadboard-Kit repository on GitHub, at the commit this page was made from: the board is v2/hardware/pico-breadboard.kicad_pcb and its schematic v1/hardware/pico-breadboard.kicad_sch. PCBKit opens the board in the browser, with nothing to install.
Its repository publishes it under the MIT licence: you may reuse it on that licence's terms (keep the author's notice, and for a copyleft licence share your changes alike).