2 layers73.7 × 55.9 mm
F ramune arduino
obskyr/f-ramune
A device for testing and programming FRAM chips! Finally you can be sure that FRAM you bought from China works.
15 parts6

 obskyr/f-ramune6
A device for testing and programming FRAM chips! Finally you can be sure that FRAM you bought from China works.
F ramune avr is an open-source printed circuit board by obskyr, from the obskyr/f-ramune repository on GitHub. It is a 2-layer board of 63.5 × 45.5 mm with 27 parts on 60 nets, routed with 780 tracks and 73 vias.
It is built around the ATMEGA328P-AU, MCP2221A-I/P and 74HC595, with the IRL520NPBF among its other parts. Its parts include 8 capacitors, 6 resistors, 5 ICs, 2 diodes and 2 connectors. It belongs with the AVR (ATmega, ATtiny) boards of this library.


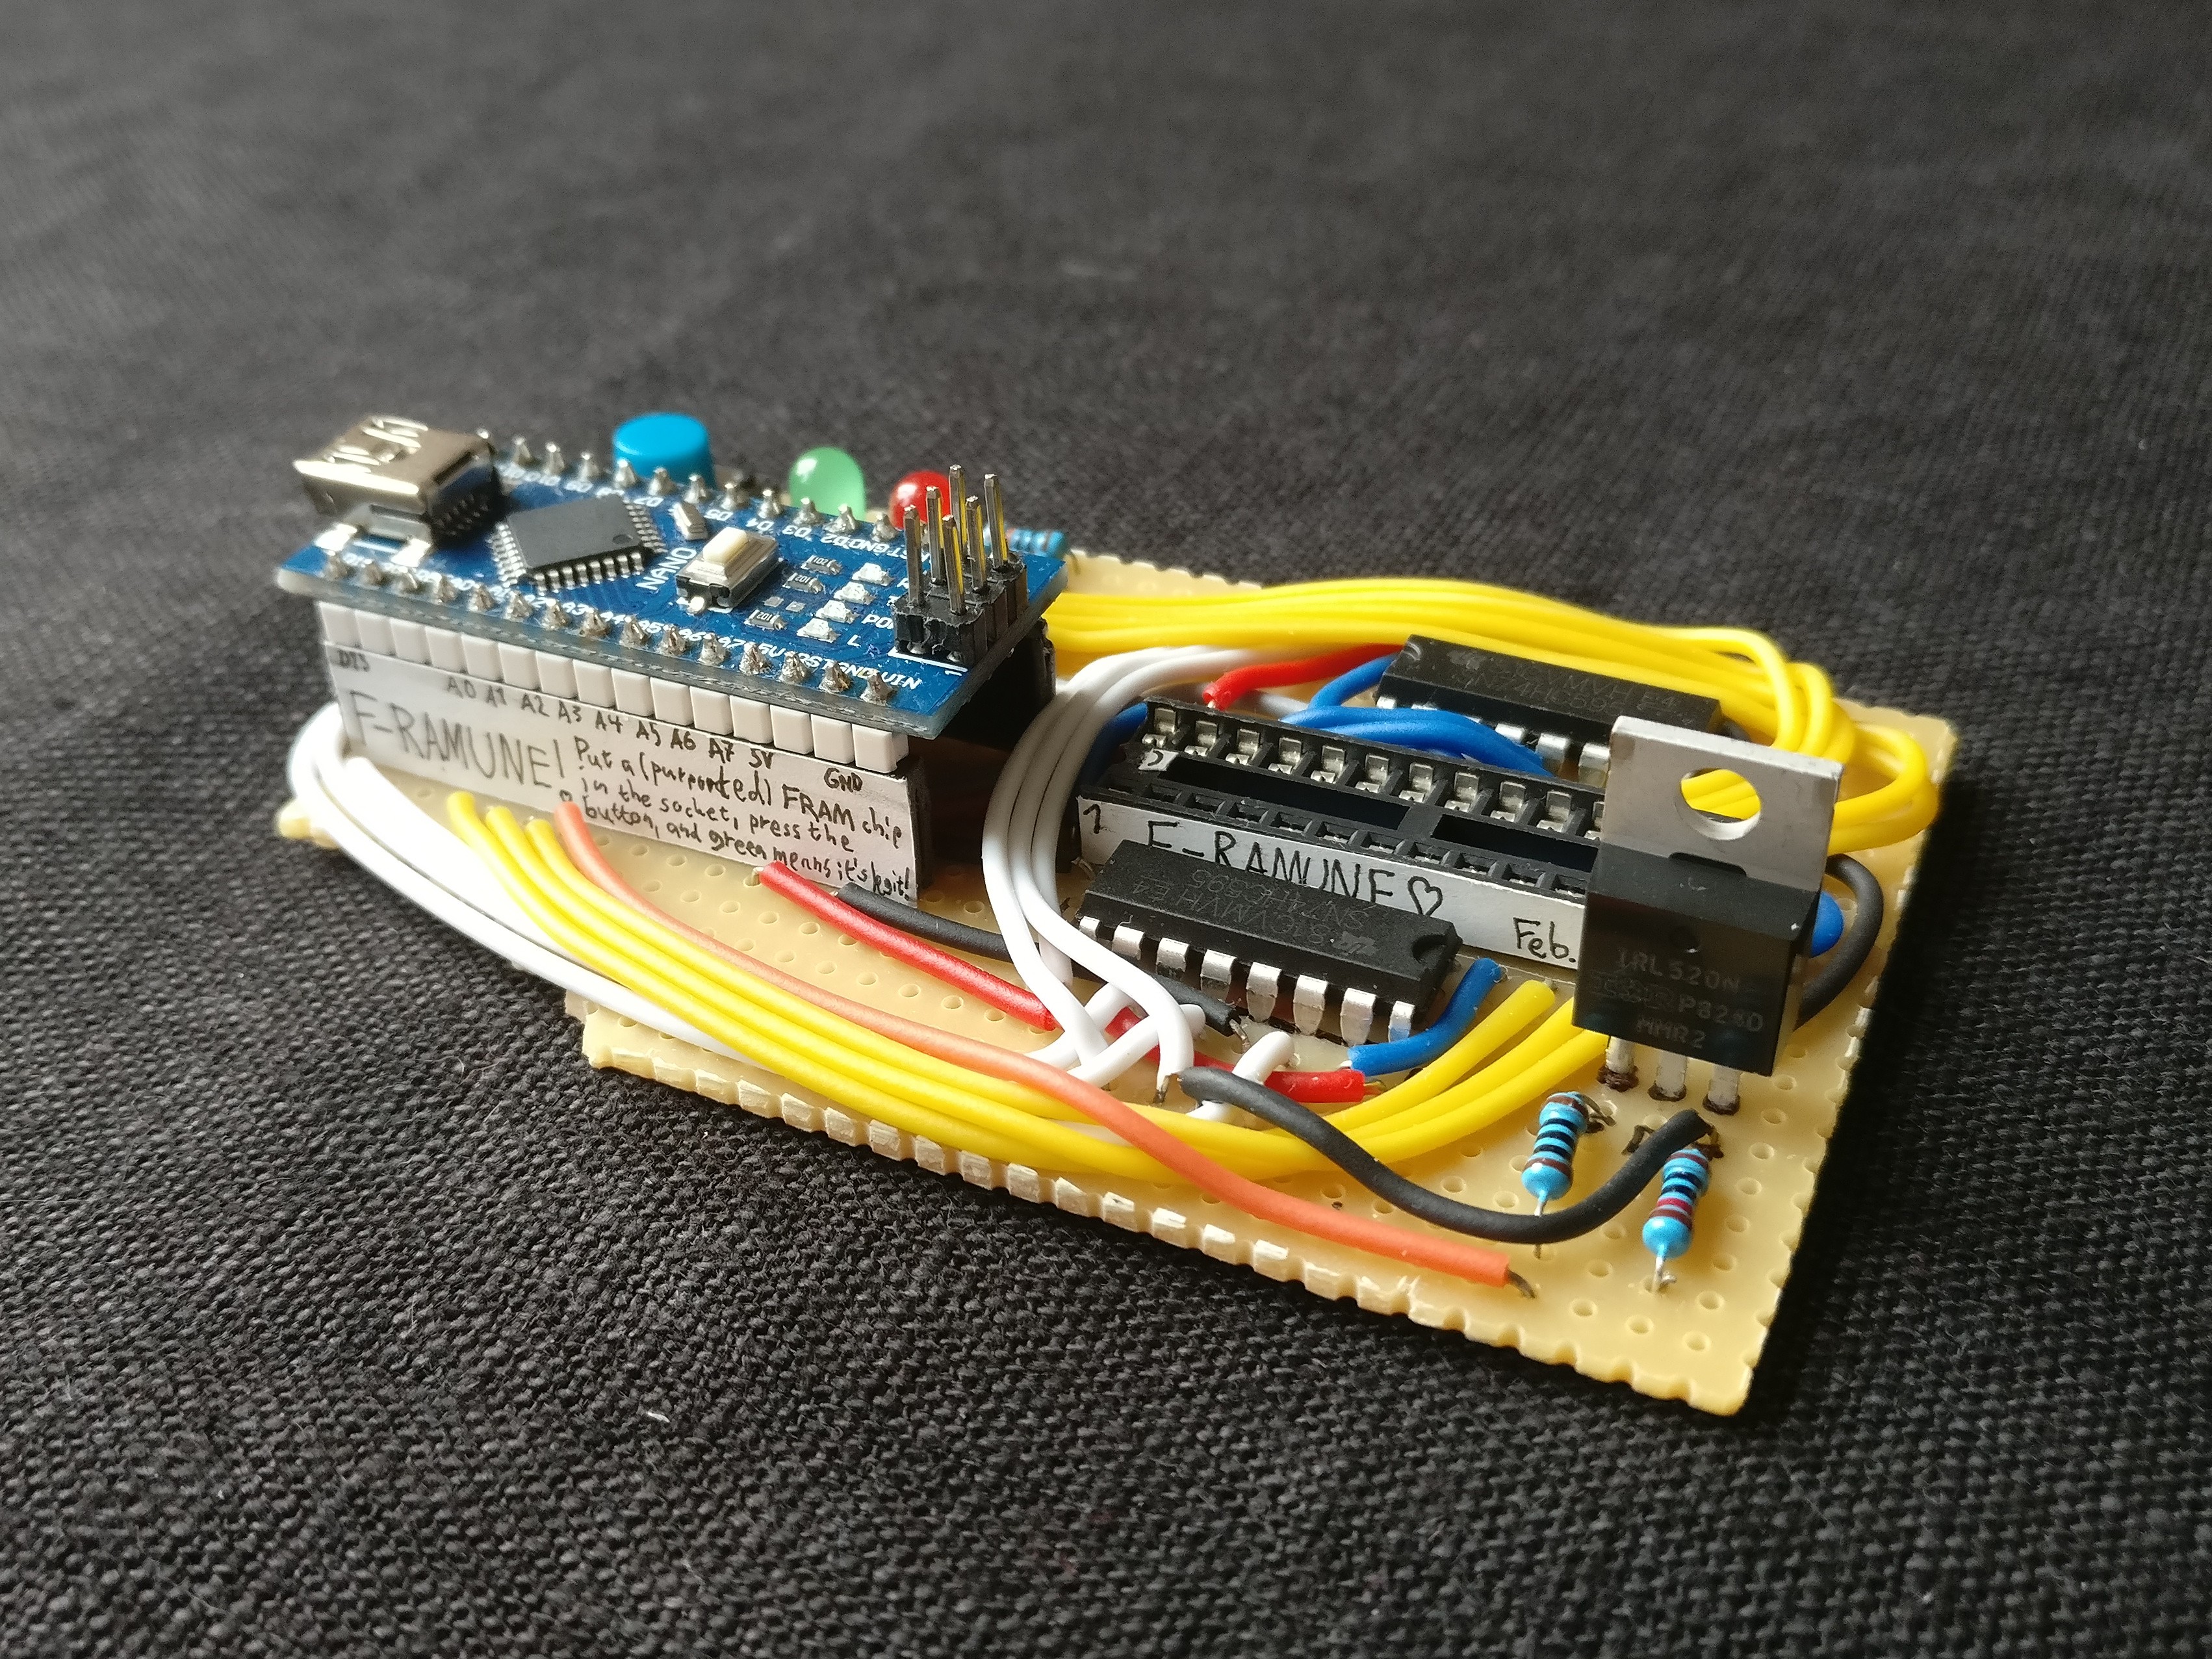
F-Ramune is a device that lets you test and program 28-pin FRAM chips (e.g. the FM1808 family)! It lets you:
It features a reprogrammable pushbutton that lets you quickly test chips – out of the box, it's set to check that a chip is 32 KiB of genuine FRAM in full working order – and a serial interface with accompanying software that lets you program your memory chips from your PC.
I made this to test FM1808s of dubious (i.e. cheap Chinese) origin so that the Game Boy cartridge immortalization mod (link to come) would become more feasible and accessible. I expect that to be the main use of F-Ramune, but it's written in an extensible fashion – if you want to test or program FRAM (or SRAM!) in a different form factor or pinout, not much needs to be changed.
Since F-Ramune is a physical device, you'll first need to build that device. Instructions for this can be found in the hardware directory of the repo. At the moment, there's no PCB version, so it's fairly involved – you have to manually route it on stripboard or breadboard – but it's more than doable.
Once you've built the device, you need to upload the firmware to it. For user-friendliness, F-Ramune's firmware is Arduino-based! Open software.ino (in the software directory) in the Arduino IDE, set the board to "Arduino Nano", and click the "upload" button. Bam! Your F-Ramune is now ready to go!
Put the chip you want to test in the socket. Press the button to test the chip. Out of the box, upon pressing the button, the LEDs will possibly flash back and forth a bit while testing, and finally indicate:
The function of the button can be reprogrammed in software.ino, if you'd like to check for other traits.
Plug the F-Ramune Arduino into your PC, and put the chip you want to test in the socket. Using the command-line program framune.py (found in the software directory; requires Python 3) , you can read from, write to, and analyze the properties of the chip. Run framune.py --help for details.
F-Ramune is just one part of a larger project, and it's fairly niche, so my instructions here are more terse than they usually are. But fear not! If you have any questions, there are any issues, or you just want to talk, you can contact me in the following ways:
For a quick response, writing to me on Twitter is your best bet. If you built F-Ramune, especially, I would love to hear about it!
Enjoy! ☆
| Qty | Value | Footprint | References |
|---|---|---|---|
| 8 | 0.1uF | f-ramune:C_0603_1608Metric_Pad1.05x0.95mm_HandSolder | C1, C2, C3, C4, C5, C6, C7, C8 |
| 3 | 10kΩ | f-ramune:R_0603_1608Metric_Pad1.05x0.95mm_HandSolder | R3, R5, R6 |
| 2 | 330Ω | f-ramune:R_0603_1608Metric_Pad1.05x0.95mm_HandSolder | R1, R2 |
| 2 | 74HC595 | f-ramune:SOIC-16_3.9x9.9mm_P1.27mm | U1, U2 |
| 1 | 100Ω | f-ramune:R_0603_1608Metric_Pad1.05x0.95mm_HandSolder | R4 |
| 1 | 16Mhz | f-ramune:Crystal_SMD_HC49-SD_HandSoldering | Y1 |
| 1 | ATmega328P-AU | f-ramune:TQFP-32_7x7mm_P0.8mm_HandSolder | U4 |
| 1 | FRAM Socket (DIP-28) | f-ramune:ZIF_Socket_DIP-28_With_Alternatives | U3 |
| 1 | Green | f-ramune:LED_0603_1608Metric_Pad1.05x0.95mm_HandSolder | D2 |
| 1 | IRL520N | f-ramune:TO-220-3_Vertical | Q1 |
| 1 | ISP Header | f-ramune:PinHeader_2x03_P2.54mm_Vertical | J1 |
| 1 | LOGO | f-ramune:Logo_OpenSourceHW | G*** |
| 1 | MCP2221A | f-ramune:SOIC-14_3.9x8.7mm_P1.27mm | U5 |
| 1 | Red | f-ramune:LED_0603_1608Metric_Pad1.05x0.95mm_HandSolder | D1 |
| 1 | SW_Push | f-ramune:SW_Push_1P1T_NO_CK_KSC6xxJ | SW1 |
| 1 | USB Type-B Port | f-ramune:USB_B_OST_USB-B1HSxx_Horizontal | J2 |
obskyr/f-ramune
A device for testing and programming FRAM chips! Finally you can be sure that FRAM you bought from China works.

inventor02/led-strip-controller
Pi Pico/RP2040-based 12V DC LED strip controller


bigbass1997/PICTAS
Low-cost replay device for playing back Tool Assisted Speedruns on real hardware

bigbass1997/remote64
Provides a method for N64 homebrew developers to test their roms on remote hardware


It measures 63.5 × 45.5 mm and has 2 copper layers, 1.6 mm thick.
27 parts, built around the ATMEGA328P-AU, MCP2221A-I/P, 74HC595 and IRL520NPBF. The full list of its parts is on this page, with links to each part's symbol and footprint where PCBKit's library has them.
From the obskyr/f-ramune repository on GitHub, at the commit this page was made from: the board is hardware/pcb_avr/f-ramune_avr.kicad_pcb. PCBKit opens the board in the browser, with nothing to install.
Its repository states no licence, so its author keeps all rights: ask obskyr before reusing the design.