
2 layers19 × 93 mm

 nezumee/zebra53
Zebra, adjustable column stagger keyboard
Zebra twohead is an open-source printed circuit board by nezumee, from the nezumee/zebra repository on GitHub. It is a 2-layer board of 38.1 × 43.2 mm with 18 parts on 25 nets, routed with 96 tracks and 2 vias.
Its parts include 3 resistors, 3 connectors, 2 ICs, 1 diode and 1 switch. It belongs with the AVR (ATmega, ATtiny) boards of this library.
Zebra, adjustable column stagger keyboard
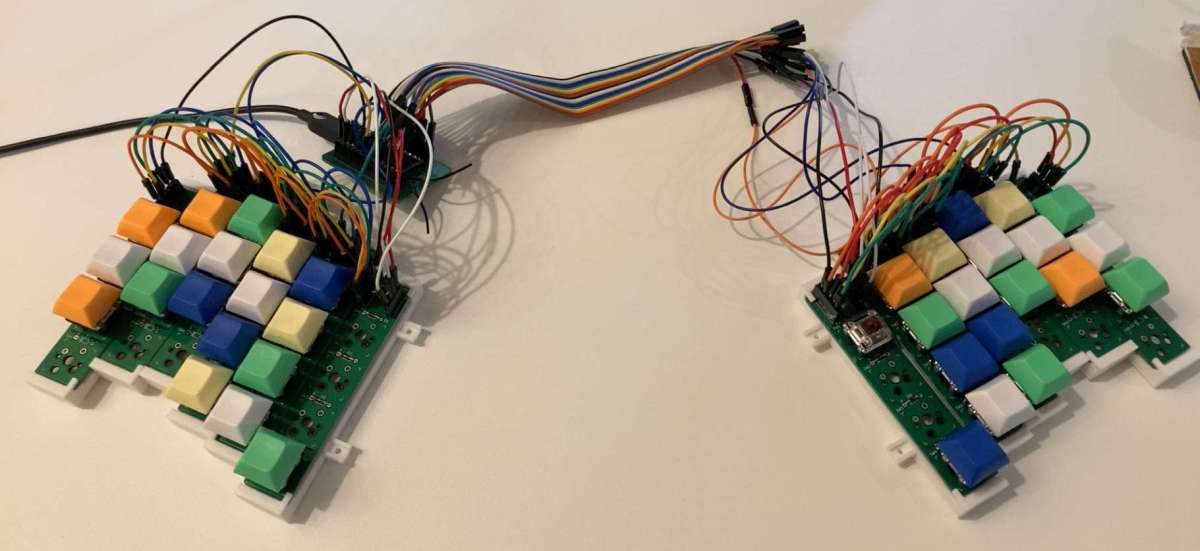
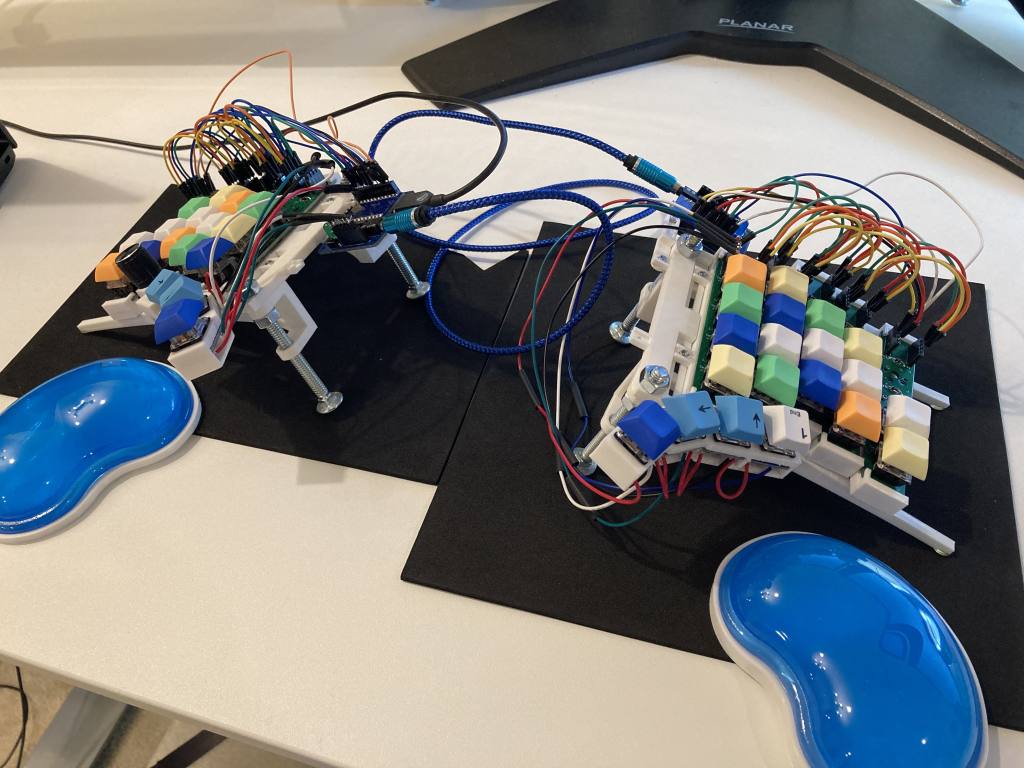
Zebra is a column staggered keyboard with independent PCBs for every column, allowing them to be put together in different positions or combinations without remaking any components or resoldering.
For pictured configuration:
Solder the ProMicro socket. Make sure to do it on the right side of the PCB depending on the way the pins on your ProMicro are oriented (Pin 1 is square on the PCB). My ProMicro has pins soldered so it's mounted upside down, with the MCU facing downwards
Solder the jumper headers on the same side
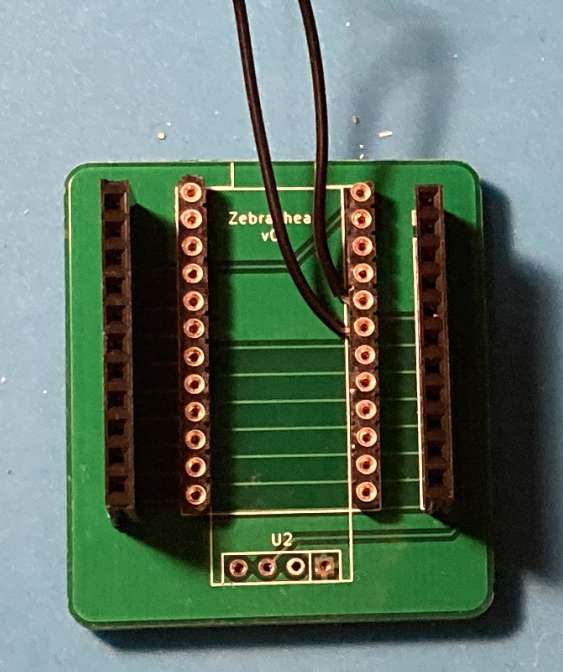
(ignore the wires in the picture)
Solder the diodes, switch sockets and jumper headers
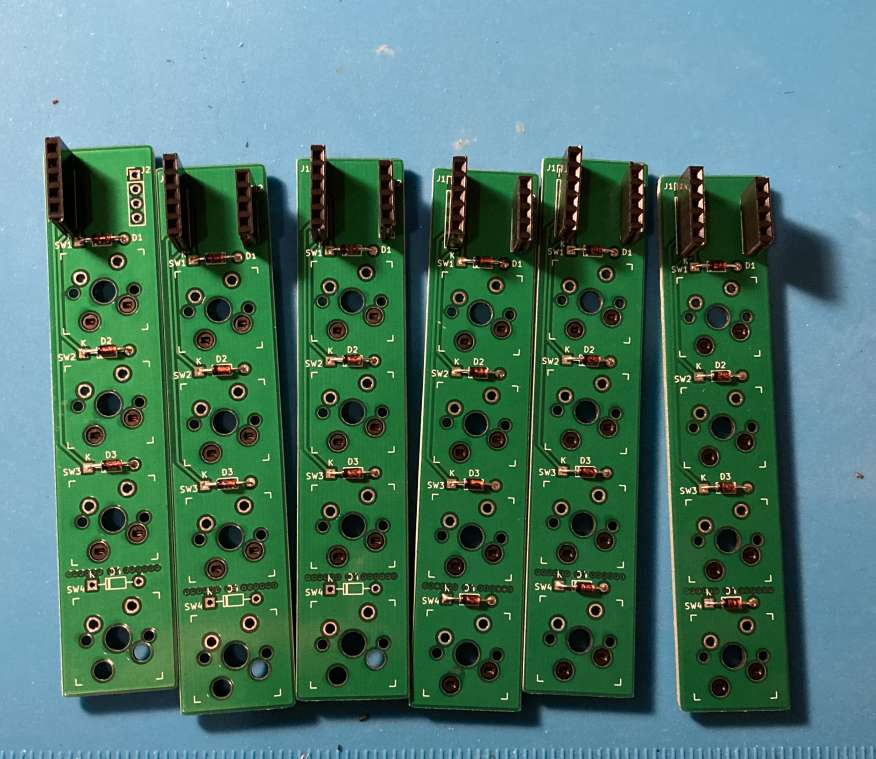
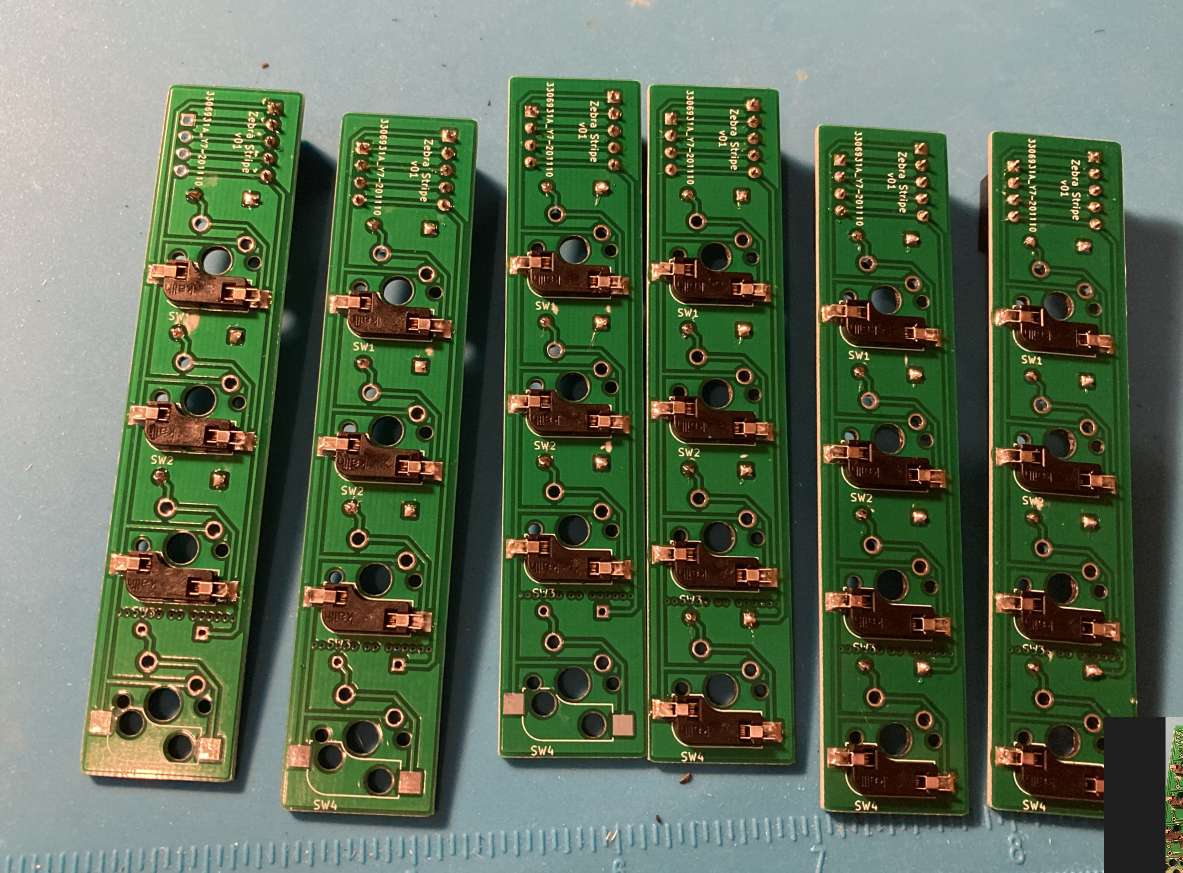
You can skip soldering the diodes and sockets if you're not planning to use some switches (lower left).
Here's how the wires must be connected:
Head
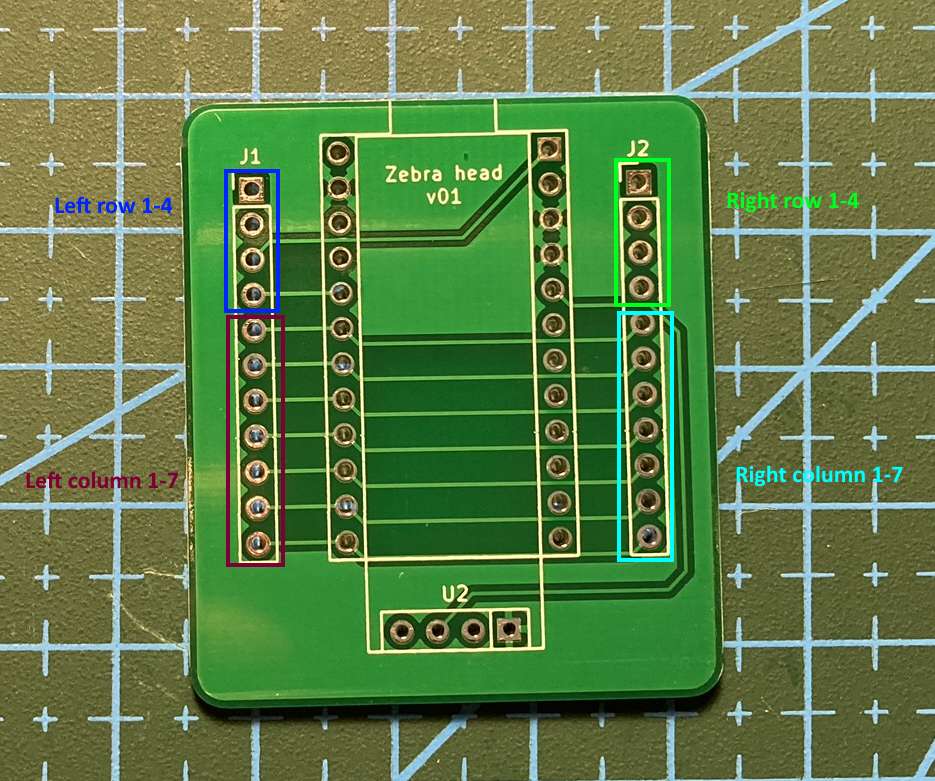
Note that the row wires are different between the left and right sides, don't connect them to each other!
Stripes
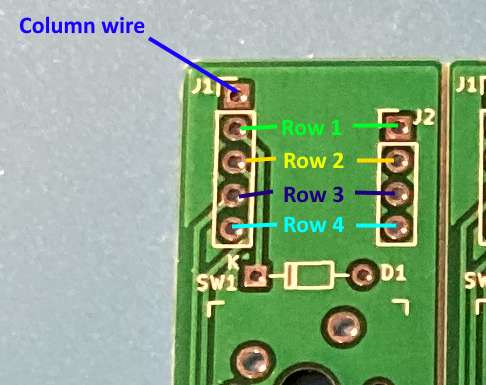
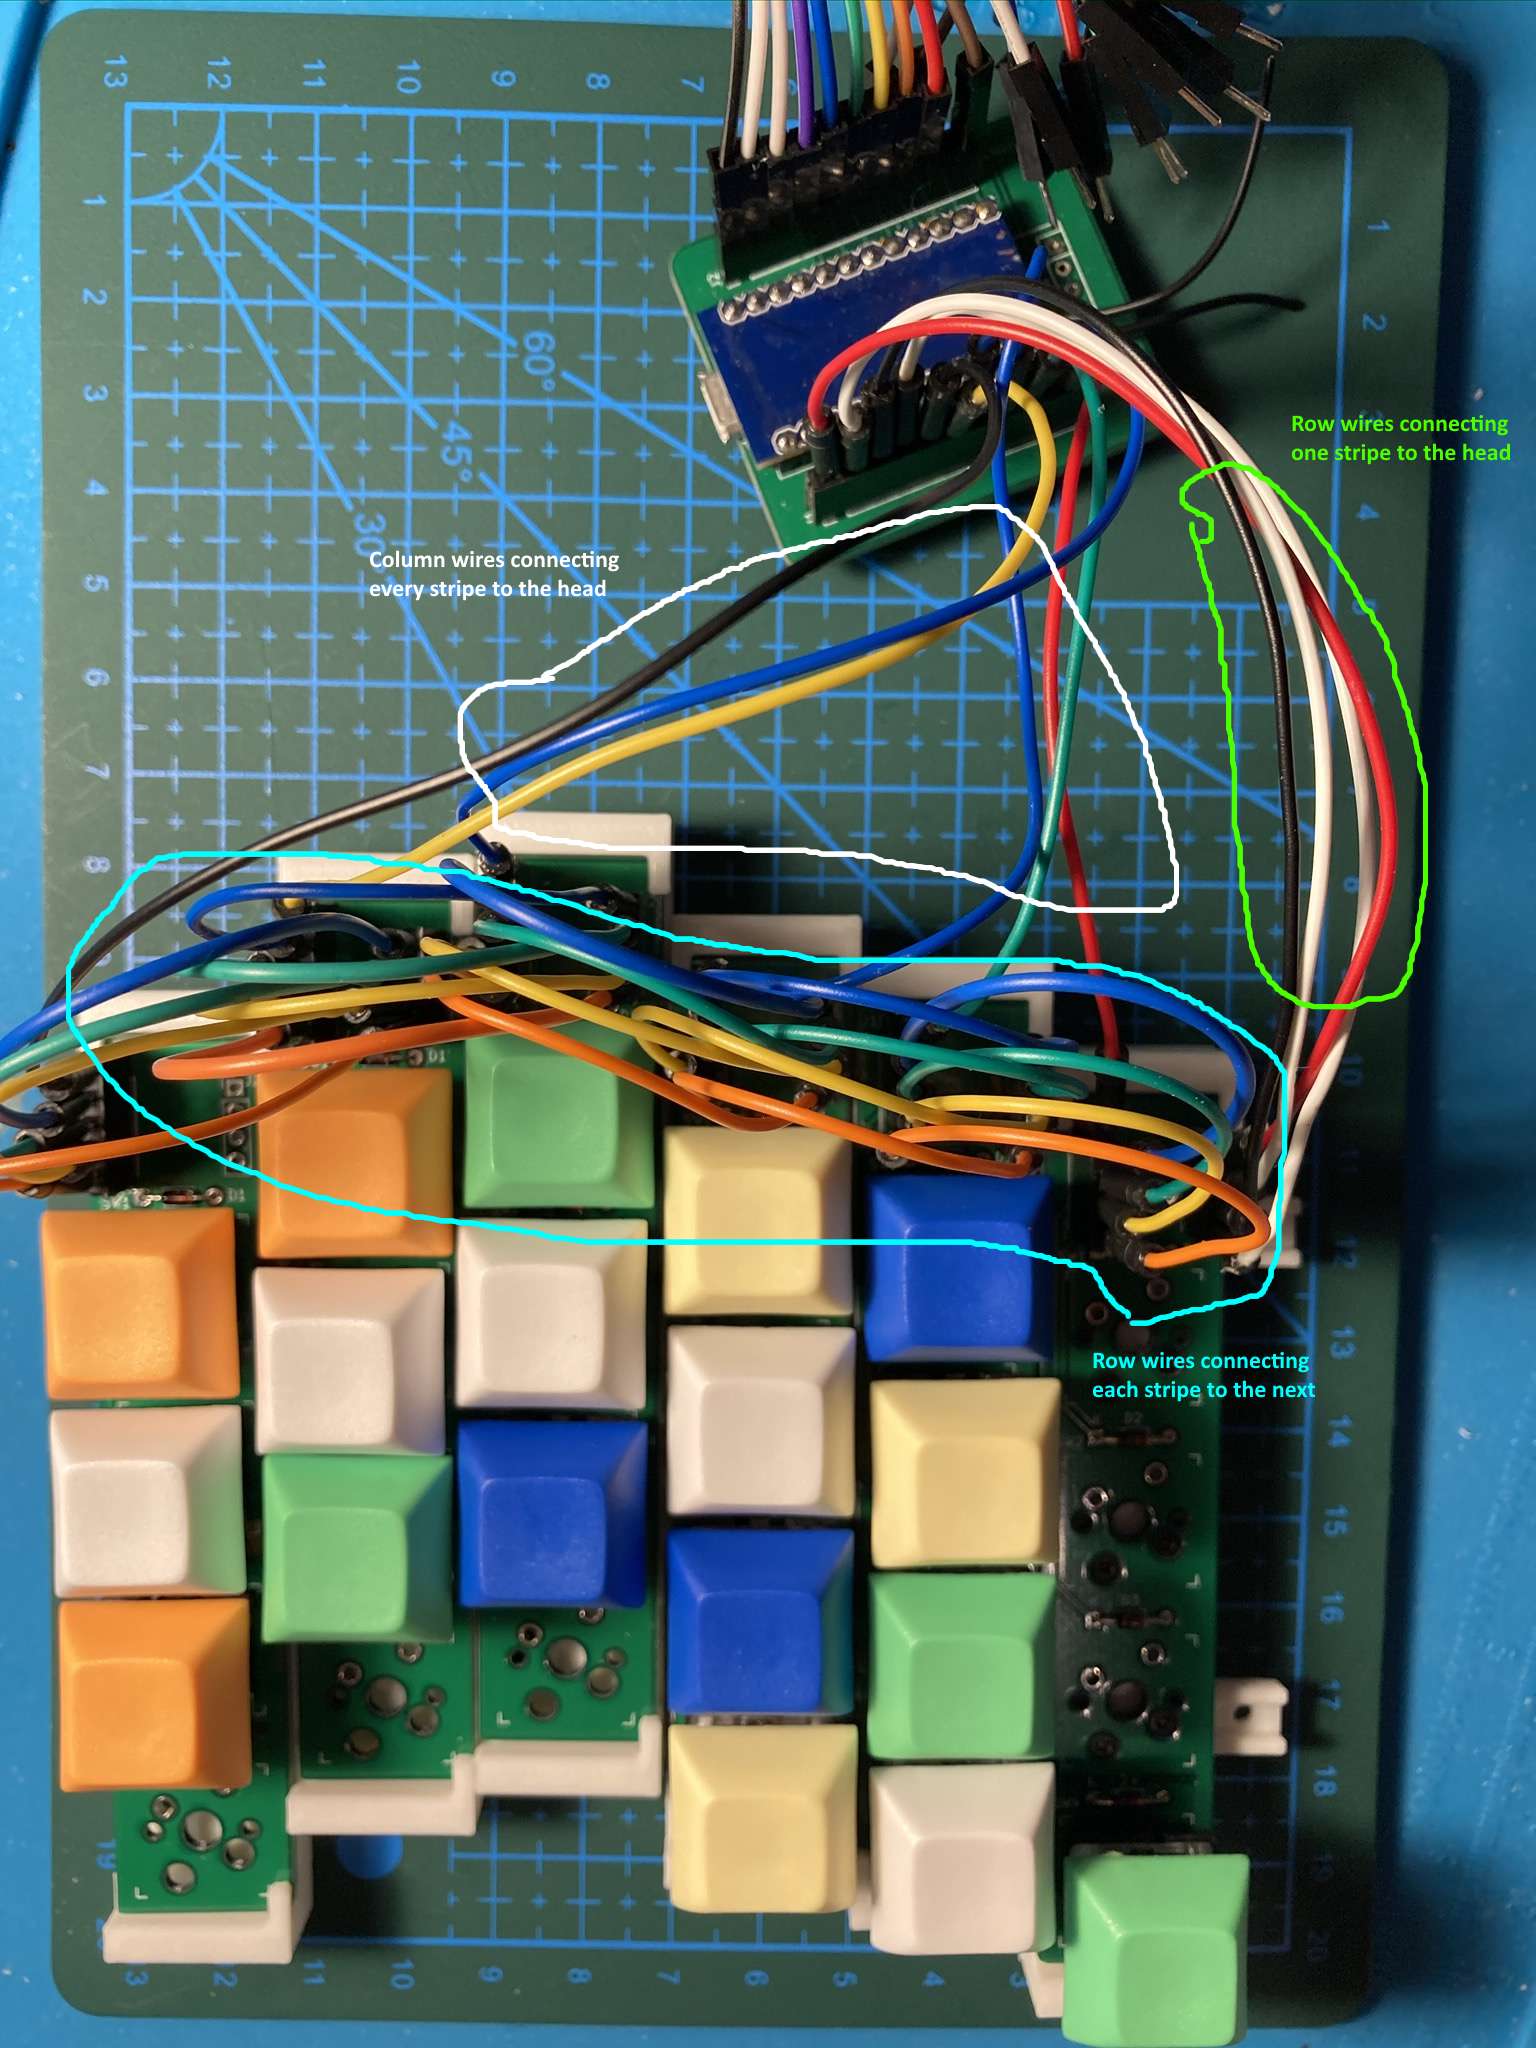
Overview of connections:
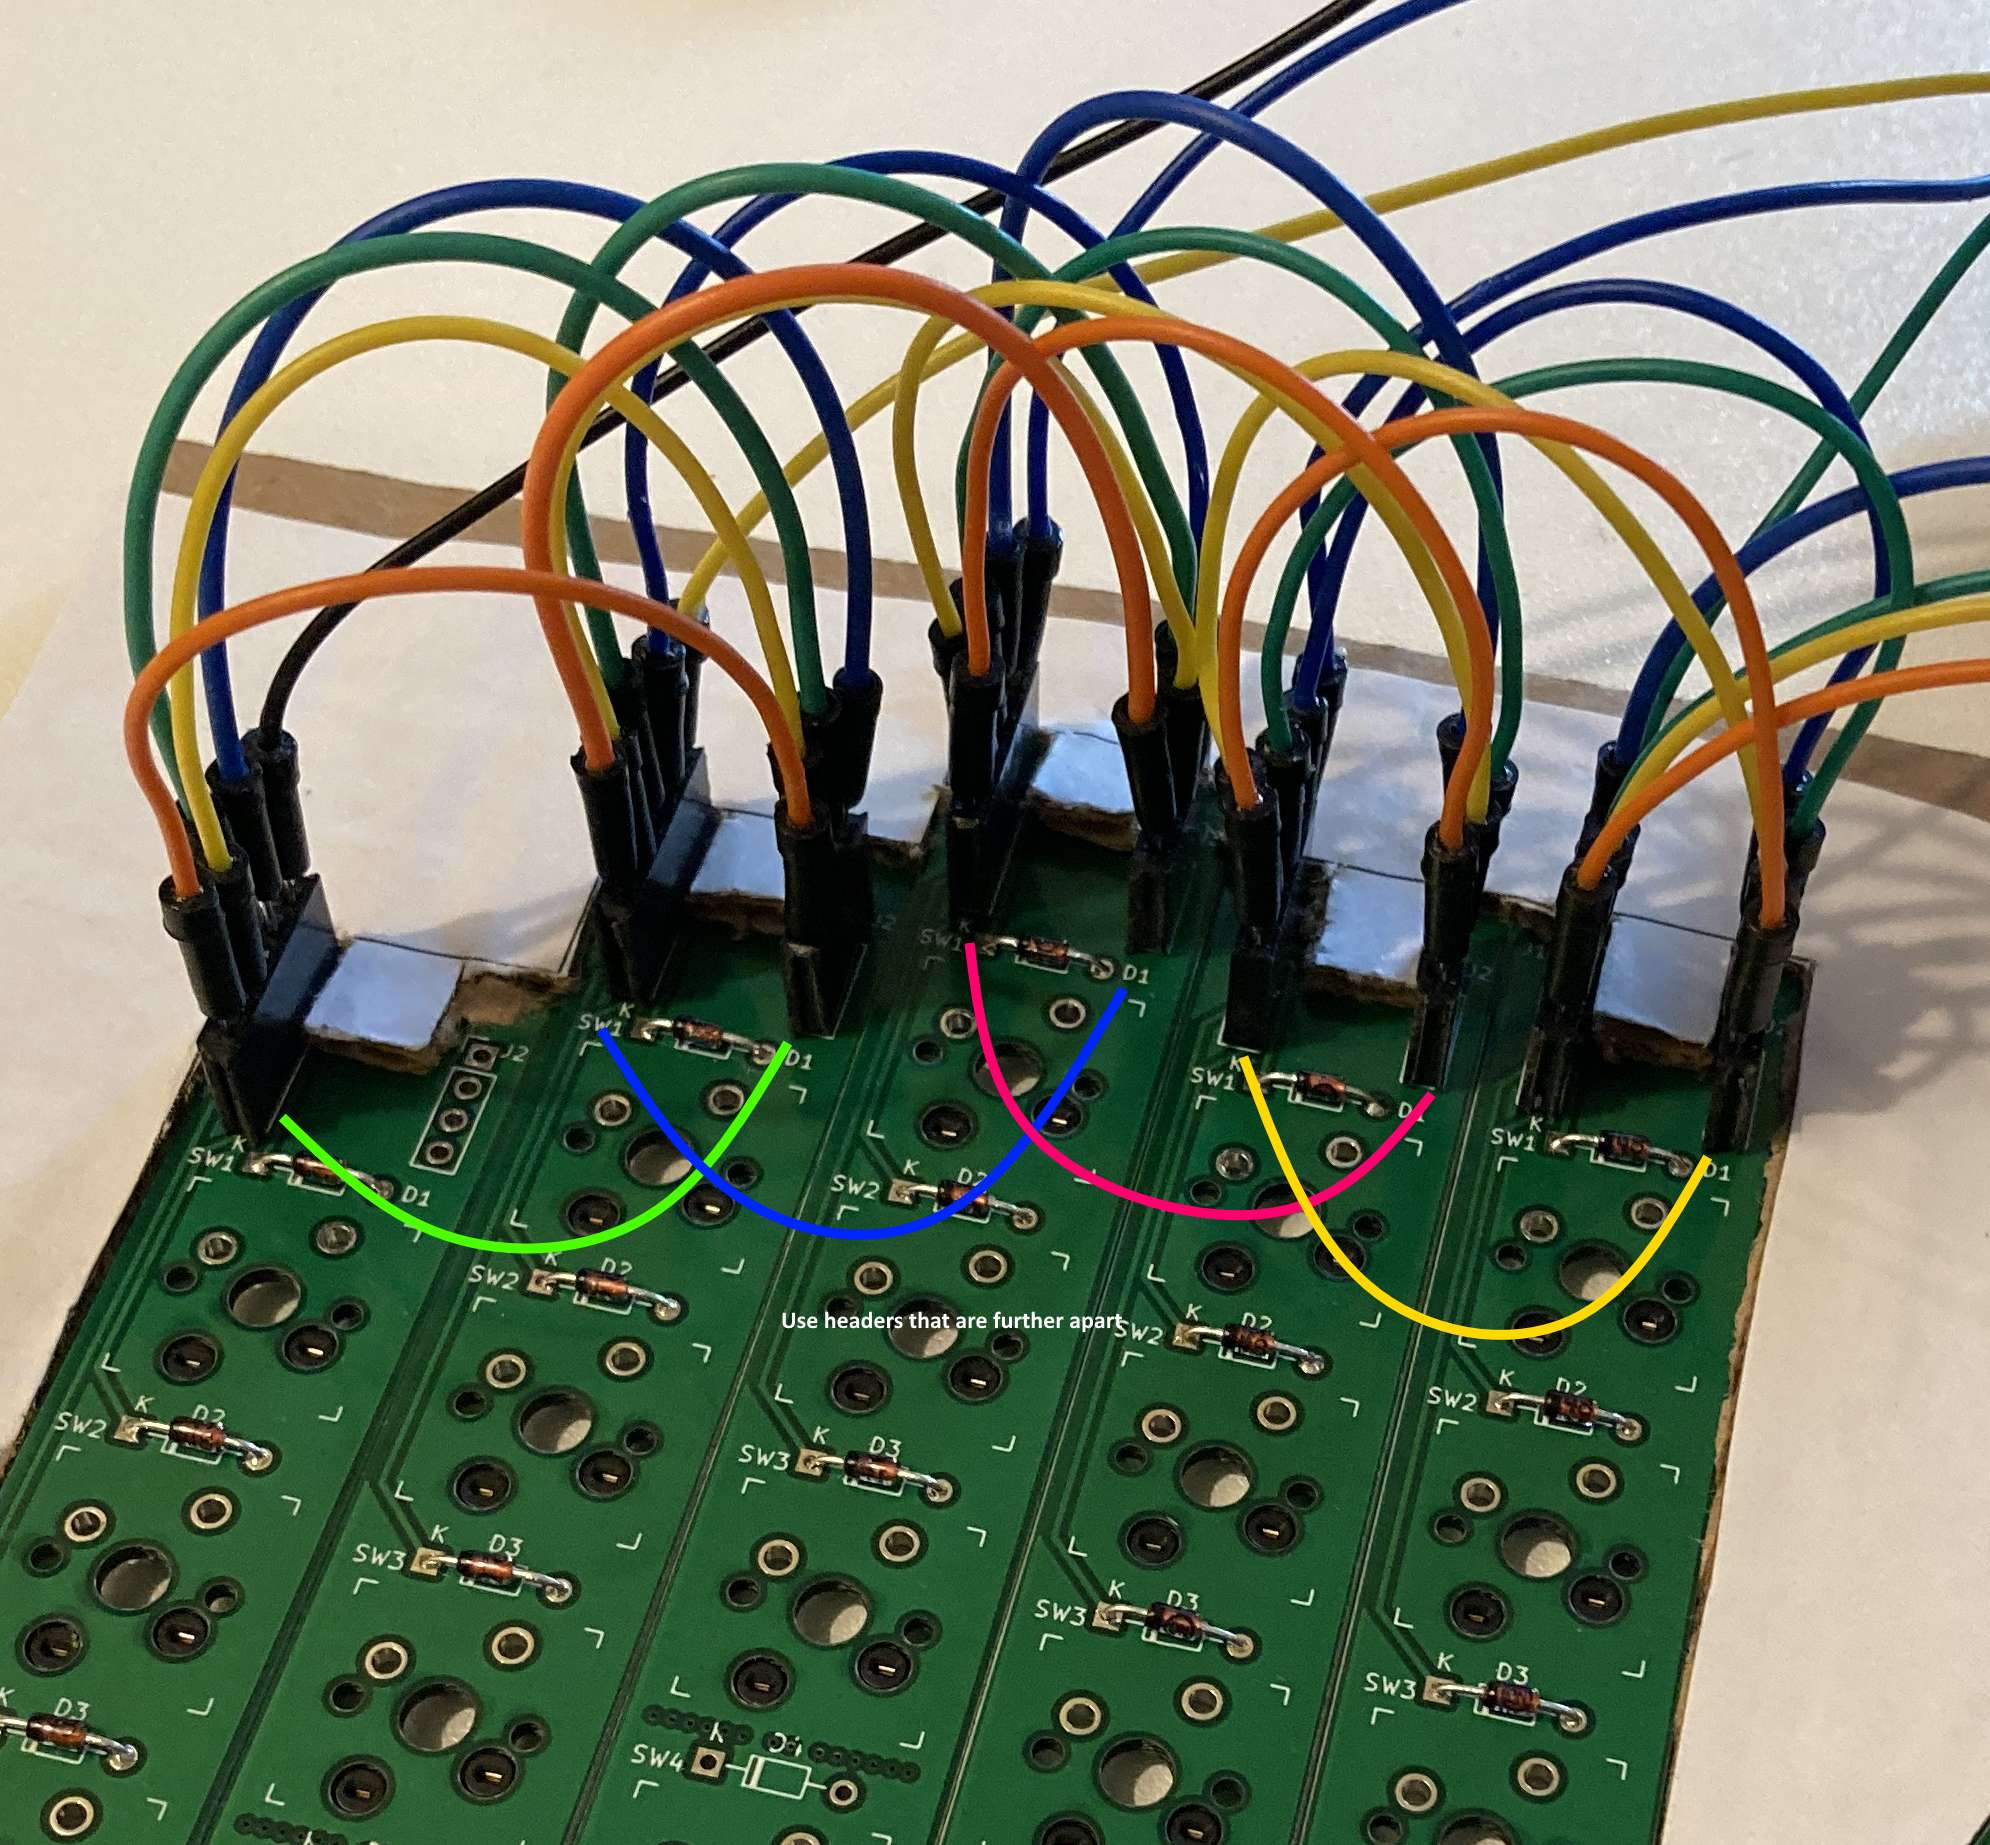
When connecting row wires between stripes, use the headers that are further apart so that the wires don't need to bend as much when the columns are arranged next to each other:
Now the difficult part - putting the stripes in place.
Option 1: cut the shape out of cardboard that you want to place the stripes in, put some sticky tape at the back (glue side up), and stick the column boards to it:
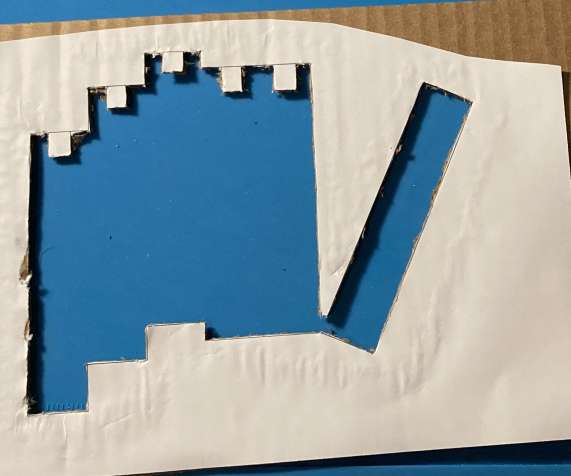
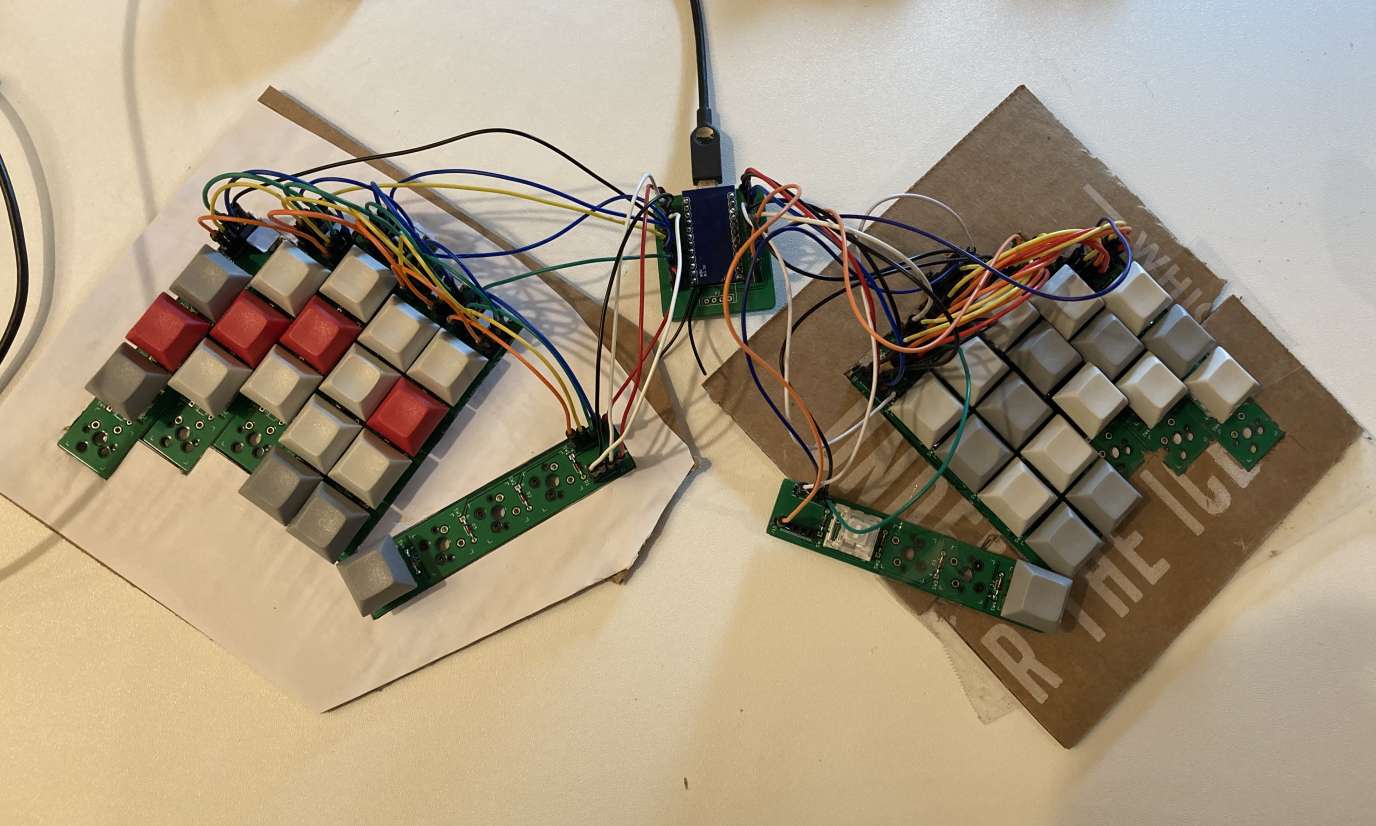
A template is available in cardboard.svg file.
Option 2: 3d print stripe holders, screw them together and insert the stripe PCBs:
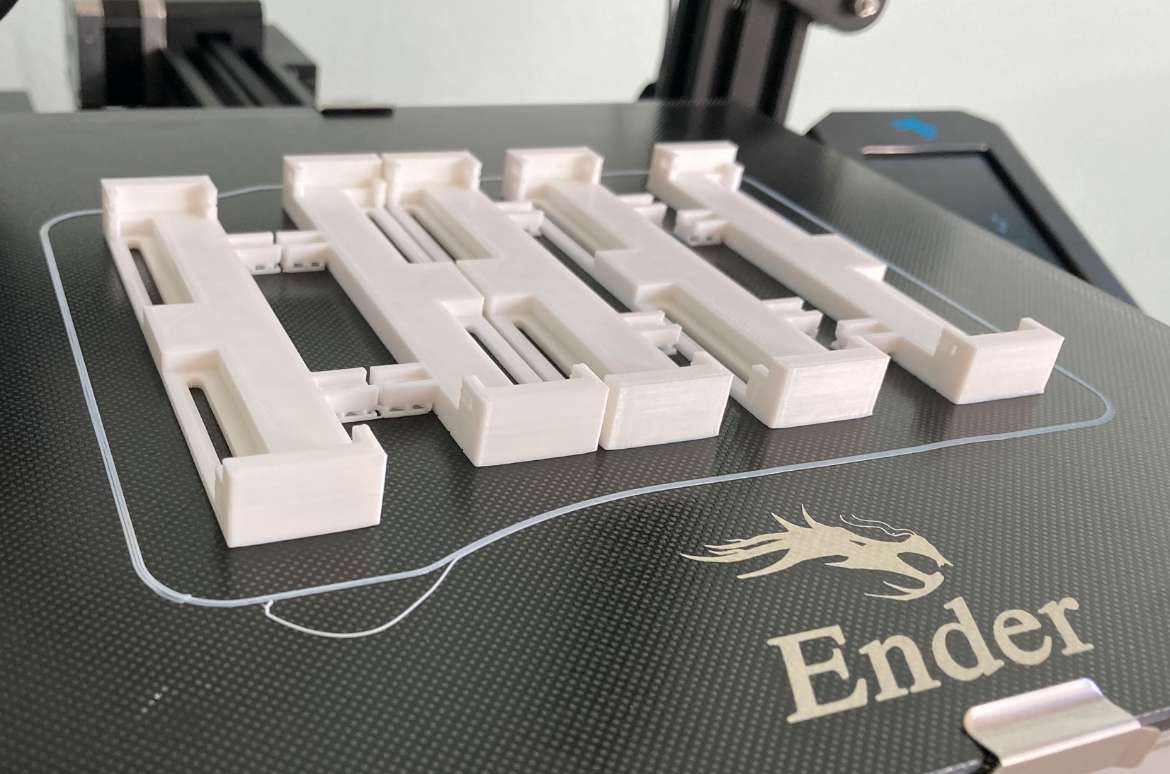
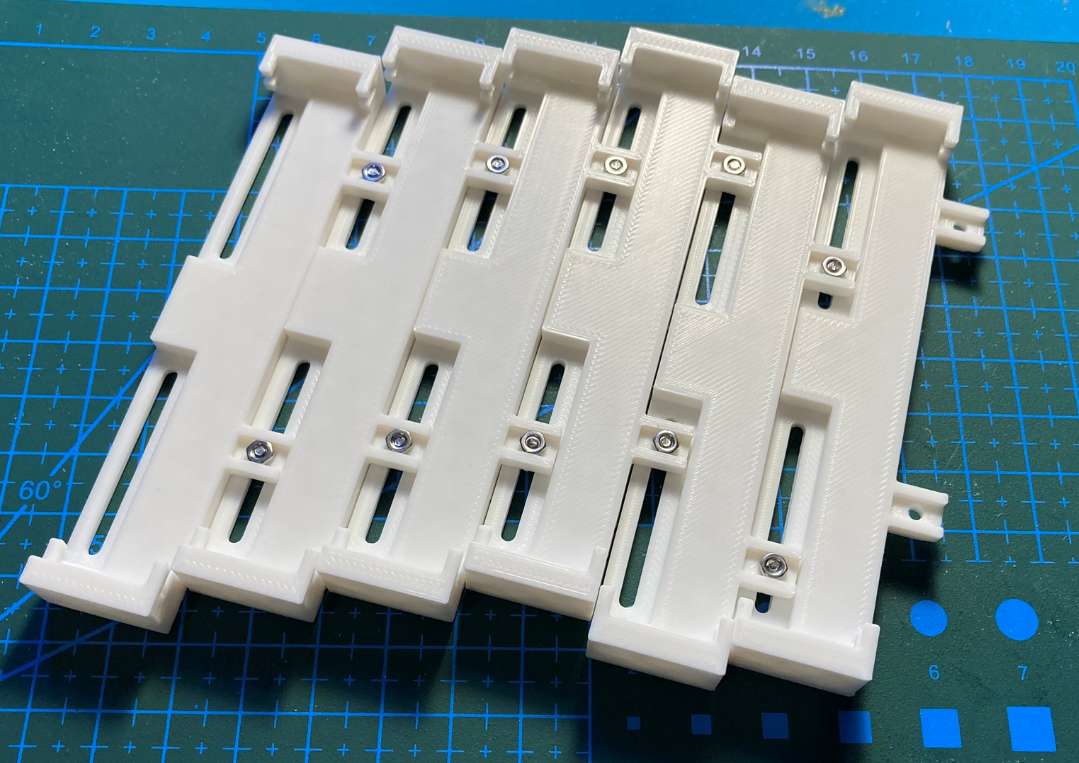
Note that a stripe allows changing stagger between 10mm in one direction and 20mm in another. Mirror half the stripes to flip which way gets more stagger on different sides of the keyboard.
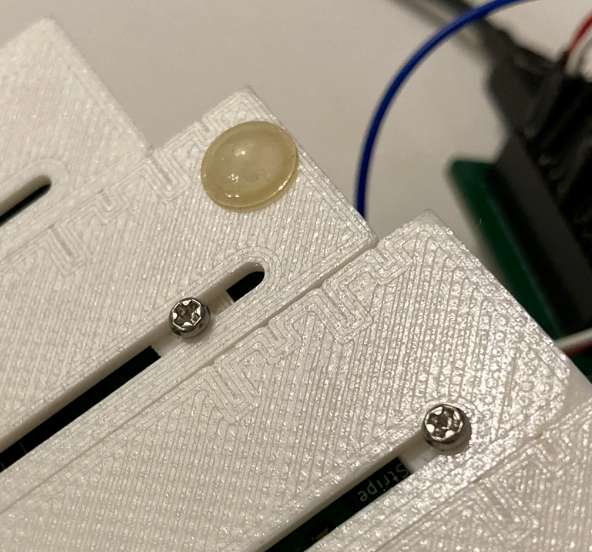
A basic ruler is built into the bottom of each stripe to measure the column stagger:
Zebra is running QMK, see the source code under the QMK folder. Copy the zebra folder under the keyboards folder in your QMK environment to compile. You can use JSON layout files made for Corne (LAYOUT_split_3x6_3) to build your layout in QMK configurator.
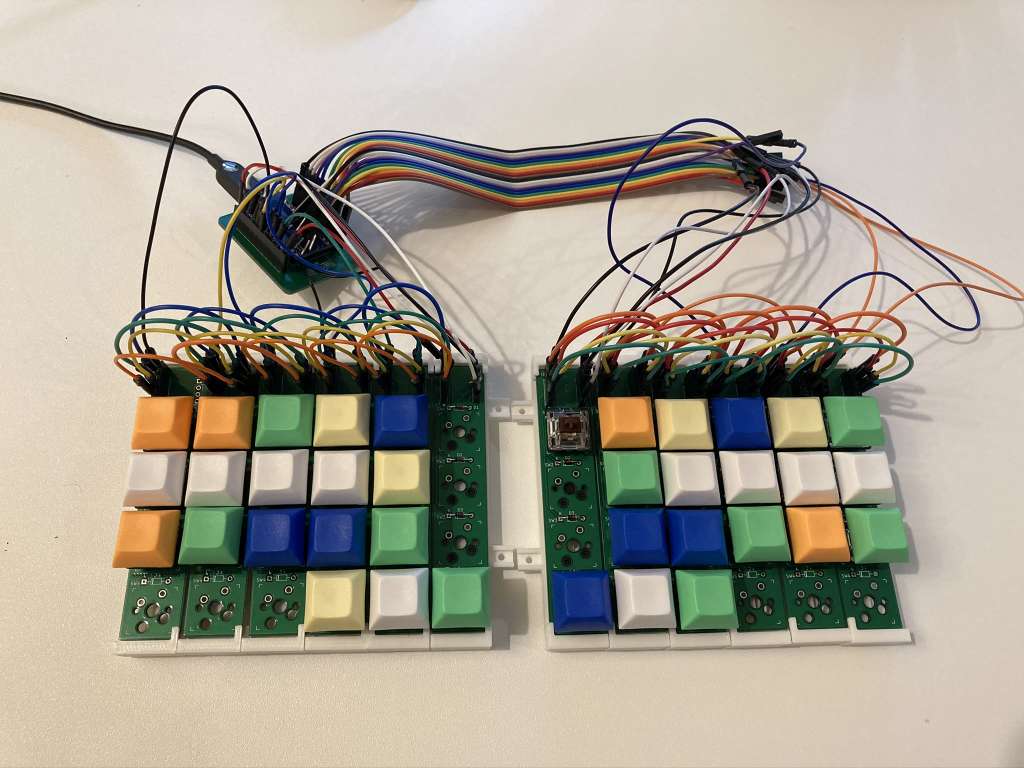
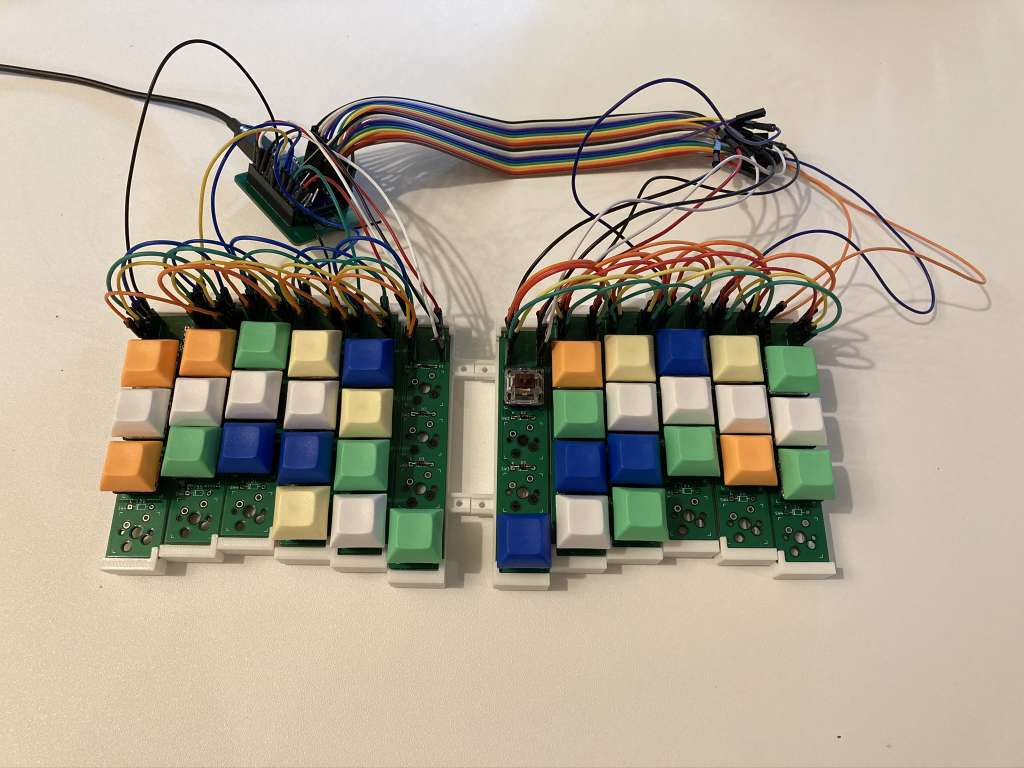
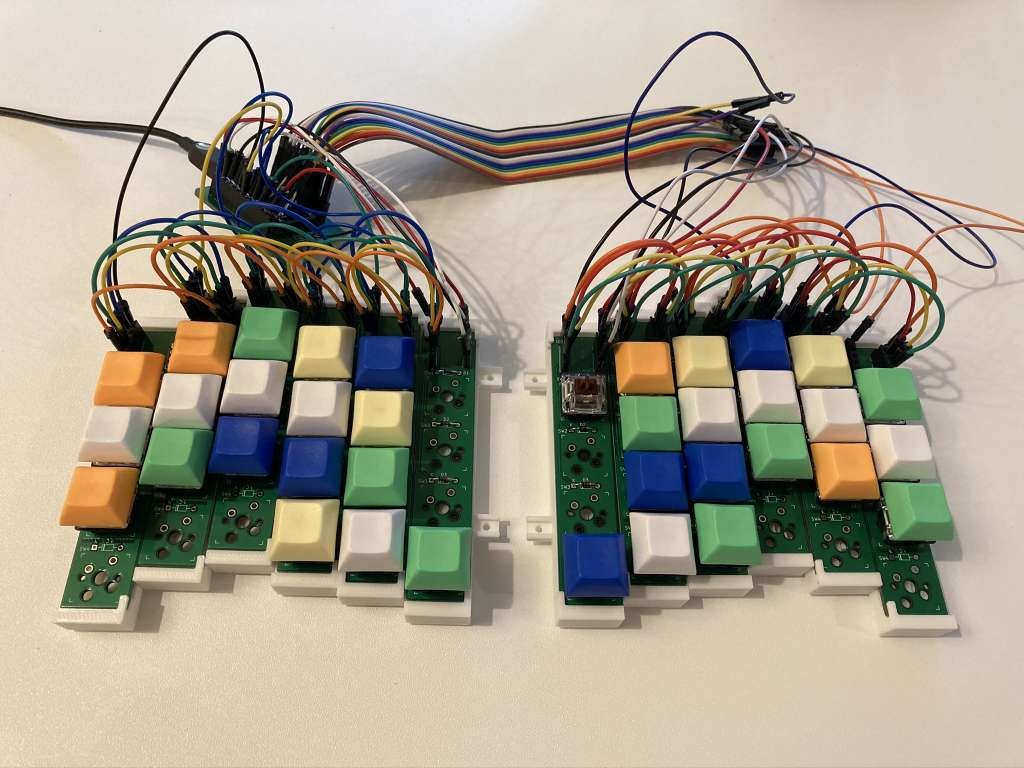
Try some popular or crazy configurations and see what you like!
Here's some examples:
| Qty | Value | Footprint | References |
|---|---|---|---|
| 2 | 6k | Resistor_SMD:R_1206_3216Metric_Pad1.30x1.75mm_HandSolder | R1, R2 |
| 2 | Jumper_NO_Small | Jumper:SolderJumper-2_P1.3mm_Open_Pad1.0x1.5mm | JP1, JP2 |
| 1 | |||
| 1 | 1k | Resistor_SMD:R_1206_3216Metric_Pad1.30x1.75mm_HandSolder | R3 |
| 1 | Conn_01x06 | Connector_PinHeader_2.54mm:PinHeader_1x06_P2.54mm_Vertical | J3 |
| 1 | Conn_01x11 | Connector_PinHeader_2.54mm:PinHeader_1x11_P2.54mm_Vertical | J1 |
| 1 | Jumper_NC_Small | Jumper:SolderJumper-2_P1.3mm_Bridged_Pad1.0x1.5mm | JP3 |
| 1 | LED | LED_THT:LED_D3.0mm | D1 |
| 1 | MJ-4PP-9 | kbd:MJ-4PP-9_1side | J2 |
| 1 | ProMicro | kbd:ProMicro_v3.5 | U1 |
| 1 | SW_Push | kbd:ResetSW_1side | SW1 |
| 1 | ssd1306 | ssd1306:SSD1306 | U2 |
The 14 most common of 18 parts.


VoronDesign/Voron-Hardware
Cool Hardware designed by the Voron Design group


hackclub/OnBoard
💡 Join 1,000 teenagers and make your first PCB with a $100 grant!

VoronDesign/Voron-Tap
Tap is a nozzle-based z-probe for the V2 and Trident printer designs. The entire toolhead moves to trigger an optical switch. Tap offers many advantages:

Luos-io/luos_engine
Open-source and real-time orchestrator for cyber-physical-systems, to easily design, test and deploy embedded applications and digital twins.


Twotoz/C5VRX
Ultra-minimal, zero-CPU 5.8 GHz analog FPV video receiver using ESP32-C5 Wi-Fi 6 PHY MODEM_DIAG, BitScrambler WBFM demodulation & resistor DAC CVBS
It measures 38.1 × 43.2 mm and has 2 copper layers, 1.6 mm thick.
18 parts. The full list of its parts is on this page, with links to each part's symbol and footprint where PCBKit's library has them.
From the nezumee/zebra repository on GitHub, at the commit this page was made from: the board is PCB/Zebra/Zebra-twohead.kicad_pcb. PCBKit opens the board in the browser, with nothing to install.
Its repository states no licence, so its author keeps all rights: ask nezumee before reusing the design.