
2 layers380 × 148.5 mm

 nader3254/ann-Medics5
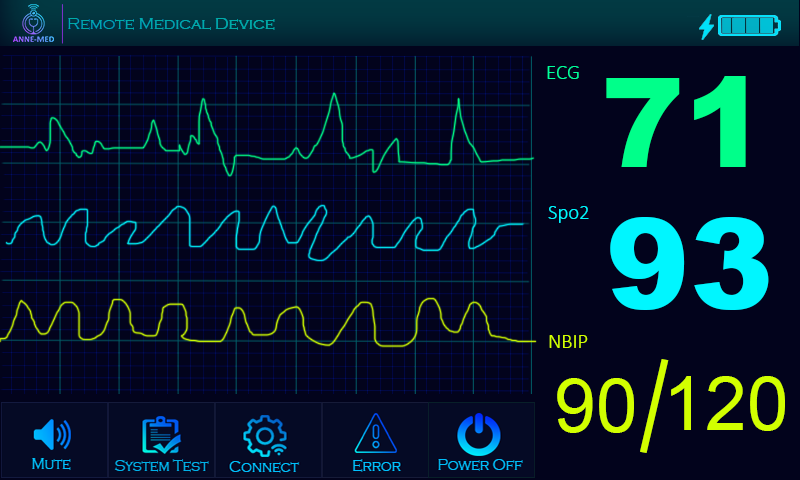
Remote medical device based on embedded Linux System with Qt5 beautiful Gui and android application included
Rpi shieled 2 is an open-source printed circuit board by nader3254, from the nader3254/ann-Medics repository on GitHub. It is a 2-layer board of 100.1 × 60.1 mm with 10 parts on 51 nets, routed with 236 tracks and 8 vias.
It is built around the MCP3008-I/P. Its parts include 5 connectors, 2 resistors, 2 diodes and 1 IC. It belongs with the computers and single-board computers boards of this library.
This repo is for university graduation project
Ann-Medics is a enhanced Remote Medical Device that store the human vitalities and monitor it for doctors,nurses and other medical stuff , it also management system that works to organize the doctors’ hours, especially the anesthesiologists, given that their number is few in the world. Instead of waiting for the anesthesiologist for the patient to prepare for anesthesia, he can do anything else until this humble system summons him and sends a message to the doctor, and thus we will be as much as possible to save the treating doctor’s time.
https://www.youtube.com/watch?v=FgDbxe8dL8w&ab_channel=naderhany
Host machine: Ubuntu 18.04.4 LTS or later
Target machine: Raspberry Pi 3B , AD8232 ecg module , Max30102 ,buzzer
sudo apt install rpi-imagernote:select any raspbian lite image because we don't need to have x11 or wayland gui
sudo apt-get install libboost-all-dev libudev-dev libinput-dev libts-dev libmtdev-dev libjpeg-dev libfontconfig1-dev libssl-dev libdbus-1-dev libglib2.0-dev libxkbcommon-dev libegl1-mesa-dev libgbm-dev libgles2-mesa-dev mesa-common-dev libasound2-dev libpulse-dev gstreamer1.0-omx libgstreamer1.0-dev libgstreamer-plugins-base1.0-dev gstreamer1.0-alsa libvpx-dev libsrtp2-dev libsnappy-dev libnss3-dev "^libxcb.*" flex bison libxslt-dev ruby gperf libbz2-dev libcups2-dev libatkmm-1.6-dev libxi6 libxcomposite1 libfreetype6-dev libicu-dev libsqlite3-dev libxslt1-dev sudo apt-get install libavcodec-dev libavformat-dev libswscale-dev libx11-dev freetds-dev libsqlite3-dev libpq-dev libiodbc2-dev firebird-dev libgst-dev libxext-dev libxcb1 libxcb1-dev libx11-xcb1 libx11-xcb-dev libxcb-keysyms1 libxcb-keysyms1-dev libxcb-image0 libxcb-image0-dev libxcb-shm0 libxcb-shm0-dev libxcb-icccm4 libxcb-icccm4-dev libxcb-sync1 libxcb-sync-dev libxcb-render-util0 libxcb-render-util0-dev libxcb-xfixes0-dev libxrender-dev libxcb-shape0-dev libxcb-randr0-dev libxcb-glx0-dev libxi-dev libdrm-dev libxcb-xinerama0 libxcb-xinerama0-dev libatspi2.0-dev libxcursor-dev libxcomposite-dev libxdamage-dev libxss-dev libxtst-dev libpci-dev libcap-dev libxrandr-dev libdirectfb-dev libaudio-dev libxkbcommon-x11-devThis will install a bunch of libraries from the Debian repository that Qt needed to deploy various kinds of applications on Raspberry Pi.
We also will make a directory that will hold the Qt installation targeting Raspberry Pi, as specified in the previous section. Actually, this can be done at every time before sending Qt 6 build from host machine to the Raspberry Pi, but in this guide we will create it now:
sudo mkdir /usr/local/qt6this is all for raspberry pi
sudo apt install gcc-aarch64-linux-gnu g++-aarch64-linux-gnuWe also want to setup an SSH connection between Raspberry Pi and a host machine. This is needed to transfer data between both devices. The official Raspberry Pi documentation page provided a very detailed and thorough instruction on how to setup SSH between Raspberry Pi and other device, so you can refer this step into that https://www.raspberrypi.com/documentation/computers/remote-access.html#ssh.
We need to build a Sysroot from our own Raspberry Pi device in the host machine. To do this, we will copy and paste a few directories from Raspberry Pi using rsync through SSH. If rsync is not installed yet in your host machine, simply install it by executing sudo apt install rsync.
After the host machine and Raspberry Pi is connected,
 rsync -avz --rsync-path="sudo rsync" --delete <pi_username>@<pi_ip_address>:/lib rpi-sysroot
 rsync -avz --rsync-path="sudo rsync" --delete <pi_username>@<pi_ip_address>:/usr/include rpi-sysroot/usr
 rsync -avz --rsync-path="sudo rsync" --delete <pi_username>@<pi_ip_address>:/usr/lib rpi-sysroot/usr
 rsync -avz --rsync-path="sudo rsync" --delete <pi_username>@<pi_ip_address>:/opt/vc rpi-sysroot/opt
Change <pi_username> and <pi_ip_address> with your Raspberry Pi username and IP Address, respectively.
Note: Your Raspberry Pi might not have a directory named /opt/vc, and it is fine. Usually this directory contains proprietary Broadcom libraries, but during the testing the author did not find any issue with the lack of this directory.
After building our own sysroot, we need to fix absolute symbolic links that were broken during the syncing process by converting them to relative symlinks. The easiest, fastest way to do this is to use a command-line tool called symlinks, which is available from the Ubuntu official repository.
 sudo apt install symlinks
 cd ~
symlinks -rc rpi-sysrootcd $HOME
git clone "https://codereview.qt-project.org/qt/qt5"
cd qt5/
git checkout 6.4.0
perl init-repository -f
cd ..
mkdir $HOME/qt-hostbuild
cd $HOME/qt-hostbuild/
cmake ../qt5/ -GNinja -DCMAKE_BUILD_TYPE=Release -DQT_BUILD_EXAMPLES=OFF -DQT_BUILD_TESTS=OFF -DCMAKE_INSTALL_PREFIX=$HOME/qt-host
cmake --build . --parallel 8
cmake --install .First, we want to create our own CMake toolchain file. This file is important to link the right compilers and libraries so that CMake can produces the suitable Qt build for Raspberry Pi. For this guide, we will use the following CMake code and save it as toolchain.cmake.
cmake_minimum_required(VERSION 3.18)
include_guard(GLOBAL)

set(CMAKE_SYSTEM_NAME Linux)
set(CMAKE_SYSTEM_PROCESSOR arm)

set(TARGET_SYSROOT /path/to/your/sysroot)
set(CMAKE_SYSROOT ${TARGET_SYSROOT})

set(ENV{PKG_CONFIG_PATH} $PKG_CONFIG_PATH:/usr/lib/aarch64-linux-gnu/pkgconfig)
set(ENV{PKG_CONFIG_LIBDIR} /usr/lib/pkgconfig:/usr/share/pkgconfig/:${TARGET_SYSROOT}/usr/lib/aarch64-linux-gnu/pkgconfig:${TARGET_SYSROOT}/usr/lib/pkgconfig)
set(ENV{PKG_CONFIG_SYSROOT_DIR} ${CMAKE_SYSROOT})

# if you use other version of gcc and g++ than gcc/g++ 9, you must change the following variables
set(CMAKE_C_COMPILER /usr/bin/aarch64-linux-gnu-gcc-9)
set(CMAKE_CXX_COMPILER /usr/bin/aarch64-linux-gnu-g++-9)

set(CMAKE_C_FLAGS "${CMAKE_C_FLAGS} -I${TARGET_SYSROOT}/usr/include")
set(CMAKE_CXX_FLAGS "${CMAKE_C_FLAGS}")

set(QT_COMPILER_FLAGS "-march=armv8-a")
set(QT_COMPILER_FLAGS_RELEASE "-O2 -pipe")
set(QT_LINKER_FLAGS "-Wl,-O1 -Wl,--hash-style=gnu -Wl,--as-needed")
Now that we have our toolchain, as well as the cross compiler and sysroot, we can continue with configuring and building Qt for our Raspberry Pi!
As decided in the planning process, we will put all build configuration files on qtpi-build, so let's cd into that directory:
cd ~/qtpi-buildNow inside this directory, we can run this configuration command:
 ../qt5/configure -release -opengl es2 -nomake examples -nomake tests -qt-host-path $HOME/qt-host -extprefix $HOME/qt-raspi -prefix /usr/local/qt6 -device linux-rasp-pi4-aarch64 -device-option CROSS_COMPILE=aarch64-linux-gnu- -- -DCMAKE_TOOLCHAIN_FILE=$HOME/toolchain.cmake -DQT_FEATURE_xcb=ON -DFEATURE_xcb_xlib=ON -DQT_FEATURE_xlib=ON
The command above will run a configuration script that came with the Qt source code and complementing it with the CMake toolchain that we just created. It is equivalent to this CMake command: cmake ../qt5/ -GNinja -DCMAKE_BUILD_TYPE=Release -DINPUT_opengl=es2 -DQT_BUILD_EXAMPLES=OFF -DQT_BUILD_TESTS=OFF -DQT_HOST_PATH=$HOME/qt-host -DCMAKE_STAGING_PREFIX=$HOME/qt-raspi -DCMAKE_INSTALL_PREFIX=/usr/local/qt6 -DCMAKE_TOOLCHAIN_FILE=$HOME/toolchain.cmake -DQT_QMAKE_TARGET_MKSPEC=devices/linux-rasp-pi4-aarch64 -DQT_FEATURE_xcb=ON -DFEATURE_xcb_xlib=ON -DQT_FEATURE_xlib=ONNote: Both commands will do exactly the same thing: configuring Qt to be installed in folder qt-raspi on the host machine, with expectation that it will populate usr/local/qt6 on the Raspberry Pi. If you already run the first command, then there is no need to run the second command.
The Qt installation from this build will be suitable to run Qt ARM64 applications using X11 as the windowing system. You can check this page from Qt Docs to learn more about xcb plugins.
In more advanced cases, check this page from Qt Documentation if you want to use other windowing systems such as Wayland or EGLFS.
We can then proceed with building and installing.
 cmake --build . --parallel 4
 cmake --install .
After Qt is successfully installed on ~/qt-raspi, we will then send this Qt installation back to the Raspberry Pi.
To do this, we can use rsync as we did when building sysroot, or scp. Both will accomplish the same thing, and there should be no significant difference between both of them.
To use rsync:
rsync -avz --rsync-path="sudo rsync" /path/to/qt-raspi/* <pi_username>@<pi_ip_address>:/usr/local/qt6To use scp:
 cd ~/qt-raspi
scp -r * <pi_username>@<pi_ip_address>:/usr/local/qt6ssh pi@169.254.187.77 export LD_LIBRARY_PATH=$LD_LIBRARY_PATH:/usr/local/qt6/lib/ cd ~/qt5/qtbase/examples/gui/analogclock/
ls ## make sure there is a CMakeLists.txt file
~/qt-raspi/bin/qt-cmake CMakeLists.txt cmake --build . --parallel 4
cmake --install .We now have the binary of our application ready to be run on the Raspberry Pi. We can then send the binary to our Raspberry Pi using either scp or rsync and run the application (either through SSH or directly on the Raspberry Pi with keyboard and mouse connected).
 scp -r gui_analogclock <pi_username>@<pi_ip_address>:/home/pi
 ssh <pi_username>@<pi_ip_address>
 cd ~ ## or cd to the directory where you send the binary
 ./gui_analogclock
now you are ready download our repo and go to device directory and build it for your device .


| Qty | Value | Footprint | References |
|---|---|---|---|
| 2 | R | Resistor_THT:R_Axial_DIN0204_L3.6mm_D1.6mm_P5.08mm_Vertical | R1, R2 |
| 1 | MCP3008 | Package_DIP:DIP-14_W7.62mm_LongPads | U1 |
| 1 | buzz | LED_THT:LED_D2.0mm_W4.8mm_H2.5mm_FlatTop | D2 |
| 1 | buzzer | Connector_PinSocket_2.54mm:PinSocket_1x02_P2.54mm_Vertical | J3 |
| 1 | ecg | Connector_PinSocket_2.54mm:PinSocket_1x06_P2.54mm_Vertical | J4 |
| 1 | lcd. | Connector_PinSocket_2.54mm:PinSocket_2x13_P2.54mm_Vertical | J5 |
| 1 | pwr | LED_THT:LED_D2.0mm_W4.8mm_H2.5mm_FlatTop | D1 |
| 1 | rpi | Connector_PinSocket_2.54mm:PinSocket_2x20_P2.54mm_Vertical | J1 |
| 1 | spo2 | Connector_PinSocket_2.54mm:PinSocket_1x04_P2.54mm_Vertical | J2 |

cyberboy666/recurBOY
a rpi0 video-instrument – created in collaboration with Guergana Tzatchkova

nekonaute/pogobot
Pogobot is an open-source open-hardware robotic platform for swarm robotics

cyberboy666/i_n_c_u_r
a r_e_c_u_r video sampler extension circuit - adding knobs, cv and serial midi control


IceyPlazza/EWB-EPA-Rainworks
26-27 EWB EPA Rainworks project; We're putting a sensor box in the ground!

butterstick-fpga/programming-jig
A FT232H based production programming jig for the ButterStick

challengerjdb/RaspberryPiHat-datalogger
My name is Jacob Bendell, and I’m a student at the University of Pennsylvania studying Electrical Engineering. I took this past year off from school to avoid online classes and intern at Amped Innovation, a start-up in…
It measures 100.1 × 60.1 mm and has 2 copper layers, 1.6 mm thick.
10 parts, built around the MCP3008-I/P. The full list of its parts is on this page, with links to each part's symbol and footprint where PCBKit's library has them.
From the nader3254/ann-Medics repository on GitHub, at the commit this page was made from: the board is rpi_shieled_pcb/rpi_shieled_2/rpi_shieled_2.kicad_pcb. PCBKit opens the board in the browser, with nothing to install.
Its repository states no licence, so its author keeps all rights: ask nader3254 before reusing the design.