2 layers117.3 × 54.5 mm

 machinoro/corny1
My first custom split keyboard that takes inspiration from the Corne keyboard.
Right finished is an open-source printed circuit board by machinoro, from the machinoro/corny repository on GitHub. It is a 2-layer board of 147.2 × 118.7 mm with 69 parts on 53 nets, routed with 423 tracks and 3 vias.
Its parts include 30 diodes and 30 switches. It belongs with the keyboards and input boards of this library.
My first custom split keyboard that takes inspiration from the Corne keyboard.
I’m pretty much a geek who always finds ways to create things tailored specifically for myself. I've been using Arch Linux (BTW), Hyprland (BTW), and Neovim (BTW) for over a year now, and most of my workflow depends heavily on the keyboard.
Over time, I’ve tried 60%, 75%, and 100% mechanical keyboards. They’re all nice, but I struggled to find space on my desk for schoolwork, and placing the keyboard on my laptop caused the battery to heat up. Then one day, I stumbled upon this video, which sparked the idea—and here it is: my first-ever custom-built split keyboard. All the design work was done in less than 5 days.
This keyboard was created using Ergogen, with extra helpful guidance from the Flatfootfox tutorial and HunterCook—a genius and my friend on Discord.
The design is entirely customized for my hand movements and habits. It may not suit your typing style (or even mine, as this is my first attempt). All routing was done manually and can be found in the ergogen/results/pcbs/ directory, not in ergogen/output/pcbs, which contains files auto-generated by Ergogen.
The layout was fully created inside Ergogen.
Here’s my initial design of Corny, drawn in Excalidraw:
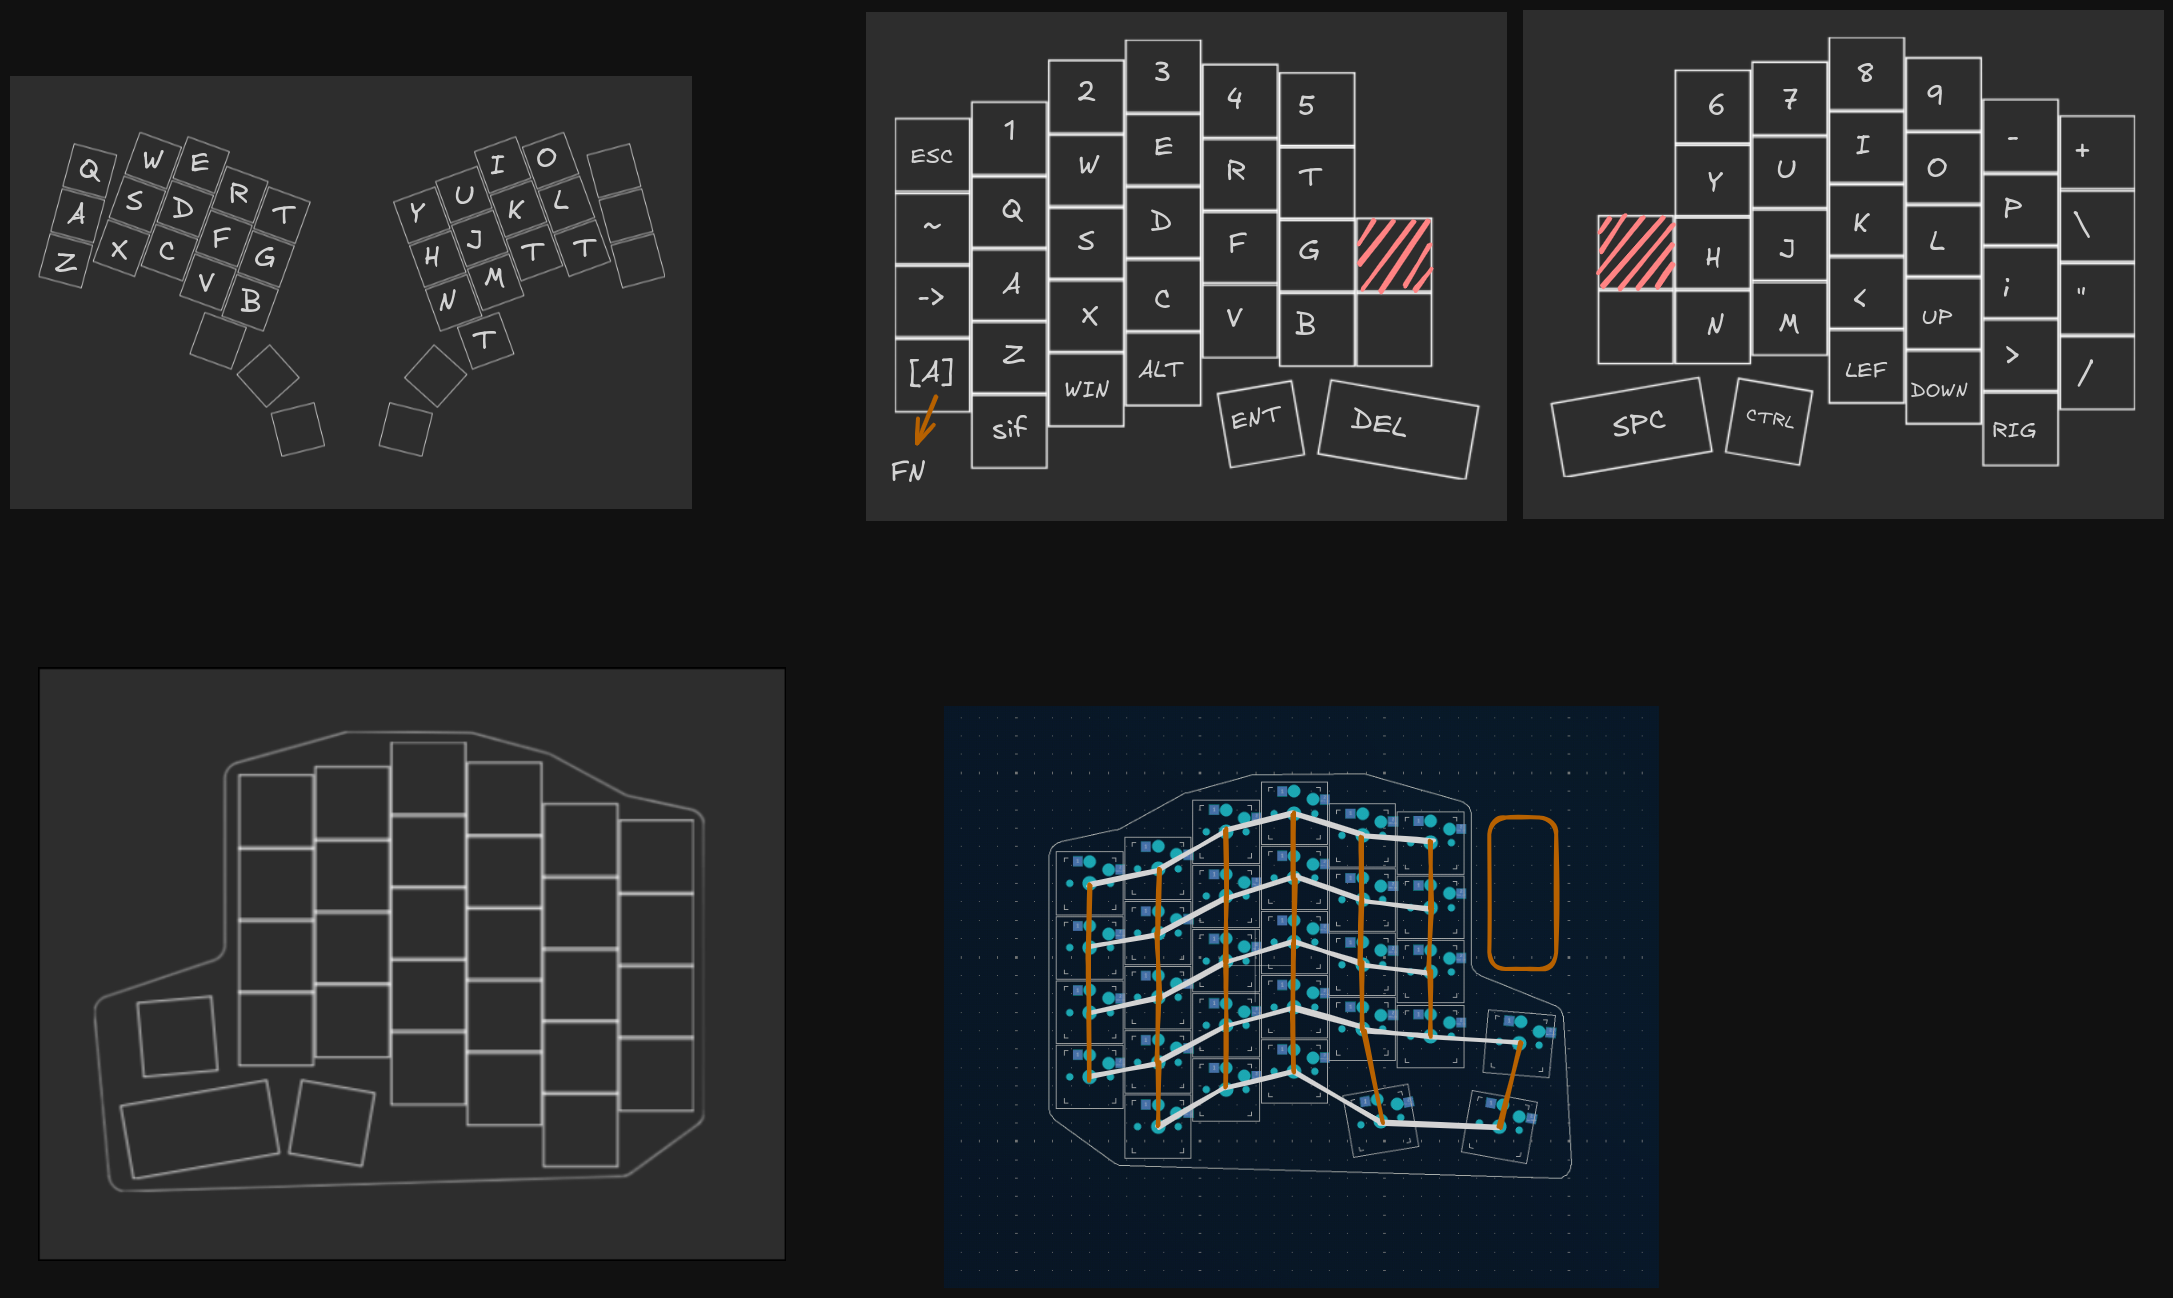
It was draw in the first day with some adjustments. However, while working on the board I realized that I forgot the {} and the FN key so I have to make some changes
CAPSLOCK to FN cuz who even use it now?For switches, I decided to use MX switches instead of Choc switches like most others, because MX switches are much easier to find in Vietnam. In fact, I couldn’t find any retailers selling Choc switches on the major e-commerce platforms here. My switch of choice is the Akko Rosewood.
Choc switch (low profile): 17×18mm
MX switch (The type of switch on normal mechanical keyboard): 19×19mm
For the MCU, I used the nice!nano v2 for wireless functionality despite of the fact that you can see, yep obviously the MCU in the PCBS are nice!nano_v1 but I could only find the version 2. However, you can use almost any available MCU, such as the Pro Micro or even a Raspberry Pi Zero.
The PCBs were auto-generated by Ergogen in .kicad_pcb format, which you can open in KiCad. Be sure to connect all routes manually, and aim for an unrouted count of zero—otherwise, you'll have unconnected components (oops!).
I had a hard time with the PCBs when I was connecting everything and remembered that damn this should not be here so make sure connecting all the important components first (hardest part) before working with the keys
The finished PCBs are located in ./PCBs/ not in ./ergogen/output/pcbs/, they are auto generated by ergogen
Here are the final PCB designs:
| Left Plate | Right Plate |
|---|---|
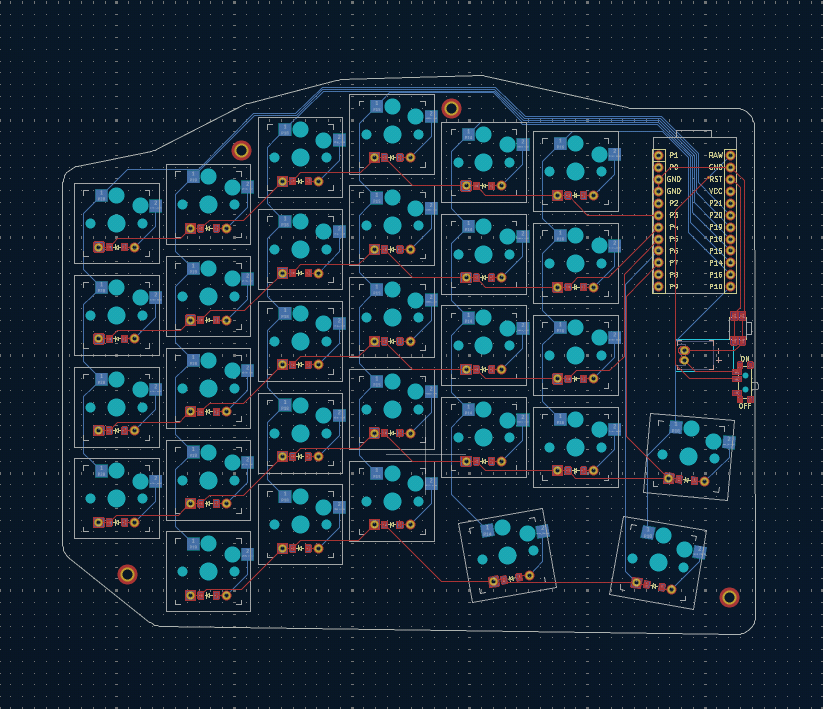 | 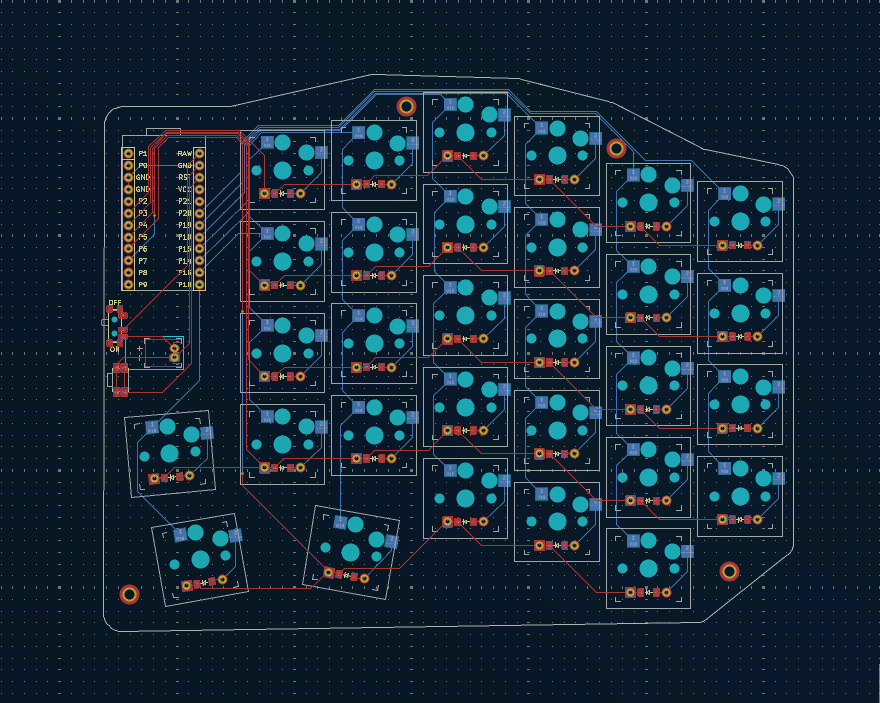 |
Design the case inside ergogen is possible. However, it was a pain in the ass so I made a dirty (or genius?) move by making half of the case in ergogen, the eport it in jscad convert to stl using the @jscad/cli@1 package and then put it inside OnShape then delete the wrong part
Here is the image of the final stl file
| Left case | Right case |
|---|---|
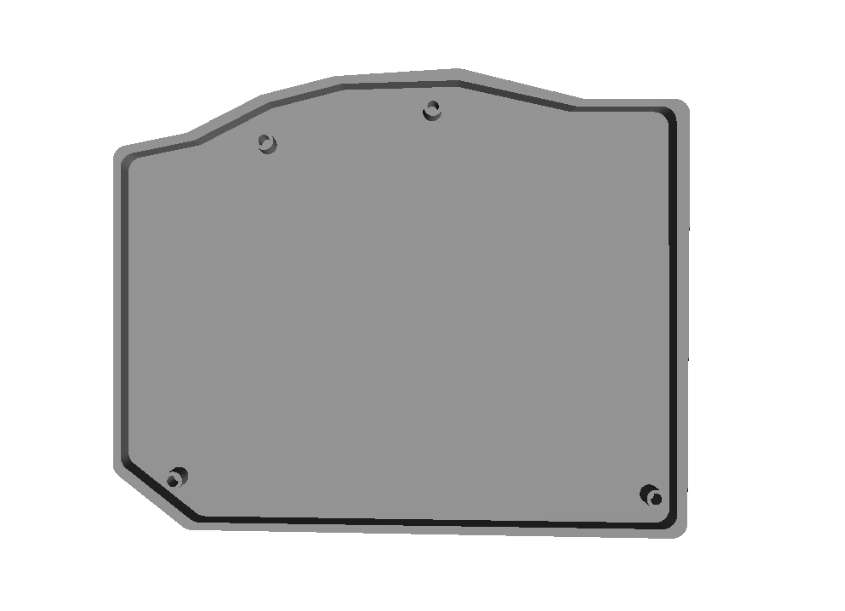 | 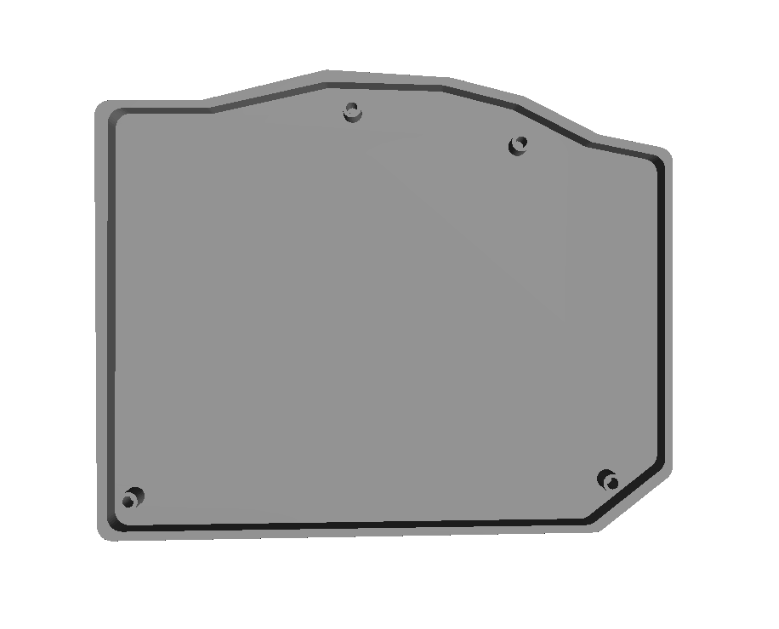 |
P/s: Im praying that the mounting hole will fit
The case was denied because it was just a basic outline which you can literally create anywhere using a case genereator. So I decided to sit back and start working with OnShaped to design a new case.
First, I imported the .dxf files from the ./ergogen/output/outline and lay it on to the sketch so that I can have a brief view of what the outlines are. (Disclaimer: the outline is 10 times the actual size so after all you have to scale it down) Then I extrude the parts I need to create a simple case as the version_1.
Then I have to create the nut for M2 screws but I had had a bad time with creating custom nut and screw so I decided to use the public version of a M2 nut and extrude it so that it has a little margin I need to stand the PCBs.
Next step is the worst step you can imagine, making the top plate!!! I had to redo the first step of making the case (creating a plate without the walls) the align it so that the keys hole and the plate aligned perfectly. Then I had to extrude each key individually!!!!! That is over 30 keys and yes it took a whooping amount of timeto do it. Also remember to cut the hole for the MCU to (you don't want to cut it manually when you got the 3D printed case tho)
Penultimate is the piercing hole for the velcro strap. This create 2 holes so that you can use the velcro strap to strap the keyboard around your leg when you are on a plane/train or just simply don't have the space for you keyboard.
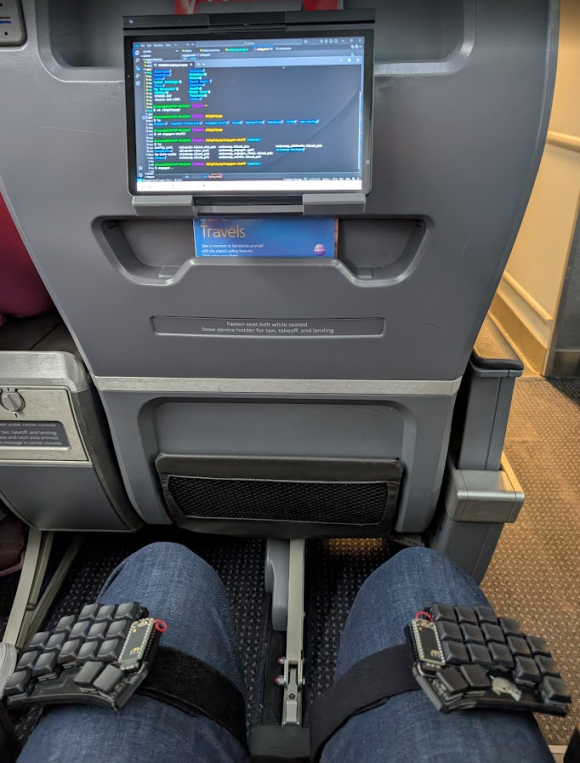
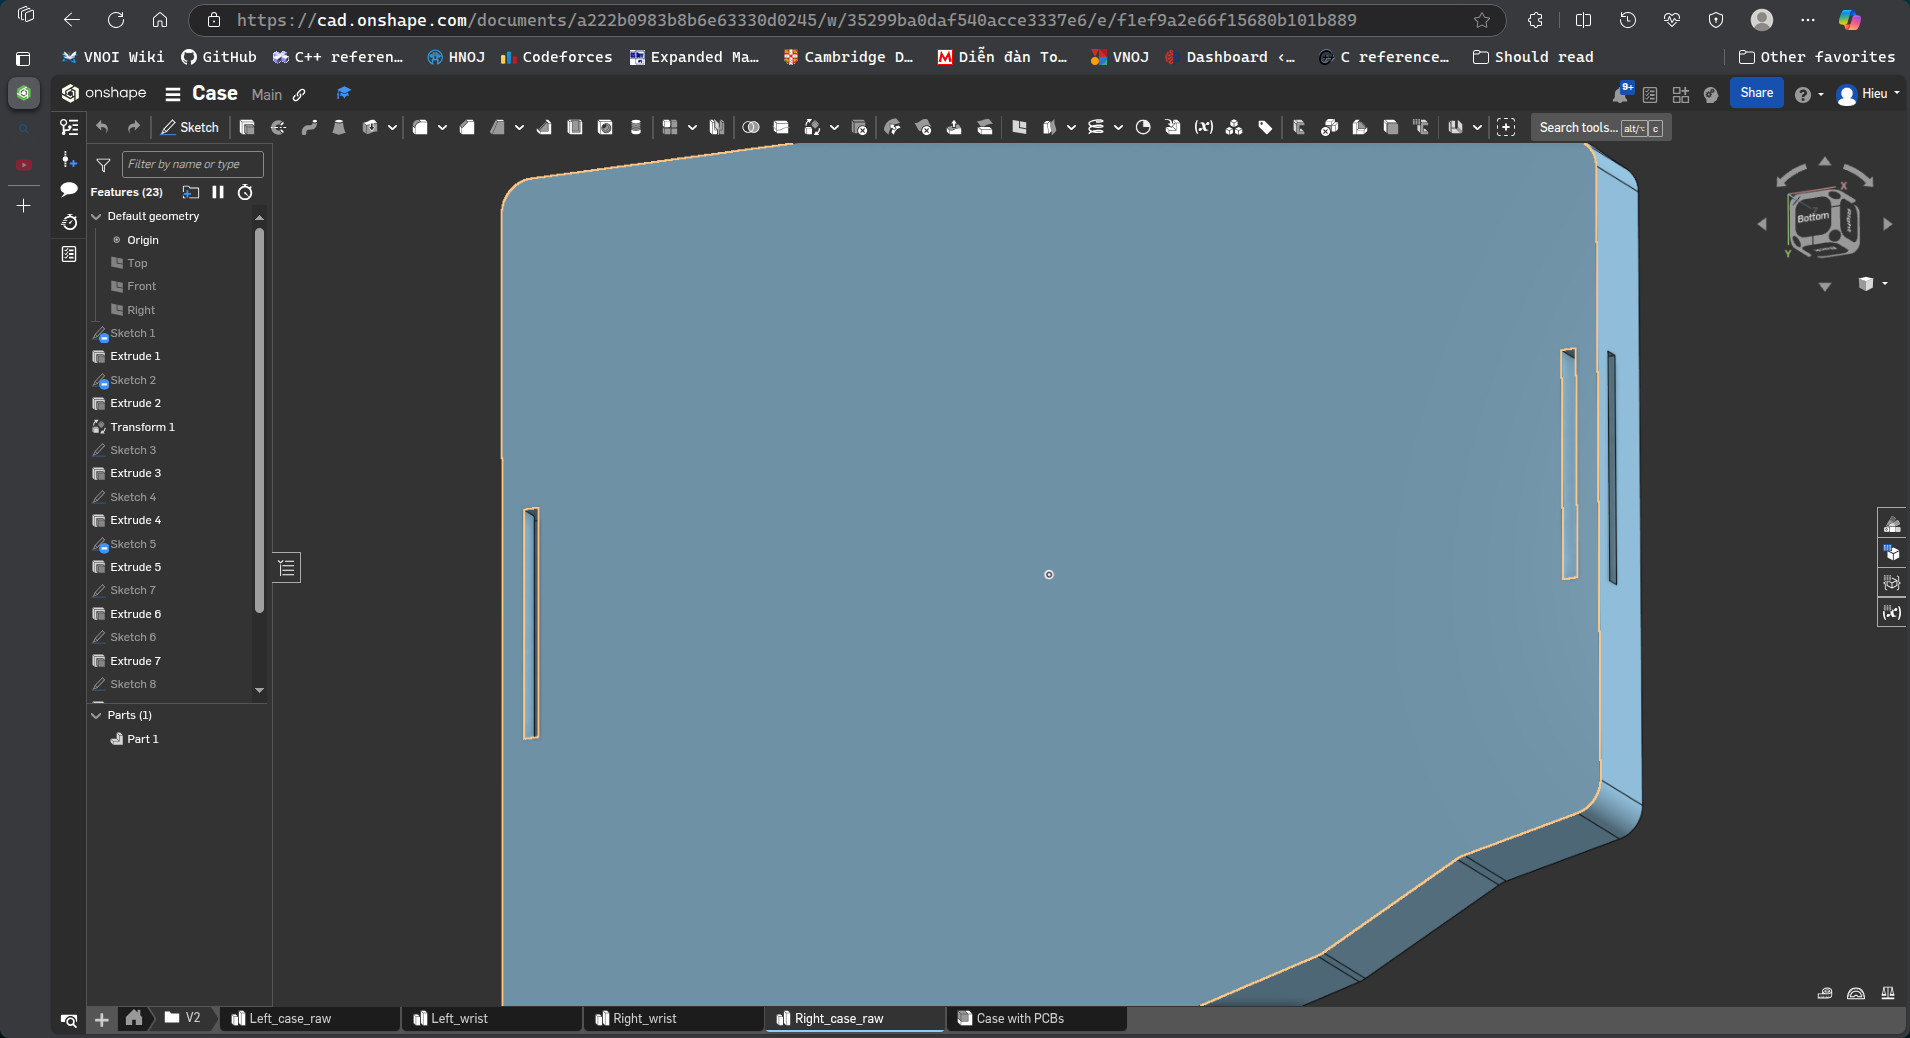
Final parts are the detachable wrist rest using magnet. I use two 6mmx1.5mm magnet mounted to the case so that you can attach and remove the wrist rest with ease.
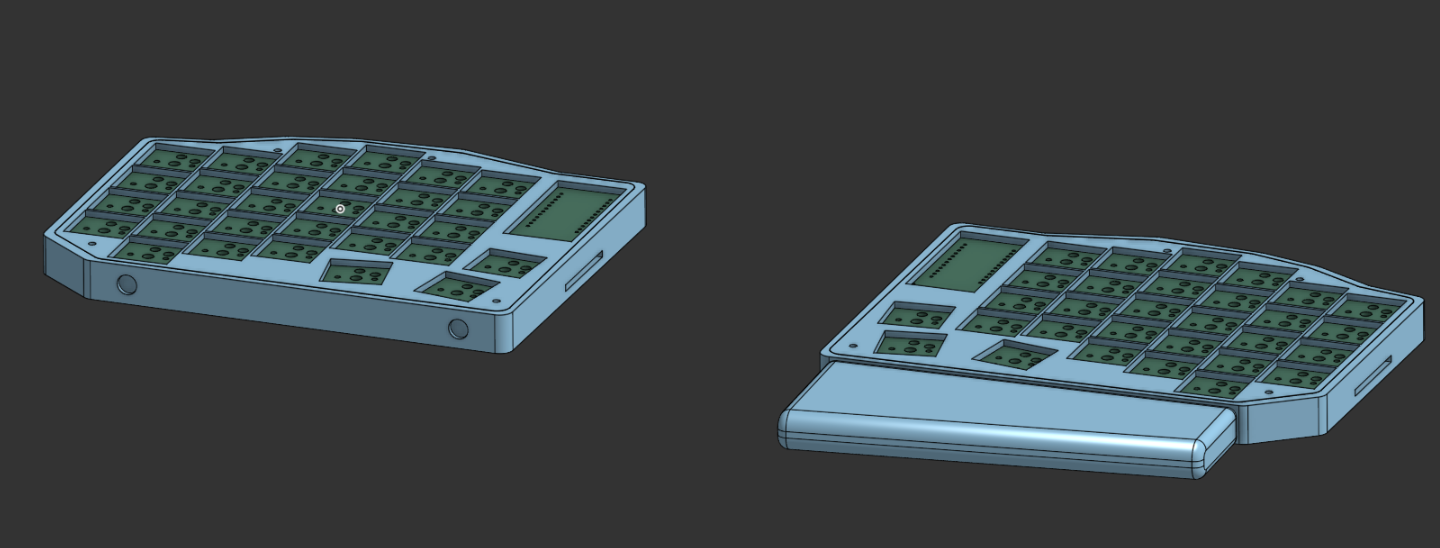
I haven't had fund to get the parts yet but there is a tool called zmk - I will keep the repo private for now since I am just doing it blindly without the physical parts
AYou can check the BOM in here. As you can see, the prices look a bit messy—that's the best I could do when converting between VND and USD (inflation is killing me). Only Shopee Vietnam, a Vietnamese e-commerce platform, lists exact prices in VND, which I then converted to USD. All the other retailers charge in USD. Even more frustrating, Typeractive actually charges more in VND than in USD!
Electronics Total: 119.34 USD / 3,107,030 VND
Hardware Total: 62.6 USD / 1,641,596 VND
Disclaimer: When you try to converting VND to USD you can see that they are about ~1 dollar away from each other. It is because you can not accurately convert the price down to every cent.
| Qty | Value | Footprint | References |
|---|---|---|---|
| 30 | ComboDiode | D1, D2, D10, D11, D12, D13, D14, D15, D16, D17, D18, D19, D20, D21, D22, D23 +14 | |
| 30 | PG1350 | S1, S2, S10, S11, S12, S13, S14, S15, S16, S17, S18, S19, S20, S21, S22, S23 +14 | |
| 4 | ceoloide:mounting_hole_plated | H1, H2, H3, H4 | |
| 1 | ceoloide:reset_switch_smd_side | RST1 | |
| 1 | ceoloide:power_switch_smd_side | PWR1 | |
| 1 | ceoloide:battery_connector_jst_ph_2 | JST1 | |
| 1 | ceoloide:mcu_nice_nano | MCU1 | |
| 1 | LOGO | PCBs:flag | G*** |
It measures 147.2 × 118.7 mm and has 2 copper layers, 1.6 mm thick.
69 parts. The full list of its parts is on this page, with links to each part's symbol and footprint where PCBKit's library has them.
From the machinoro/corny repository on GitHub, at the commit this page was made from: the board is PCBs/right_finished.kicad_pcb. PCBKit opens the board in the browser, with nothing to install.
Its repository states no licence, so its author keeps all rights: ask machinoro before reusing the design.

jackw01/scanlight
A better light source for scanning color negative film

Biacco42/Ergo42
7x4 ortho linear split keyboard - The Answer to the Ultimate Question of Life, the Universe, and at least Keyboards

eigenco/frankenpi
This is an experimental project to connect Raspberry Pi with the help of cheap Cyclone IV FPGA board to 8-bit ISA bus to act as multiple different devices.

mattybrad/drumkid
Version 4 was the first successful working design, with full code, schematics, Gerbers, etc available on GitHub.

KaiPereira/Overglade-Badges
NFC hackathon badges for the Overglade game jam in Singapore!

BerkeleyHCI/PolymorphicBlocks
A Python-based hardware description language for PCBs for higher-level (block-diagram / system-architecture level) PCB design through libraries of directly reusable subcircuit generators.
