2 layers176 × 100 mm
SmartDesk v1p0
daverowntree/SmartDesk
I open sourced a design I made a few years back for a non-paying client. Use it as you see fit!
190 parts

 kollhof/thermostat
ESP32 based thermostat for a DIY heating system
Thermostat is an open-source printed circuit board by kollhof, from the kollhof/thermostat repository on GitHub. It is a 2-layer board of 59.1 × 38.1 mm with 27 parts on 41 nets, routed with 276 tracks and 36 vias.
It is built around the ESP32-WROOM-32D, RAC03-05SK and BME280, with the AP2112K-3.3 among its other parts. Its parts include 7 capacitors, 5 resistors, 5 connectors, 2 ICs and 2 switches. It belongs with the home automation and IoT boards and the ESP32 boards of this library.


ESP32 based thermostat for a DIY heating system
Create a factory NVS partitions with hardware and homekit config:
../esp-homekit-sdk/tools/mfg_homekit/hk_mfg_gen.py --conf mfg-config.csv --values mfg-values.csv --prefix thermo --cid 9 --outdir ./secret/mfg/ --size 0x6000Flash factory partitions to individual devices:
esptool.py write_flash 0x340000 secret/mfg/bin/thermo-[homekit-setup-id].binFlash firmware:
idf.py clean build flashUpdate firmware over the air:
The Device ID can be found as serial number in Homekit once paired.
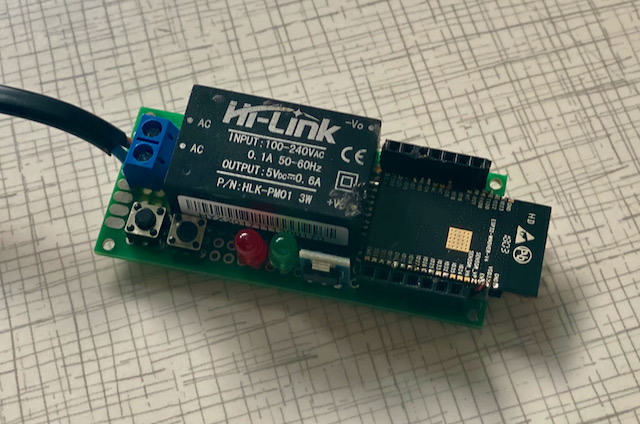
idf.py -DOTA_DEVICE_ID=[device-id] clean build flash-otaThis first version used an ESP32-WROVER-V4 powered by a Hi-link power supply all badly soldered to a protboard with way too thick wires.
After reading up on powersupplies I decided to ditch the Hi-link for a Recom RAC03-05SK. It does not need any extra components to be safe which made things a bit simpler.
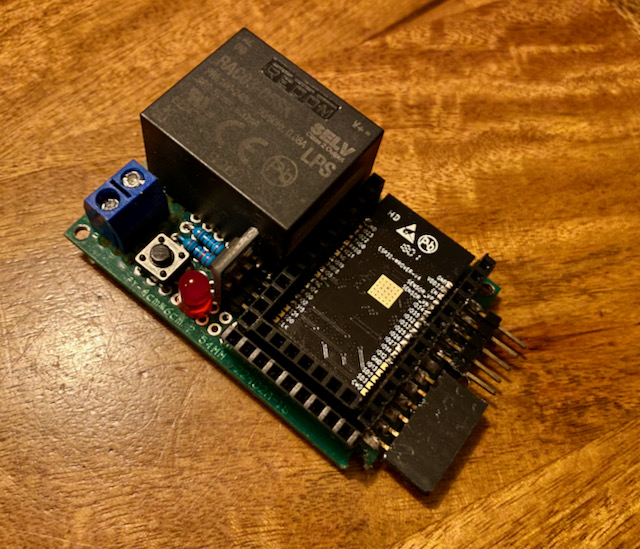
The female pin headers were awful to work with and I wanted a bit more ports exposed for experimenting.
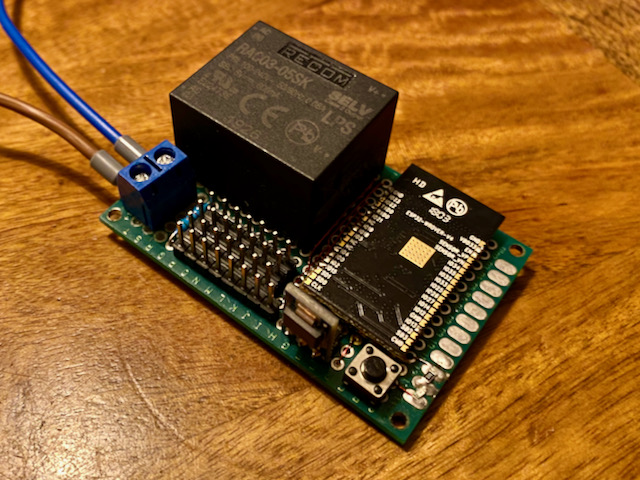
I also started to get a tiny bit better at soldering, and my choice of wires improved as well.
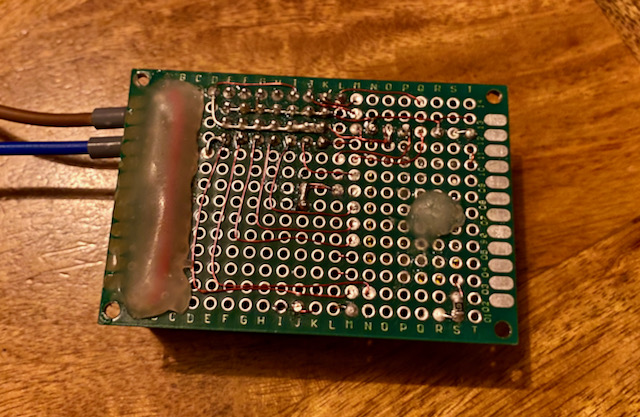
Now I had a pretty well working little board. I used Dallas ds18b20 sensors to measure temperatur and relays to drive the electric radiators.
I needed about 5 of these boards, wiring and soldering everything got old pretty quickly. Instead of continuing to use protoboards, I decided to design my own PCB. I downloaded KiCad, looked at many ESP-32 dev board schematics for inspiration and created my own little board.
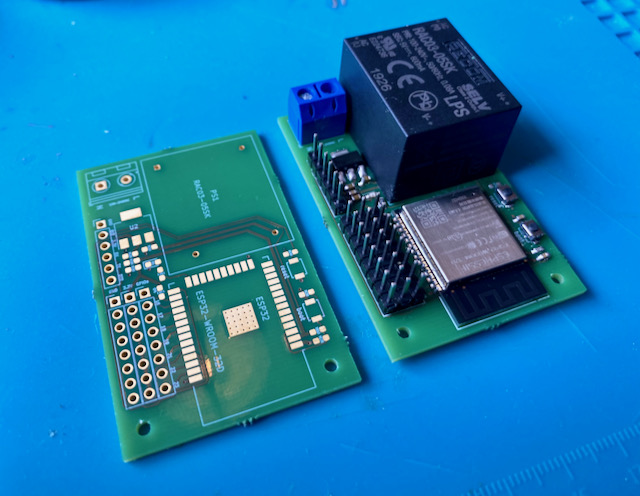
I had them printed by https://aisler.net and few days later I had a 3 PCBs and all the parts needed. I soldered all the SMD components using a hot air blower,and everything just worked!
| Qty | Value | Footprint | References |
|---|---|---|---|
| 4 | 0.1uF | Capacitor_SMD:C_0603_1608Metric_Pad1.05x0.95mm_HandSolder | C3, C4, C6, C7 |
| 3 | 4.7k | Resistor_SMD:R_0603_1608Metric_Pad1.05x0.95mm_HandSolder | R2, R7, R8 |
| 2 | MountingHole | MountingHole:MountingHole_2.2mm_M2_ISO7380 | H1, H2 |
| 1 | 1.0uF | Capacitor_SMD:C_0603_1608Metric_Pad1.05x0.95mm_HandSolder | C1 |
| 1 | 10K | Resistor_SMD:R_0603_1608Metric_Pad1.05x0.95mm_HandSolder | R1 |
| 1 | 1k | Resistor_SMD:R_0603_1608Metric_Pad1.05x0.95mm_HandSolder | R3 |
| 1 | 2.2uF | Capacitor_SMD:C_0603_1608Metric_Pad1.05x0.95mm_HandSolder | C2 |
| 1 | 22uF | Capacitor_SMD:C_0603_1608Metric_Pad1.05x0.95mm_HandSolder | C5 |
| 1 | 230AC | TerminalBlock_RND:TerminalBlock_RND_205-00045_1x02_P5.00mm_Horizontal | J1 |
| 1 | 3.3V | Connector_PinHeader_2.54mm:PinHeader_1x08_P2.54mm_Vertical | J3 |
| 1 | AP2112K-3.3 | Package_TO_SOT_SMD:SOT-23-5 | U1 |
| 1 | BME280 | Package_LGA:Bosch_LGA-8_2.5x2.5mm_P0.65mm_ClockwisePinNumbering | U2 |
| 1 | ESP32-WROOM-32D | RF_Module:ESP32-WROOM-32 | ESP32 |
| 1 | GND | Connector_PinHeader_2.54mm:PinHeader_1x08_P2.54mm_Vertical | J4 |
| 1 | GPIOs | Connector_PinHeader_2.54mm:PinHeader_1x08_P2.54mm_Vertical | J5 |
| 1 | Logo_Open_Hardware_Small | Symbol:OSHW-Symbol_6.7x6mm_SilkScreen | LOGO1 |
| 1 | RAC03-05SK | RAC03-05SK:CONV_RAC03-05SK | PS1 |
| 1 | boot | Button_Switch_SMD:SW_SPST_B3U-1000P | SW2 |
| 1 | program | Connector_PinHeader_2.54mm:PinHeader_1x06_P2.54mm_Vertical | J2 |
| 1 | reset | Button_Switch_SMD:SW_SPST_B3U-1000P | SW1 |
| 1 | status | LED_SMD:LED_0603_1608Metric_Pad1.05x0.95mm_HandSolder | D1 |
daverowntree/SmartDesk
I open sourced a design I made a few years back for a non-paying client. Use it as you see fit!

CommanderRedYT/ws2812-clock
A simple pcb clock using ws2812 in 7-segment form

kbx81/ClimateSprinklerController
ESP32-based climate and sprinkler controller for use with ESPHome


wenzel-lab/syringe-pumps-and-controller
Design of 3d printable syringe pumps and dual controller.

SkullKill/ESP32-Wall-Clock-PCB
ESP32 based 30cm Wall Mounted Clock. WiFi, NTP, SNMP, web interface, MicroUsb, Type-C, HG3613 Retrofit

It measures 59.1 × 38.1 mm and has 2 copper layers, 1.6 mm thick.
27 parts, built around the ESP32-WROOM-32D, RAC03-05SK, BME280 and AP2112K-3.3. The full list of its parts is on this page, with links to each part's symbol and footprint where PCBKit's library has them.
From the kollhof/thermostat repository on GitHub, at the commit this page was made from: the board is hardware/thermostat.kicad_pcb. PCBKit opens the board in the browser, with nothing to install.
Its repository states no licence, so its author keeps all rights: ask kollhof before reusing the design.