2 layers49.3 × 103.7 mm
 Jutta-Proto/protocol-cpp86
C++ JURA protocol implementation for controlling a Jura coffee maker over a serial (UART) connection.
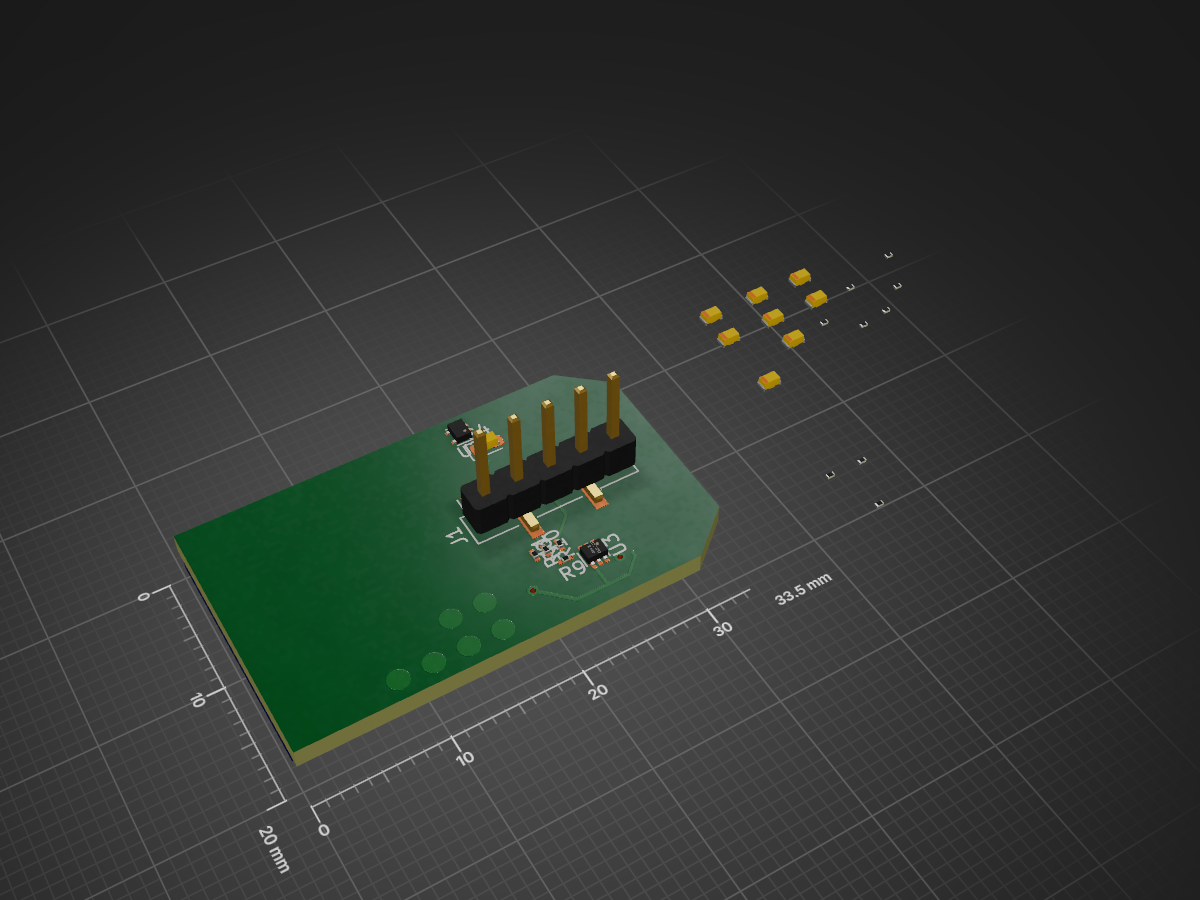
JURA WiFi Dongle is an open-source printed circuit board by Jutta-Proto, from the Jutta-Proto/protocol-cpp repository on GitHub, published under the GPL-3.0 licence. It is a 2-layer board of 33.5 × 20 mm with 31 parts on 62 nets, routed with 54 tracks and 3 vias.
It is built around the ESP32-WROOM-32D, ICL7667CPA+ and TSAL4400. Its parts include 15 resistors, 9 capacitors, 3 ICs, 1 diode and 1 connector. It belongs with the interfaces and adapters and radio and wireless boards and the ESP32 boards of this library.


C++ JURA protocol implementation for controlling a Jura coffee maker over a serial (UART) connection.
This work is based on the excellent work done by the people over at Protocol JURA. They were able to figure out the basic protocol used for communication with older JURA coffee makers.
Since newer models do not use this old V1-Protocol any more I started this project to understand the new one and create a reference implementation for it.
The following example shows the interaction with a JURA coffee maker over XMPP.
The complete implementation for this demo can be found here.

There are several steps of obfuscation being done by the JURA coffee maker to prevent others from reading the bare protocol.
To connect to an JURA coffee maker we are using a 5V UART signal with the following configuration:
Once a connection has been established we can start sending and receiving data.
But all data send and received is obfuscated.
The following description shows how to deobfuscate data received from the coffee maker.
To obfuscate data just follow the steps in reverse.
Step 0 The coffee maker always sends 4 "raw" byte per one byte of data with a break of 8ms in between each "raw" byte. This looks something like this:
01011011 <8ms break> 01011111 <8ms break> 01011111 <8ms break> 01011111 <8ms break>
01011111 <8ms break> 01111011 <8ms break> 01011111 <8ms break> 01011111 <8ms break>
01111011 <8ms break> 01111011 <8ms break> 01111111 <8ms break> 01011011 <8ms break>
01011111 <8ms break> 01111111 <8ms break> 01011011 <8ms break> 01011011 <8ms break>
01111011 <8ms break> 01111011 <8ms break> 01011011 <8ms break> 01011011 <8ms break>
Each line corresponds to one actual data byte.
Step 1
Each of our 4 "raw" bytes (each line) contains only 2 bits of our resulting data bit.
Bit 2 and 5.
All other bits (except 0) are set to 1.
0b01011011
    ^  ^
  DB1  DB2
DB1 and DB2 are our actual data bits here.
We have to combine alle 8 (of our 4 "raw" bytes) into a single data byte.
Examples:
const std::array<uint8_t, 4> encData{0b01011011, 0b01011111, 0b01011111, 0b01011111};

// Bit mask for the 2. bit from the left:
constexpr uint8_t B2_MASK = (0b10000000 >> 2);

// Bit mask for the 5. bit from the left:
constexpr uint8_t B5_MASK = (0b10000000 >> 5);

uint8_t decData = 0;
decData |= (encData[0] & B2_MASK) << 2;
decData |= (encData[0] & B5_MASK) << 4;
decData |= (encData[1] & B2_MASK);
decData |= (encData[1] & B5_MASK) << 2;
decData |= (encData[2] & B2_MASK) >> 2;
decData |= (encData[2] & B5_MASK);
decData |= (encData[3] & B2_MASK) >> 4;
decData |= (encData[3] & B5_MASK) >> 2; // 0b00010101Input -> Output
0 0 0 1 0 1 0 1 -> 0 1 0 1 0 0 0 1
0 1 1 0 0 1 0 1 -> 0 1 0 1 0 1 1 0
1 0 1 0 1 1 0 0 -> 1 1 0 0 1 0 1 0
0 1 1 1 0 0 0 0 -> 0 0 0 0 0 1 1 1
1 0 1 0 0 0 0 0 -> 0 0 0 0 1 0 1 0Step 2
In this step we switch both nibbles (4 bit) of each byte.
Examples:
1100 1100 -> 0011 0011
uint8_t in = 0b00010101;
uint8_t out = ((in & 0xF0) >> 4) | ((in & 0x0F) << 4); // 0b01010001Input -> Output
01011011 <8ms break> 01011111 <8ms break> 01011111 <8ms break> 01011111 <8ms break> -> 0 1 0 1 0 0 0 1
01011111 <8ms break> 01111011 <8ms break> 01011111 <8ms break> 01011111 <8ms break> -> 0 1 0 1 0 1 1 0
01111011 <8ms break> 01111011 <8ms break> 01111111 <8ms break> 01011011 <8ms break> -> 1 1 0 0 1 0 1 0
01011111 <8ms break> 01111111 <8ms break> 01011011 <8ms break> 01011011 <8ms break> -> 0 0 0 0 0 1 1 1
01111011 <8ms break> 01111011 <8ms break> 01011011 <8ms break> 01011011 <8ms break> -> 0 0 0 0 1 0 1 0Step 3
A last time we have to shift all bits in our byte around.
Here we have to split up our byte into two nibbles (4 bit) and switch two bits each.
Examples:
1100 1100 -> 0011 0011
uint8_t in = 0b01010001;
uint8_t out = ((in & 0xC0) >> 2) | ((in & 0x30) << 2) | ((in & 0x0C) >> 2) | ((in & 0x03) << 2); // 0b01010100Input -> Output -> Output_Hex Output_Dec Output_Char
0 1 0 1 0 0 0 1 -> 0 1 0 1 0 1 0 0 -> 54 84 T
0 1 0 1 0 1 1 0 -> 0 1 0 1 1 0 0 1 -> 59 89 Y
1 1 0 0 1 0 1 0 -> 0 0 1 1 1 0 1 0 -> 3A 58 :
0 0 0 0 0 1 1 1 -> 0 0 0 0 1 1 0 1 -> 0d 13 '\r'
0 0 0 0 1 0 1 0 -> 0 0 0 0 1 0 1 0 -> 0a 10 '\n'Which results in the message TY:\r\n.
Every message/command send from or to the coffee maker has to end with \r\n to be valid.
For simplicity reasons we omit the \r\n from all of the following messages and examples.
In general for every valid command a response will be send from the coffee maker.
The actual command is always uppercase (e.g. TY:) and the response send back is lowercase (ty:EF532M V02.03).
The following list of commands has been tested on an Jura E6 2019 platin (15326).
| Name | Command | Response | Description |
|---|---|---|---|
| UNKNOWN | AN:01 | ok: | - |
| Turn off | AN:02 | ok: | Turns off the coffee maker. |
| Erase EPROM | AN:0A | UNKNOWN | Untested! Erases the EPROM. Do not use. |
| Test UCHI | AN:0C | ok: | Test the UCHI steam plate. |
| Test Mode on | AN:20 | ok: | Turns on the test mode. |
| Test Mode off | AN:21 | ok: | Turns off the test mode. |
| UNKNOWN | AN:40 | an:40 | - |
| UNKNOWN | AN:AA | ok: | - |
| Get Type of Machine | TY: | ty: (e.g. ty:EF532M V02.03) | Returns the type of the machine. |
| UNKNOWN | FA:01 | ok: | - |
| (Button 1) | FA:04 | ok: | Simulates the button 1 press (left top). |
| (Button 2) | FA:05 | ok: | Simulates the button 2 press (left center). |
| (Button 3) | FA:06 | ok: | Simulates the button 3 press (left bottom). |
| (Button 4) | FA:07 | ok: | Simulates the button 4 press (right top). |
| (Button 5) | FA:08 | ok: | Simulates the button 5 press (right center). |
| (Button 6) | FA:09 | ok: | Simulates the button 6 press (right bottom). |
| Coffee Pump on | FN:01 | ok: | Turns on the coffee pump. |
| Coffee Pump off | FN:02 | ok: | Turns off the coffee pump. |
| Coffee Heater on | FN:03 | ok: | Turns on the coffee heater. |
| Coffee Heater off | FN:04 | ok: | Turns off the coffee heater. |
| Grinder on | FN:07 | ok: | Turns on the coffee grinder. |
| Grinder off | FN:08 | ok: | Turns off the coffee grinder. |
| Brew Group Something on | FN:09 | ok: | Turns something in relation to the brew group on. |
| Brew Group Something off | FN:0A | ok: | Turns something in relation to the brew group off. |
| Coffee press on | FN:0B | ok: | Turns on the coffee press. |
| Coffee press off | FN:0C | ok: | Turns off the coffee press. |
| Init Brew Group | FN:0D | ok: | Initializes the brew group. |
| Brew Group to open Postion | FN:0E | ok: | Moves the brew group into the "open" position. |
| Brew Group to grinding Postion | FN:0F | ok: | Moves the brew group into the grinding position. |
| Brew Group to unknown Postion XYZ | FN:13 | ok: | Moves the brew group into an currently unknown position. |
| Brew Group to unknown Postion XYZ | FN:1B | ok: | Moves the brew group into an currently unknown position. |
| Brew Group to throw out position?! Postion XYZ | FN:1C | ok: | Moves the brew group into the throw out position. |
| Brew Group to brewing Position | FN:22 | ok: | Moves the brew group into the brewing position. |
| UNKNOWN | FN:24 | ok: | - |
| UNKNOWN | FN:25 | ok: | - |
| UNKNOWN | FN:26 | ok: | - |
| UNKNOWN | FN:27 | ok: | - |
| UNKNOWN | FN:44 | ok: | - |
| UNKNOWN | FN:45 | ok: | - |
| UNKNOWN | FN:50 | ok: | - |
| Turn off | FN:51 | ok: | Turns off the coffee maker. |
| UNKNOWN | FN:54 | ok: | - |
| UNKNOWN | FN:55 | ok: | - |
| UNKNOWN | FN:60 | ok: | - |
| UNKNOWN | FN:61 | ok: | - |
| UNKNOWN | FN:62 | ok: | - |
| UNKNOWN | FN:63 | ok: | - |
| UNKNOWN | FN:64 | ok: | - |
| UNKNOWN | FN:65 | ok: | - |
| UNKNOWN | FN:66 | ok: | - |
| UNKNOWN | FN:67 | ok: | - |
| UNKNOWN | FN:70 | ok: | - |
| UNKNOWN | FN:71 | ok: | - |
| UNKNOWN | FN:72 | ok: | - |
| UNKNOWN | FN:73 | ok: | - |
| UNKNOWN | FN:80 | ok: | - |
| UNKNOWN | FN:81 | ok: | - |
| UNKNOWN | FN:88 | ok: | - |
| UNKNOWN | FN:89 | ok: | - |
| Debug mode on | FN:89 | ku:, Ku: pause ku:, Ku:, ... | Enables the debug mode. Sends continuously ku:, Ku:, ... Once an action like opening the hot water valve accrues, outputs information like percentage done. To disable it again disconnect the coffee maker from power. |
| UNKNOWN | FN:90 | ok: | - |
| UNKNOWN | FN:99 | ok: | - |
FN:07 # Grind onFN:08 # Grind offFN:22 # Brew group to brewing positionFN:0B # Coffee press onFN:0C # Coffee press offFN:03 # Turn on the coffee water heaterFN:01 # Coffee water pump onFN:02 # Coffee water pump offFN:04 # Turn off the coffee water heaterFN:03 # Turn on the coffee water heaterFN:01 # Coffee water pump onFN:02 # Coffee water pump offFN:04 # Turn off the coffee water heaterFN:0D # Reset the brew group and throw out the old coffee grainThe following requirements are required to build this project.
To install those dependencies on Fedora, run the following commands:
sudo dnf install -y gcc clang cmake python3 python3-pip
pip install --user conan==1.59.0 # conan 2.x.x is not supported right nowTo install those dependencies on a Raspberry Pi, running the Raspberry Pi OS, run the following commands:
sudo apt install -y cmake python3 python3-pip
pip3 install --user conan==1.59.0 # conan 2.x.x is not supported right now
For all the other requirements, head over here: https://github.com/Jutta-Proto/hardware-pi#raspberry-pi-os
Run the following commands to build this project:
# Clone the repository:
git clone https://github.com/Jutta-Proto/protocol-cpp.git
# Switch into the newly cloned repository:
cd protocol-cpp
# Build the project:
mkdir build
cd build
cmake ..
cmake --build .[1]: https://uk.jura.com/en/homeproducts/accessories/SmartConnect-Main-72167
| Qty | Value | Footprint | References |
|---|---|---|---|
| 7 | C | Capacitor_Tantalum_SMD:CP_EIA-1608-08_AVX-J | C1, C2, C3, C4, C5, C7, C9 |
| 3 | 0 | Resistor_SMD:R_0201_0603Metric | R7, R10, R11 |
| 3 | 100 | Resistor_SMD:R_0201_0603Metric | R1, R8, R9 |
| 3 | 10K | Resistor_SMD:R_0201_0603Metric | R13, R14, R15 |
| 1 | 131,7K | Resistor_SMD:R_0201_0603Metric | R3 |
| 1 | 1K | Resistor_SMD:R_0201_0603Metric | R5 |
| 1 | 2K | Resistor_SMD:R_0201_0603Metric | R6 |
| 1 | 3,9K | Resistor_SMD:R_0201_0603Metric | R4 |
| 1 | 480uF | Capacitor_Tantalum_SMD:CP_EIA-1608-08_AVX-J | C6 |
| 1 | 7.4K | Resistor_SMD:R_0201_0603Metric | R2 |
| 1 | 8,4 K | Resistor_SMD:R_0201_0603Metric | R12 |
| 1 | C | Capacitor_Tantalum_SMD:CP_EIA-1608-08_AVX-J_Pad1.25x1.05mm_HandSolder | C8 |
| 1 | Conn_01x05_MountingPin | Connector_PinHeader_2.54mm:PinHeader_1x05_P2.54mm_Vertical_SMD_Pin1Right | J1 |
| 1 | ESP32-WROOM-32D | RF_Module:ESP32-WROOM-32 | U1 |
| 1 | GL2576-5.0TA5R | Package_TO_SOT_SMD:SOT-553 | U2 |
| 1 | ICL7667 | Package_TO_SOT_SMD:SOT-563 | U3 |
| 1 | SW_Push | Button_Switch_SMD:SW_Push_SPST_NO_Alps_SKRK | SW1 |
| 1 | TSAL4400 | LED_SMD:LED_0201_0603Metric | D1 |
The 30 most common of 31 parts.
It measures 33.5 × 20 mm and has 2 copper layers, 1.6 mm thick.
31 parts, built around the ESP32-WROOM-32D, ICL7667CPA+ and TSAL4400. The full list of its parts is on this page, with links to each part's symbol and footprint where PCBKit's library has them.
From the Jutta-Proto/protocol-cpp repository on GitHub, at the commit this page was made from: the board is JURA WiFi/JURA WiFi Dongle/JURA WiFi Dongle.kicad_pcb and its schematic JURA WiFi/JURA WiFi Dongle/JURA WiFi Dongle.kicad_sch. PCBKit opens the board in the browser, with nothing to install.
Its repository publishes it under the GPL-3.0 licence: you may reuse it on that licence's terms (keep the author's notice, and for a copyleft licence share your changes alike).


bejaouihamza/https-github.com-bejaouihamza-IR-Interruption-Detector
This project is a complete PCB-based system that detects interruptions between an IR emitter and receiver. When an object blocks the IR beam: - A buzzer/speaker is triggered, - A 7-segment display counter is…

chislonljoseph/Medivault
ESP32-based smart medicine storage and reminder PCB designed in KiCad 10 with complete manufacturing files and documentation.

