2 layers35 × 39 mm
 jonny190/TableLight
A 3D-printable, battery-powered, USB-C rechargeable table lamp in the classic "Poldina" shape - honeycomb disc base, thin stem, down-firing cone shade with a white top - running WLED on an ESP32, with a capacitive touch…
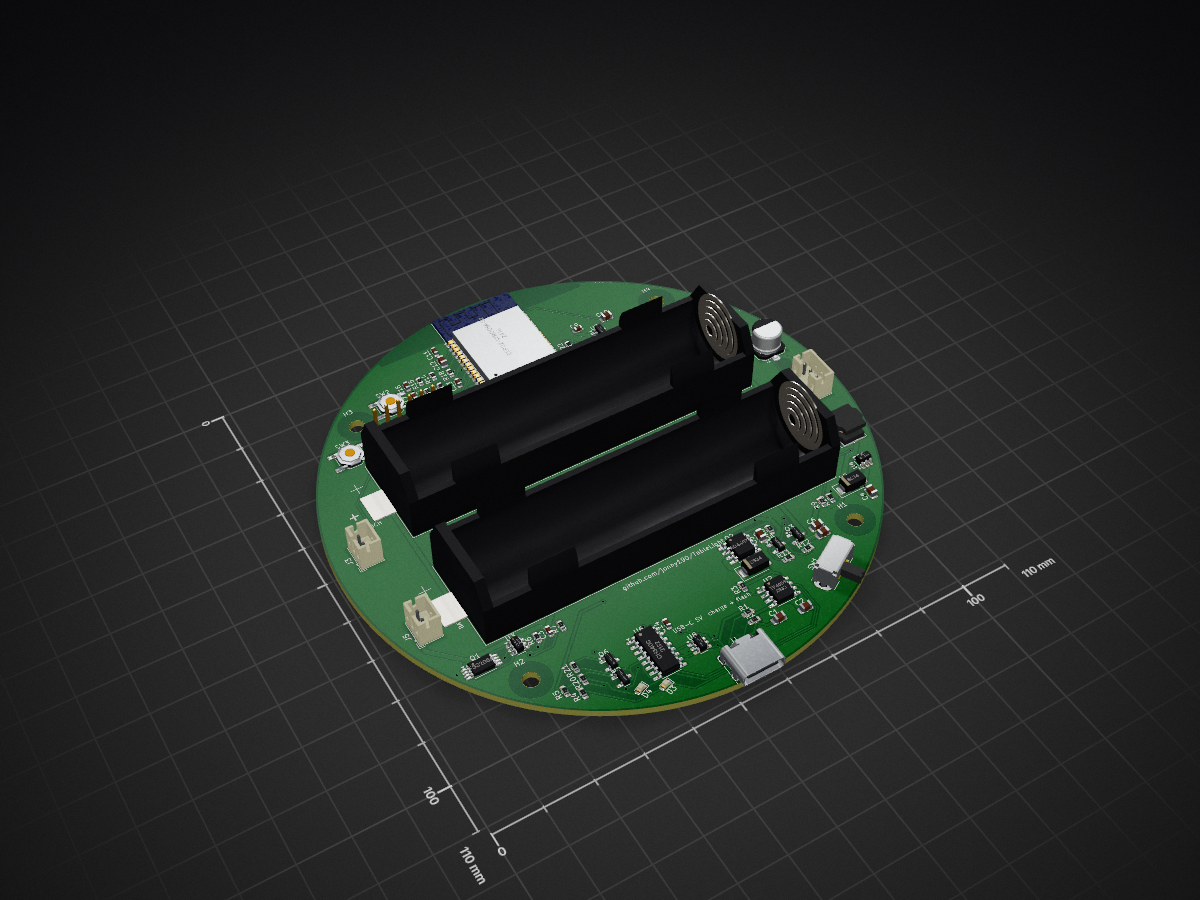
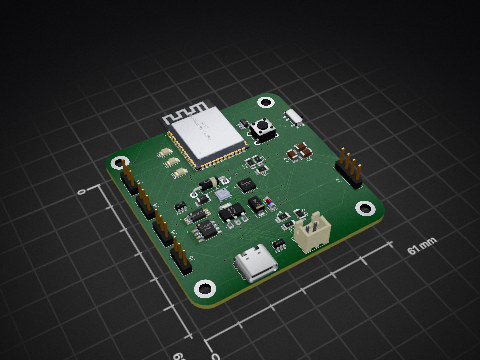
TableLight is an open-source printed circuit board by jonny190, from the jonny190/TableLight repository on GitHub, published under the MIT licence. It is a 2-layer board of 62 × 6 mm with 72 parts on 46 nets, routed with 755 tracks and 58 vias.
It is built around the 74AHCT1G125SE, CH340C and ESP32-WROOM-32E-N4, with the MT3608, AP2112K-3.3 and DW01A among its other parts. Its parts include 22 resistors, 17 capacitors, 8 ICs, 6 transistors and 5 connectors. It belongs with the ESP32 boards of this library.


A 3D-printable, battery-powered, USB-C rechargeable table lamp in the classic "Poldina" shape - honeycomb disc base, thin stem, down-firing cone shade with a white top - running WLED on an ESP32, with a capacitive touch pad hidden under the white top plate.
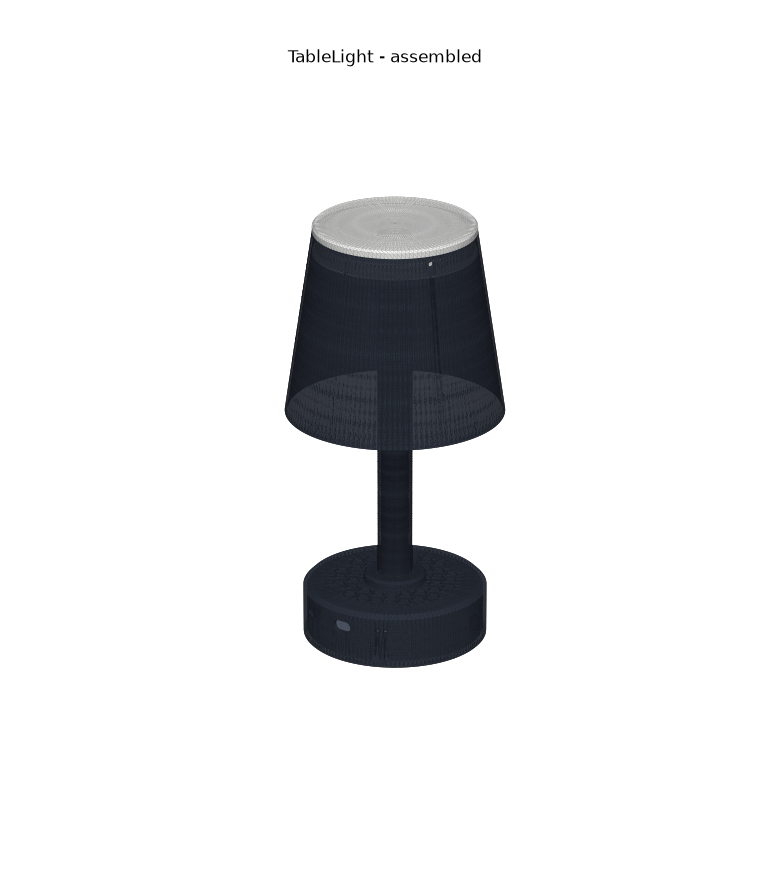
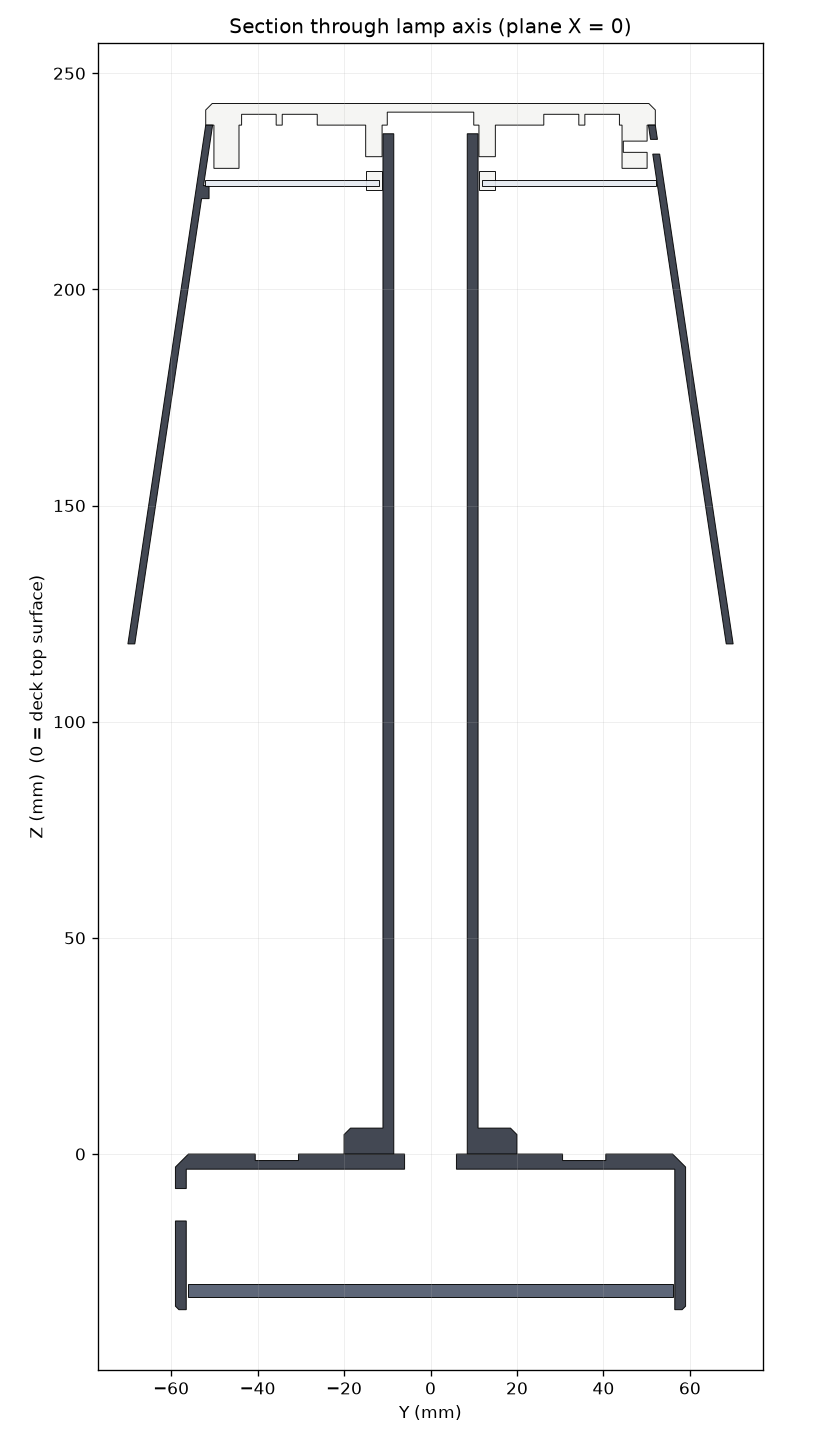
| Size | Ø118 x 36 mm base, Ø22 stem, shade Ø140 -> Ø104 x 120 mm, 279 mm tall overall |
| Light | 24-LED SK6812 RGBW (or WS2812B) ring under the head, shining down through a diffuser; optional second 16-LED ring |
| Power | 1 or 2 x 18650 Li-ion in parallel (1S) in the base, USB-C charging (1 A) in the base, runs while charging |
| Control | WLED app / web UI / Home Assistant + touch on the white top (ESP32 native touch) |
| Electronics | one custom Ø110 mm PCB in the base (KiCad board + PCBWay Gerber/BOM/CPL package included); flashes WLED over the same USB-C port |
| Runtime | ~5 h at full reading brightness, ~12 h at mood brightness with two 3500 mAh cells (half with one cell) |
cad/tablelight.py          parametric CAD (Python: trimesh + manifold) - ALL dimensions live here
cad/stl/                   ready-to-print STL files (6 parts)
hardware/pcb/              custom controller PCB: SKiDL circuit, KiCad 7 board (kicad/), PCBWay fab package
                           (fab/: Gerbers, drill, BOM, pick-and-place), board generator, design notes
firmware/wled/             WLED build override + settings for this lamp
docs/BOM.md                complete bill of materials (printed parts, electronics, hardware, consumables)
docs/PRINTING.md           print settings and orientation per part
docs/ASSEMBLY.md           step-by-step build
docs/WLED_SETUP.md         WLED configuration (pins, 2D matrix, touch button, battery, current limit)
docs/images/               renders, section drawing, PCB placement, block diagram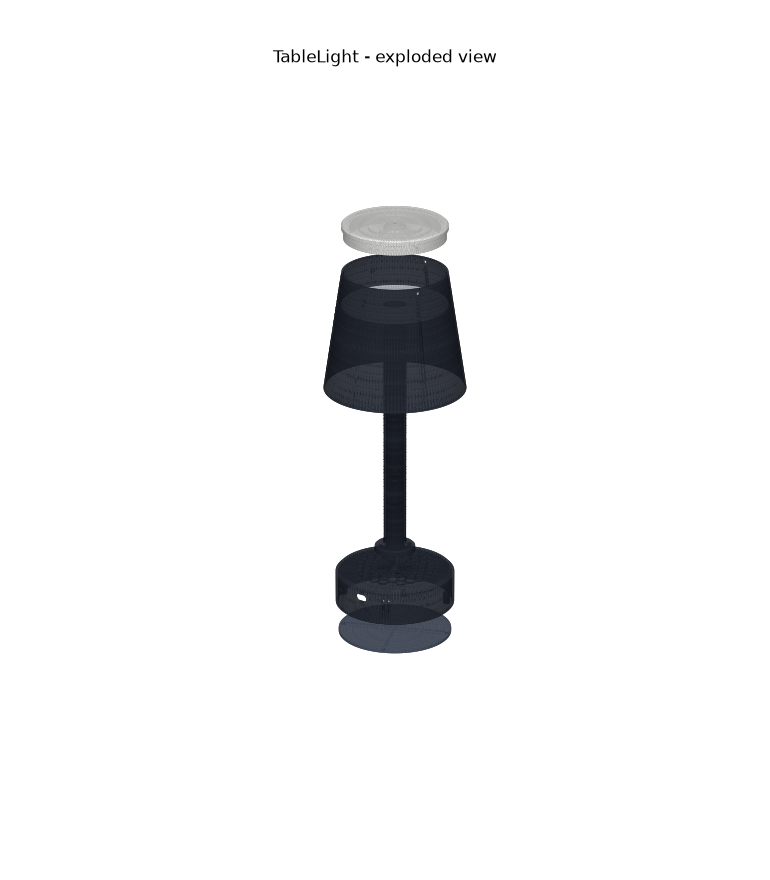
| STL | Qty | What it does |
|---|---|---|
base_shell.stl | 1 | Honeycomb-topped base disc: the PCB hangs under its deck (components facing down), USB-C, power switch and charge LEDs in the side wall, 1-2 x 18650 inside |
base_bottom_plate.stl | 1 | Screw-on floor with rubber feet; remove it to reach the batteries, buttons and connectors |
stem.stl | 1 | Ø22 hollow stem with a Ø40 foot flange; screwed to the deck from below, carries the wires to the head |
head_plate.stl | 1 | White top: stem socket, two LED-ring channels on the underside, skirt that the shade screws to, touch-pad recess |
cone_shade.stl | 1 | Opaque cone Ø140 -> Ø104, open at the bottom; 3 nubs hold the diffuser, 3 radial screws hold it to the head |
head_diffuser.stl | 1 | Ø104 translucent disc 14 mm under the LED ring so you never see bare LEDs from below |
Section through the assembled lamp (all clearances are modelled, nothing is glued):
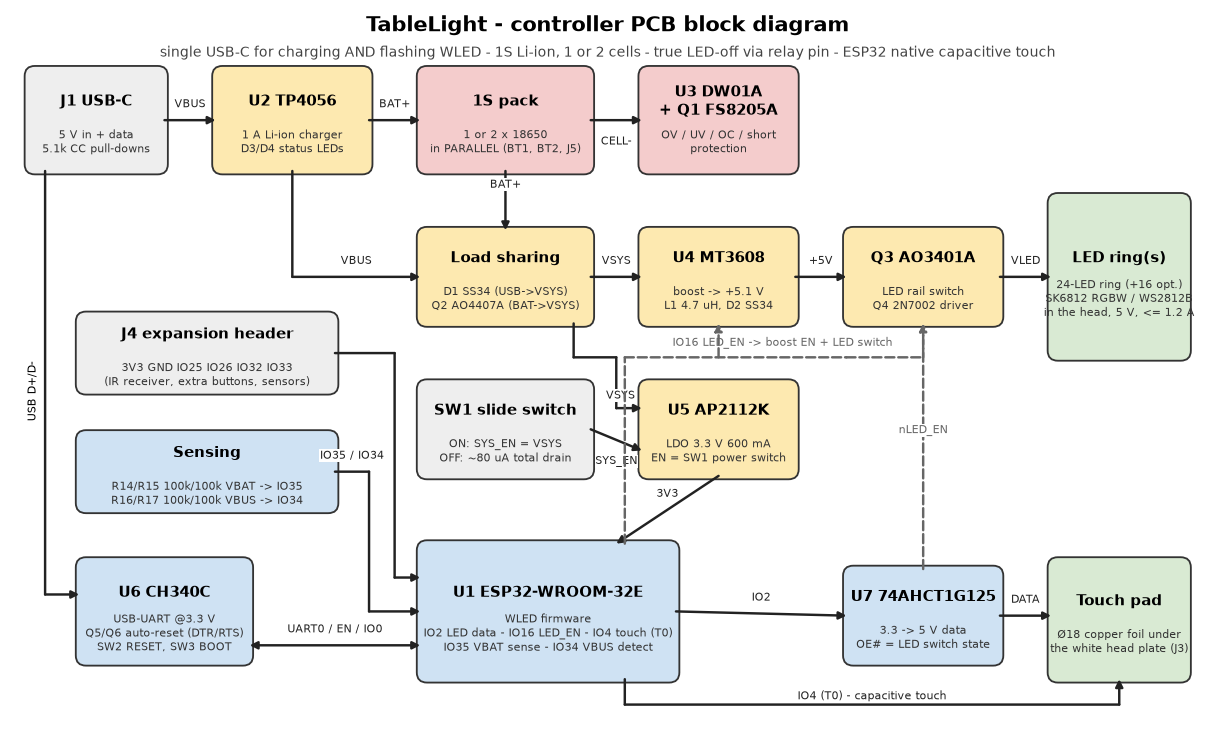
Power path: USB-C -> TP4056 charger -> 1S pack (DW01A/FS8205A protected) -> load-share (Schottky + P-FET)
-> VSYS -> MT3608 boost 5.1 V -> P-FET LED switch -> LED ring in the head (via the stem); VSYS -> 3.3 V LDO -> ESP32-WROOM-32E.
The USB-C data lines go to a CH340C with auto-reset, so WLED is flashed through the charging port.
A slide switch in the base wall is the hard off (about 80 uA drain). WLED's "relay pin" cuts the LED rail so
standby is only the ESP32.
See hardware/pcb/README.md for the design rationale and hardware/pcb/SCHEMATIC.md for every net.
docs/PRINTING.md). Fit 12 x M3 heat-set inserts.hardware/pcb/fab/tablelight-gerbers.zip to PCBWay (hardware/pcb/fab/README.md has the form values). Flash WLED (docs/WLED_SETUP.md).docs/ASSEMBLY.md).pip install -r requirements.txt
python3 cad/tablelight.py # STLs -> cad/stl, renders -> docs/images
python3 hardware/pcb/tablelight_netlist.py # tablelight.net, bom_pcb.csv, SCHEMATIC.md
python3 hardware/pcb/board_outline.py # outline.dxf, placement.svg, PLACEMENT.md
python3 hardware/pcb/build_board.py # KiCad board -> autoroute -> DRC -> fab/ (needs KiCad 7 + freerouting.jar)
python3 docs/block_diagram.py # block_diagram.svg/.pngChange a value in the P = dict(...) block at the top of cad/tablelight.py (shade size and taper, stem length,
base diameter, honeycomb size, ring diameters...) and everything that depends on it - head socket, cone screw
positions, wall openings, PCB placement drawing - follows. The stem is 236 mm tall as printed; set stem_len
lower if your printer's Z is under 240 mm.
MIT for the code and design files. WLED is licensed separately by its authors.
| Qty | Value | Footprint | References |
|---|---|---|---|
| 6 | 100k | R_0603_1608Metric | R8, R11, R14, R15, R16, R17 |
| 6 | 100nF | C_0603_1608Metric | C3, C11, C14, C15, C16, C17 |
| 4 | 10k | R_0603_1608Metric | R10, R12, R18, R19 |
| 4 | 10uF 10V | C_0805_2012Metric | C1, C2, C10, C12 |
| 4 | 1k | R_0603_1608Metric | R4, R5, R7, R22 |
| 4 | 22uF 10V | C_0805_2012Metric | C4, C5, C6, C7 |
| 4 | M3 | MountingHole_3.2mm_M3 | H1, H2, H3, H4 |
| 2 | 12k | R_0603_1608Metric | R20, R21 |
| 2 | 1uF | C_0603_1608Metric | C9, C13 |
| 2 | 5.1k | R_0603_1608Metric | R1, R2 |
| 2 | MMBT3904 | SOT-23 | Q5, Q6 |
| 2 | SS34 | D_SMA | D1, D2 |
| 1 | 1.2k | R_0603_1608Metric | R3 |
| 1 | 100R | R_0603_1608Metric | R6 |
| 1 | 100uF 6.3V | CP_Elec_6.3x5.4 | C8 |
| 1 | 18650 | BatteryHolder_Keystone_1042_1x18650 | BT1 |
| 1 | 18650 (optional 2nd cell) | BatteryHolder_Keystone_1042_1x18650 | BT2 |
| 1 | 2N7002 | SOT-23 | Q4 |
| 1 | 330R | R_0603_1608Metric | R13 |
| 1 | 4.7uH 4A | L_Bourns_SRN6045TA | L1 |
| 1 | 74AHCT1G125 | SOT-23-5 | U7 |
| 1 | 75k | R_0603_1608Metric | R9 |
| 1 | AO3401A | SOT-23 | Q3 |
| 1 | AO4407A | SOIC-8_3.9x4.9mm_P1.27mm | Q2 |
| 1 | AP2112K-3.3 | SOT-23-5 | U5 |
| 1 | BAT ALT | JST_PH_B2B-PH-K_1x02_P2.00mm_Vertical | J5 |
| 1 | BOOT | SW_SPST_TL3342 | SW3 |
| 1 | CH340C | SOIC-16_3.9x9.9mm_P1.27mm | U6 |
| 1 | DW01A | SOT-23-6 | U3 |
| 1 | ESP32-WROOM-32E-N4 | ESP32-WROOM-32 | U1 |
| 1 | EXP | PinHeader_1x06_P2.54mm_Vertical | J4 |
| 1 | FS8205A | TSSOP-8_4.4x3mm_P0.65mm | Q1 |
| 1 | GREEN | LED_0603_1608Metric | D4 |
| 1 | LED RING | JST_PH_B3B-PH-K_1x03_P2.00mm_Vertical | J2 |
| 1 | MT3608 | SOT-23-6 | U4 |
| 1 | POWER | SW_Slide_SPDT_Angled_CK_OS102011MA1Q | SW1 |
| 1 | RED | LED_0603_1608Metric | D3 |
| 1 | RESET | SW_SPST_TL3342 | SW2 |
| 1 | TOUCH | JST_PH_B2B-PH-K_1x02_P2.00mm_Vertical | J3 |
| 1 | TP4056 | SOIC-8-1EP_3.9x4.9mm_P1.27mm_EP2.29x3mm | U2 |
| 1 | USB-C 16P | USB_C_Receptacle_HRO_TYPE-C-31-M-12 | J1 |
| 1 | USBLC6-2SC6 | SOT-23-6 | U8 |
It measures 62 × 6 mm and has 2 copper layers, 1.6 mm thick.
72 parts, built around the 74AHCT1G125SE, CH340C, ESP32-WROOM-32E-N4 and MT3608. The full list of its parts is on this page, with links to each part's symbol and footprint where PCBKit's library has them.
From the jonny190/TableLight repository on GitHub, at the commit this page was made from: the board is hardware/pcb/kicad/tablelight.kicad_pcb. PCBKit opens the board in the browser, with nothing to install.
Its repository publishes it under the MIT licence: you may reuse it on that licence's terms (keep the author's notice, and for a copyleft licence share your changes alike).


hilham1990/Multimetre
AkademiUsta Multimetre: ATmega328P + 16 bit ADS1115 ADC, OLED ekran ve Li-ion pil ile açık kaynak el multimetresi. KiCad 10 dosyaları, Gerber ve LCSC kodlu BOM. Kart henüz üretilmedi.

t3ry4git/stm32Co2
A simple CO2 and environmental monitor based on the STM32F103C8 microcontroller. The firmware reads temperature and humidity from a DHT22 sensor, measures CO2 concentration using an MHZ19B module and displays values on…


dev-campusfab/chessLab
Interactive Chess board that brings visuals to the game and can help the player to learn.

GuzziFlipFlops/ESP32-Walkie-Talkie
An open source ESPNOW based walkie talkie with a 600 meter tested distance, with an OLED and multiple buttons to interact with