2 layers139.7 × 73.7 mm

 joezilla/bitsby82
MCP-Enabled Serial Terminal, Disk Image Management, Altair FDC+ Disk Server
AltairDrive is an open-source printed circuit board by joezilla, from the joezilla/bitsby8 repository on GitHub, published under the GPL-3.0 licence. It is a 2-layer board of 207 × 76 mm with 40 parts on 60 nets, routed with 235 tracks and 0 vias.
Its parts include 17 resistors, 17 diodes, 4 connectors and 2 switches. It belongs with the computers and single-board computers and interfaces and adapters boards of this library.

BitsBy8 turns a Raspberry Pi (or any Linux/macOS machine) into a disk server and virtual-machine workbench for the MITS Altair 8800 and other S-100 computers.
It serves virtual floppy and hard-disk images to a real Altair through its FDC+ Enhanced Floppy Disk Controller over a serial cable — and it can also build and boot fully virtual S-100 machines right in your browser, no hardware required. Everything runs from a single Svelte web UI, with a REST API and an MCP server for AI assistants on the side.
Version: 3.0.0-alpha · License: GPL-3.0 · Platforms: Linux (Raspberry Pi & x86), macOS
Note: BitsBy8 is the product name. The Debian package and systemd service are now named
bitsby8(the CLI isbitsby8, with anfdcsdsalias kept for backward compatibility). The source repo is stillfdcplus-web.
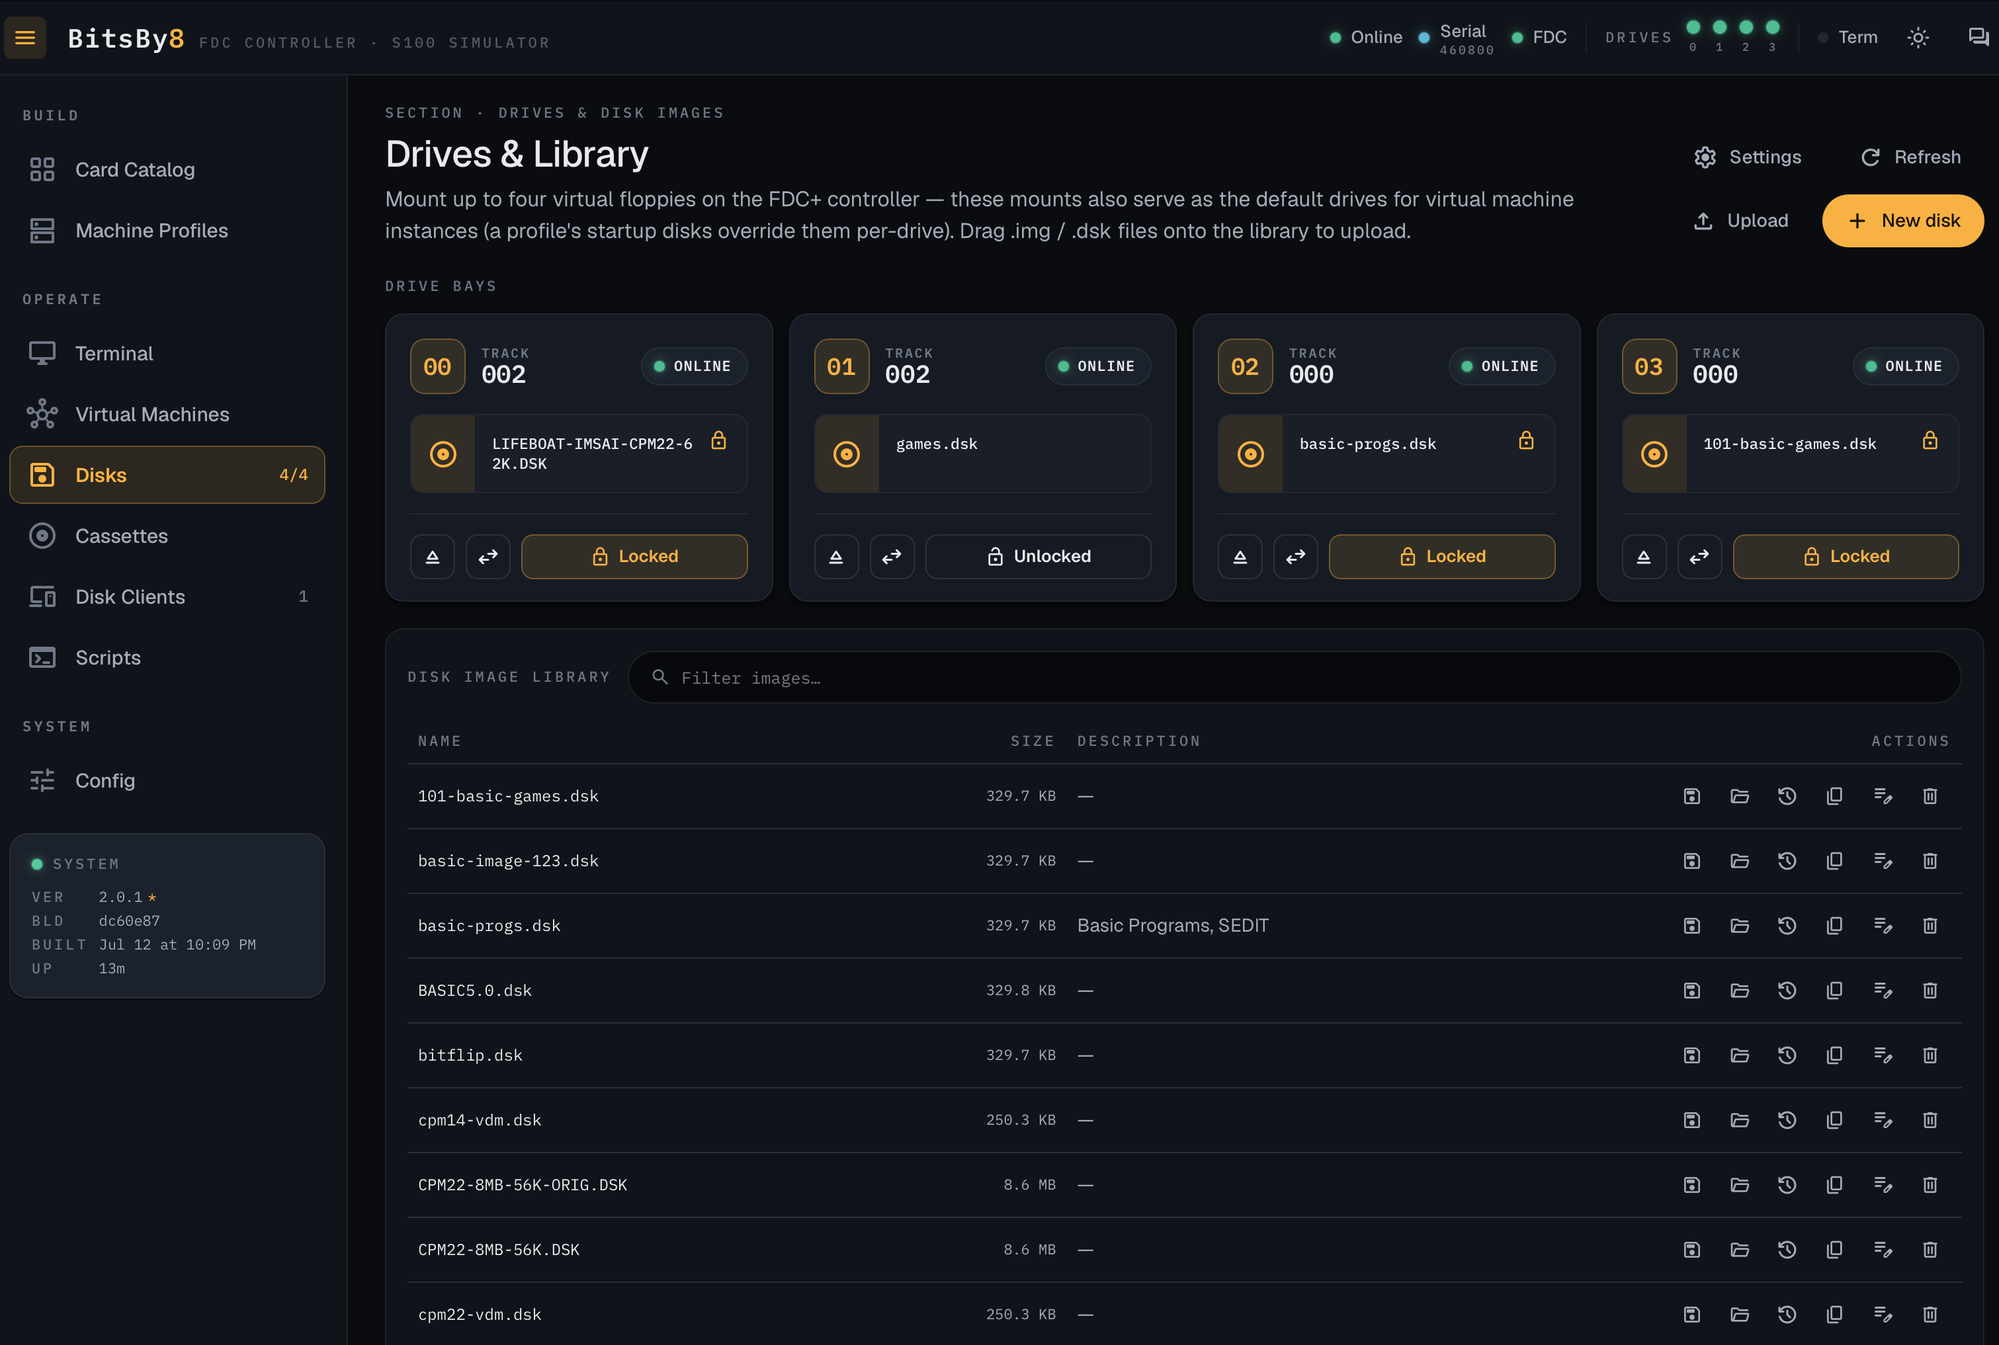
Serve disks to a real Altair. Mount up to four floppies (plus larger hard-disk images) and serve them to an unmodified Altair 8800 through its FDC+ controller over serial — or over a WebSocket link to an Altair simulator. Drives can be read-only or copy-on-write, and multiple machines can share the same library at once.
Run virtual machines. Assemble an S-100 computer from a catalog of emulated cards — CPU (8080/Z80), RAM, disk, serial, video — save it as a reusable Machine Profile, and boot it in the browser. Each running machine gets a live serial console, an Altair-style front panel, and a video monitor (VDM-1 character display / Cromemco Dazzler graphics). Snapshot a machine and restore it later.
One place to drive it all. The web UI, a full REST API, and an MCP server (90+ tools) all reach the same live state, so you can operate BitsBy8 by hand, from scripts, or from an AI assistant.
At a glance:
/api/docsTry the whole thing on your laptop — mount a sample disk or boot a virtual machine without an Altair in sight:
git clone <repo-url> fdcplus-web && cd fdcplus-web
pnpm install            # provisions the backend + frontend workspace
pnpm dev:all            # backend + web UI, live-reloading
open http://localhost:3000
Requires Node.js 22+ and pnpm.
Build and install the .deb, then run it as a systemd service:
make deb
sudo dpkg -i ../bitsby8_*.deb
sudo apt-get install -f            # pull in any missing dependencies

sudo nano /etc/bitsby8/bitsby8.config.json   # set your serial port, drives, etc.
sudo systemctl enable --now bitsby8          # start on boot and now
Upgrading from an older fdcsds install is automatic — apt supersedes it and
your config, data, and database are migrated.
The web UI is then at http://<pi-hostname>:3000. See DEBIAN-PACKAGE.md for the full packaging guide.
docker compose up -d # then open the web UI (default port 3000)Configuration and data persist in the mounted volume; see docker-compose.yml.
git clone <repo-url> fdcplus-web && cd fdcplus-web
pnpm install
pnpm build:all            # compile backend + build the web UI
pnpm start -- --web # or: bitsby8 --web (if installed globally)Wire the FDC+ controller to a USB serial adapter and point BitsBy8 at that port:
bitsby8 -p /dev/ttyUSB0 -0 disks/cpm22.dsk -w
# -p  serial port for the FDC+     -0..-3  mount a disk to a drive
# -w  enable the web interface     -b <rate>  set baud (default 230400)
A second serial port can drive an interactive console terminal in the web UI:
bitsby8 -p /dev/ttyUSB0 -0 disks/cpm22.dsk \
  --terminal-port /dev/ttyUSB1 --terminal-baud 9600 -w
A few setup notes:
dialout group (sudo usermod -aG dialout $USER, then log out and back in)./dev/ttyUSB0 can shuffle across reboots. Run bitsby8 --show-persistent-paths to get a stable /dev/serial/by-id/... path for your config.Generate a starter config any time with bitsby8 --example-config > .bitsby8.config, and run bitsby8 --help for the full option list.
Open the UI and everything is in the left sidebar:
| Section | What it's for |
|---|---|
| Disks | Mount/unmount images across the four drive bays, toggle read-only, browse and upload the disk library, take snapshots |
| Virtual Machines | Boot machine profiles and drive them in the run cockpit — serial console, Altair front panel, video monitor |
| Card Catalog / Machine Profiles | Assemble S-100 machines from emulated cards and save them as reusable profiles |
| Terminal | A VT102 console for a real serial port or a running virtual machine |
| Cassettes | Play cassette-tape audio images |
| Disk Clients | See and manage the machines currently sharing your disks (multi-client serving) |
| Scripts | Replay canned input / XMODEM transfers to a machine |
| Config | Server settings — serial defaults, web/API, MCP |
More detail in docs/WEB-INTERFACE.md.
BitsBy8 ships a Model Context Protocol server exposing 90+ tools — mount disks, drive machines, read/write CP/M files, run the terminal — to assistants like Claude Code. It's off by default; opt in per transport:
bitsby8 --mcp:
{ "mcpServers": { "bitsby8": { "command": "bitsby8", "args": ["--mcp", "--data-dir", "/path/to/data"] } } }--mcp-http). It requires a bearer token and is intended for trusted networks — put TLS in front if you expose it.The tools can read and write disk images and send bytes to real hardware, so don't point an assistant at a production machine without meaning to.
Settings live at two layers:
/etc/bitsby8/bitsby8.config.json, or .bitsby8.config from source) plus CLI flags. These set up the box; changes take effect on restart.The data directory (/var/lib/bitsby8 on a .deb install) holds your disk library, uploads, cassettes, and the database.
GPL-3.0.
See AUTHORS for the full contributor list.
| Qty | Value | Footprint | References |
|---|---|---|---|
| 17 | 470 | Resistor_THT:R_Bare_Metal_Element_L12.4mm_W4.8mm_P11.40mm | R1, R2, R3, R4, R5, R6, R7, R8, R10, R11, R12, R13, R14, R15, R16, R17 +1 |
| 1 | 1_HL | LED_THT:LED_D5.0mm | D2 |
| 1 | 1_MT | LED_THT:LED_D5.0mm | D1 |
| 1 | 1_RO | LED_THT:LED_D5.0mm | D3 |
| 1 | 2_HL | LED_THT:LED_D5.0mm | D5 |
| 1 | 2_MT | LED_THT:LED_D5.0mm | D4 |
| 1 | 2_RO | LED_THT:LED_D5.0mm | D6 |
| 1 | 3_HL | LED_THT:LED_D5.0mm | D8 |
| 1 | 3_MT | LED_THT:LED_D5.0mm | D7 |
| 1 | 3_RO | LED_THT:LED_D5.0mm | D9 |
| 1 | 4_HL | LED_THT:LED_D5.0mm | D11 |
| 1 | 4_MT | LED_THT:LED_D5.0mm | D10 |
| 1 | 4_RO | LED_THT:LED_D5.0mm | D12 |
| 1 | ACT | LED_THT:LED_D5.0mm | D17 |
| 1 | Conn_01x03_Pin | Connector:FanPinHeader_1x03_P2.54mm_Vertical | J3 |
| 1 | Conn_02x20_Odd_Even | Connector_PinHeader_2.54mm:PinHeader_2x20_P2.54mm_Vertical | J1 |
| 1 | I2C | Connector:FanPinHeader_1x04_P2.54mm_Vertical | J4 |
| 1 | PWR | LED_THT:LED_D5.0mm | D16 |
| 1 | SERIAL | Connector:FanPinHeader_1x03_P2.54mm_Vertical | J2 |
| 1 | SW_PWR | MrEppot:E-Switch | SW2 |
| 1 | SW_RBT | MrEppot:E-Switch | SW3 |
| 1 | S_CO | LED_THT:LED_D5.0mm | D13 |
| 1 | S_RX | LED_THT:LED_D5.0mm | D15 |
| 1 | S_TX | LED_THT:LED_D5.0mm | D14 |
It measures 207 × 76 mm and has 2 copper layers, 1.6 mm thick.
40 parts. The full list of its parts is on this page, with links to each part's symbol and footprint where PCBKit's library has them.
From the joezilla/bitsby8 repository on GitHub, at the commit this page was made from: the board is kicad/AltairDrive.kicad_pcb and its schematic kicad/AltairDrive.kicad_sch. PCBKit opens the board in the browser, with nothing to install.
Its repository publishes it under the GPL-3.0 licence: you may reuse it on that licence's terms (keep the author's notice, and for a copyleft licence share your changes alike).

hackclub/OnBoard
💡 Join 1,000 teenagers and make your first PCB with a $100 grant!

Chrismettal/EleLab_v2
Cheap DIY lab system for hobbyists and the tinkering folk

Chrismettal/flipper-zero-backpacks
Backpack-style addon boards for the Flipper Zero!


ohmtech-rdi/eurorack-blocks
Software to Hardware Prototyping for Eurorack using C++, Max/Gen~ or Faust
