2 layers80 × 55 mm

 hvitis/PingPongLauncher
Launch your balls up in the air.
Hien servo breakout is an open-source printed circuit board by hvitis, from the hvitis/PingPongLauncher repository on GitHub. It is a 2-layer board of 85 × 60 mm with 18 parts on 13 nets.
Its parts include 9 connectors, 3 capacitors and 2 resistors. It belongs with the robots and motor control and interfaces and adapters boards of this library.
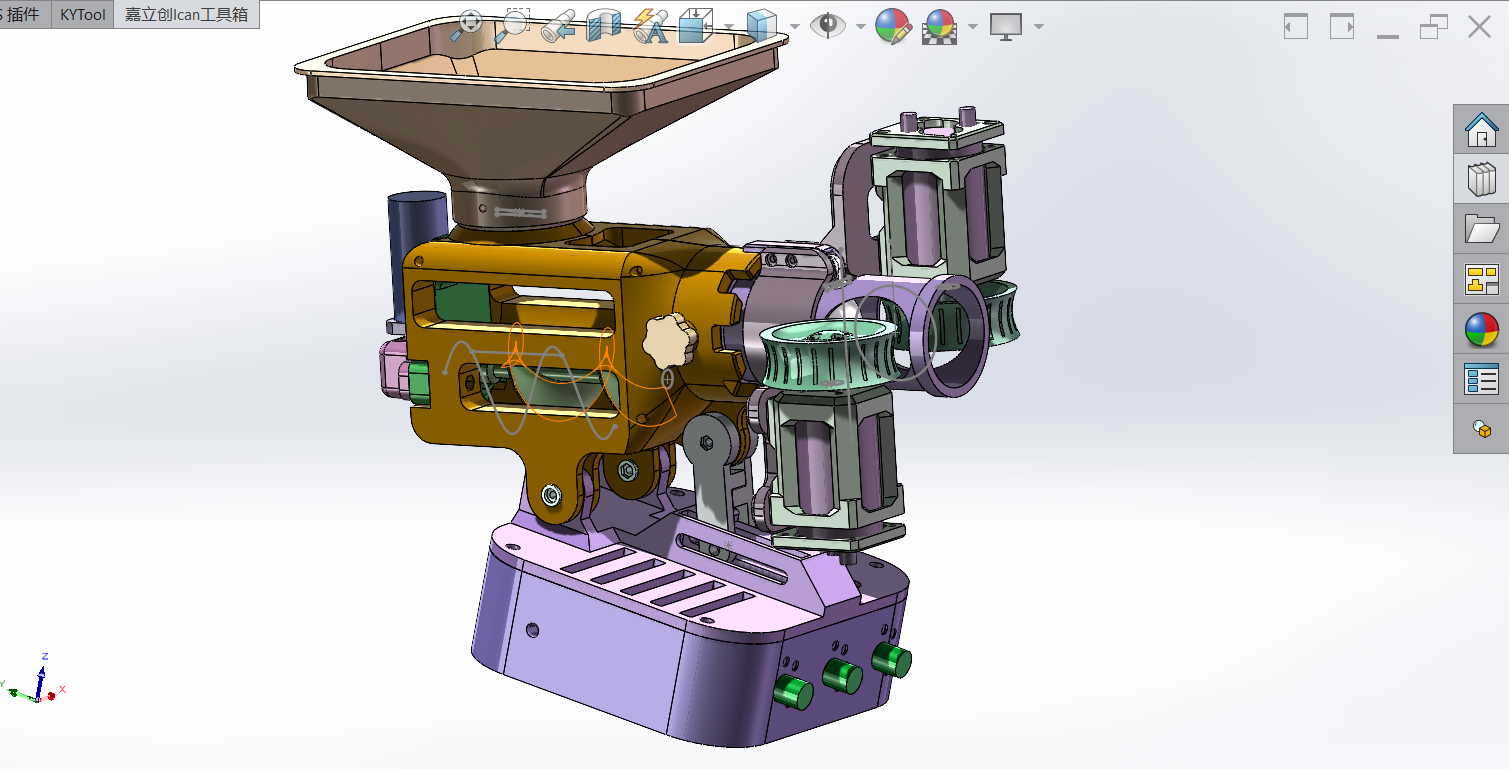
A static website with four launcher tabs: the supplied 3D-printed launcher, codyhsu’s Arduino launcher, PingPongThrower (Pico 2 W), and Nguyen Van Hien’s Bluetooth Table Tennis Robot.
The original launcher has a complete build guide. It includes English source translations, an interactive Three.js CAD viewer, a 13-step animated assembly wizard, a parts list, and printable model downloads.
Build status: documented prototype. The source includes a physical prototype, but this English guide has not been validated through a complete build. Resolve the open build questions before ordering or operating the hardware.
The launch energy comes from two motor-driven, rubber-covered wheels. Their rotating mass stores energy. Friction transfers some of that energy to the ball when it passes between their rims.
The “exhaust” is the outlet tube. It guides the ball toward the wheel contact region and the exit. The wheels provide the throwing force.
flowchart LR
    H[Hopper: gravity feeds balls] --> F[Geared feed screw: advances balls]
    F --> S[Stopper: holds the following ball]
    S --> W[Two rubber-covered wheels: accelerate one ball]
    W --> O[Outlet: ball leaves toward the table]
    C1[Left PWM control] --> W
    C2[Right PWM control] --> W
    C3[Feed PWM control] --> F
The feeder meters balls into the launch region. It is separate from the wheel mechanism that supplies launch energy. The feeder PWM mainly changes the feed interval. The other two PWM controls change the two launch motors independently.
A wheel’s rim speed depends on its radius and measured rotational speed:
rim speed v = 2 × π × wheel radius r × rpm / 60Use meters for r to obtain meters per second. The real exit speed also depends on contact pressure, rubber, slip, wheel inertia, motor torque, and speed loss during a shot. A PWM knob position is not a measured rpm or ball speed.
For an ideal pair of opposing, parallel wheel contacts with no slip, ball translation is approximately the average of the two contact speeds. The difference produces spin:
ideal ball speed ≈ (v1 + v2) / 2
ideal spin rate  ≈ (v1 - v2) / (2 × ball radius)  [radians per second]
These equations describe a simplified contact model, not a calibrated prediction for this CAD. Actual contact angles, rubber compression, and slip change the result. Similar contact speeds reduce differential spin in that model. Unequal speeds add spin about the axis determined by the wheel arrangement.
The source does not specify the final rubber thickness, wheel gap, motor rpm, exit speed, or spin calibration. Measure those values during a guarded physical build. The website explains the ball path alongside the model.
Use Node.js 22 or newer. The website and development server require no package installation.
make serveOpen http://127.0.0.1:4173. make serve regenerates and validates the current site before opening the preview server. The server watches docs/ and reloads the browser after a change. An edit to docs/data/project.json also regenerates the written guide and BOM.
make serve PORT=4200   # choose another local port
make build             # regenerate, check, and export dist/
make check             # regenerate and validate current content
npm run check        # check content, links, inventory, and GLB structure
npm run build        # regenerate documentation and copy the site to dist/
The local server binds to 127.0.0.1 by default. The exported site has no server requirement. All Three.js modules, models, photos, and fonts are local; there are no runtime CDN requests.
Open ?launcher=mobile01 to link directly to the second tab. Arrow keys, Home and End switch tabs; the URL supports reload and browser Back/Forward. Old section links still open the printed launcher.
Read the analysis and design notes. The new diagrams explain the mechanism and a proposed electrical arrangement; they do not claim original CAD dimensions or verified original GPIO assignments. The KiCad download is an unrouted placement draft, with pads and named nets. It has no fabrication outputs and has not passed KiCad DRC or a physical build.
docs/data/mobile01.json records the parts and proposed connection map. The matching table and CSV files are maintained alongside it. Regenerate the three SVG diagrams, PCB and pad netlist with python3 scripts/create-mobile01-assets.py; the normal Node-only build uses the checked-in outputs.
Open ?launcher=hien to link directly to the fourth tab (Nguyen Van Hien's project).
Read the technical analysis report. The tab features:
docs/downloads/hien-parts.csv and docs/downloads/hien-connections.csv).docs/assets/hien/mechanism.svg), electrical schematic with ATX split power rails and Mega GPIO assignments (docs/assets/hien/schematic.svg), and KiCad breakout board placement (docs/assets/hien/pcb.svg).docs/downloads/hien-servo-breakout.kicad_pcb) and netlist CSV (docs/downloads/hien-pcb-netlist.csv). Regenerate assets using python3 scripts/create-hien-assets.py.Start with the full English assembly guide. Use the website wizard to explore the CAD groups and track your checks on the current device.
| Build resource | File |
|---|---|
| Shopping checklist | Website-ready checklist · CSV |
| Hardware and tools | English BOM · CSV |
| Component image sources | Photo references and rights |
| Print settings, orientations, and plates | Print guide |
| English print project | 28 objects on 10 plates |
| Individual STL files | ZIP, organized by plate |
| Editable CAD | STEP assembly |
| Wiring and first power-on | DC topology and checks |
| English annotations and terminology | Source translation |
| Offline written instructions | Guide ZIP with reference photos |
| Missing details and source differences | Build notes |
The source specifies two 12 V 550 motors, one 12 V / 77 rpm geared motor, three PWM controllers, four 7 × 16 × 5 mm bearings, and a 12 V / 3 A supply. These are source specifications, not a verified motor-current budget. The CAD and spreadsheet disagree on some screw lengths and tilt hardware.
The print project stores a Bambu Lab A1 mini profile, a 0.4 mm nozzle, 0.20 mm layers, four walls, 25% infill, and manual tree supports. All 28 objects use slot 1, saved as PETG. Select your actual printer and material before slicing. Inspect the original orientations and painted supports.
WARNING: Disconnect power before assembly or adjustment. Wait for all moving parts to stop.
WARNING: Fit guards around accessible wheels, gears, and the feeder before operation. Keep hands clear of pinch points.
The project uses native browser modules and a small Node server. Content and behavior are separated.
docs/
  index.html                 Page structure and fixed explanatory sections
  styles.css                 Responsive styles and reduced-motion handling
  app.js                     Parts filters, plate cards, and viewer setup
  viewer.js                  Three.js loading, picking, orbiting, and animation
  wizard.js                  Steps, navigation, and browser-local progress
  shopping.js                Shopping checklist and gathered-item progress
  storage.js                 Shared storage helpers with failure handling
  data/project.json          Main editable content: BOM, tools, checks, steps
  data/print-inventory.json  Generated geometry and plate report
  assets/                    Local GLB, photos, plate previews, and video
  downloads/                 English 3MF, STL pack, STEP, CSV, and guide ZIP
  vendor/                    Pinned Three.js 0.180.0 modules and license
scripts/
  serve.mjs                  Local preview and live reload
  generate-docs.mjs          Written guides, BOM, and deterministic document ZIP
  check.mjs                  Content, link, module, and asset checks
  build.mjs                  Generate, check, export to dist/
  import-step.mjs            Optional CAD tessellation
  create-viewer-model.mjs    Optional conversion to grouped GLB
  prepare-assets.py          Optional STL and inventory regeneration
Edit project.json for parts and assembly content. It feeds both the website and generated Markdown. Do not edit generated assembly-guide.md, hardware-bom.md, print-guide.md, or build-notes.md directly. Edit their content or generator template instead. Translation, wiring, and attribution documents are maintained directly.
The GLB contains 101 meshes from the actual supplied STEP. Both viewers share one model request and use separate scenes and materials. Off-screen rendering pauses. Animation respects reduced-motion preferences. A reference image and written instructions remain available when WebGL fails.
Normal content edits do not require CAD conversion or Python. To regenerate geometry, install occt-import-js@0.0.23 for development and NumPy for the Python mesh exporter. For example, use npm install --no-save occt-import-js@0.0.23 in a development checkout. Then run:
node scripts/import-step.mjs
node scripts/create-viewer-model.mjs
python3 scripts/prepare-assets.py
npm run build
The tools read the retained English-named CAD and 3MF. The Python exporter preserves source build orientations. Mesh closure checks do not establish printability, physical fit, wall thickness, or safe operating speed.
Run npm ci, then npx playwright install chromium. Run npm test while the preview server is running, or npm run test:ci to build and test the static export without a server. BASE_URL selects a different preview URL. PLAYWRIGHT_MODULE can point to an existing Playwright module. The script checks desktop/mobile layout, wizard progress, filters, the model, reduced motion, and the image fallback.
The repository includes a Pages deployment workflow. It runs on every pushed tag and by manual dispatch. A branch push alone does not deploy. It uses the official GitHub Pages workflow.
git init -b main if necessary.main branch to that repository.github-pages environment if deployment restrictions are enabled.For example, after committing the current files:
git tag v1.0.0
git push origin v1.0.0
The workflow checks and builds the tagged commit, runs both browser suites against dist/, tests firmware logic, and creates a GitHub Release with a static-site ZIP after deployment. Each tag has its own workflow concurrency group, so a later tag does not cancel an earlier tag run. The site is one shared deployment; avoid pushing release tags out of order.
All site paths are relative, so a project URL such as /PingPongLauncher/ works. The workflow uploads only dist/. It does not publish development dependencies or original input folders.
No hosted deployment is implied by these instructions. Publishing requires working GitHub authentication. Confirm redistribution rights for the supplied hardware and media before making a public repository.
The next useful iteration is a documented physical build: resolve fasteners, measure currents and fits, and replace inferred steps with confirmed photographs. Follow that with guards, a verified DC system, an updated outlet/stopper, replaceable balanced tires, and measured speed control. See FUTURE.md for priorities and completion evidence.
The Chinese-named input files and duplicate STEP are removed after verification, as requested. Their useful contents remain as English-named CAD, print files, media, and translations. Historical filenames and SHA-256 hashes remain in the source manifest.
The source designer and hardware/media license are unknown. The MIT license covers newly written website and tooling code only. See sources and rights. Three.js retains its own MIT license. The source video audio is unchanged and has not been transcribed; English captions describe the visible mechanism.
Open ?launcher=thrower for the third tab: native simulation, five test phases, parts, wiring (including the 3D cable explorer), assembly and print downloads. The port uses isolated shadow DOM views styled with the app theme. docs/thrower/ is the single maintained source for this project: edit its viewer modules, JSON, CAD, firmware and resources directly. Optional CAD and wiring tools are retained in docs/thrower/tools/. The build uses existing meshes and print files and needs no CAD tools.
| Qty | Value | Footprint | References |
|---|---|---|---|
| 1 | 1000uF 16V | Capacitor_THT:CP_Radial_D10.0mm_P5.00mm | C1 |
| 1 | 100nF | Capacitor_THT:C_Disc_D5.0mm_W2.5mm_P2.50mm | C3 |
| 1 | 1k Divider | Resistor_THT:R_Axial_DIN0207_L6.3mm_D2.5mm_P10.16mm_Horizontal | R1 |
| 1 | 2k Divider | Resistor_THT:R_Axial_DIN0207_L6.3mm_D2.5mm_P10.16mm_Horizontal | R2 |
| 1 | 470uF 6.3V | Capacitor_THT:CP_Radial_D8.0mm_P3.50mm | C2 |
| 1 | ATX Power In | Connector_PinHeader_2.54mm:PinHeader_1x04_P2.54mm_Vertical | J9 |
| 1 | Agitator Servo | Connector_PinHeader_2.54mm:PinHeader_1x03_P2.54mm_Vertical | J4 |
| 1 | Btm ESC | Connector_PinHeader_2.54mm:PinHeader_1x03_P2.54mm_Vertical | J3 |
| 1 | Gate Servo | Connector_PinHeader_2.54mm:PinHeader_1x03_P2.54mm_Vertical | J5 |
| 1 | HM-10 BLE | Connector_PinHeader_2.54mm:PinHeader_1x04_P2.54mm_Vertical | J8 |
| 1 | Mega Harness | Connector_PinHeader_2.54mm:PinHeader_1x10_P2.54mm_Vertical | J1 |
| 1 | Pan Servo | Connector_PinHeader_2.54mm:PinHeader_1x03_P2.54mm_Vertical | J6 |
| 1 | Tilt Servo | Connector_PinHeader_2.54mm:PinHeader_1x03_P2.54mm_Vertical | J7 |
| 1 | Top ESC | Connector_PinHeader_2.54mm:PinHeader_1x03_P2.54mm_Vertical | J2 |
The 14 most common of 18 parts.


VoronDesign/Voron-Hardware
Cool Hardware designed by the Voron Design group


hackclub/OnBoard
💡 Join 1,000 teenagers and make your first PCB with a $100 grant!

VoronDesign/Voron-Tap
Tap is a nozzle-based z-probe for the V2 and Trident printer designs. The entire toolhead moves to trigger an optical switch. Tap offers many advantages:

Luos-io/luos_engine
Open-source and real-time orchestrator for cyber-physical-systems, to easily design, test and deploy embedded applications and digital twins.


Twotoz/C5VRX
Ultra-minimal, zero-CPU 5.8 GHz analog FPV video receiver using ESP32-C5 Wi-Fi 6 PHY MODEM_DIAG, BitScrambler WBFM demodulation & resistor DAC CVBS
It measures 85 × 60 mm and has 2 copper layers, 1.6 mm thick.
18 parts. The full list of its parts is on this page, with links to each part's symbol and footprint where PCBKit's library has them.
From the hvitis/PingPongLauncher repository on GitHub, at the commit this page was made from: the board is docs/downloads/hien-servo-breakout.kicad_pcb. PCBKit opens the board in the browser, with nothing to install.
Its repository states no licence, so its author keeps all rights: ask hvitis before reusing the design.