
2 layers96.6 × 82.8 mm
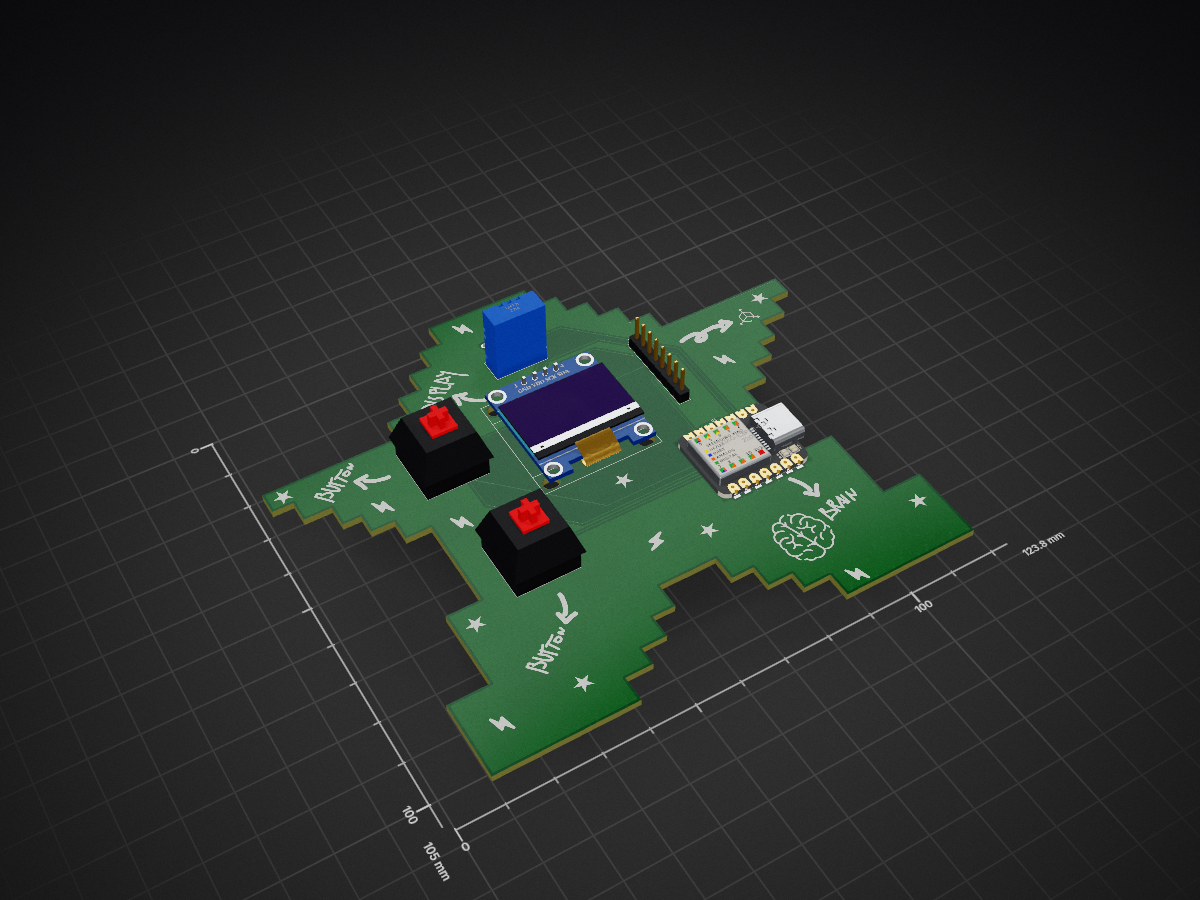
 emdcomputer-crypto/Starbie
Making a starbie
Starbie is an open-source printed circuit board by emdcomputer-crypto, from the emdcomputer-crypto/Starbie repository on GitHub. It is a 2-layer board of 123.8 × 105 mm with 35 parts on 19 nets, routed with 77 tracks and 0 vias.
It is built around the DHT11. Its parts include 2 ICs, 2 connectors, 2 switches and 1 resistor. It belongs with the ESP32 and RISC-V boards of this library.
Starbie is a small virtual pet PCB made with a XIAO ESP32-C3. It uses a 0.96-inch OLED screen to show an animated pet menus and different stats. The project also has two buttons an MPU6050 motion sensor, and a DHT11 temperature and humidity sensor.
This is my Week 1 PCB project for Hack Club Half Life. I designed the schematic and PCB in KiCad, routed the traces, added a ground pour, checked the board with the Design Rules Checker, and prepared the fabrication files.
I started by following the guided Starbie project from SharKingStudios, because I was already planning to make something similar and this was a good starting point as it was also guided.
After setting up the schematic with the XIAO ESP32-C3, OLED display, MPU6050, DHT11 sensor, and buttons, I started routing everything in KiCad. Routing by hand became messy quickly, so I looked up some tips to make the traces cleaner.
Instead of manually routing every ground connection, I added a full-board GND copper pour. When I ran the DRC, I found some isolated ground pads because traces were blocking the copper pour from reaching them. I fixed this by adding short bridge traces from those pads to the ground zone. After that, the board had zero unconnected pads.
I also used KiCad's 3D viewer to check if the components would fit correctly. Later, I had a problem where JLCPCB kept showing the board as a small default rectangle. I eventually realized that I had forgotten to press the Plot button after changing the KiCad settings. After plotting the files again and re-zipping them, the board showed correctly.
These are the prices I found for the parts in Italy:
I took the time to carefully research and compare components. Originally, I considered sourcing through Amazon Italy to avoid potential customs delays. However I realized that ordering directly through AliExpress offers significantly lower individual component prices even when accounting for EU VAT and standard shipping to Italy.
By spending extra time finding good AliExpress parts like the XIAO microcontroller, OLED display, and sensors, I was able to slash the total project cost down by a little:
| Part | What it is used for | Quantity | Price | Vendor |
|---|---|---|---|---|
| XIAO ESP32-C3 | Main microcontroller and Wi-Fi | 1 | $10.92 | AliExpress |
| 0.96-inch OLED Display | Displays pet status and sensor readings | 1 | $2.28 | AliExpress |
| MPU6050 Module | 6DOF Motion and gyroscope sensor | 1 | $3.24 | AliExpress |
| DHT11 Sensor | Temperature and humidity monitoring | 1 | $2.09 | AliExpress |
| 3-Pin MX Switches | Mechanical user input switches | 1 | $4.70 | AliExpress |
| Relegendable Keycaps | Clear dual-layer customizable keycap shell | 1 | $4.66 | AliExpress |
| PCB Fabrication | Custom circuit board manufacturing | 1 | $10.30 | JLCPCB |
Hardware/Project.kicad_sch — KiCad schematicHardware/Project.kicad_pcb — KiCad PCB layoutHardware/Project.kicad_pro — KiCad project fileFabricationFiles — Gerber and drill filesFirware/Starbie.ino — ESP32-C3 firmwareBOM.md — full bill of materialsBOM.csv — CSV version of the bill of materialsJOURNAL.md — project development journalThis project was based on the guided Starbie project by SharKingStudios. I used it as a starting point and made my own PCB layout, fabrication files, documentation, and project changes for Hack Club Half Life Week 1.
| Qty | Value | Footprint | References |
|---|---|---|---|
| 8 | LOGO | logos:star | G***, G***, G***, G***, G***, G***, G***, G*** |
| 7 | LOGO | logos:bolt | G***, G***, G***, G***, G***, G***, G*** |
| 5 | LOGO | logos:arro1 | G***, G***, G***, G***, G*** |
| 2 | LOGO | logos:button | G***, G*** |
| 2 | SW_Push | Button_Switch_Keyboard:SW_Cherry_MX_1.00u_PCB | SW1, SW2 |
| 1 | 10k | Resistor_THT:R_Axial_DIN0204_L3.6mm_D1.6mm_P7.62mm_Horizontal | R1 |
| 1 | Conn_01x04_Pin | half life foot:Display_128x64_096_I2C | J1 |
| 1 | Conn_01x08_Pin | Connector_PinHeader_2.54mm:PinHeader_1x08_P2.54mm_Vertical | J2 |
| 1 | DHT11 | Sensor:Aosong_DHT11_5.5x12.0_P2.54mm | U2 |
| 1 | LOGO | logos:termistor | G*** |
| 1 | LOGO | logos:arro3 | G*** |
| 1 | LOGO | logos:brain2 | G*** |
| 1 | LOGO | logos:vector | G*** |
| 1 | LOGO | logos:Brain | G*** |
| 1 | LOGO | logos:display | G*** |
| 1 | XIAO-ESP32-C3-SMD | half life foot:XIAO-ESP32-C6-DIP | U1 |
It measures 123.8 × 105 mm and has 2 copper layers, 1.6 mm thick.
35 parts, built around the DHT11. The full list of its parts is on this page, with links to each part's symbol and footprint where PCBKit's library has them.
From the emdcomputer-crypto/Starbie repository on GitHub, at the commit this page was made from: the board is Hardware/Project.kicad_pcb and its schematic Hardware/Project.kicad_sch. PCBKit opens the board in the browser, with nothing to install.
Its repository states no licence, so its author keeps all rights: ask emdcomputer-crypto before reusing the design.

lansidev/conveyor-belt
Miniature 3D printed conveyor belt for simulation and fun working with sensors, all controllable with Raspberry Pi


ebrithiljonas/OMG_PCB
All in One PCB for the OpenMQTTGateway Project

GeorgK/SniffingTrinket
A room climate monitor using the Adafruit Trinket Pro

bhaskar9980/Guardian
Guardian is an advanced, fully automated hydroponics system designed to optimize plant growth and maximize yield.

Twistx77/Firefly
Open WIFI-enabled RGB lamp with temperature, humidity, suspended air particles and eCO2 sensors.

unla-investigacion-desarrollo/ecosistema-iot
Antes de desarrollar el sistema final, realizamos una etapa de exploración donde investigamos y experimentamos con las siguientes tecnologías: