
4 layers93.3 × 60.3 mm
Arduino 386EX V5
dbalsom/arduinoX86
An interface between an Arduino Due or Arduino GIGA and 8088, 8086, V20, V30, 186 or 286 CPUs
56 parts114

 dbalsom/arduinoX86114
An interface between an Arduino Due or Arduino GIGA and 8088, 8086, V20, V30, 186 or 286 CPUs
Ard8088 is an open-source printed circuit board by dbalsom, from the dbalsom/arduinoX86 repository on GitHub. It is a 2-layer board of 96.2 × 55.9 mm with 14 parts on 85 nets, routed with 365 tracks and 28 vias.
It is built around the PN2222A. Its parts include 3 resistors, 3 diodes, 2 capacitors, 2 ICs and 1 transistor. It belongs with the AVR (ATmega, ATtiny) boards of this library.

I've written a blog article that gives an overview of this project and how it is used.
https://martypc.blogspot.com/2023/06/hardware-validating-emulator.html
This project was originally called Arduino8088, but then I expanded it to support the 8086, 80186, 80286, with plans for the 80386, so it is now named the suitably generic ArduinoX86.
This project expands on the basic idea of controlling a CPU via GPIO pins to clock the CPU and read and write control and data signals. This can be used to validate an emulator's accuracy, but also as a general method of exploring the operation of CPU instructions and timings.
This project currently supports the following CPUs:
Where it differs from existing Raspberry Pi-based projects is that it uses an Arduino Giga for the expanded number of GPIO pins available. The Giga has enough GPIO to operate 808X-compatible CPUs in Maximum mode. This enables several useful signals to be read such as the QS0 & QS1 processor instruction queue status lines, which give us more insight into the internal state of the CPU. We can also enable inputs such as READY, NMI, INTR, and TEST, so we can execute interrupts, NMIs, emulate wait states, and potentially even simulate FPU and DMA operations.
I have been using this project to validate the cycle-accuracy of my PC emulator, MartyPC, and produce CPU test suites for emulators, covering the 8088, V20 and 8086 and 286 to date.
This project has three main components:
The original "Arduino8088" project utilized an Arduino MEGA, but this board no longer supported. It is painfully slow and limited to a serial UART instead of fast native USB communication. As of the current release, an Arduino Due, or preferably, an Arduino GIGA should be used instead. A GIGA is required to operate 5V CPUs such as older 80186's and the 80286. Despite Arduino's official warnings, the STM32 GPIO in the Giga is 5V tolerant (with a few exceptions). You will likely void your warranty and I take no responsibility for any damage to your Arduino that occurs attempting to use a 5V CPU with your Arduino.
Revision 1.1 of the 808X shield supports the 8086 and NEC V30 by adding a connection for the 8086's BHE pin.
The Due can operate the 8088, 8086, V20 and V30, despite these chips being 5V. The current 8088 shield feeds those CPUs 3.3V which they tolerate quite well at low clock speeds.
The Giga can operate the 8088, 8086, V20 and V30 directly at 5V if desired. The Giga requires the 3V supply pin to be cut off the shield's pin headers and external power supplied due to the lower available overall power budget.
[!WARNING]
Do not attempt to use the 8088 shield with a Giga without using external power, or you may damage your Arduino.
The ArduinoX86 cpu_server sketch supports operation of a low-voltage 80L186 on an Arduino Due.
There is no shield yet for the 80186, you will need to use a breakout board and connect directly to the Arduino Due's headers. See Using an 80186 for more information.
A shield for the 80C286 is in the design phase, located in /shields/286_5V
Current support for the 80286 has been performed via breadboard.
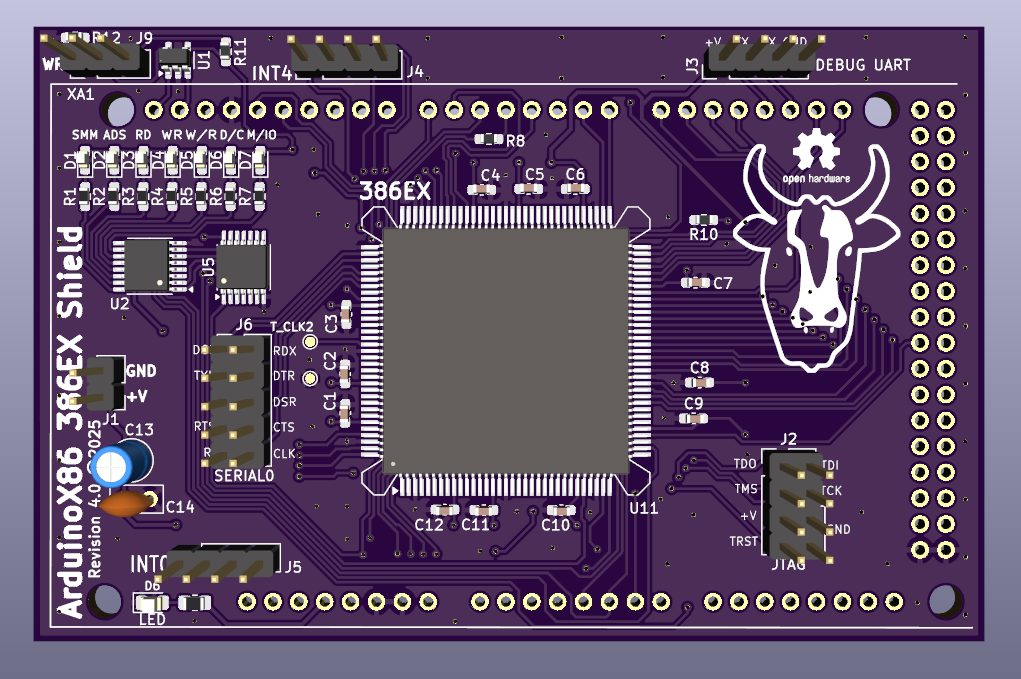
A shield for the 80386EX CPU is provided in /shields/386EX_V4
In short, no. We are well past the published minimum cycle times when executing programs via a serial protocol, cycle by cycle. Some chips tolerate this better than others. When working with an Intel branded 8088, I noticed that effective address calculations were failing to add the displacement or index register, but otherwise functioned. I have had more luck with the AMD second-source 8088 CPUs, which seem to function perfectly under slow clocks, although they will hang and need to be reset if not cycled for a several milliseconds. The issue is "dynamic logic" - logic gates that lose their state if not refreshed electrically within a frequent enough interval. To be absolutely safe, it is best to use a fully CMOS process CPU such as the 80C88. CMOS versions of most x86 chips are available.
An example application for cpu_server is provided, written in Rust, in the /crates/exec_program directory. It
demonstrates how to upload arbitrary code to the ArduinoX86 and display cycle traces. The client will emulate the
entire address space and set up a basic IVT.
Assembly language files, intended to be assembled with NASM. To execute code on the ArduinoX86, one must supply two binary files, one containing the program to be executed, and one containing the register values to load onto the CPU before program execution.
A library crate that implements a client for the ArduinoX86's serial protocol.
A library crate built on top of the arduinox86_client crate, this provides a RemoteCpu struct that models CPU state
and can execute programs.
A GUI (written in egui) for ArduinoX86, supporting the 386EX. It allows you to write and assemble assembly-language programs and execute them on the CPU with an easy-to-use interface.
A binary implementing an interface for the arduinox86_cpu crate that will load a provided register state binary and
execute the specified program binary.
A program that generates CPU tests for emulator authors.
Contains the KiCad project files and Gerber files for the various ArduinoX86 shields. See the README.md in each shield directory for more information and BOMs for building each.
The main server code that runs on the Arduino Due or GIGA. You must have platformio installed to build and upload the project to your Arduino.
The original cpu_server Arduino IDE sketch. Development has since moved to platformio.
The original sketch for Arduino MEGA only demonstrating how to control an 8088. It does not contain a serial protocol server - code is run directly from an array defined within the sketch.
Inspired by the Pi8088 validator created by Andreas Jonsson as part of the VirtualXT project:
https://github.com/andreas-jonsson/virtualxt/tree/develop/tools/validator/pi8088
8bitforce's Retroshield: https://www.8bitforce.com/projects/retroshield/
homebrew8088's Raspberry Pi Hat: https://github.com/homebrew8088/pi86
The Universal Chip Analyser (U. C. A.): https://x86.fr/uca/
Foxtech's 486 Breadboard Computer: https://www.youtube.com/watch?v=wSiDSdHS2QQ
| Qty | Value | Footprint | References |
|---|---|---|---|
| 2 | 0.1uf | Capacitor_SMD:C_0805_2012Metric_Pad1.18x1.45mm_HandSolder | C1, C2 |
| 2 | LED | LED_SMD:LED_0805_2012Metric_Pad1.15x1.40mm_HandSolder | D1, D2 |
| 2 | R | Resistor_SMD:R_0805_2012Metric_Pad1.20x1.40mm_HandSolder | R2, R3 |
| 1 | 1N4148 | Diode_SMD:D_0805_2012Metric_Pad1.15x1.40mm_HandSolder | D3 |
| 1 | 8088_Max_Mode | Package_DIP:DIP-40_W15.24mm | U1 |
| 1 | 8288 | Package_DIP:DIP-20_W7.62mm | U2 |
| 1 | Arduino_Mega2560_Shield | Arduino_Library:Arduino_Mega2560_Shield | XA1 |
| 1 | Buzzer | Buzzer_Beeper:Buzzer_12x9.5RM7.6 | BZ1 |
| 1 | LOGO | cow:cow | G*** |
| 1 | PN2222A | Package_TO_SOT_THT:TO-92_Inline | Q1 |
| 1 | R1 | Resistor_SMD:R_0805_2012Metric_Pad1.20x1.40mm_HandSolder | R1 |
dbalsom/arduinoX86
An interface between an Arduino Due or Arduino GIGA and 8088, 8086, V20, V30, 186 or 286 CPUs

dbalsom/arduinoX86
An interface between an Arduino Due or Arduino GIGA and 8088, 8086, V20, V30, 186 or 286 CPUs

dbalsom/arduinoX86
An interface between an Arduino Due or Arduino GIGA and 8088, 8086, V20, V30, 186 or 286 CPUs

dbalsom/arduinoX86
An interface between an Arduino Due or Arduino GIGA and 8088, 8086, V20, V30, 186 or 286 CPUs

dbalsom/arduinoX86
An interface between an Arduino Due or Arduino GIGA and 8088, 8086, V20, V30, 186 or 286 CPUs

dbalsom/arduinoX86
An interface between an Arduino Due or Arduino GIGA and 8088, 8086, V20, V30, 186 or 286 CPUs

dbalsom/arduinoX86
An interface between an Arduino Due or Arduino GIGA and 8088, 8086, V20, V30, 186 or 286 CPUs

dbalsom/arduinoX86
An interface between an Arduino Due or Arduino GIGA and 8088, 8086, V20, V30, 186 or 286 CPUs

dbalsom/arduinoX86
An interface between an Arduino Due or Arduino GIGA and 8088, 8086, V20, V30, 186 or 286 CPUs

dbalsom/arduinoX86
An interface between an Arduino Due or Arduino GIGA and 8088, 8086, V20, V30, 186 or 286 CPUs

skiselev/micro_8088
Micro 8088 - IBM XT Compatible Processor Board based on Faraday FE2010 chipset

Staacks/there.oughta.be
Projects featured on my blog at https://there.oughta.be


plusvic/simplebus2-intercom
General description of the Simplebus2 protocol used by some Comelit's intercoms. Hardware for retransmitting Simplebus2 messages over UART.


It measures 96.2 × 55.9 mm and has 2 copper layers, 1.6 mm thick.
14 parts, built around the PN2222A. The full list of its parts is on this page, with links to each part's symbol and footprint where PCBKit's library has them.
From the dbalsom/arduinoX86 repository on GitHub, at the commit this page was made from: the board is shields/808X_V3/kicad/ard8088.kicad_pcb and its schematic shields/286_5V/kicad/arduino_286_5V.kicad_sch. PCBKit opens the board in the browser, with nothing to install.
Its repository states no licence, so its author keeps all rights: ask dbalsom before reusing the design.