2 layers49.4 × 35.8 mm
WS2812Controller
klein0r/pcb-ws2812-wifi-controller
WiFi Controller for WS2812 LED Stripes
22 parts82MIT

 apiculallc/dhtmon2
Temperature and humidity monitor
Dhtmon is an open-source printed circuit board by apiculallc, from the apiculallc/dhtmon repository on GitHub, published under the Apache-2.0 licence. It is a 2-layer board of 28.4 × 58.5 mm with 17 parts on 27 nets, routed with 78 tracks and 4 vias.
It is built around the ESP-12F and AMS1117-3.3. Its parts include 4 resistors, 2 ICs, 1 capacitor, 1 diode and 1 connector. It belongs with the home automation and IoT boards and the ESP8266 boards of this library.


To create a small, contained and "offline" temperature / humidity monitoring system for hard-to-reach places like attics, garages, crawlspaces, sheds etc.
| Part | Quantity | Price ( approx ) | Link |
|---|---|---|---|
| ESP8266 | 1 | $ 1.20 | https://www.ebay.com/itm/185185809189?var=692941428853 |
| DHT22/AM2302 | 1 | $ 3.33 | https://www.amazon.com/gp/product/B08TGQY64D/ref=ppx_yo_dt_b_search_asin_title?ie=UTF8&th=1 |
| AMS1117 | 1 | $ 0.35 | https://www.amazon.com/gp/product/B08CDMZMDN/ref=ppx_yo_dt_b_search_asin_title?ie=UTF8&psc=1 |
| Capacitor 10mF | 1 | $ 0.03 | https://www.amazon.com/gp/product/B087785H1J/ref=ppx_yo_dt_b_search_asin_title?ie=UTF8&psc=1 |
| USB 2.0 Type A Male Socket Connector Jack Port | 1 | $ 0.11 | https://www.amazon.com/gp/product/B07QY6GJ6M/ref=ppx_yo_dt_b_search_asin_title?ie=UTF8&th=1 |
| Push button 6mm | 1 | $ 0.07 | https://www.ebay.com/itm/312535619242 |
| SMD Resistor 10kOhm | 4 | $ 0.03 | https://www.ebay.com/itm/163584740236 |
| PCB | 1 | $ 2.57 | https://oshpark.com/ |
Clone the repository as git clone --recurse-submodules -j8 git://github.com/apiculallc/dht.git
nvs.csv file to specify the location and name of the sensor. You can skip this step and configure everything using WiFi setup
wifi_ssid - name of the access point to connect towifi_password - WiFi passwordapp_location - sensor location ( attic, garage etc )app_mqtt_url - the URL to MQTT broker - this is typically the same location as where you will have InfluxDB and the Hub runningmake all to build the flash imagemake flash to flash the partition tablemake nvs to flash the NVS table with the probe settingsgomake to build the executable for your platform - you'll need to have Golang installedmake docker to build a docker imageWith use of Docker Compose everything shall be straightforward:
docker-compose up -dThat should create all the necessary pieces
For step-by-step instructions please read below.
Create a config file mosquitto.conf with the content:
persistence false

log_dest stdout
log_type warning
log_timestamp true
connection_messages true

listener 1883

## Authentication ##
allow_anonymous true
Then run Mosquitto in Docker as:
docker run --name mosquitto \
 -d --restart=unless-stopped \
 -p 1883:1883 \
 -v `pwd`/mosquitto.conf:/mosquitto/config/mosquitto.conf \
eclipse-mosquitto
This will expose Mosquitto on port 1883 and allow anonymous access.
Run in Docker as:
docker run -d -p 8086:8086 \
  --name=dhtmon-influx \
  --restart=unless-stopped \
  -v "/opt/data/influxdb-dhtmon:/var/lib/influxdb2" \
  -v "/opt/config/influxdb-dhtmon:/etc/influxdb2" \
  -e DOCKER_INFLUXDB_INIT_MODE=setup \
  -e DOCKER_INFLUXDB_INIT_USERNAME=admin \
  -e DOCKER_INFLUXDB_INIT_PASSWORD=admin123456 \
  -e DOCKER_INFLUXDB_INIT_ORG=home \
  -e DOCKER_INFLUXDB_INIT_BUCKET=dhtmon \
  -e `DOCKER_INFLUXDB_INIT_ADMIN_TOKEN=token123456 \
  influxdb:2.7-alpine
This will provision the instance of InfluxDB locally that exposes port 8086 if you need to check on the connection string.
In order to test that the Hub works well, you may use the following command ( assuming you have Golang installed ):
APP_MQTT_BROKER=mqtt://127.0.0.1:1883 \
INFLUX_DB=http://127.0.0.1:8086 \
INFLUX_TOKEN=token123456 \
go run main.go
This will build the project and start the service. Normal output should look like:
DB http://127.0.0.1:8086
TOKEN token123456
2024/07/03 10:11:12 started processing topics
Now the system is ready to receive data from the sensors.
Alternatively, use Docker container that you built as:
docker run --rm \
  -it \
  -e APP_MQTT_BROKER=mqtt://mosquitto:1883 \
  -e INFLUX_DB=http://dhtmon-influx:8086 \
  -e INFLUX_TOKEN=token123456 \
  --link dhtmon-influx \
  --link mosquitto \
  ghcr.io/apiculallc/dhtmon:latest

DB http://dhtmon-influx:8086
TOKEN token123456
2024/07/04 10:11:12 started processing topics
If the Hub is running without any error, you can automate the process with
docker run --restart=unless-stopped \
  -it \
  -e APP_MQTT_BROKER=mqtt://mosquitto:1883 \
  -e INFLUX_DB=http://dhtmon-influx:8086 \
  -e INFLUX_TOKEN=token123456 \
  --link dhtmon-influx \
  --link mosquitto \
  ghcr.io/apiculallc/dhtmon:latest
This will start the hub in daemon mode.
Just plug the sensor - it shall connect to the WiFi access point and then start sending data to the topics.
There is no LCD screens or anything that can be easily observed by a human being, so it is hard to tell whether the system works as expected. The joy of system level programming! So we shall be creative about our means to verify the functionality.
The easiest way to test that everything works as expected is to use an MQTT client and subscribe to the topics. For example, using mqtt-shell:
mqtt-shell -b mqtt://127.0.0.1:1883
>> sub /home/sensor/#
/home/sensor/attic/temp | 29.3
/home/sensor/attic/humid | 55.9
/home/sensor/garage/temp | 27.1
/home/sensor/garage/humid | 56.1
This indicates that sensors actually transmits data.
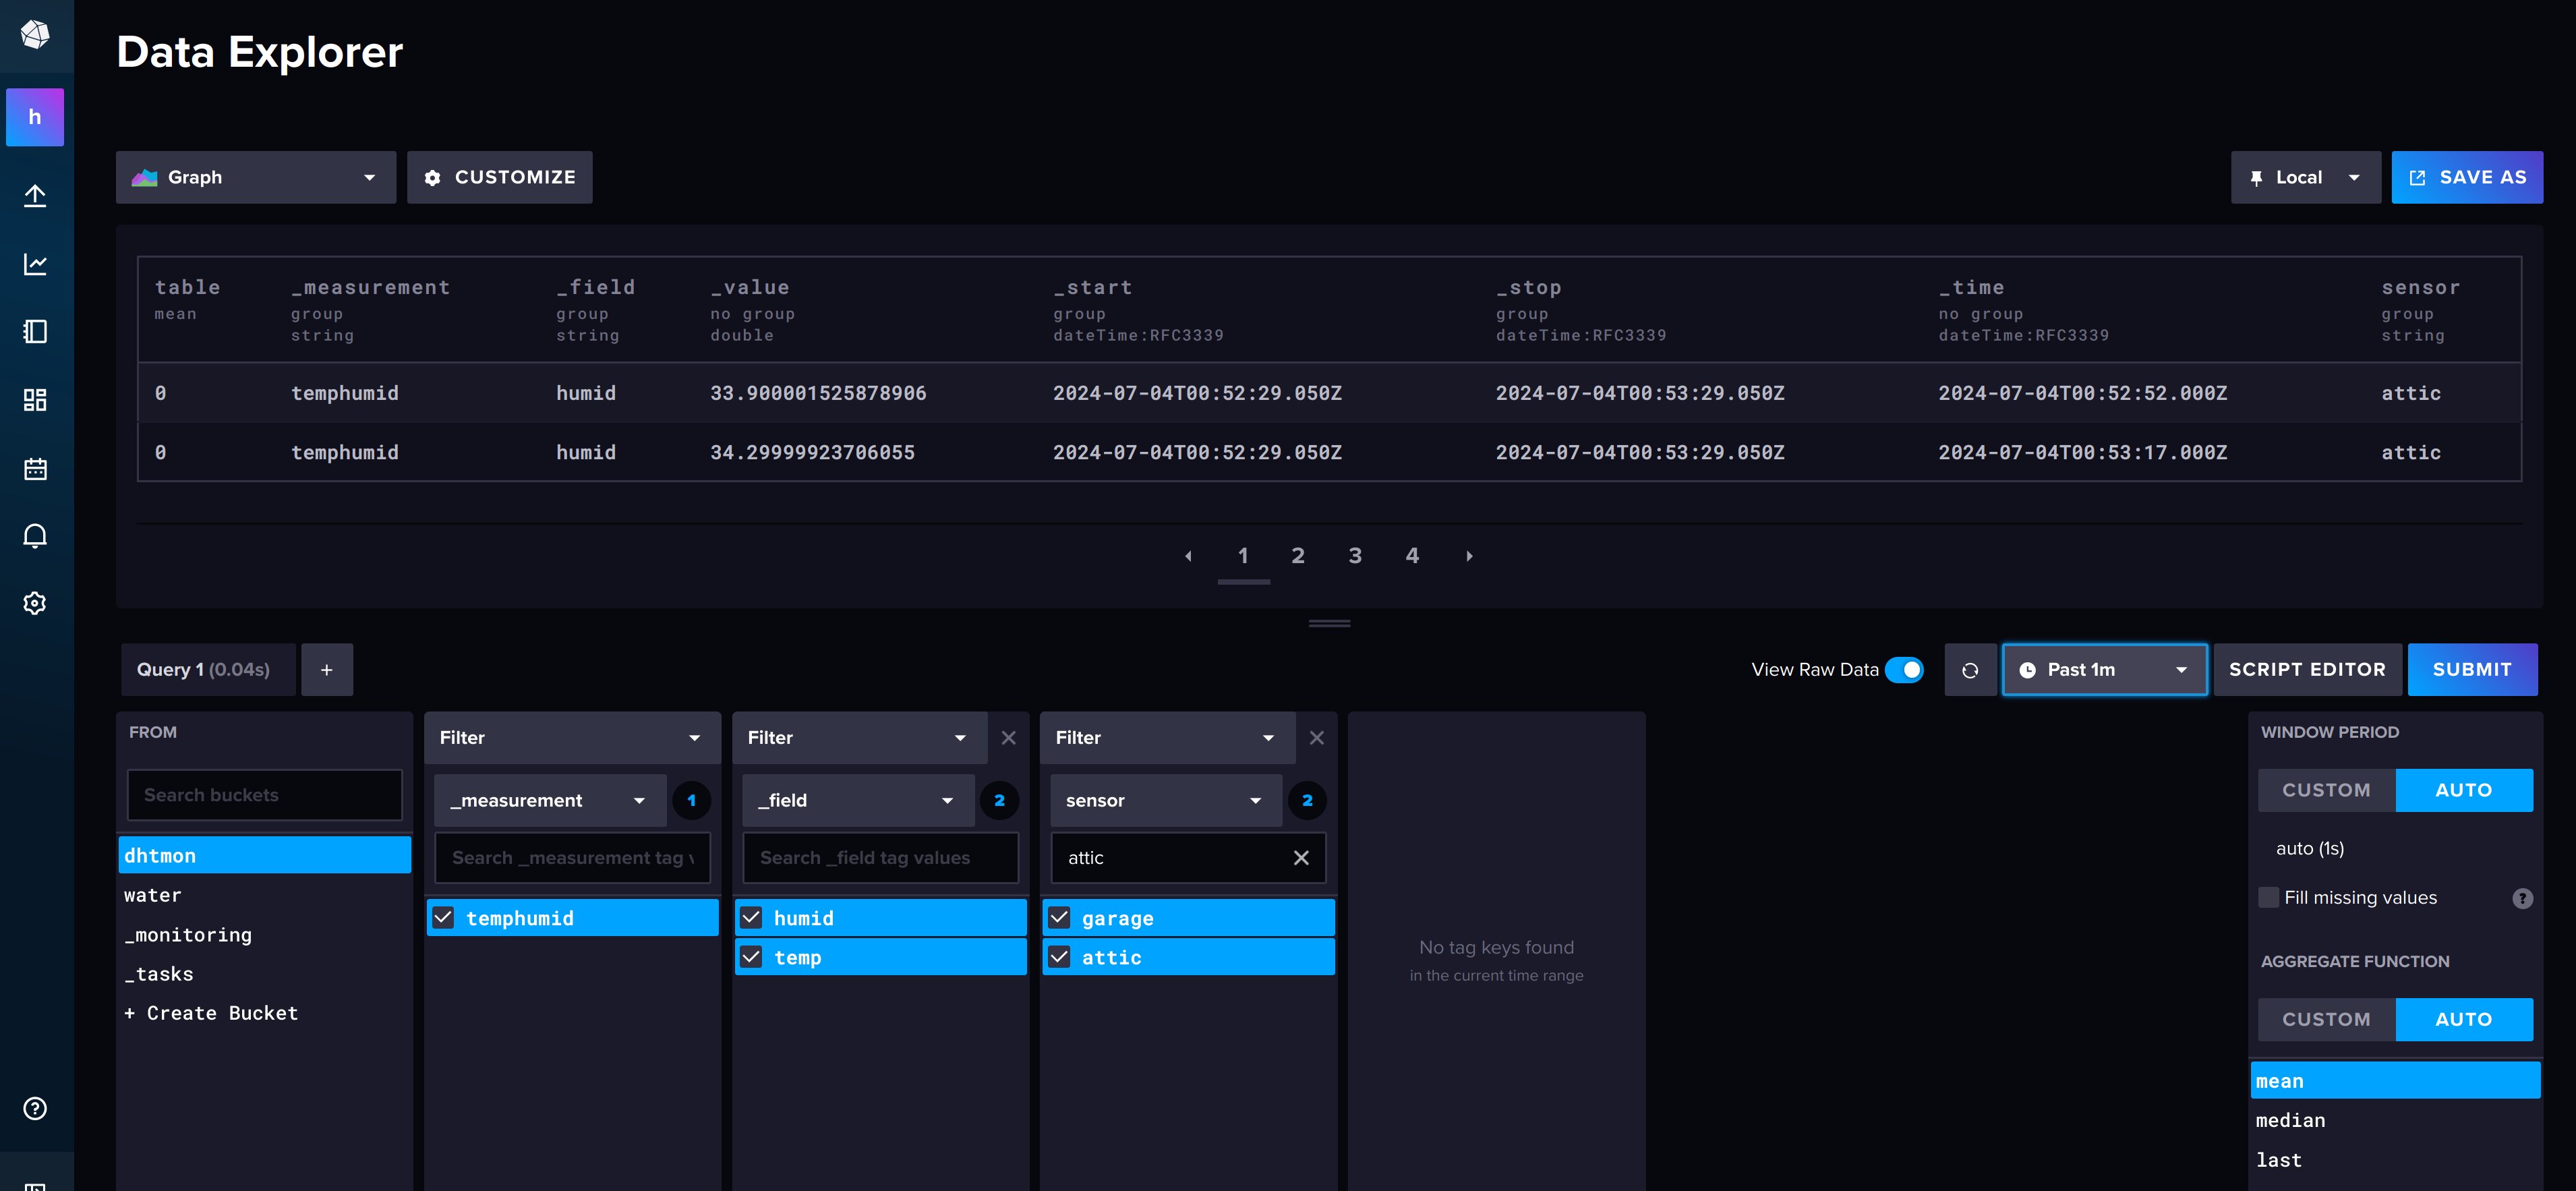
To verify that we actually receive something in the database ( InfluxDB ) we need to connect to the DB and run a few queries. As we have the installation that exposes ports 8086 - we can simply open http://127.0.0.1:8086 and use login admin and password admin123456 to peek into the storage. Choose Buckets and select dhtmon:
From here, you may want to configure Grafana.
This is fairly sophisticated and powerful tool for monitoring and alerting in DevOps world. We're going to use it to render the charts and get the most recent data from the set of probes that we setup.
Pull the docker image and link it to a container that runs InfluxDB.
docker run --restart=unless-stopped \
	-e GF_SECURITY_ADMIN_USER=admin \
	-e GF_SECURITY_ADMIN_PASSWORD=admin123 \
	--link influxdb \
	-p 3000:3000 \
	-v ./grafana/provisioning/:/etc/grafana/provisioning/ \
	-v ./grafana/dashboards/:/var/lib/grafana/dashboards/ \
	grafana/grafana:10.0.10
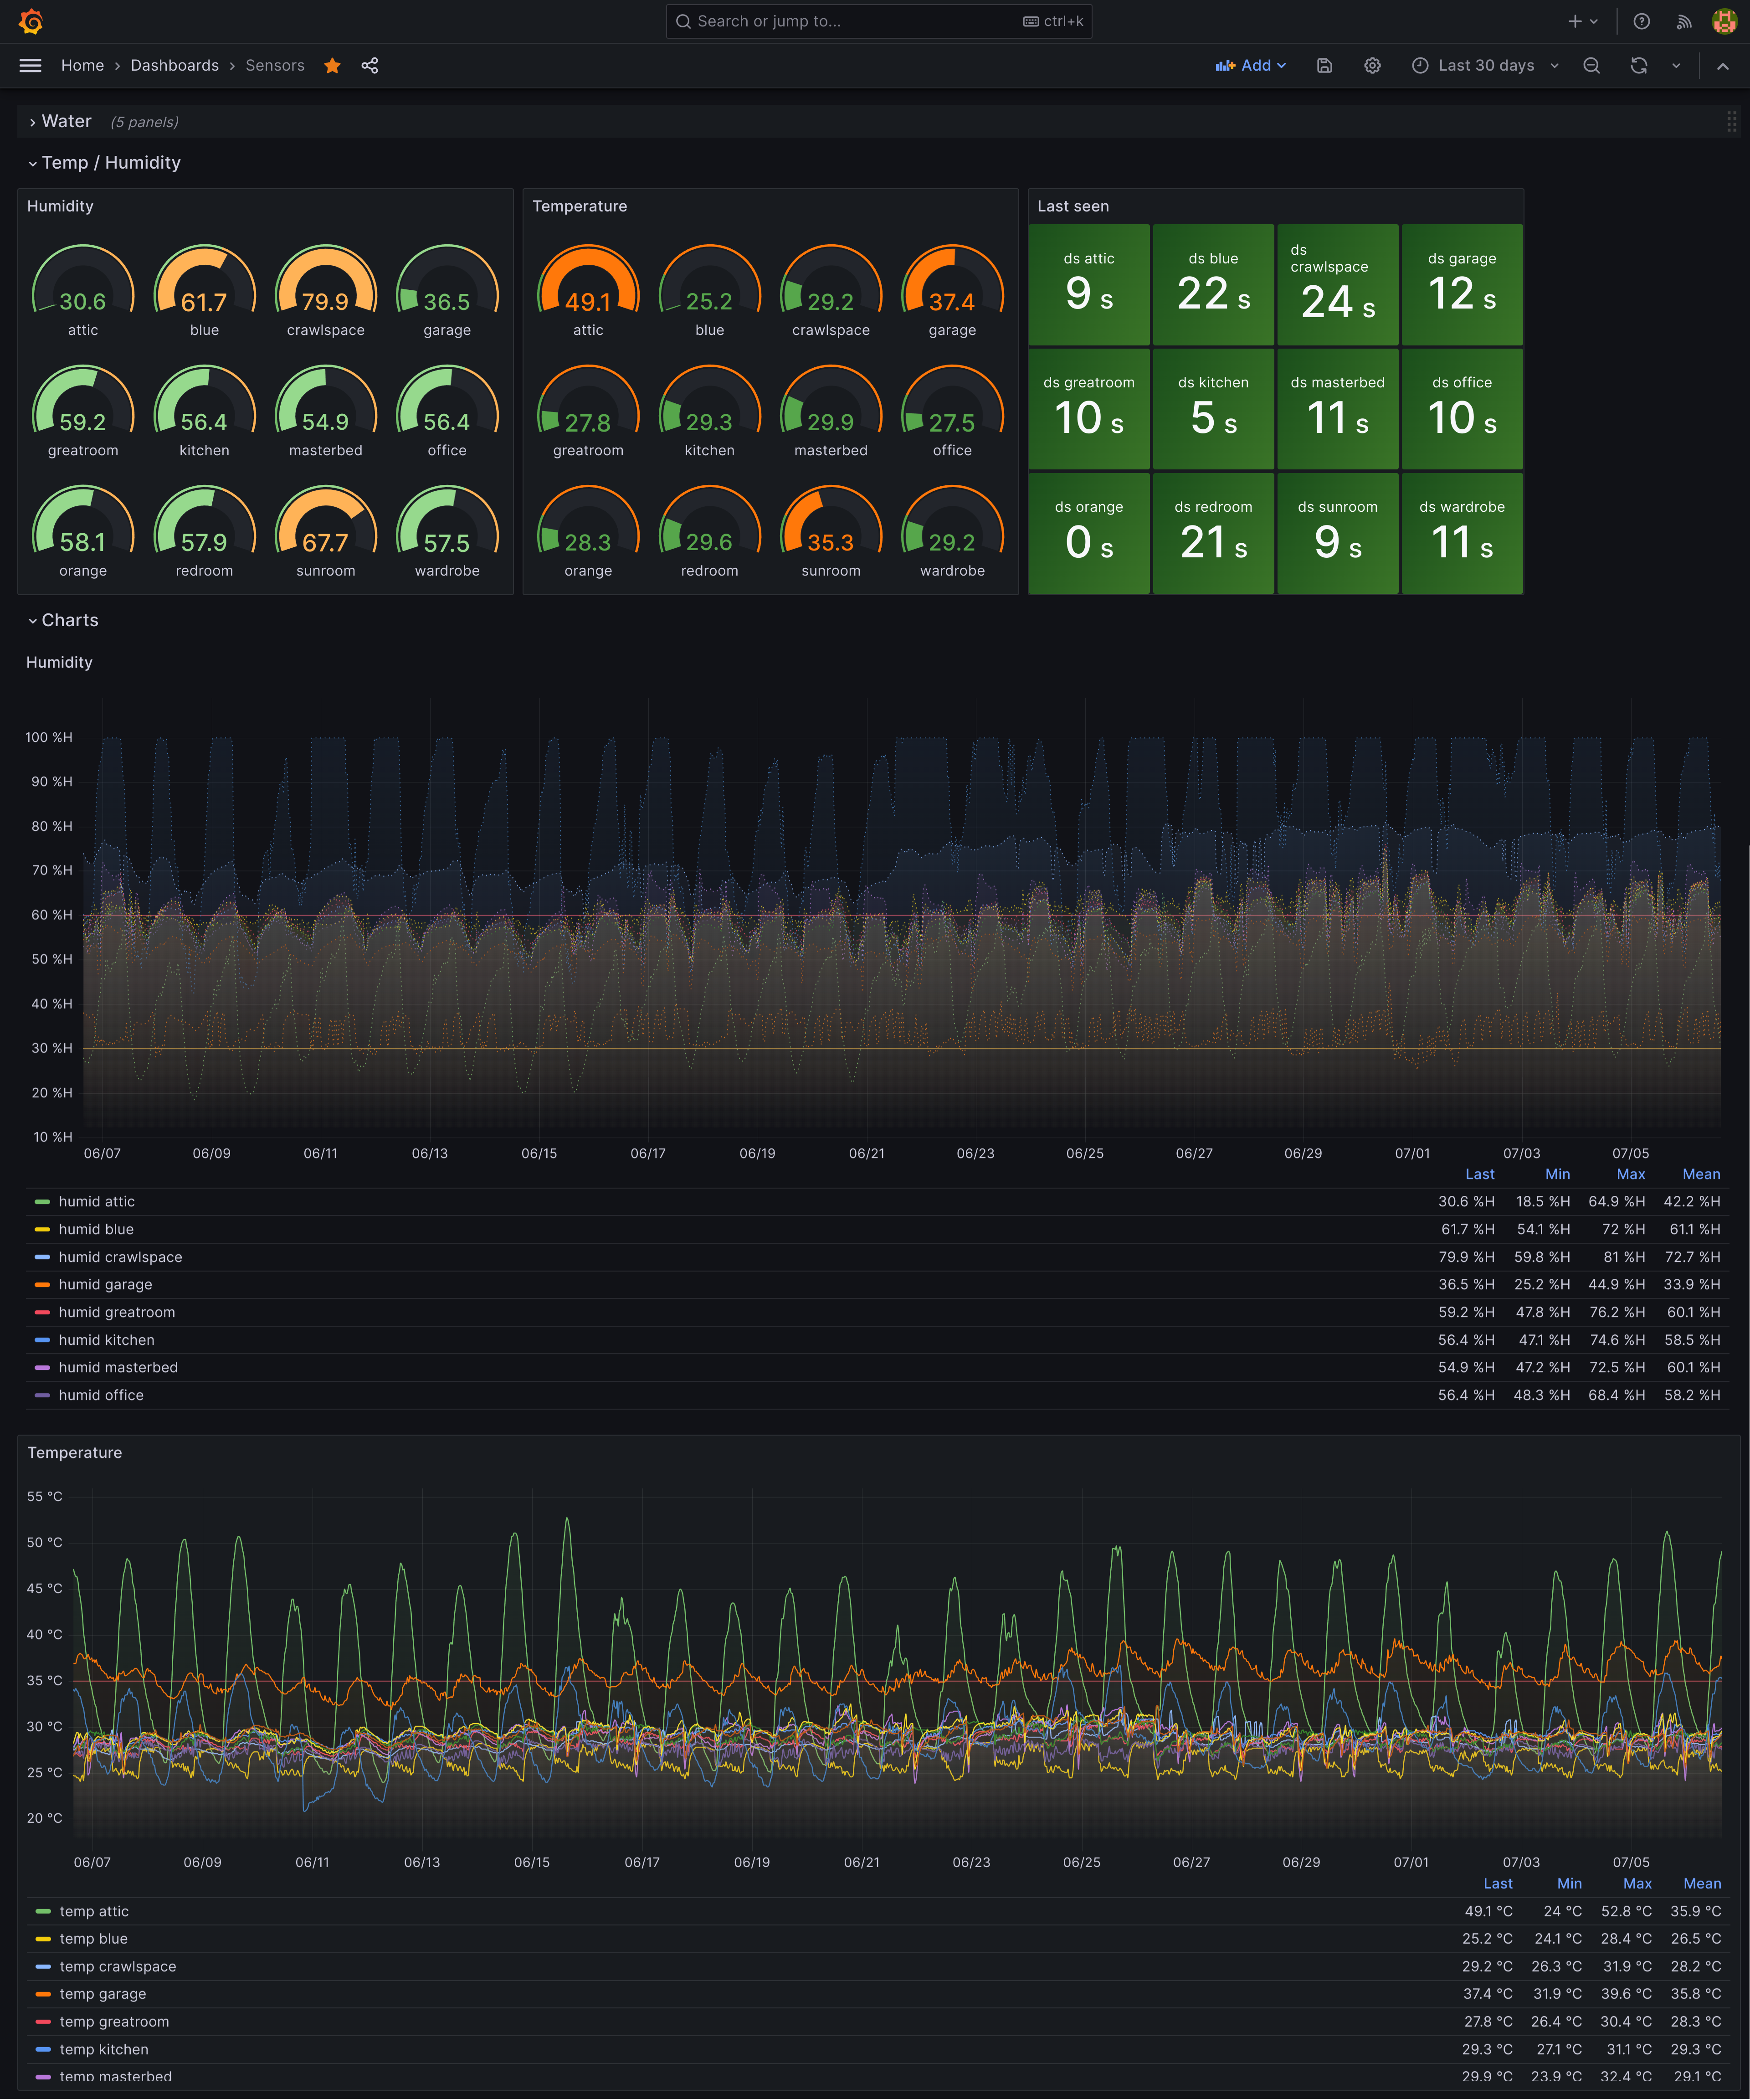
This will populate the default data source with the InfluxDB and then create a dashboard that shall look like following ( if you have some data in there from the sensors ).
To "prime" some data and verify that this part works fine, you can use the following command:
cat <<EOF | mqtt-shell -b mqtt://127.0.0.1:1883
pub /home/sensor/garage/temp 32.1
pub /home/sensor/garage/humid 55.0
pub /home/sensor/attic/humid 35.0
pub /home/sensor/attic/temp 40.0
pub /home/sensor/crawlspace/temp 27.0
pub /home/sensor/crawlspace/humid 65.0
EOF
Successfully connected to mqtt broker.
The result can look like:
 After you run that for some time, the result will be much more interesting:
| Qty | Value | Footprint | References |
|---|---|---|---|
| 3 | 10K | Resistor_SMD:R_0805_2012Metric | R1, R2, R3 |
| 2 | MountingHole_2.1mm | MountingHole:MountingHole_2.1mm | REF1, REF2 |
| 1 | 50 mF | Capacitor_THT:C_Disc_D5.0mm_W2.5mm_P5.00mm | C1 |
| 1 | AMS1117-3.3 | Package_TO_SOT_THT:TO-262-3_Vertical | U1 |
| 1 | Conn_01x04 | Connector_PinHeader_2.54mm:PinHeader_1x04_P2.54mm_Vertical | DEBUG1 |
| 1 | Conn_01x06 | Connector_PinHeader_2.54mm:PinHeader_1x06_P2.54mm_Vertical | GPIO1 |
| 1 | ESP-12F | Library:ESP-12E | U3 |
| 1 | FLASH | Connector_PinHeader_2.54mm:PinHeader_1x02_P2.54mm_Vertical | JP1 |
| 1 | LED | LED_THT:LED_D3.0mm | D1 |
| 1 | R | Resistor_SMD:R_0805_2012Metric | R5 |
| 1 | SETUP | Button_Switch_THT:SW_PUSH_6mm | SW1 |
| 1 | VIN | Connector_USB:USB_A_CNCTech_1001-011-01101_Horizontal | J1 |
The 15 most common of 17 parts.
It measures 28.4 × 58.5 mm and has 2 copper layers, 1.6 mm thick.
17 parts, built around the ESP-12F and AMS1117-3.3. The full list of its parts is on this page, with links to each part's symbol and footprint where PCBKit's library has them.
From the apiculallc/dhtmon repository on GitHub, at the commit this page was made from: the board is kicad/dhtmon/dhtmon.kicad_pcb and its schematic kicad/dhtmon/dhtmon.kicad_sch. PCBKit opens the board in the browser, with nothing to install.
Its repository publishes it under the Apache-2.0 licence: you may reuse it on that licence's terms (keep the author's notice, and for a copyleft licence share your changes alike).
klein0r/pcb-ws2812-wifi-controller
WiFi Controller for WS2812 LED Stripes


klein0r/pcb-ttl-ftdi-esp-adapter
PCB to connect a TTL reader either to an FTDI or ESP12-E/F (WiFi)


piwko28/smart-home-ebus-adapter
eBUS adapter PCB for use with ebusd-esp firmware as well as with other UART devices.


alextrical/ESP8266-Sentinel-Kinetic-Wired-Remote
ESP8266 based Re-implementation of the Vent-Axia Sentinel Kinetic Wired Remote Controller