Skip to the content
4 layers95.9 × 72 mmSX70z Normal, the printed circuit board in 3D

SX70z Normal

ZeshuLiu/SX70z10

SX-70 电子化机身主控 | Electronic Polaroid SX-70 Controller 基于 ESP32 的宝丽来 SX-70 相机控制模块,替换原装机头控制器。 支持自动测光曝光、B/T/手动模式、闪光灯同步、BLE+WiFi配网、OTA升级。 配备 128×32 OLED 机身控制器显示 EV 和快门速度,3D 按键交互。 Firmware: GPLv3 Hardware: CERN-OHL-S 2.0

Size
95.9 × 72 mm
Copper layers
4
Thickness
1.6 mm
Parts
52
Nets
67
Pads
235
Tracks, vias
435, 145
Pours
12
Routed
Yes
KiCad
KiCad 9.0 (file 20241229)
Created
23 May 2026
Updated
5 Nov 2026

Overview

SX70z Normal is an open-source printed circuit board by ZeshuLiu, from the ZeshuLiu/SX70z repository on GitHub. It is a 4-layer board of 95.9 × 72 mm with 52 parts on 67 nets, routed with 435 tracks and 145 vias.

It is built around the ESP32-PICO-D4, OPT4001DTSR and SPX3819M5-L-3-3, with the 1N4148WS and MMBT3904 among its other parts. Its parts include 26 resistors, 9 capacitors, 4 ICs, 4 diodes and 4 transistors. It belongs with the radio and wireless boards and the ESP32 and RISC-V boards of this library.

Main components

5

README

Readme.md

SX-70z

介绍

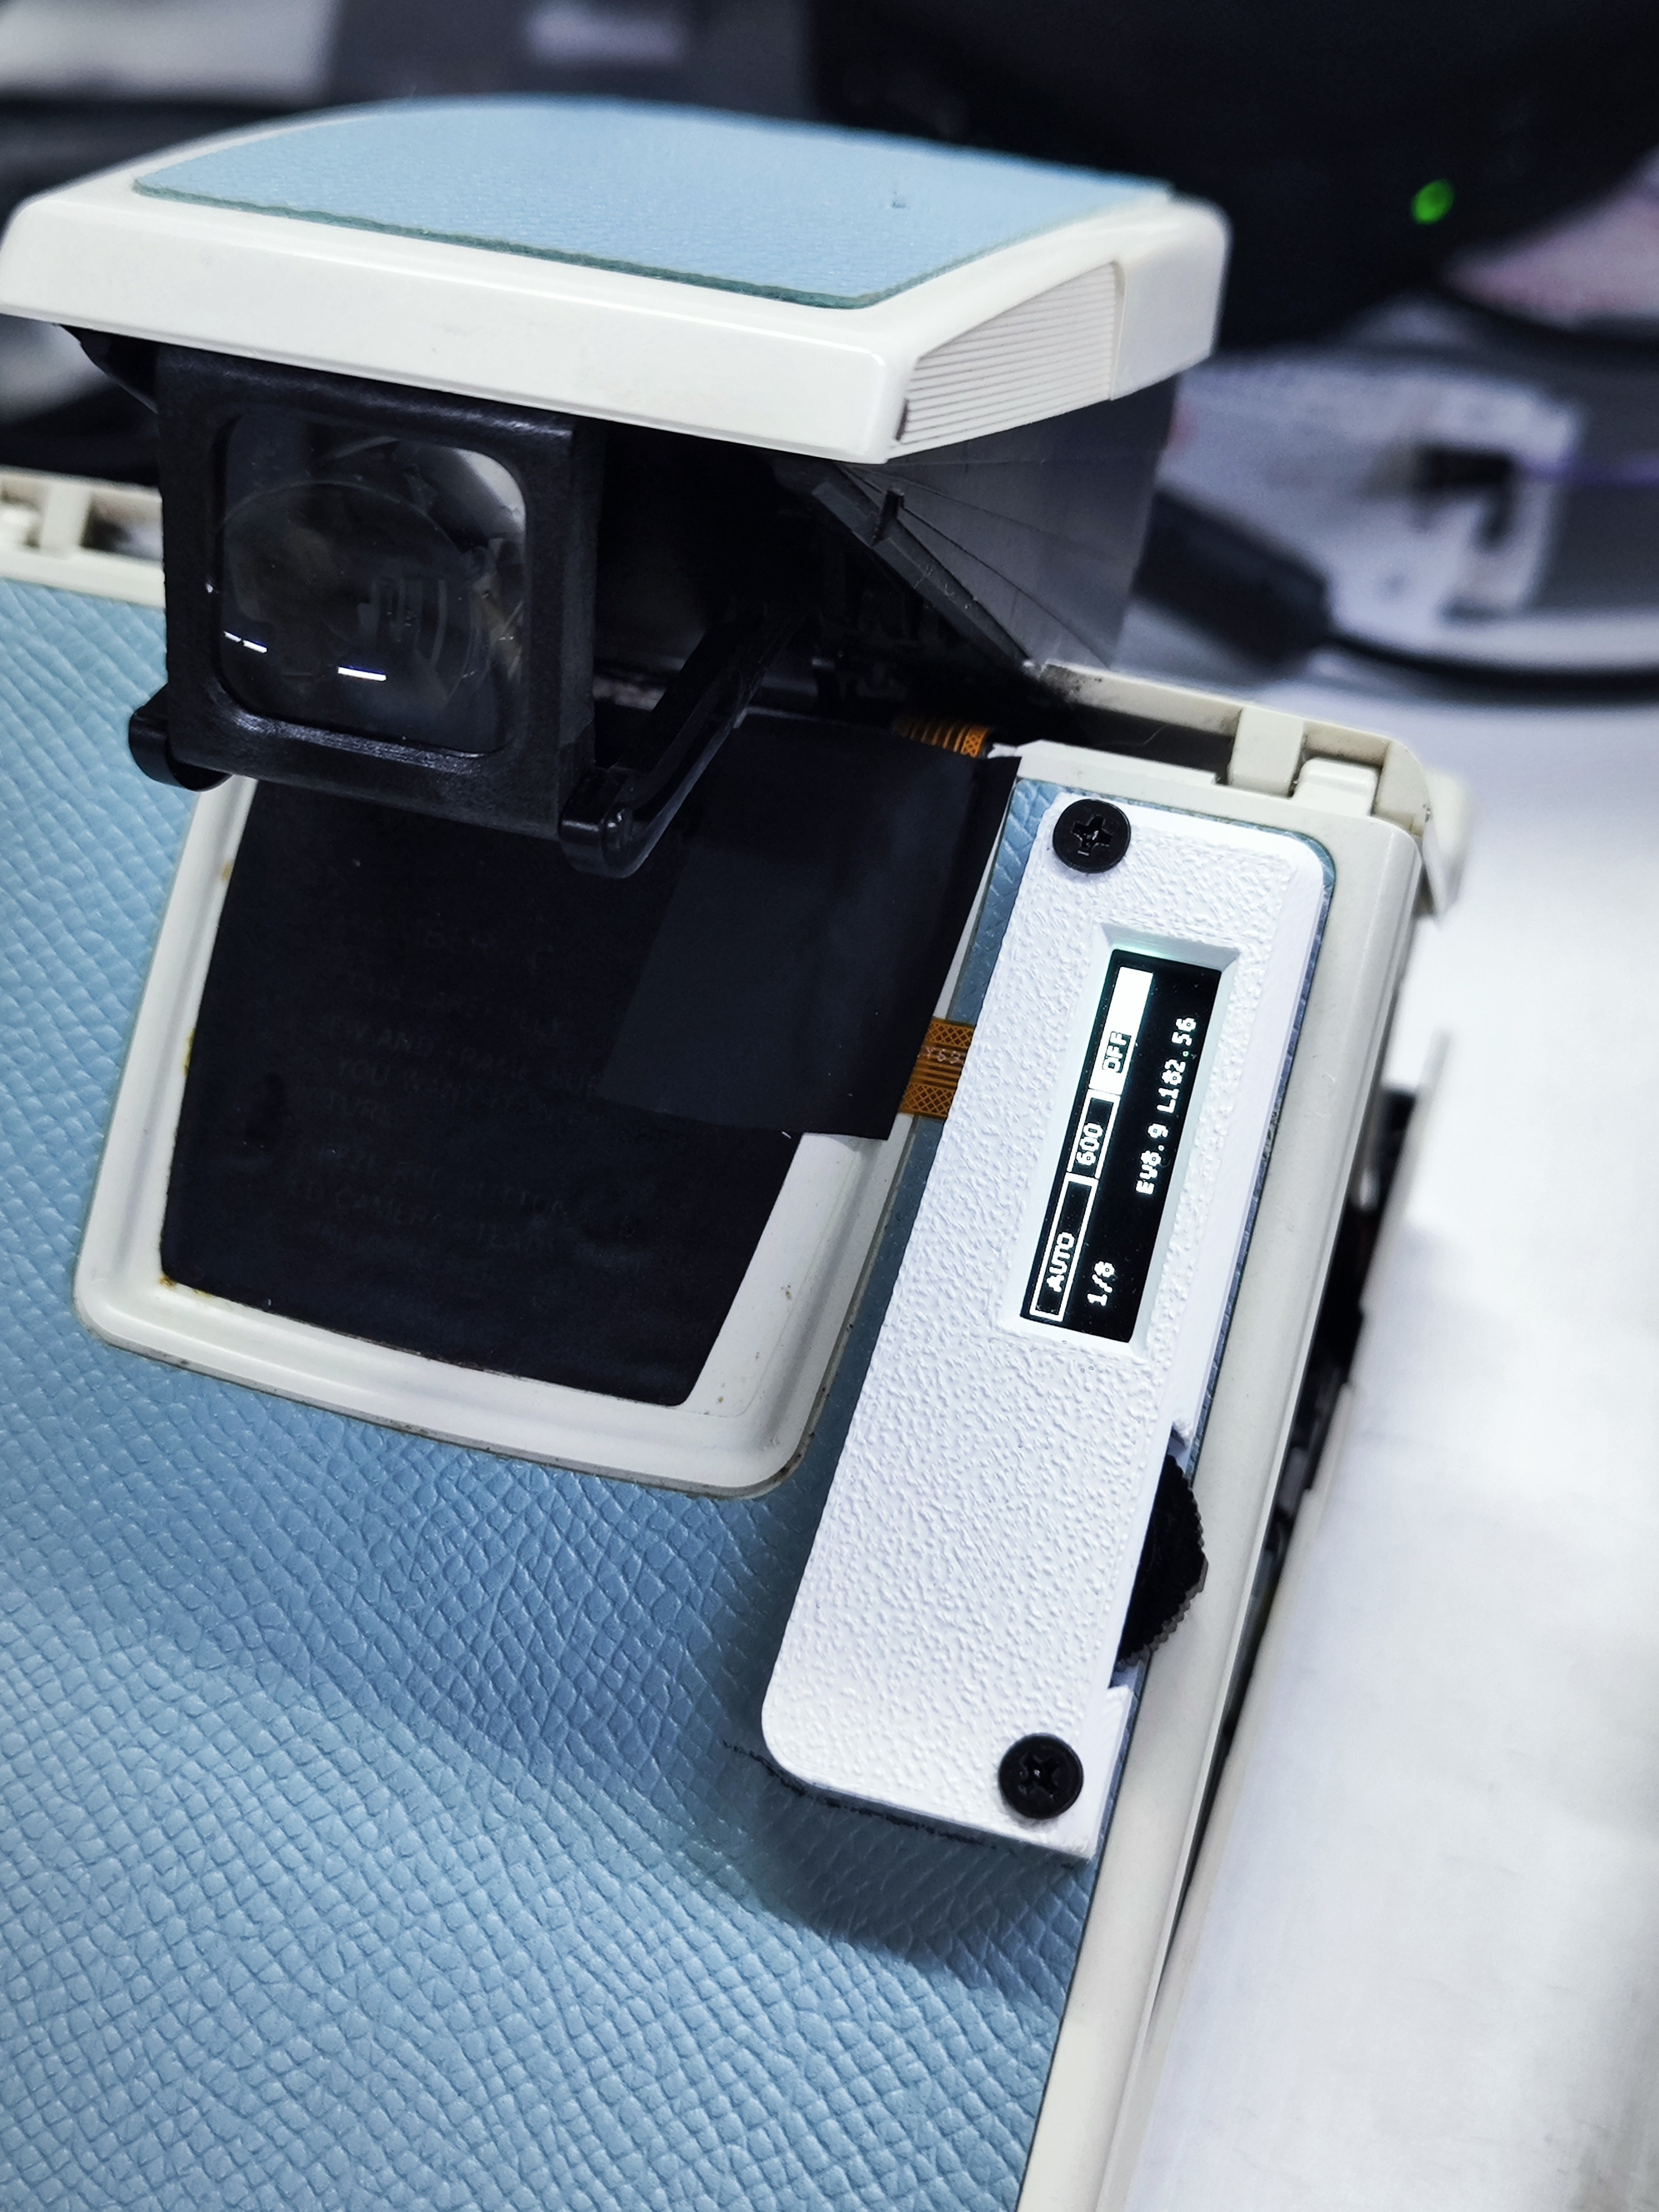
机身照片

项目组成

项目中包含几个部分的硬件:

  1. 相机主控板:替换相机机头内原装的控制器,接管相机的控制。
  2. 机身控制器:显示当前相机工作状态并提供用于交互的按键。粘贴在机身背部,不会增加相机高度,因此大部分相机包依旧可以通用,与相机主控板连接需要 Fpc 排线。

开发

PCB部分除FPC使用嘉立创EDA外均使用KiCad9绘制,仓库提供了相应的工程和光绘(gerber)文件。

机身控制器采用ESP-IDF进行开发

性能参数

相机主控可以单独使用,此时可以进行自动测光和曝光,如果需要使用B、T以及手动模式需要配备机身控制器。

快门速度: 3s-1/8000s,共 27 档,支持 B 门及 T 门 。 T 门可设置时间,至多5h (非定时T和B门无时间限制)
自拍定时: 0s/2s/5s/10s (倒计时完成后按当前模式自动曝光,倒计时期间挂起其余 Core 1 任务,不受按键干扰)
多重曝光: 最多 11 张(受 MCU 机能限制,曝光过程中无法折叠相机,断电将导致快门保持打开状态造成严重过曝)。多重曝光期间电磁铁持续通电,间隔超过 5 分钟可能导致过热,建议尽快完成所有曝光并吐片。设置方式:长按进入设置菜单,切换 MultiExp 选项(-1 为仅中止/首张防护,0 为正常拍摄,1-10 为额外曝光张数)
测光: 支持 ISO 640 相纸(通过 OPT4001 环境光传感器 + 窗口衰减系数 METERING_ATTEN_K 标定),实测与 Sekonic L-308S 测光表对比,全快门速度范围(3s – 1/8000s)精度一致,自动测光下最低快门速度 3s
闪光同步: 插入闪光灯后快门速度自动锁定 1/30s,手动模式可设置慢于 1/30s 进行填充闪光

SX70的光圈在使用闪光灯时将会根据对焦距离进行收缩,此时调整黑白轮可以控制其光圈大小。本项目依旧保留了该特点,因此在使用闪光灯时请注意对焦距离以及黑白轮的位置

曝光模式 × 闪光灯 行为矩阵

模式无闪光灯有闪光灯
AUTO测光 → 自动选快门速度 → 普通曝光快门固定 1/30s → 闪光曝光(47ms 预延迟后触发电容引闪)
BULB开快门 → 等 S1T 释放 → 关快门SOL2 光圈打开 → 开快门 → 47ms → 闪光 → 等 S1T 释放
TIME开快门 → 等 S1T 按两次 → 关快门SOL2 光圈打开 → 开快门 → 47ms → 闪光 → 等 S1T 按两次
MANUAL用户指定快门速度 → 普通曝光快门限制在 1/30s,按用户速度计算 gap → 闪光曝光

所有模式下,相机任务均运行在 ESP32 的 Core 1,按优先级分层隔离,曝光时序不受 WiFi/BLE 干扰。

软件架构

text
Core 0:   WiFi 协议栈 + NimBLE BLE + HTTP Server (OTA Web) + 事件回调
Core 1:   相机控制(与射频中断隔离)
  ├─ Shutter  Task  prio 10 — 强时序引脚控制(busy-wait,独占 Core 1)
  ├─ Control  Task  prio 8  — 主控逻辑(按键/模式/S1 快门)
  ├─ Display  Task  prio 5  — SSD1306 I2C 刷屏(200ms 周期)
  └─ Metering Task  prio 3  — OPT4001 测光(1s 周期)

模块文件:

文件职责
camera_main.c任务调度、曝光时序、电磁铁/电机控制
gpio_inputs.cGPIO 输入处理:S1/S2 去抖、3D 按键、设置菜单(自拍定时 / 多重曝光 / IP 显示)
display_manager.cOLED 帧绘制、倒计时显示、设置菜单布局
opt4001.cOPT4001 环境光传感器 I2C 驱动
ssd1306.cSSD1306 OLED I2C 驱动(esp_lcd 后端,含 ssd1306_draw_str_black 反色绘制)
pcf8575.cPCF8575 I2C GPIO 扩展驱动
pin_init.cGPIO 引脚初始化
ota_web.cWiFi HTTP OTA 网页升级

设置菜单

长按 3D 按键的"按下"键进入设置菜单,菜单参数化支持上下键切换选项、短按"按下"键切换调整/浏览模式:

选项说明
SelfTimer自拍定时:0s / 2s / 5s / 10s
MultiExp多重曝光:-1(仅中止,首张防护)/ 0(正常)/ 1-10(额外张数,最多 11 张)
IP Addr只读,显示相机当前 WiFi IP 地址(未连接时显示 "not connected")

状态栏右上角同时显示当前自拍定时值与多重曝光剩余张数。

样片

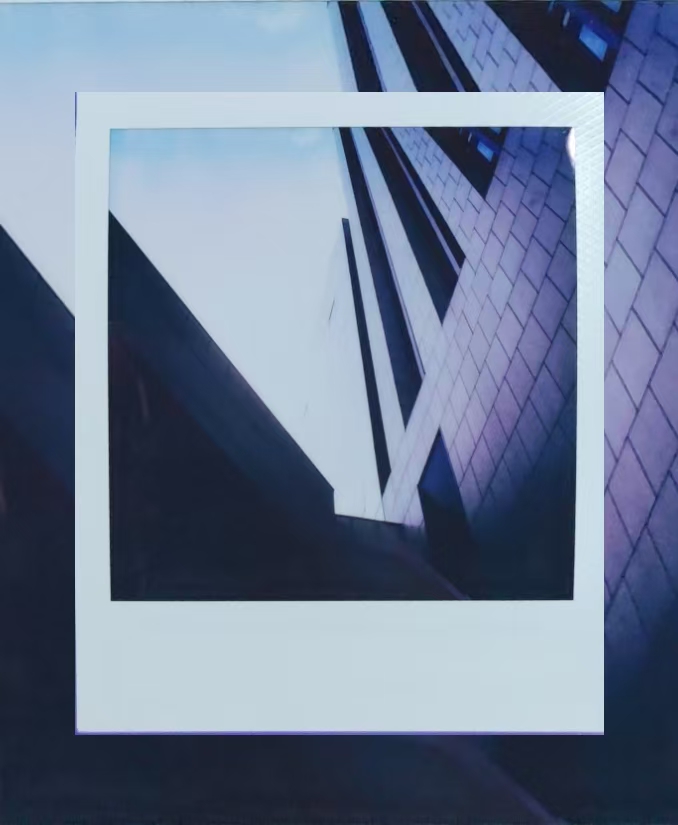
样片1 样片2 样片3 样片4

硬件制造

投产文件集中在 投产文件:主控使用 3.5 版 Gerber,机身控制器、机身 FPC 和外壳文件也在其中。BOM、坐标和硬件版本的对应关系仍须按目录说明核对后再下单。PCB 厚度应小于 0.8 mm,主板与机身控制器通过 FPC 连接。完整操作草稿见复刻与调试指南。

软件

在将机身主控安装至机器内部之前需要将固件通过串口烧录至控制器中。后续可以通过 OTA 无线升级,无需拆机。

首次 WiFi 配网:

首次开机相机没有 WiFi 凭据,会通过 BLE 广播 SX70z_POP。手机下载 ESP BLE Provisioning 应用(iOS/Android 应用商店均有),打开后选择配网,输入配对密钥 sx70z123,选择家中 WiFi 并输入密码即可。配网成功后凭据会存入 NVS,下次开机自动连接。

OTA 升级方式:

  1. 相机开机连接 WiFi(通过 BLE 配网或已保存的凭据自动连接)
  2. 手机或电脑连接同一局域网,浏览器打开相机 IP(OLED 设置菜单中可查看)
  3. 选择编译好的 .bin 固件文件上传
  4. 上传完成自动重启,新固件生效(Bootloader 会校验固件有效性,异常自动回滚)

快门可通过 http://<相机IP>/calibration 页面校准并保存,无需修改源码。先将 1/8000 调到快门形成一个小缝,其余档位可参考该档的偏移量在默认值基础上调整,再逐档测量确认;具体操作可搜索“陆工主板 快门校准”教程,也可使用快门速度测试器。详细说明见复刻与调试指南。

组装

提示:组装需要一些基本的工具:电烙铁、撬棒和镊子。
大多数sx70相机的螺丝都是非常特殊的1mm x 1mm 宝丽来螺丝,拆卸需要特殊的螺丝刀,可以从咸鱼买一把或者自己磨一个。
在操作之前推荐先浏览以下内容Disassembly Guide 或者 SX70 camera 125ASA to 600ASA conversion.

拆卸后对原本主板进行替换即可,如需要机身控制器则将左上角焊盘焊线引出即可通过转接板连接机身控制器。焊接FPC时建议使用含铅(低温)焊锡,否则有损伤机器FPC的风险。只需要将原本的拆掉并且替换上去即可,对于有焊接及机身拆装经验的人来说难度不高。

相关开源软件

  1. 项目受到了OPSX 和openSX70的启发。

Parts

52
QtyValueFootprintReferences
1210kResistor_SMD:R_0402_1005Metric_Pad0.72x0.64mm_HandSolderR1, R2, R3, R4, R5, R9, R11, R12, R13, R15, R17, R19
412kResistor_SMD:R_0402_1005Metric_Pad0.72x0.64mm_HandSolderR10, R14, R18, R20
3120Resistor_SMD:R_0402_1005Metric_Pad0.72x0.64mm_HandSolderR21, R22, R24
31N4148WSDiode_SMD:D_SOD-323D1, D3, D4
2100kResistor_SMD:R_0402_1005Metric_Pad0.72x0.64mm_HandSolderR23, R25
2100nCapacitor_SMD:C_0402_1005Metric_Pad0.74x0.62mm_HandSolderC6, C15
21uCapacitor_SMD:C_0402_1005Metric_Pad0.74x0.62mm_HandSolderC4, C5
2Conn_01x02Connector_PinHeader_2.54mm:PinHeader_1x02_P2.54mm_VerticalJ1, J3
2DNPCapacitor_SMD:C_0402_1005MetricC1, C2
2Q_NMOS_GSDPackage_TO_SOT_SMD:SOT-23Q1, Q2
10RInductor_SMD:L_0402_1005MetricL1
110ufCapacitor_SMD:C_0402_1005Metric_Pad0.74x0.62mm_HandSolderC7
110ufCapacitor_SMD:C_0402_1005MetricC8
11kResistor_SMD:R_0402_1005Metric_Pad0.72x0.64mm_HandSolderR6
13.3kResistor_SMD:R_0402_1005Metric_Pad0.72x0.64mm_HandSolderR26
1330Resistor_SMD:R_0402_1005Metric_Pad0.72x0.64mm_HandSolderR34
147kResistor_SMD:R_0402_1005Metric_Pad0.72x0.64mm_HandSolderR8
15.6kResistor_SMD:R_0402_1005Metric_Pad0.72x0.64mm_HandSolderR7
1Conn_01x03_SocketConnector_PinHeader_2.54mm:PinHeader_1x03_P2.54mm_VerticalJ2
1DNPCapacitor_SMD:C_0402_1005Metric_Pad0.74x0.62mm_HandSolderC3
1ESP32-PICO-D4Package_DFN_QFN:QFN-48-1EP_7x7mm_P0.5mm_EP5.1x5.1mm_ThermalViasU4
1LEDDiode_SMD:D_0603_1608Metric_Pad1.05x0.95mm_HandSolderD5
1MMBT3904Package_TO_SOT_SMD:SOT-23Q5
1OPT4001DTSROPT4001:OPT4001-DTS0008A-MFGU5
1Q_PMOS_GSDPackage_TO_SOT_SMD:SOT-23Q6
1SPX3819M5-L-3-3Package_TO_SOT_SMD:SOT-23-5U3
1sx~OPSX:sx70_i2csx1
1~KiCadLib:AN2051-245U1

More from ZeshuLiu/SX70z

1
  • 2 layers20.3 × 63 mmBodyControllerForSX70z, the printed circuit board in 3D

    BodyControllerForSX70z

    ZeshuLiu/SX70z

    SX-70 电子化机身主控 | Electronic Polaroid SX-70 Controller 基于 ESP32 的宝丽来 SX-70 相机控制模块,替换原装机头控制器。 支持自动测光曝光、B/T/手动模式、闪光灯同步、BLE+WiFi配网、OTA升级。 配备 128×32 OLED 机身控制器显示 EV 和快门速度,3D 按键交互。 Firmware: GPLv3 Hardware: CERN-OHL-S 2.0

    22 parts10

Similar boards

  • 2 layers24.4 × 24.4 mmMinimal watch, the printed circuit board in 3D

    Minimal watch

    bkarl/minimal-watch

    minimalistic smartwatch

    40 parts
  • 8 layersSportwatch revA, the printed circuit board in 3D

    Sportwatch revA

    slimmpylk/Skoll_Ultra

    a custom outdoor and endurance-sports smartwatch.

    184 parts
  • 4 layers24.3 × 24 mmMini base v2, the printed circuit board in 3D

    Mini base v2

    anichno/tabletop-mini-tracker

    36 parts2
  • 2 layers105 × 105 mmGW A, the printed circuit board in 3D

    GW A

    ayaxan7/SolarAlert

    SolarAlert is a compact embedded hardware project designed to monitor the health and performance of solar panels.

    97 parts
  • 2 layers10.2 × 7.6 mmESPesh, the printed circuit board in 3D

    ESPesh

    Charlio99/ESPesh

    One inch ESP32 PCB designed for low power IoT applications.

    42 parts20
  • 2 layers74.2 × 5.5 mmSwarmBot, the printed circuit board in 3D

    SwarmBot

    keionbis/WhiteboardSwarm

    74 parts
  • 4 layers30 × 29 mmHoloCube, the printed circuit board in 3D

    HoloCube

    KisonHe/HoloCube-PCB

    37 partsGPL-2.0
  • 2 layers60 × 63 mmATMEGA328P AU BASE CYUSB v1.0, the printed circuit board in 3D

    ATMEGA328P AU BASE CYUSB v1.0

    kgsully/MCU.ATMEGA328P-AU-Base

    Base Schematic and PCB for ATMEGA328P-AU w/ USB-UART Bridge

    52 parts1

Questions

How big is the SX70z Normal PCB?

It measures 95.9 × 72 mm and has 4 copper layers, 1.6 mm thick.

What parts does the SX70z Normal use?

52 parts, built around the ESP32-PICO-D4, OPT4001DTSR, SPX3819M5-L-3-3 and 1N4148WS. The full list of its parts is on this page, with links to each part's symbol and footprint where PCBKit's library has them.

Where can I download the SX70z Normal KiCad files?

From the ZeshuLiu/SX70z repository on GitHub, at the commit this page was made from: the board is Hardware/MainController/SX70z_Normal/SX70z_Normal.kicad_pcb and its schematic Hardware/Body_controller/BodyControllerForSX70z/BodyControllerForSX70z.kicad_sch. PCBKit opens the board in the browser, with nothing to install.

Can I use the SX70z Normal design in my own project?

Its repository states no licence, so its author keeps all rights: ask ZeshuLiu before reusing the design.