2 layers95.1 × 72.1 mm

 MadsBornebusch/PlantFriends6
Soil moisture sensor and plant watering with an ESP8266
PlantWatering is an open-source printed circuit board by MadsBornebusch, from the MadsBornebusch/PlantFriends repository on GitHub, published under the GPL-3.0 licence. It is a 2-layer board of 30.5 × 119.1 mm with 19 parts on 22 nets, routed with 166 tracks and 34 vias.
It is built around the ESP-12E, LT1763CDE and 1N4148W, with the IRLML2502 among its other parts. Its parts include 6 resistors, 4 connectors, 3 capacitors, 2 ICs and 1 diode. It belongs with the ESP8266 boards of this library.



The code is licensed under the GNU General Public License Version 3.
The PCB is licensed under the Creative Commons Attribution-ShareAlike 4.0 license due to using an ESP8266 kicad library and a particular soil moisture probe design.

This is a plant watering ESP8266.
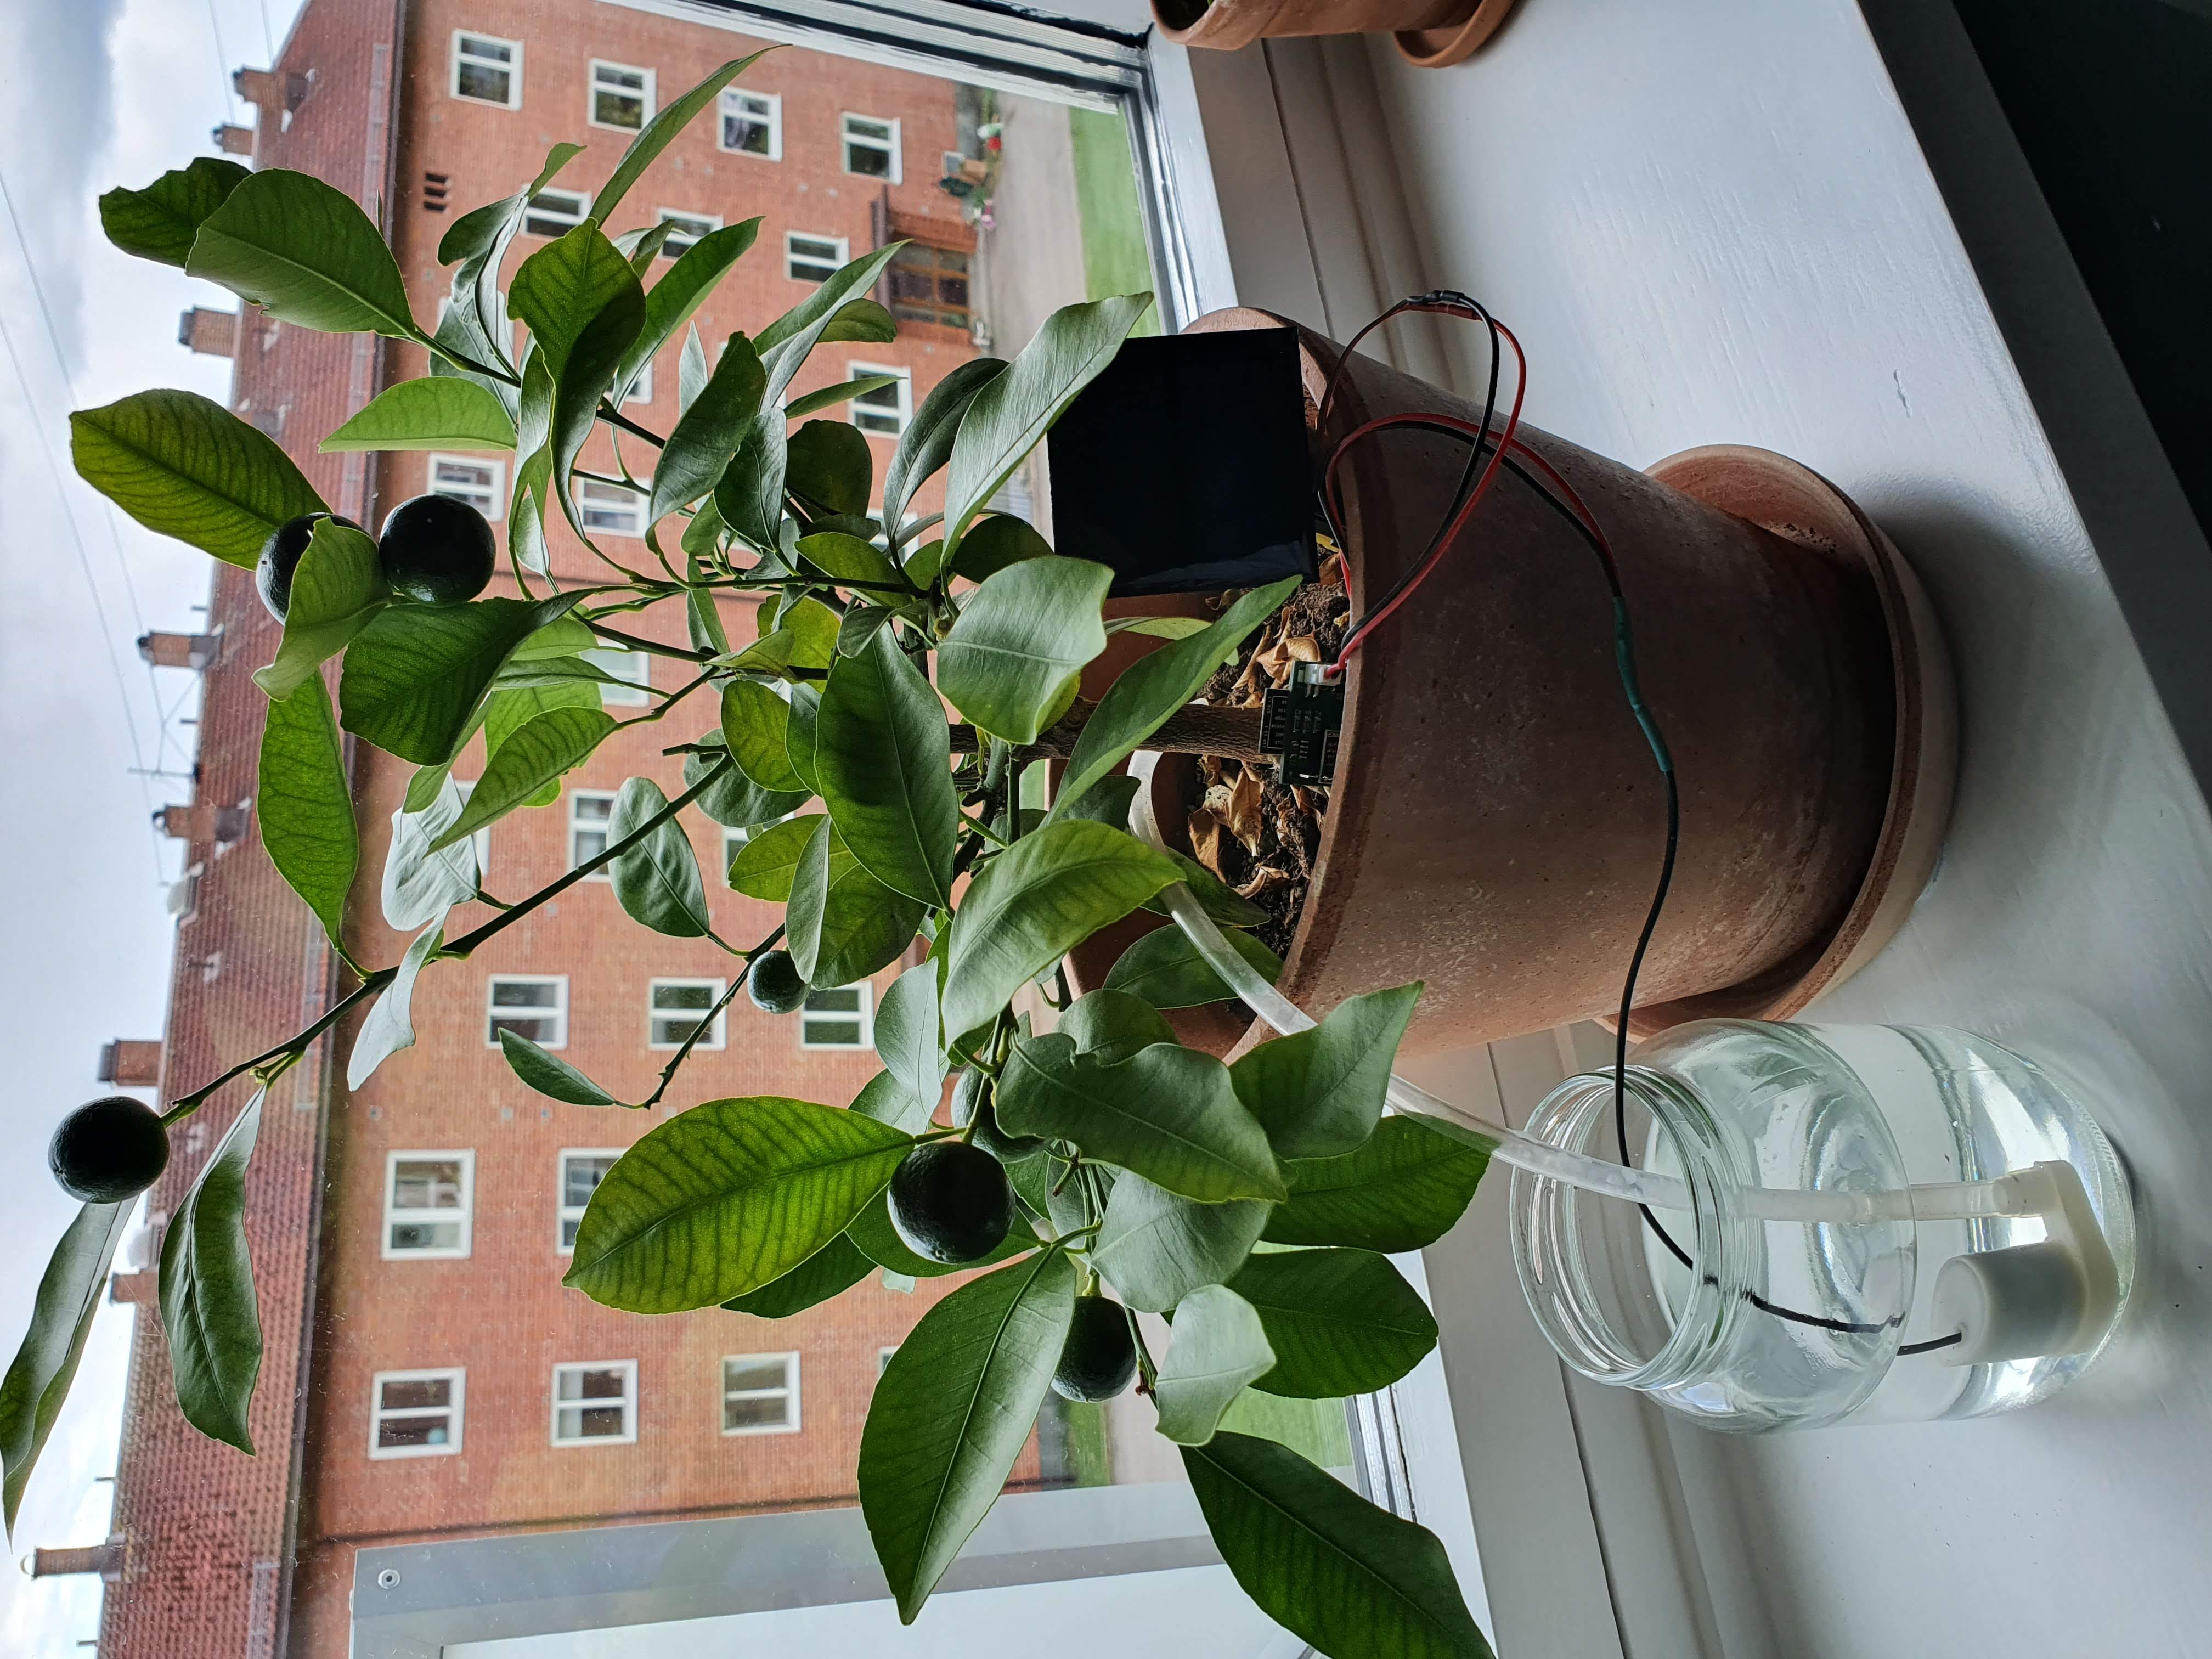
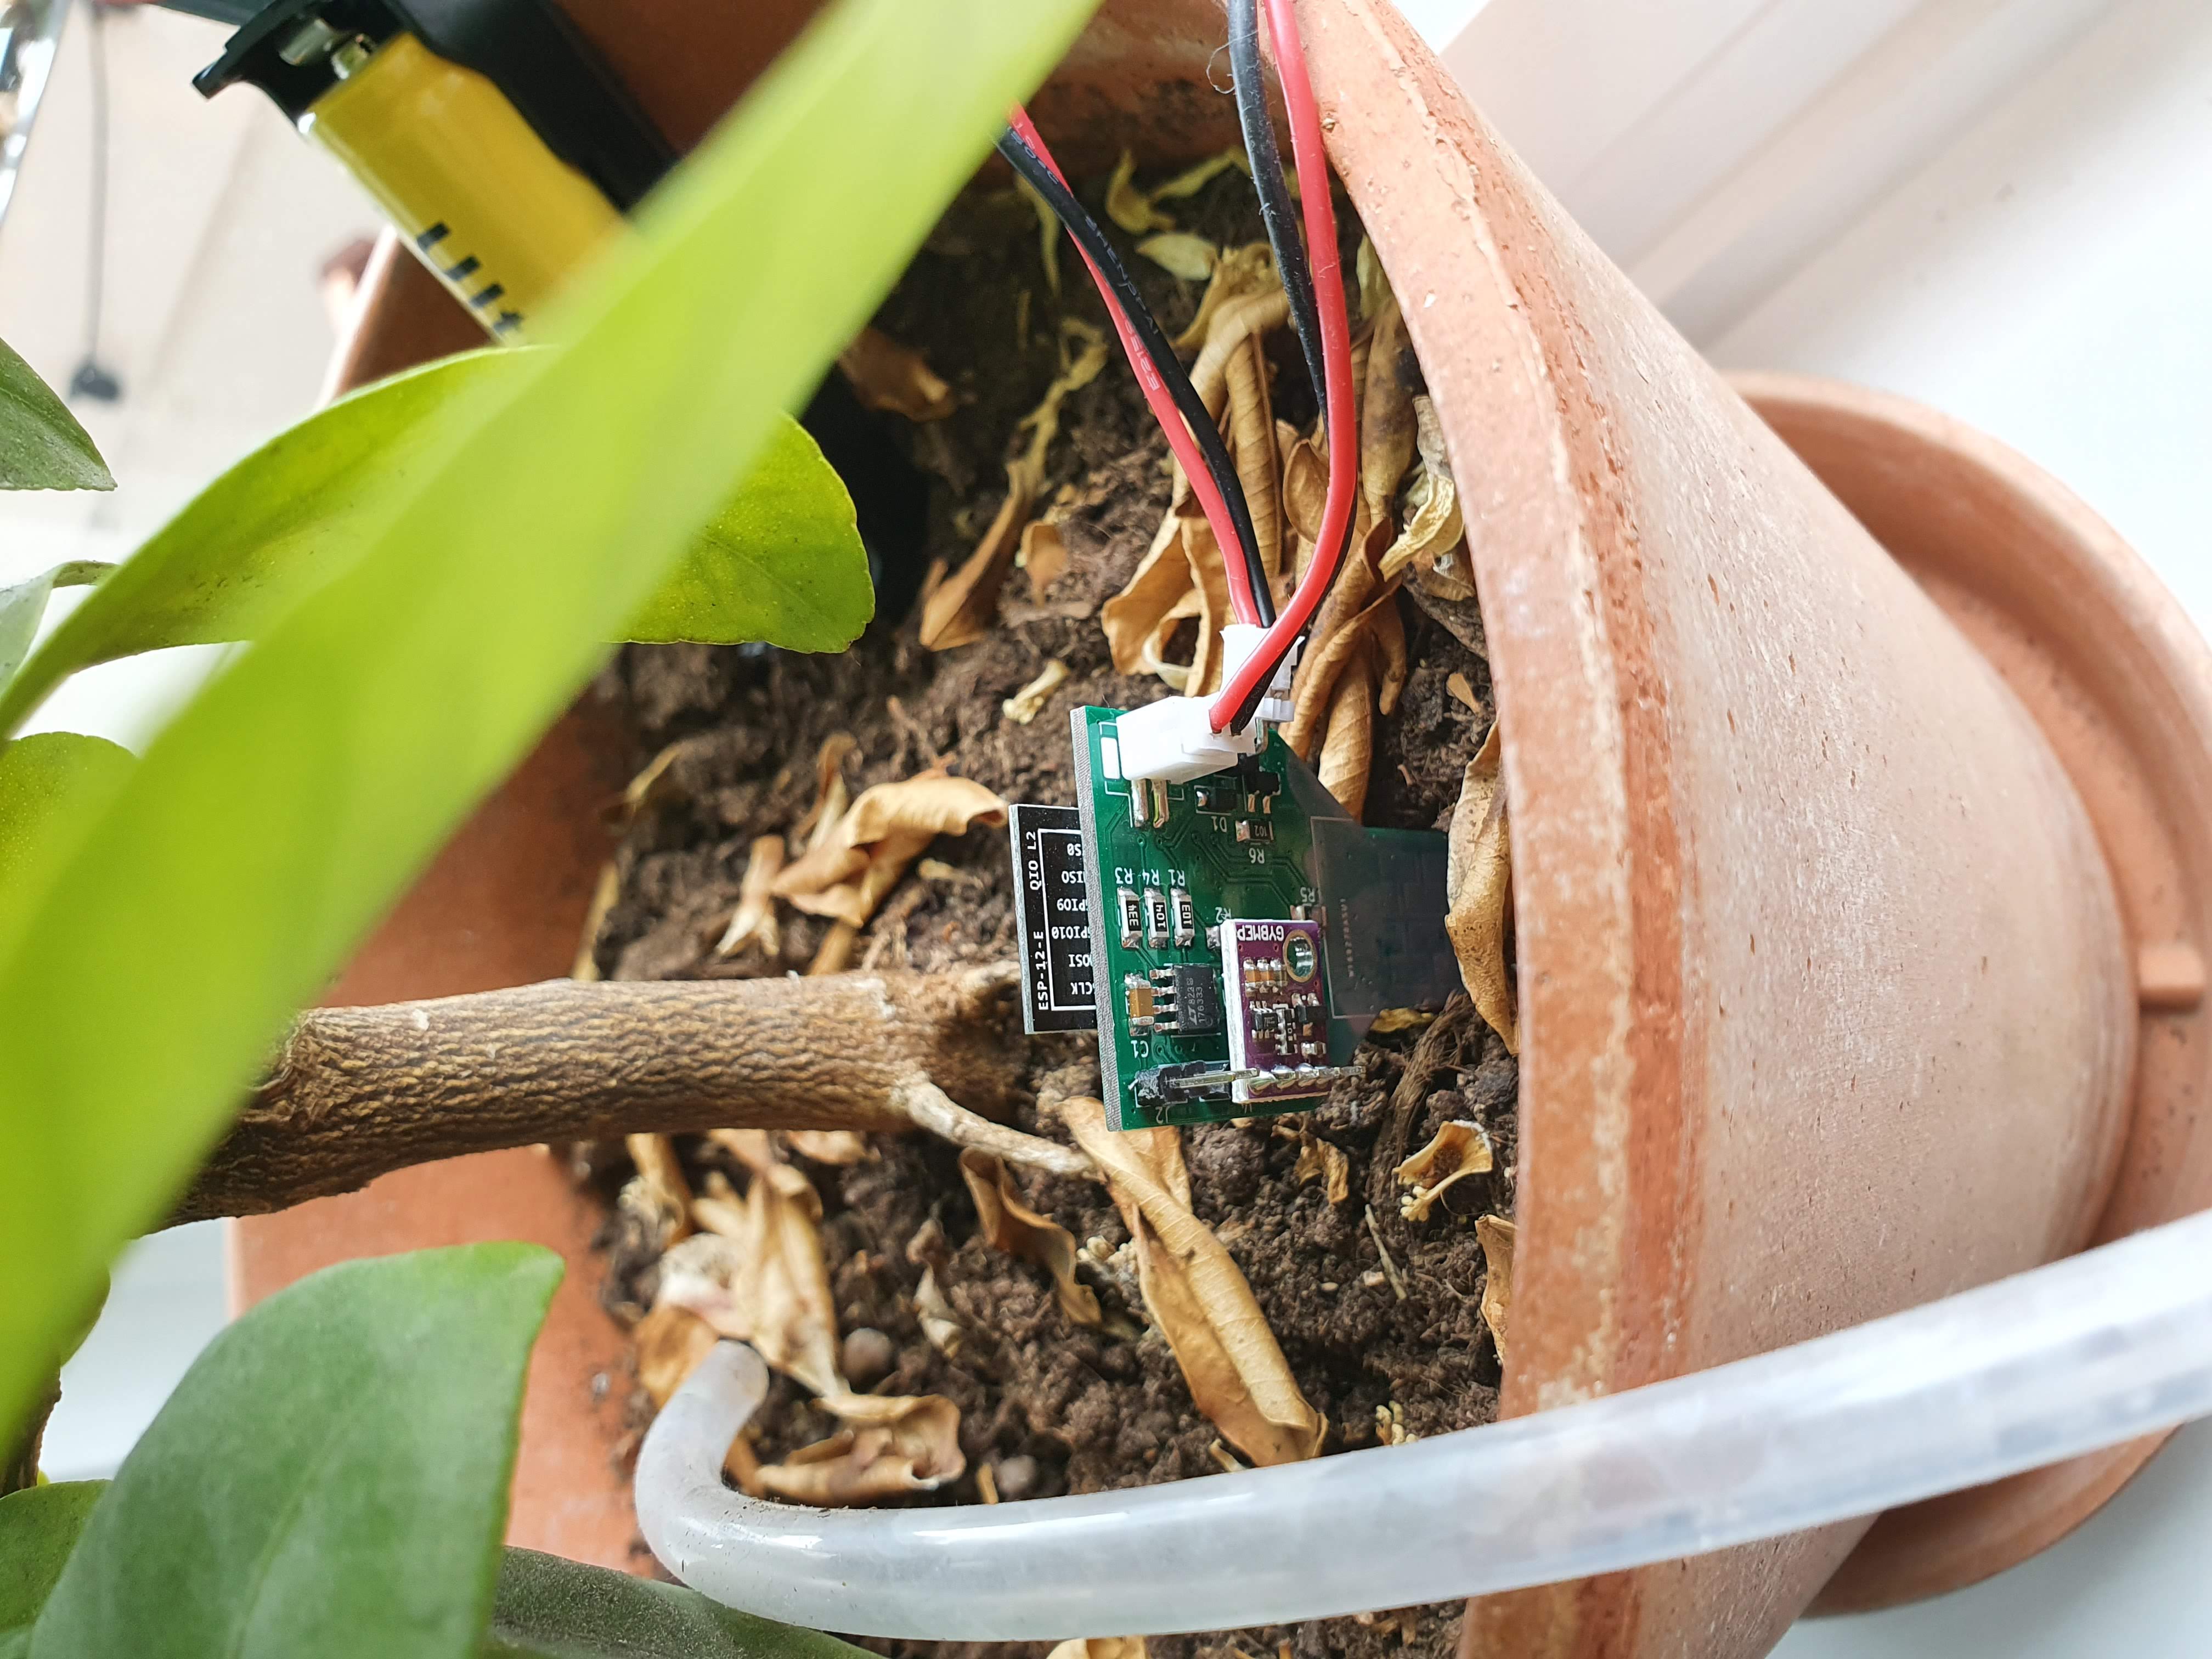
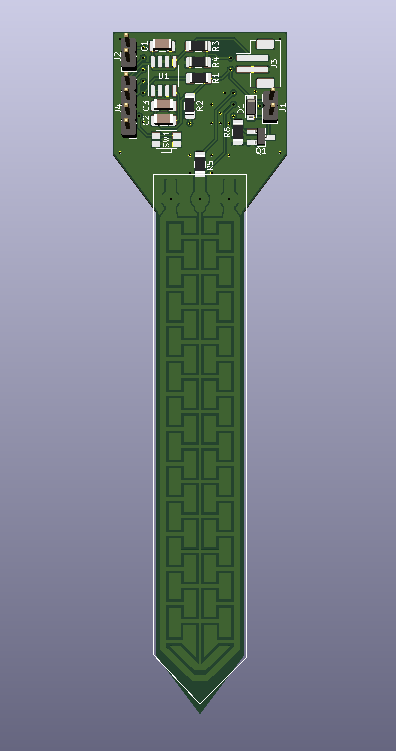
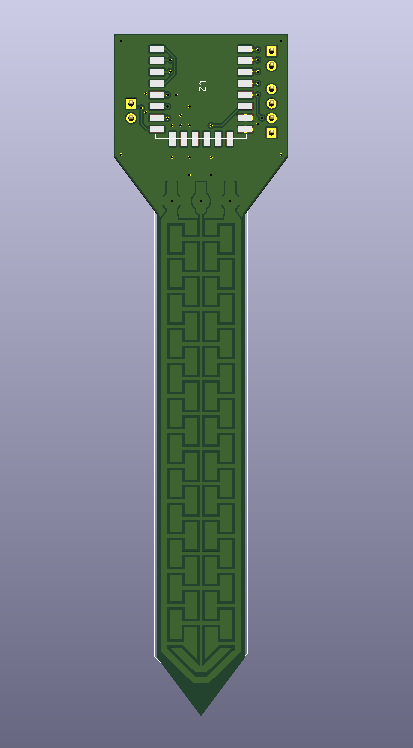
Left side from top:
A enclosure meant for 3D printing can be found in the enclosure directory. Two variant are available. One with a closed top and one with a cutout for mounting a breakout board.
TODO: Add pictures
The WiFi, ThingSpeak and MQTT settings can be configured via a web interface:
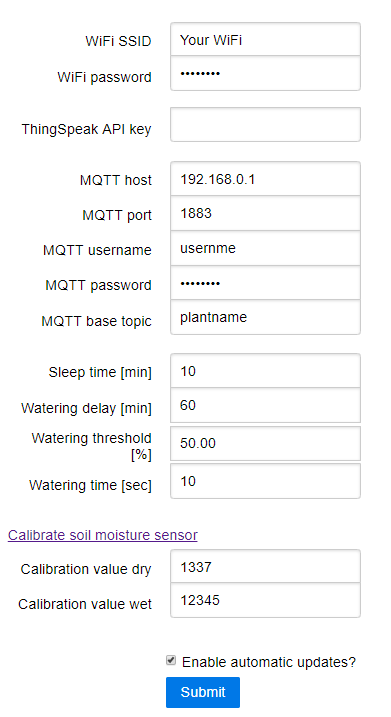
If you do not want to use ThingSpeak simply leave the ThingSpeak API key field empty. Similarly the MQTT can be disabled by leaving the MQTT base topic empty.
At first boot the module will turn on a hotspot with the SSID: PlantFriends and password: plantsarecool.
After logging on to the WiFI simply navigate to http://plantfriends.local or http://192.168.4.1 to configure the module.
The device can be put back into hotspot mode by shorting the TX and RX pins and restarting the module.
A new firmware and file system image can be uploaded by navigation to http://plantfriends.local/update or http://192.168.4.1/update.
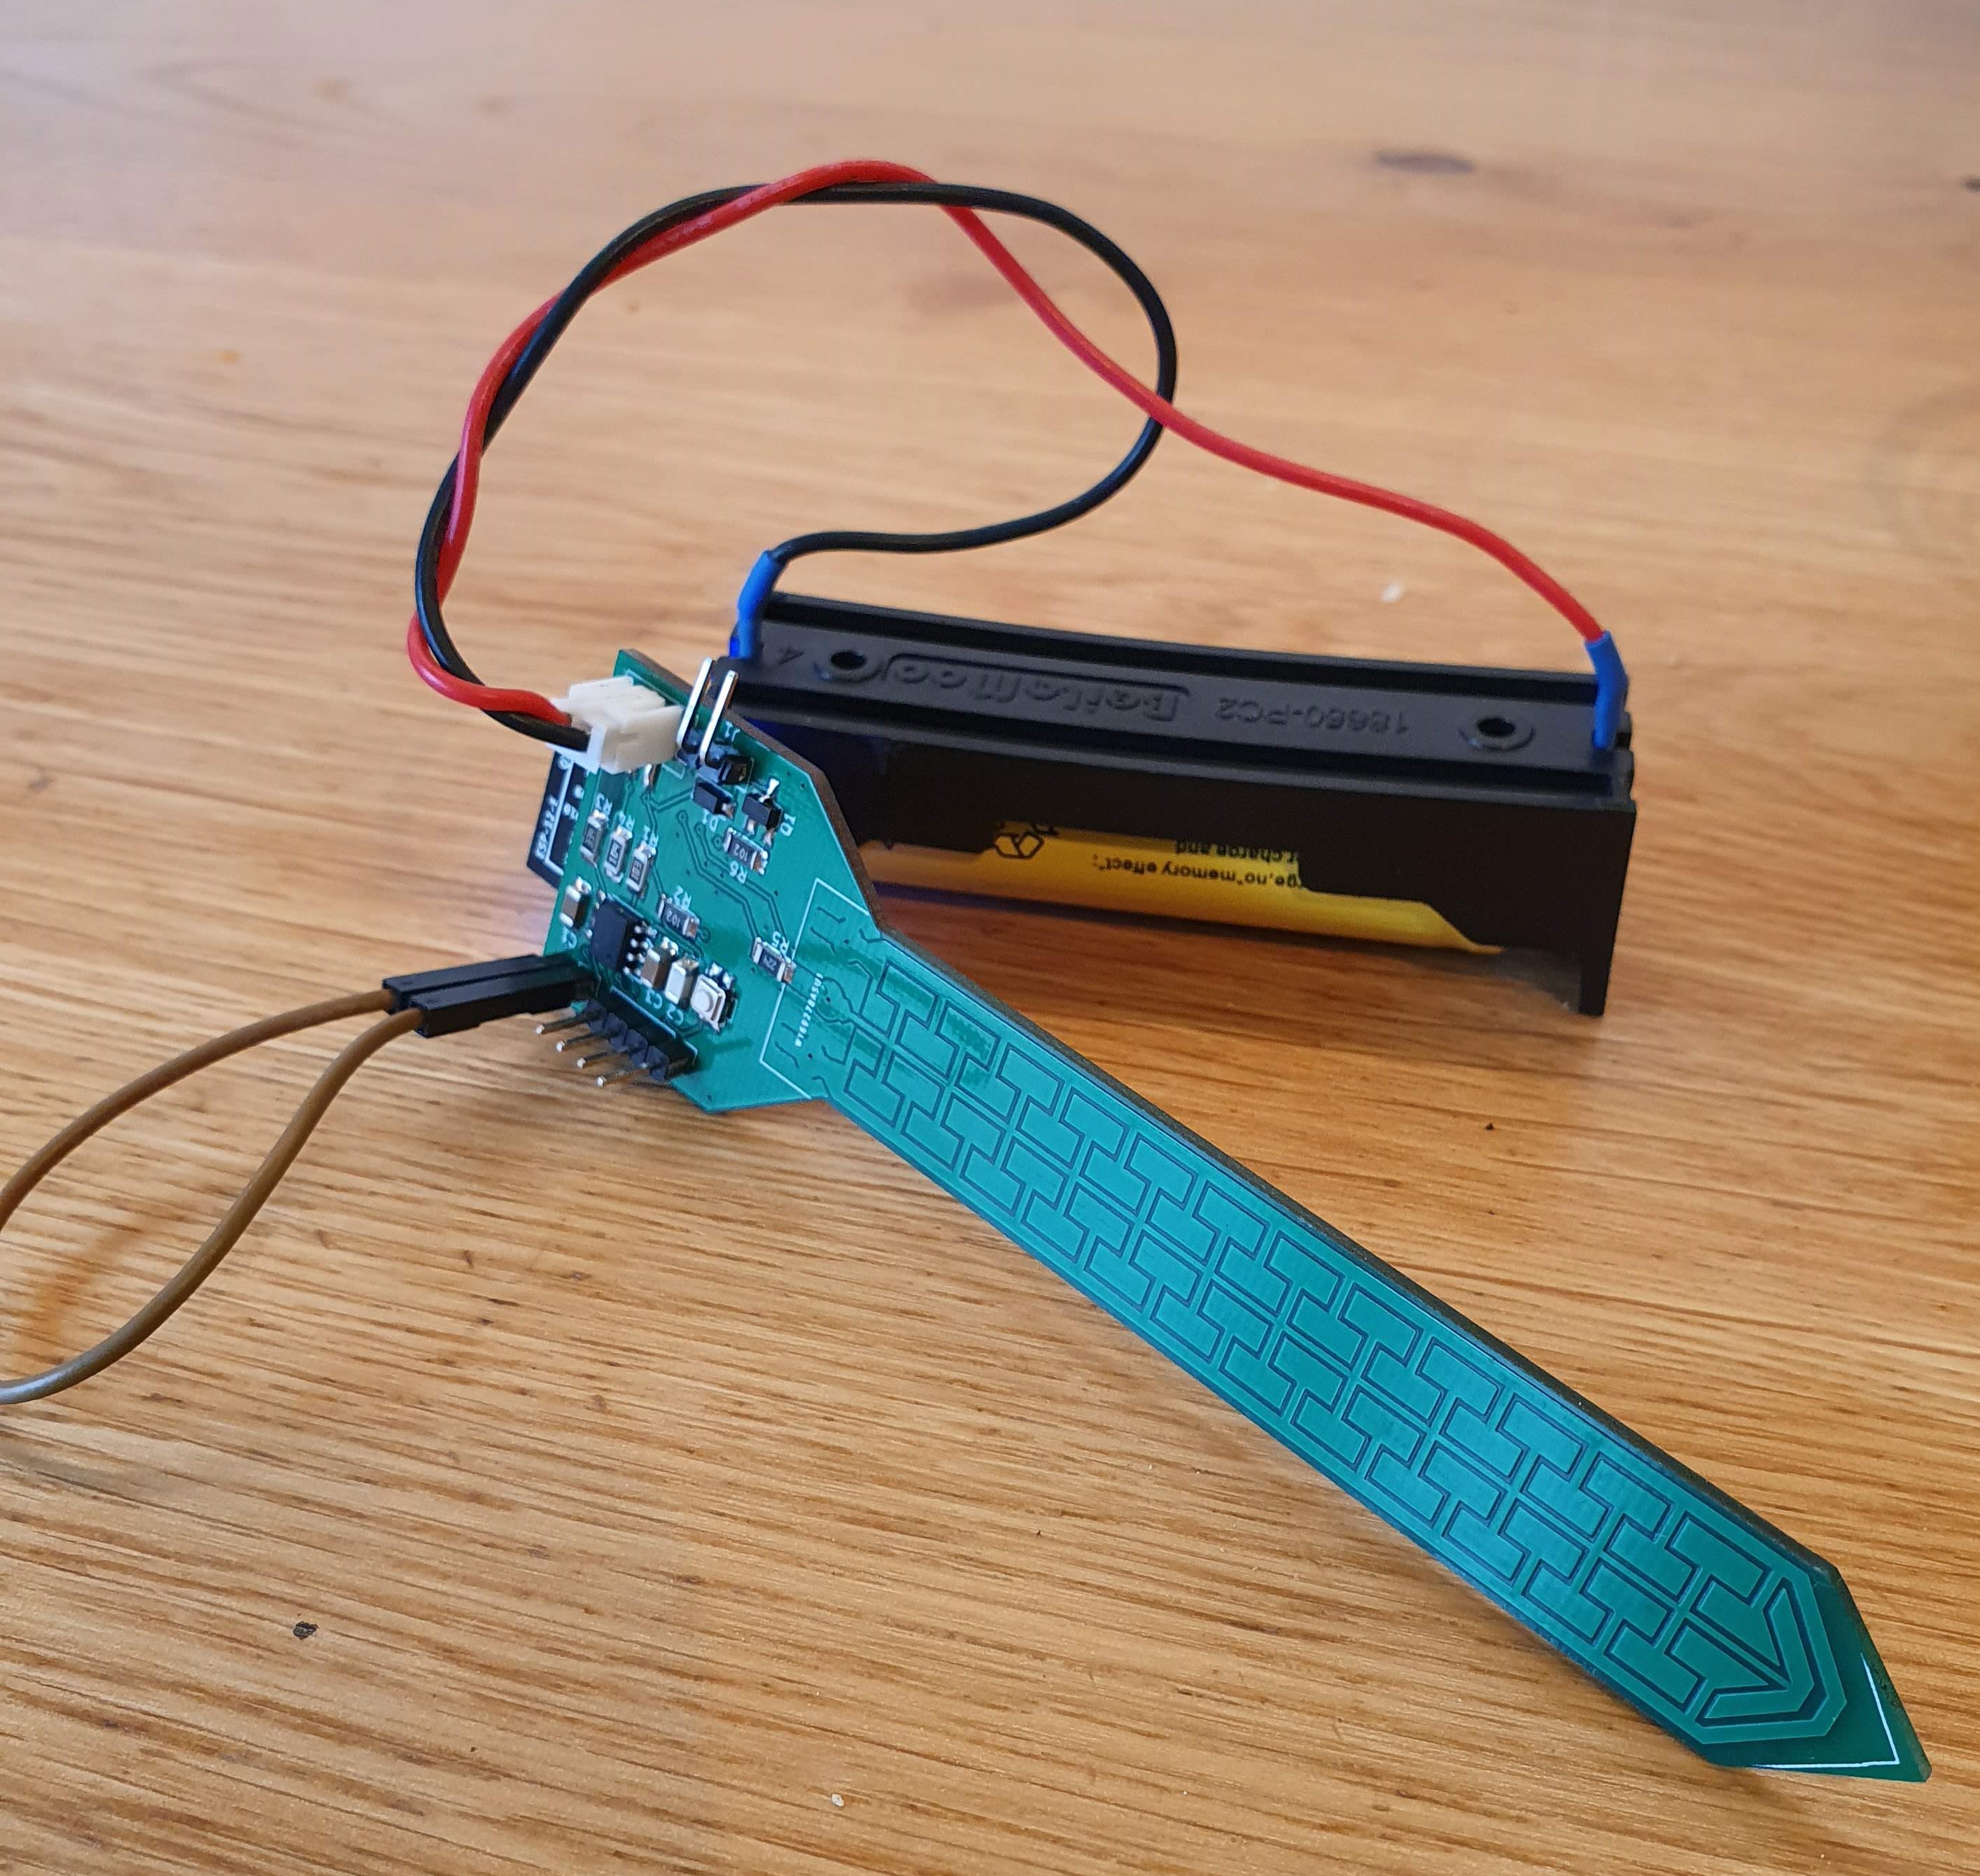
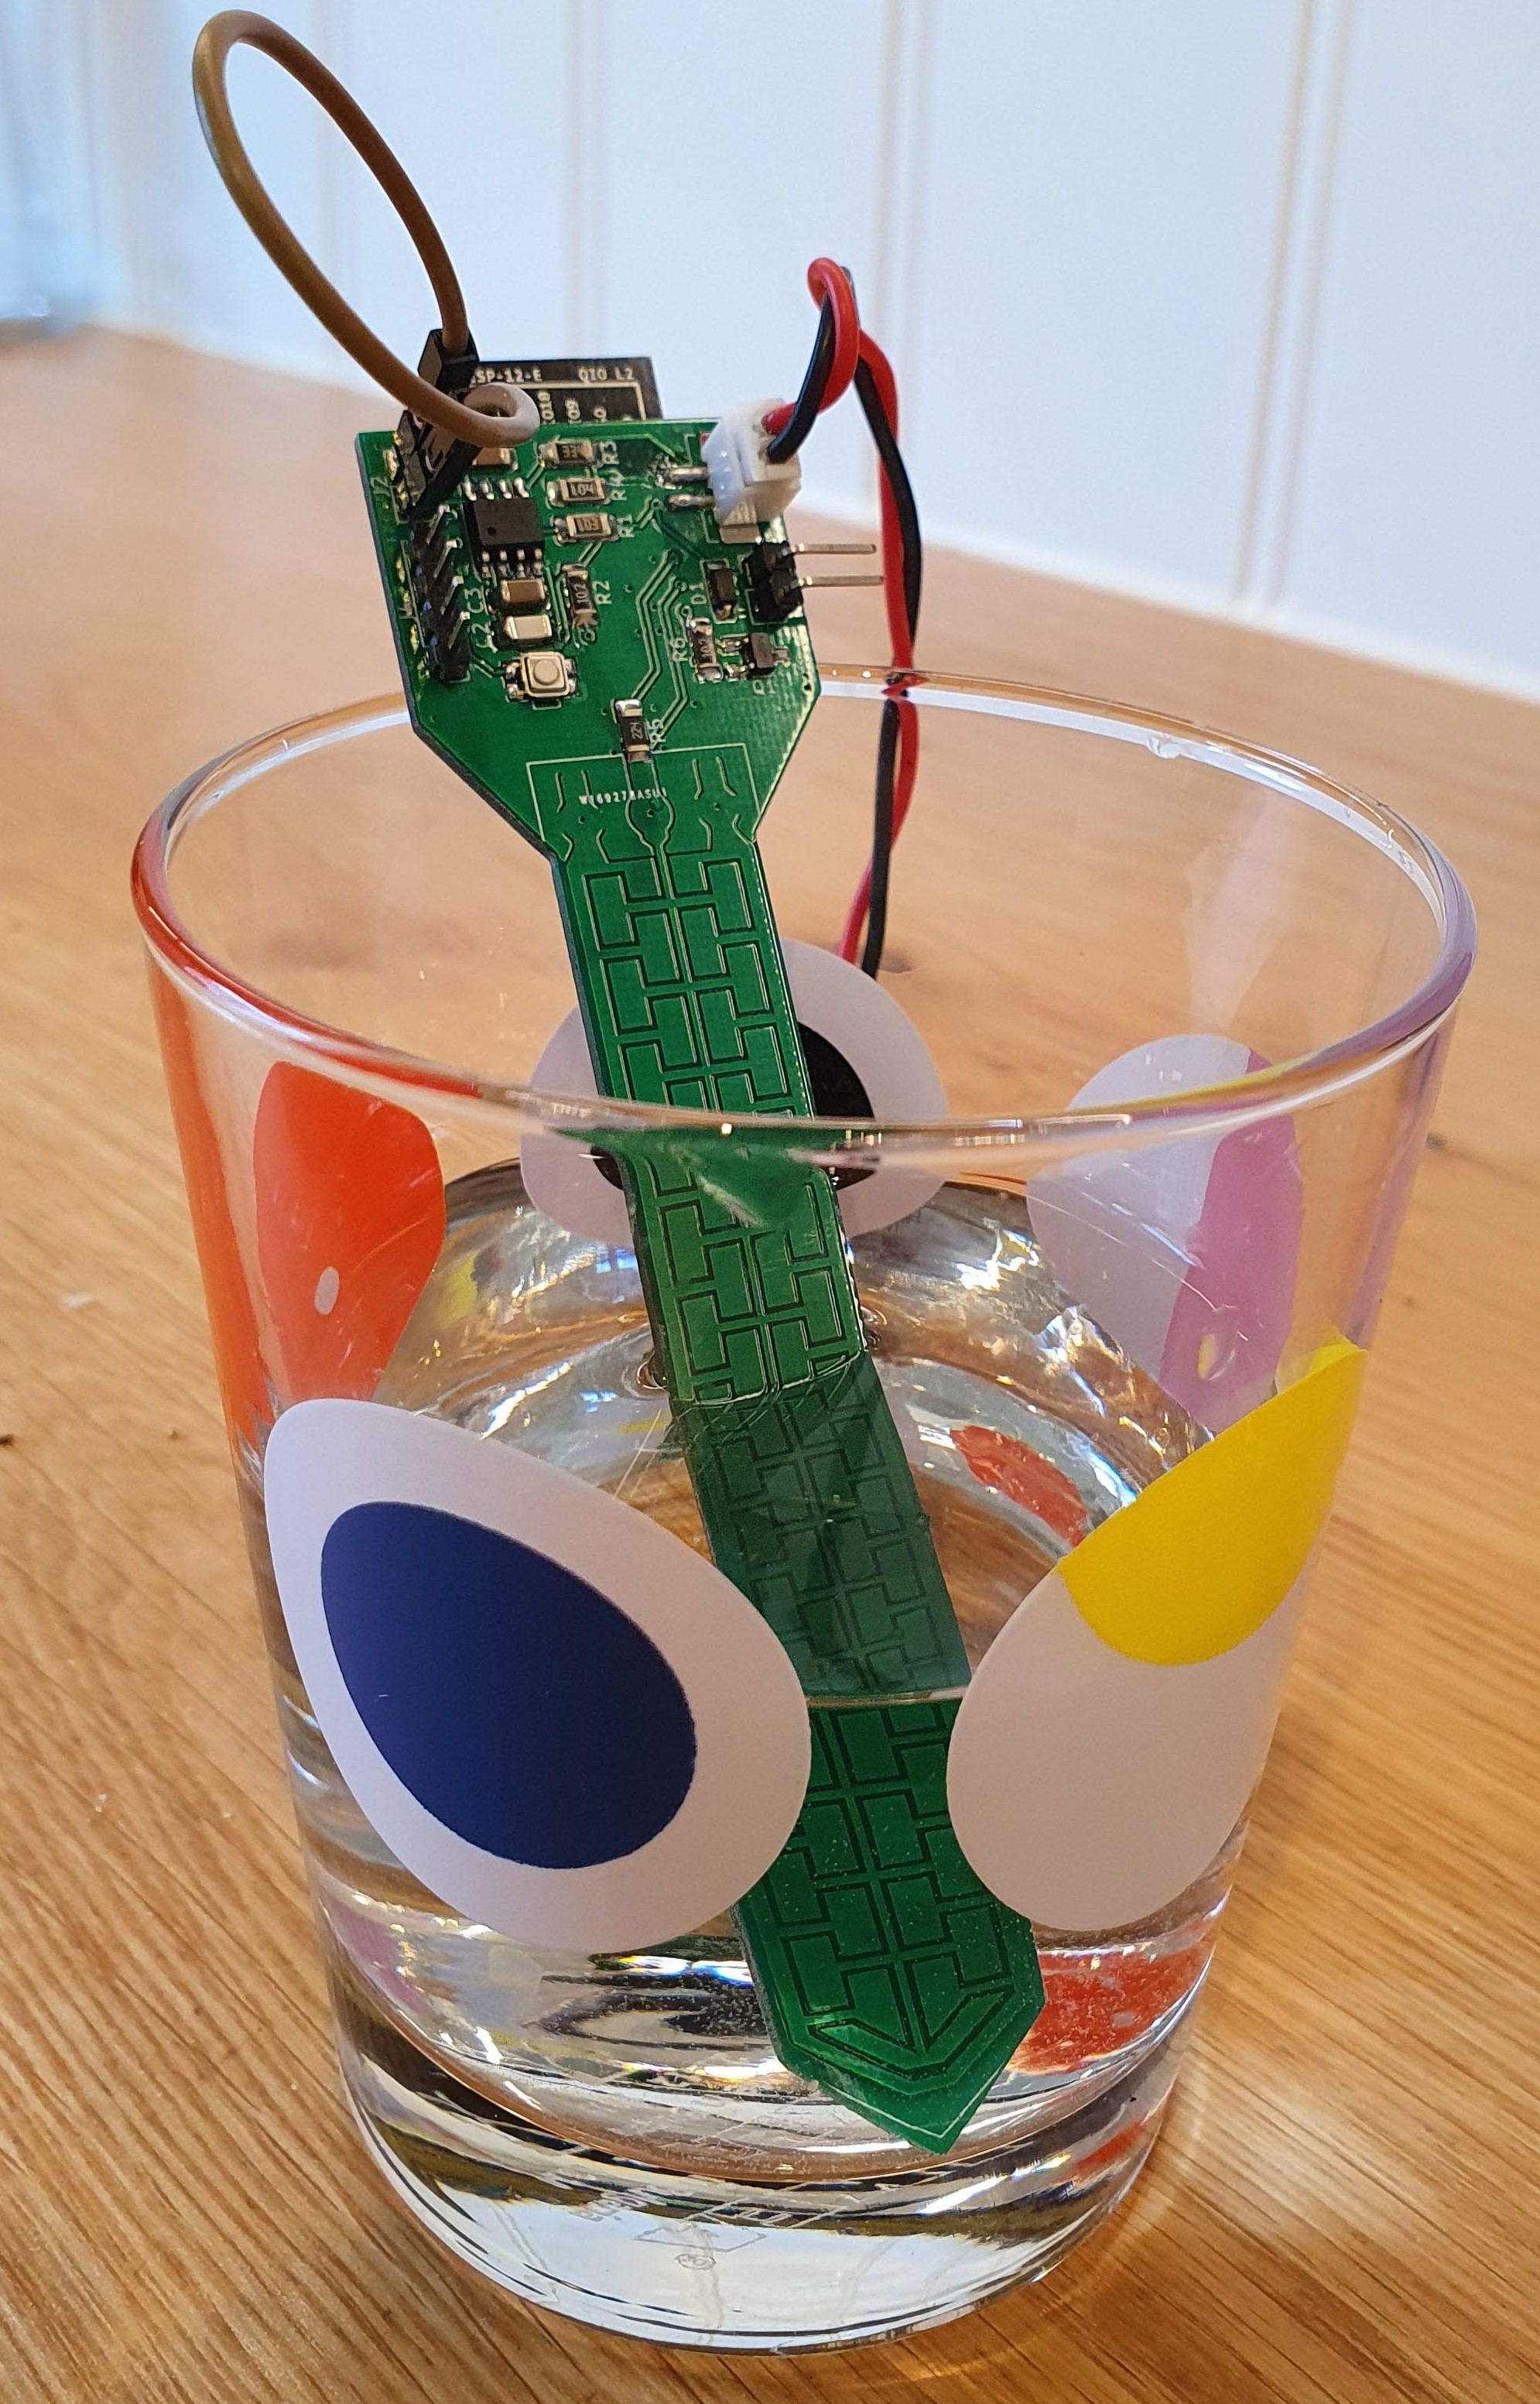
Click "Calibrate Soil moisture sensor". Follow the instructions. Some handy tips:
Images of the wet and dry calibration are shown below:
Simply activate MQTT discovery by adding the following to your configuration.yaml file:
mqtt:
  discovery: true
Assuming your plant is named office it will now show up as a sensor like so:
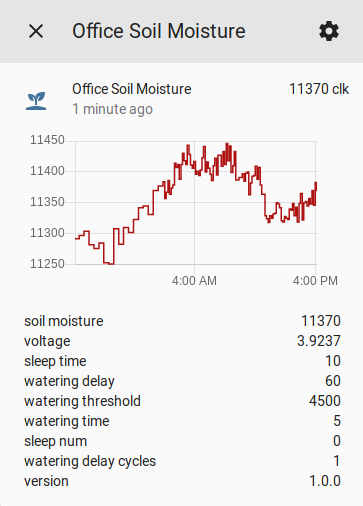
TODO: Upate this image!
The name of the plant is taken from the MQTT base topic and get be chaned via the HTTP settings page.
This section will guide you through on how to set the sleep time, watering delay, watering threshold and watering time directly via the Home Assitant overview page.
First add the following to your configuration.yaml file:
input_number:
  office_sleep_time:
    name: Sleep Time
    min: 10
    max: 60
    step: 5
    icon: mdi:sleep
    unit_of_measurement: min
  office_watering_delay:
    name: Watering Delay
    min: 0
    max: 360
    step: 10
    icon: mdi:timer-sand
    unit_of_measurement: min
  office_watering_threshold_pct:
    name: Watering Threshold Pct
    min: 0
    max: 100
    step: 0.1
    icon: mdi:target
    unit_of_measurement: pct
  office_watering_time:
name: Watering TimeThis will create four sliders, one for each parameter. Remember to replace office with the MQTT base topic you have set via the web interface.
Now add the following to your automations.yaml file:
- alias: Plant set slider
  trigger:
  - platform: mqtt
    topic: 'plant/+/config'
  action:
  - service: input_number.set_value
    data_template:
      entity_id: input_number.{{ trigger.topic.split('/')[1] }}_sleep_time
      value: "{{ trigger.payload_json.sleep_time | float }}"
  - service: input_number.set_value
    data_template:
      entity_id: input_number.{{ trigger.topic.split('/')[1] }}_watering_delay
      value: "{{ trigger.payload_json.watering_delay | float }}"
  - service: input_number.set_value
    data_template:
      entity_id: input_number.{{ trigger.topic.split('/')[1] }}_watering_threshold_pct
      value: "{{ trigger.payload_json.watering_threshold_pct | float }}"
  - service: input_number.set_value
    data_template:
      entity_id: input_number.{{ trigger.topic.split('/')[1] }}_watering_time
      value: "{{ trigger.payload_json.watering_time | float }}"
  - service: input_number.set_value
    data_template:
entity_id: input_number.{{ trigger.topic.split('/')[1] }}_automatic_otaThis makes sure that the MQTT config topic is updated when the slider is moved and that the slider is always set to the MQTT config topic when it changes.
Finally you can add the sensors and the inputs slider into on group by adding the following to groups.yaml:
office_plant:
    name: "Office Plant"
    icon: mdi:sprout
    entities:
    - sensor.office_soil_moisture_pct
    - sensor.office_voltage
    - sensor.office_battery
    - sensor.office_temperature
    - sensor.office_pressure
    - sensor.office_humidity
    - input_number.office_sleep_time
    - input_number.office_watering_delay
    - input_number.office_watering_threshold_pct
    - input_number.office_watering_time
    - input_number.office_automatic_ota
Note that the temperature, pressure and humidity sensors are only available if a BME280 is connected.
The plant will now show up in the Home Assistant overview like so:
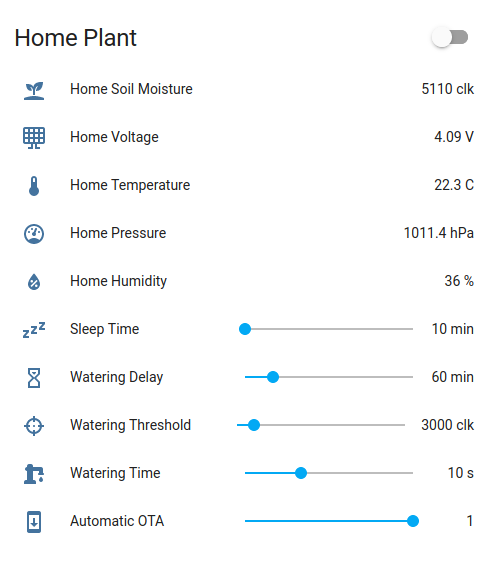
TODO: Update this image
TODO: Add guide
| Qty | Value | Footprint | References |
|---|---|---|---|
| 2 | 1K | Resistor_SMD:R_1206_3216Metric_Pad1.42x1.75mm_HandSolder | R2, R6 |
| 1 | 100K | Resistor_SMD:R_1206_3216Metric_Pad1.42x1.75mm_HandSolder | R4 |
| 1 | 10K | Resistor_SMD:R_1206_3216Metric_Pad1.42x1.75mm_HandSolder | R1 |
| 1 | 10nF | Capacitor_SMD:C_1206_3216Metric_Pad1.42x1.75mm_HandSolder | C2 |
| 1 | 1N4148W | Diode_SMD:D_SOD-123 | D1 |
| 1 | 1uF | Capacitor_SMD:C_1206_3216Metric_Pad1.42x1.75mm_HandSolder | C1 |
| 1 | 220K | Resistor_SMD:R_1206_3216Metric_Pad1.42x1.75mm_HandSolder | R5 |
| 1 | 3.3-10uF | Capacitor_SMD:C_1206_3216Metric_Pad1.42x1.75mm_HandSolder | C3 |
| 1 | 330K | Resistor_SMD:R_1206_3216Metric_Pad1.42x1.75mm_HandSolder | R3 |
| 1 | BATT | Connector_JST:JST_PH_B2B-PH-SM4-TB_1x02-1MP_P2.00mm_Vertical | J3 |
| 1 | ESP-12E | ESP8266:ESP-12E_SMD | U2 |
| 1 | FTDI | Connector_PinHeader_2.54mm:PinHeader_1x02_P2.54mm_Vertical | J2 |
| 1 | I2C_sensor | Connector_PinHeader_2.54mm:PinHeader_1x04_P2.54mm_Vertical | J4 |
| 1 | IRLML2502 | Package_TO_SOT_SMD:SOT-23_Handsoldering | Q1 |
| 1 | LT1763 | Package_SO:SOP-8_3.76x4.96mm_P1.27mm | U1 |
| 1 | Program | Button_Switch_SMD:SW_SPST_EVQP7A | SW1 |
| 1 | Pump | Connector_PinHeader_2.54mm:PinHeader_1x02_P2.54mm_Vertical | J1 |
| 1 | sfc* | sqcap-flat | SFC |


Verdefluox/Eurocard_LNA
A general purpose AC/DC low noise preamplifier on Eurocard format PCB

dolson14/k7arx
Circuit and PCB Designs, anything else related to radio and electronics

fwachsmuth/Filmkorn-Raw-Scanner
The Filmkorn Raw Scanner, turning 8mm and 16mm films into lossless 12-bit CinemaDNG


It measures 30.5 × 119.1 mm and has 2 copper layers, 1.6 mm thick.
19 parts, built around the ESP-12E, LT1763CDE, 1N4148W and IRLML2502. The full list of its parts is on this page, with links to each part's symbol and footprint where PCBKit's library has them.
From the MadsBornebusch/PlantFriends repository on GitHub, at the commit this page was made from: the board is pcb/PlantWatering.kicad_pcb. PCBKit opens the board in the browser, with nothing to install.
Its repository publishes it under the GPL-3.0 licence: you may reuse it on that licence's terms (keep the author's notice, and for a copyleft licence share your changes alike).