4 layers40 × 20 mm
Nes keyboard daughterboard
AryA-65/NES-Style-Keyboard
Custom NES inspire keyboard for a friend
17 partsGPL-2.0

 AryA-65/NES-Style-Keyboard
Custom NES inspire keyboard for a friend
Nes keyboard is an open-source printed circuit board by AryA-65, from the AryA-65/NES-Style-Keyboard repository on GitHub, published under the GPL-2.0 licence. It is a 2-layer board of 323.9 × 115.5 mm with 255 parts on 153 nets, routed with 788 tracks and 182 vias.
It is built around the RP2040, 74AHCT1G125SE and W25Q128JVEIQ, with the 1N4148W and WS2812B among its other parts. Its parts include 91 switches, 90 diodes, 27 capacitors, 12 resistors and 3 ICs. It belongs with the keyboards and input and retro computing and games boards and the RP2040 boards of this library.


[!IMPORTANT]
It is always advised that you review the files before ordering, as there may be small issues with the current revision.
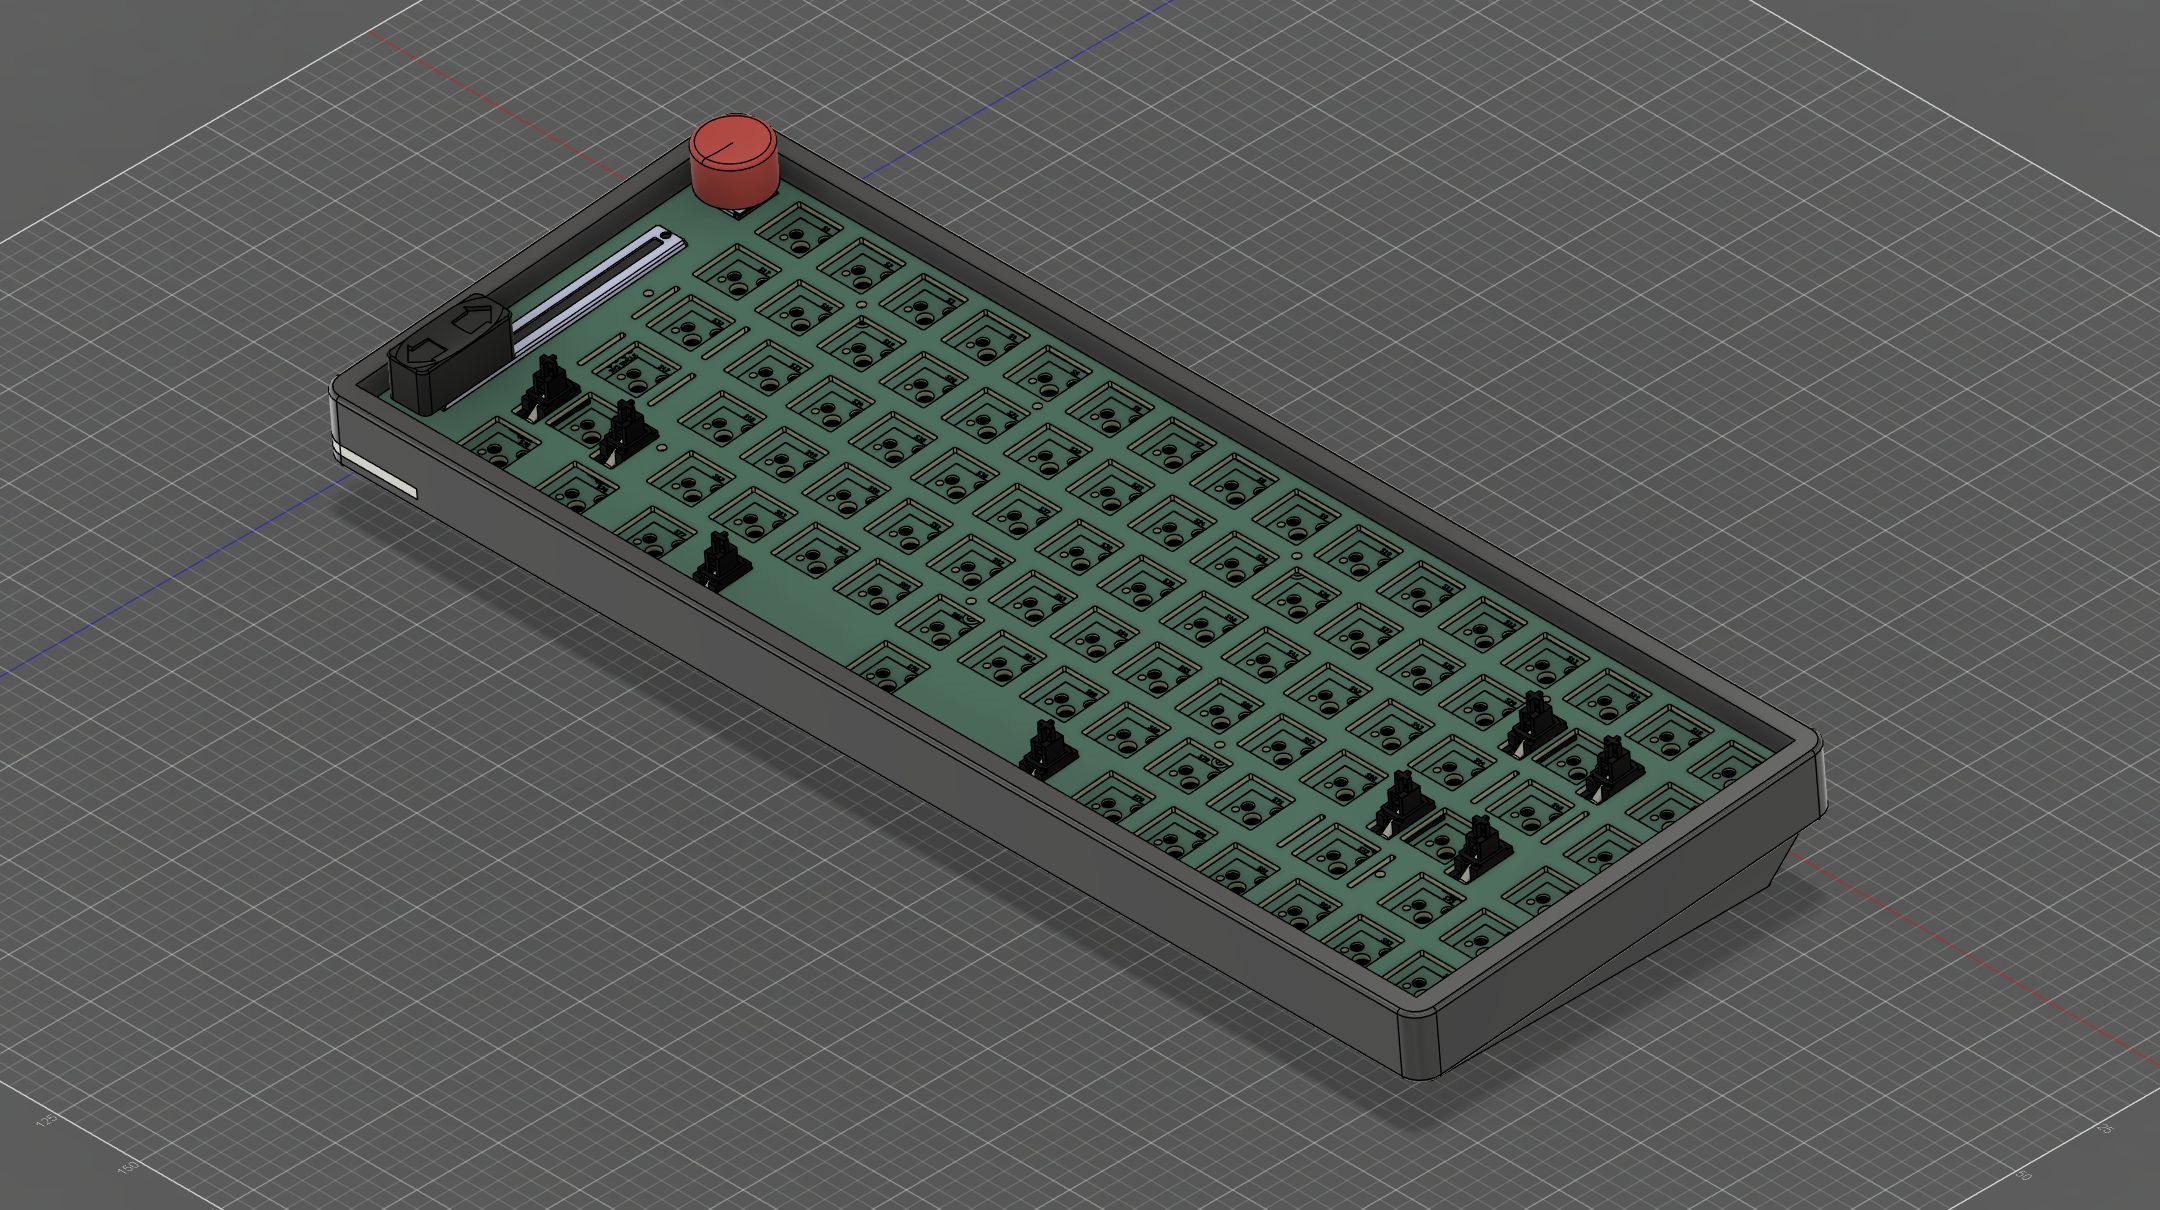
A friend of mine wanted to buy a keyboard. I convinced him to let me build him one. I decided to build him a custom 75% keyboard, with some extra features based on his preferences, and styled the color scheme to the popular NES. The whole keyboard, including the case, the main PCB, the switch plate and some of the caps, are custom designed by me.
# Base Layer
[_BASE] = LAYOUT(
        KC_ESC, KC_F1, KC_F2, KC_F3, KC_F4, KC_F5, KC_F6, KC_F7, KC_F8, KC_F9, KC_F10, KC_F11, KC_F12, KC_HOME, KC_END, KC_PAUSE,
        KC_GRV, KC_1, KC_2, KC_3, KC_4, KC_5, KC_6, KC_7, KC_8, KC_9, KC_0, KC_MINS, KC_EQL,                    KC_BSPC, KC_INS,
        KC_TAB,     KC_Q, KC_W, KC_E, KC_R, KC_T, KC_Y, KC_U, KC_I, KC_O, KC_P, KC_LBRC, KC_RBRC,               KC_BSLS, KC_DEL,
        KC_CAPS,        KC_A, KC_S, KC_D, KC_F, KC_G, KC_H, KC_J, KC_K, KC_L, KC_SCLN, KC_QUOT,                 KC_ENT, KC_PGUP,
        KC_LSFT,            KC_Z, KC_X, KC_C, KC_V, KC_B, KC_N, KC_M, KC_COMM, KC_DOT, KC_SLSH, KC_RSFT,        KC_UP, KC_PGDN,
        KC_LCTL,    KC_LGUI,    KC_LALT,            KC_SPC,                   KC_RALT, MO(_FL), KC_RCTL, KC_LEFT, KC_DOWN, KC_RIGHT
    )

#Fn Layer
[_FL] = LAYOUT(
        _______, KC_PWR, KC_F2, KC_BRIU, KC_BRID, KC_F5, KC_MSEL, KC_F7, KC_F8, KC_F9, KC_F10, KC_F11, KC_F12, _______, _______, KC_SLEP,
        _______, _______, _______, _______, _______, _______, _______, _______, _______, _______, _______, UG_SPDD, UG_SPDU,              _______, UG_NEXT,
        _______, _______, _______, _______, _______, _______, _______, _______, _______, _______, _______, _______, _______, _______, UG_PREV,
        _______, _______, _______, _______, _______, _______, _______, _______, _______, _______, _______, _______,     _______, UG_SATU,
        _______, _______, _______, _______, _______, _______, _______, _______, _______, _______, _______, _______,     UG_VALU, UG_SATD,
        _______,    _______,    _______,            _______,                    _______, _______, _______, UG_HUED, UG_VALD, UG_HUEU
)| Part | *Price | *Shipping | Link |
|---|---|---|---|
| Keycaps | $34.18 | NaN | XDA Retro NES Keycaps |
| Keyswitches (90pcs) | $32.18 | NaN | MMD Cream Switches (45G) |
| Hotswap Sockets (110ps) | $12.21 | NaN | 110pcs Kailh Hot-swappable Sockets |
| Diodes | $3.17 | NaN | 100pcs 1N4148W |
| Stabilizers | $25.99 | NaN | Durock Screw in Stabilizers V3 (Black) |
| USB-C Cable | $12.64 | NaN | 6 inch USB C to USB C Cable (3 Pack) |
| BOM | $34.96 | $8.00 | BOMs |
| Main PCB | $31.20 | $43.78** | Main PCB |
| Daughterboard | $3.00 | $43.78** | Daughterboard PCB |
| Switch Plate**** | $0.00 | NaN | Plate PCB |
| Case | $65.13 | $43.78** | Enclosure |
| Misc. | $6.50*** | $43.78** | Misc. Parts |
Total (excluding import fees): $298.66
*All prices are in CAD, check in your own currency before buying. **Combined shipping for keyboard and daughterboard PCB, misc. items and enclosure. ***Includes encoder knob, slider handle, power led bar and status bar ****I decided to print the switchplate at home, since it was much cheaper per unit and overall compared to ordering it (price will be updated soon).
This step if for first flash, right after assembling your PCBs:
Since the EN button is on the opposite side of the board and not accessible once the keyboard is assembled, I added a key combo that resets the board and enables flashing new firmware:
Coming Soon
The software and hardware come as is. It is up to the user to review and make sure that they understand the scope of the project before attempting the project. GPL V2 License
| Qty | Value | Footprint | References |
|---|---|---|---|
| 84 | 1N4148W | Diode_SMD:D_SOD-123 | D1, D2, D10, D11, D12, D13, D14, D15, D16, D17, D18, D19, D20, D21, D22, D23 +68 |
| 73 | Keyswitch | ScottoKeebs_Hotswap:Hotswap_MX_1.00u | S1, S2, S10, S11, S12, S13, S14, S15, S16, S17, S18, S19, S20, S21, S22, S23 +57 |
| 20 | TestPoint | TestPoint:TestPoint_Pad_D1.0mm | TP1, TP2, TP3, TP4, TP5, TP10, TP11, TP12, TP13, TP14, TP15, TP16, TP17, TP18, TP19, TP20 +4 |
| 16 | 0.1uF | Capacitor_SMD:C_0402_1005Metric | C2, C3, C4, C5, C6, C7, C8, C9, C10, C13, C14, C25, C26, C27, C28, C29 |
| 9 | MountingHole | MountingHole:MountingHole_2.2mm_M2_Pad | H1, H2, H3, H4, H5, H6, H7, H8, H9 |
| 6 | 100nF | Capacitor_SMD:C_0603_1608Metric | C17, C18, C19, C20, C21, C22 |
| 6 | WS2812B | LED_WS2812B-4020:LED_WS2812B-4020 | D85, D86, D87, D88, D89, D90 |
| 5 | 10k | Resistor_SMD:R_0402_1005Metric | R7, R9, R10, R11, R12 |
| 3 | Keyswitch | PCM_Mounting_Keyboard_Stabilizer:Stabilizer_Cherry_MX_2.00u | S85, S86, S87 |
| 3 | Keyswitch | ScottoKeebs_Hotswap:Hotswap_MX_1.25u | S75, S76, S77 |
| 2 | 15pF | Capacitor_SMD:C_0402_1005Metric | C11, C12 |
| 2 | 1uF | Capacitor_SMD:C_0402_1005Metric | C1, C16 |
| 2 | 27.4 | Resistor_SMD:R_0603_1608Metric | R1, R2 |
| 2 | Keyswitch | ScottoKeebs_Hotswap:Hotswap_MX_1.75u | S47, S72 |
| 2 | Keyswitch | ScottoKeebs_Hotswap:Hotswap_MX_2.25u | S59, S61 |
| 2 | Keyswitch | ScottoKeebs_Hotswap:Hotswap_MX_1.50u | S32, S45 |
| 2 | SW_Push | Button_Switch_SMD:SW_SPST_EVQP2_MiddlePushTravel_H2.5mm | SW1, SW2 |
| 1 | 0 | Resistor_SMD:R_0603_1608Metric | R5 |
| 1 | 100 | Resistor_SMD:R_0603_1608Metric | R13 |
| 1 | 10k | Resistor_SMD:R_0603_1608Metric | R8 |
| 1 | 10uF | Capacitor_SMD:C_0805_2012Metric | C15 |
| 1 | 1k | Resistor_SMD:R_0603_1608Metric | R4 |
| 1 | 1k | Resistor_SMD:R_0402_1005Metric | R3 |
| 1 | 74AHCT1G125 | Package_TO_SOT_SMD:SOT-23-5_HandSoldering | U4 |
| 1 | Crystal_GND24 | Crystal:Crystal_SMD_3225-4Pin_3.2x2.5mm | Y1 |
| 1 | Keyswitch | ScottoKeebs_Hotswap:Hotswap_MX_6.25u | S78 |
| 1 | Keyswitch | ScottoKeebs_Hotswap:Hotswap_MX_2.00u | S30 |
| 1 | Keyswitch | PCM_Mounting_Keyboard_Stabilizer:Stabilizer_Cherry_MX_6.25u | S88 |
| 1 | RP2040 | Package_DFN_QFN:QFN-56-1EP_7x7mm_P0.4mm_EP3.2x3.2mm | U1 |
| 1 | R_Potentiometer | PTA6043_2015DPB103:TRIM_PTA6043-2015DPB103 | RV1 |
| 1 | RotaryEncoder_Switch_MP | Rotary_Encoder:RotaryEncoder_Bourns_Vertical_PEC12R-3x17F-Sxxxx | SW3 |
| 1 | USB_C_Receptacle_USB2.0_16P | Connector_USB:USB_C_Receptacle_GCT_USB4105-xx-A_16P_TopMnt_Horizontal | J1 |
| 1 | W25Q128JVE | Package_SON:WSON-8-1EP_8x6mm_P1.27mm_EP3.4x4.3mm | U3 |
AryA-65/NES-Style-Keyboard
Custom NES inspire keyboard for a friend

S0L1DDEV/motormod-pcb-controlsystem
CFMoto lightkit mod, driving a lightkit based on engine information read through CAN. This PCB is part of the system responsible for reading frames and outputting a animation on a neopixel lightstrip

blafr103/pico-numpad
Hand-wired 17-key USB numpad on Pi Pico W. CircuitPython, diode matrix, event-driven scanning.


Binita126/ExitIQ
ExitIQ: ESP32-S3 Edge-AI Emergency Evacuation Guidance Terminal (Vishwakarma Awards 2026 Stage 2)

damnitzhemanth-oss/Flight_Controller
Custom STM based flightcontroller designed from scratch.

Mykola2/uart-cable-tester
design.py is the single source of truth: parts, footprints, pin-to-net map and positions. Everything else is generated from it.
It measures 323.9 × 115.5 mm and has 2 copper layers, 1.6 mm thick.
255 parts, built around the RP2040, 74AHCT1G125SE, W25Q128JVEIQ and 1N4148W. The full list of its parts is on this page, with links to each part's symbol and footprint where PCBKit's library has them.
From the AryA-65/NES-Style-Keyboard repository on GitHub, at the commit this page was made from: the board is nes_mainboard/nes_keyboard.kicad_pcb and its schematic nes_keyboard_daughterboard/nes_keyboard_daughterboard.kicad_sch. PCBKit opens the board in the browser, with nothing to install.
Its repository publishes it under the GPL-2.0 licence: you may reuse it on that licence's terms (keep the author's notice, and for a copyleft licence share your changes alike).