2 layers30 × 90 mm
TechWaveAudio MCM-100-Main
TechWave-Audio/TechWaveAudio-MidiControllerModule
TechWave Audio Midi Controller Module
50 parts4BSD-3-Clause

 TechWave-Audio/TechWaveAudio-MidiControllerModule4
TechWave Audio Midi Controller Module
TechWaveAudio MidiController is an open-source printed circuit board by TechWave-Audio, from the TechWave-Audio/TechWaveAudio-MidiControllerModule repository on GitHub, published under the BSD-3-Clause licence. It is a 2-layer board of 30 × 90 mm with 41 parts on 40 nets, routed with 232 tracks and 19 vias.
Its parts include 23 resistors, 10 connectors, 3 diodes, 2 ICs and 1 switch. It belongs with the audio and music boards of this library.
A monophonic MIDI controller Eurorack module using the Raspberry Pi Pico (RP2040).
Brought to you by TechWave Audio
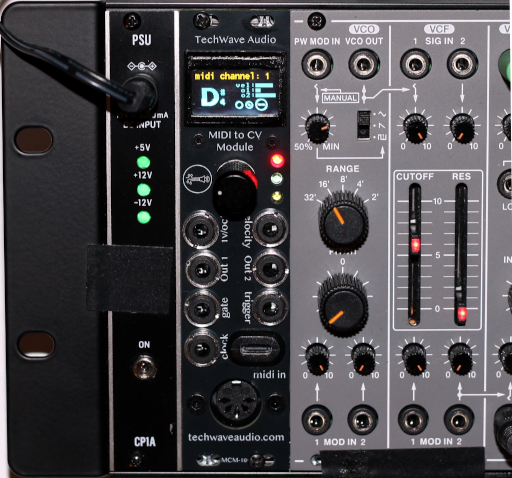

Clock output and can be routed as an aux and/or control output.Using the MCM-100-EX Expansion Module, you can also add an additional four assignable CV outputs.
This module requires a 10 pin (2x05 IDC connector) Eurorack power connection.
Be certain when you plug the connector in that the orientation is the correct way, with the -12v line (usually with the red stripe) on the left when looking at the rear of the module.
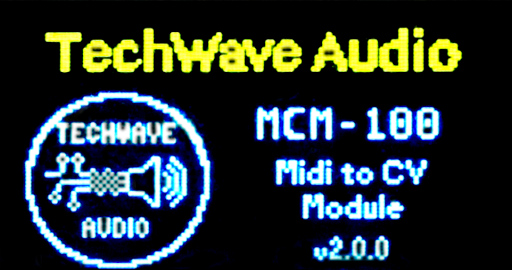
On startup, you should see the boot screen with the current version:
The note and clock LEDs should turn on and off a few times before the dashboard screen is shown and the module is ready to be used.
The user manual can be found on the TechWave Audio website.
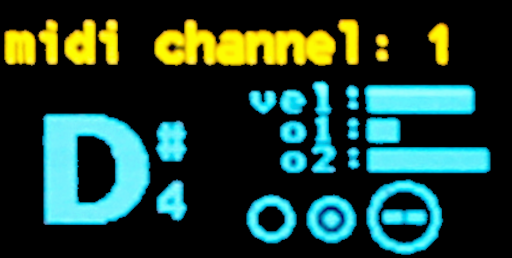
The dashboard shows the status of the current MIDI channel that it is listening on, as well as various outputs:
vel: The current velocity (corresponding to 0v to +10/+5v)o1: The current Out 1 value (corresponding to 0v to +10/+5v)o2: The current Out 2 value (corresponding to 0v to +10/+5v)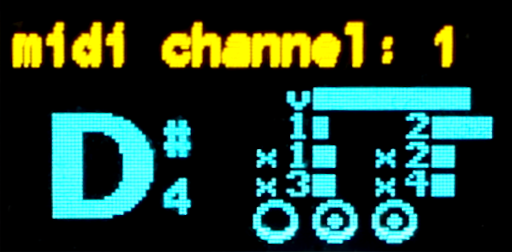
If the MCM-100-EX expansion module is attached, additionally it will show:
x1: The current Out X1 value (corresponding to 0v to +10/+5v)x2: The current Out X2 value (corresponding to 0v to +10/+5v)x3: The current Out X3 value (corresponding to 0v to +10/+5v)x4: The current Out X4 value (corresponding to 0v to +10/+5v)While using the module, you can turn the dashboard display on and off via the display settings menu. You can also adjust how often the display refreshes (set to a longer time if display events start to get dropped, shorter time for more frequent updates).
There are numerous settings available from the settings menu. Pressing the encoder button on the dashboard display (regardless if the display is visible or not) will enter the menu. See the Menu System documentation for the menu system details.
Note: any settings are not persisted until you exit the menu back to the dashboard (with the exception of when resetting the settings to default).
git submodule initgit submodule update.env.cmake.sample to .env.cmake.env.cmake for the following variables:PICO_SDK_PATH {the path to the PICO_SDK directory)
PICO_TOOLCHAIN_PATH (path to the pico toolchain for your build machine)
# You should _not_ have to change the following
set(PICO_PLATFORM rp2040)
set(PICO_BOARD pico)./build.shThis will run the full clean and build.
The firmware file will be put in:
./dist/TechWaveAudio-MCM-v2.0.0.uf2For this, you'll need a firmware release (or build your on locally), as well as a USB cable that has a micro-usb port on one end.
Note that any settings you many have modified will be reset to any default.
See the hardware design documentation for information on the schematic and PCB design for the module.
Note - all files provided including KiCad designs and any gerber files are provided as-is and to be used at your own risk. TechWave Audio does not guarantee the accuracy or any correctness of these files. See the HW_LICENSE license file for more, specifically the section "6 DISCLAIMER AND LIABILITY".
Software in this repository is licensed under the BSD-3 License. By using or contributing content to this repository you are agreeing to place your contributions under this license.
Hardware designs for this repository are licensed under the CERN-OHL-S (CERN Open Hardware License).
Parts of this repository may reference, depend on, or use compiled third party libraries. See NOTICE.txt for additional details.
| Qty | Value | Footprint | References |
|---|---|---|---|
| 7 | 5.1k | Resistor_SMD:R_0402_1005Metric | R4, R6, R7, R8, R9, R29, R30 |
| 4 | 1k | Potentiometer_THT:Potentiometer_Bourns_3296X_Horizontal | R1, R3, R34, R35 |
| 4 | 4.7k | Resistor_SMD:R_0402_1005Metric | R2, R5, R31, R32 |
| 3 | 10k | Resistor_SMD:R_0402_1005Metric | R10, R11, R12 |
| 3 | 1k | Resistor_SMD:R_0402_1005Metric | R13, R16, R36 |
| 2 | 330 | Resistor_SMD:R_0402_1005Metric | R37, R38 |
| 2 | TL074 | Package_SO:SOIC-14_3.9x8.7mm_P1.27mm | U1, U2 |
| 1 | Aux | Connector_Audio:Audio_Jack_3.5mm_SameSky_SJ3-3505x | J2 |
| 1 | Clock | LED_THT:LED_D3.0mm | D10 |
| 1 | Clock | Connector_Audio:Audio_Jack_3.5mm_SameSky_SJ3-3505x | J5 |
| 1 | Control | Connector_Audio:Audio_Jack_3.5mm_SameSky_SJ3-3505x | J3 |
| 1 | Gate | Connector_Audio:Audio_Jack_3.5mm_SameSky_SJ3-3505x | J4 |
| 1 | IO_EncClkNoteConn | Connector_PinSocket_2.54mm:PinSocket_2x04_P2.54mm_Vertical | J9 |
| 1 | IO_GateClkTrg | Connector_PinSocket_2.54mm:PinSocket_2x03_P2.54mm_Vertical | J19 |
| 1 | IO_OLED/DacOut | Connector_PinSocket_2.54mm:PinSocket_1x08_P2.54mm_Vertical | J15 |
| 1 | MountingHole | MountingHole:MountingHole_3.2mm_M3 | H2 |
| 1 | Note | Connector_Audio:Audio_Jack_3.5mm_SameSky_SJ3-3505x | J14 |
| 1 | Note On | LED_THT:LED_D3.0mm | D11 |
| 1 | Power | LED_THT:LED_D3.0mm | D9 |
| 1 | RotaryEncoder_Switch | Rotary_Encoder:Rotary_Encoder-PEC11-Breakout_Board | SW1 |
| 1 | SSD1306 | Connector_PinSocket_2.54mm:PinSocket_1x04_P2.54mm_Vertical | OLED1 |
| 1 | Trigger | Connector_Audio:Audio_Jack_3.5mm_SameSky_SJ3-3505x | J6 |
| 1 | Velocity | Connector_Audio:Audio_Jack_3.5mm_SameSky_SJ3-3505x | J13 |
It measures 30 × 90 mm and has 2 copper layers, 1.6 mm thick.
41 parts. The full list of its parts is on this page, with links to each part's symbol and footprint where PCBKit's library has them.
From the TechWave-Audio/TechWaveAudio-MidiControllerModule repository on GitHub, at the commit this page was made from: the board is design/TechWaveAudio-MCM-100-PCB-IO/TechWaveAudio_MidiController.kicad_pcb and its schematic design/RotaryEncoderCarrierBoard/RotaryEncoderCarrierBoard.kicad_sch. PCBKit opens the board in the browser, with nothing to install.
Its repository publishes it under the BSD-3-Clause licence: you may reuse it on that licence's terms (keep the author's notice, and for a copyleft licence share your changes alike).
TechWave-Audio/TechWaveAudio-MidiControllerModule
TechWave Audio Midi Controller Module

TechWave-Audio/TechWaveAudio-MidiControllerModule
TechWave Audio Midi Controller Module

TechWave-Audio/TechWaveAudio-MidiControllerModule
TechWave Audio Midi Controller Module


VoronDesign/Voron-Hardware
Cool Hardware designed by the Voron Design group

hackclub/OnBoard
💡 Join 1,000 teenagers and make your first PCB with a $100 grant!

openwch/ch32v003
CH32V003 is an ultra-cheap RISC-V MCU with 2KB SRAM, 16KB flash, and up to 18 GPIOs that sells for under $0.10

imchipwood/dumbpad
Simple 4x4 numpad with rotary encoder. Powered by QMK via ATmega32u4 Pro Micro

jrsteensen/OpenHornet
OpenHornet 1:1 F/A-18C Simulator Repository


fabiansteiner/OpenValve
3D-printable pinch valve for irrigation and sensor-driven liquid control.