Skip to the content
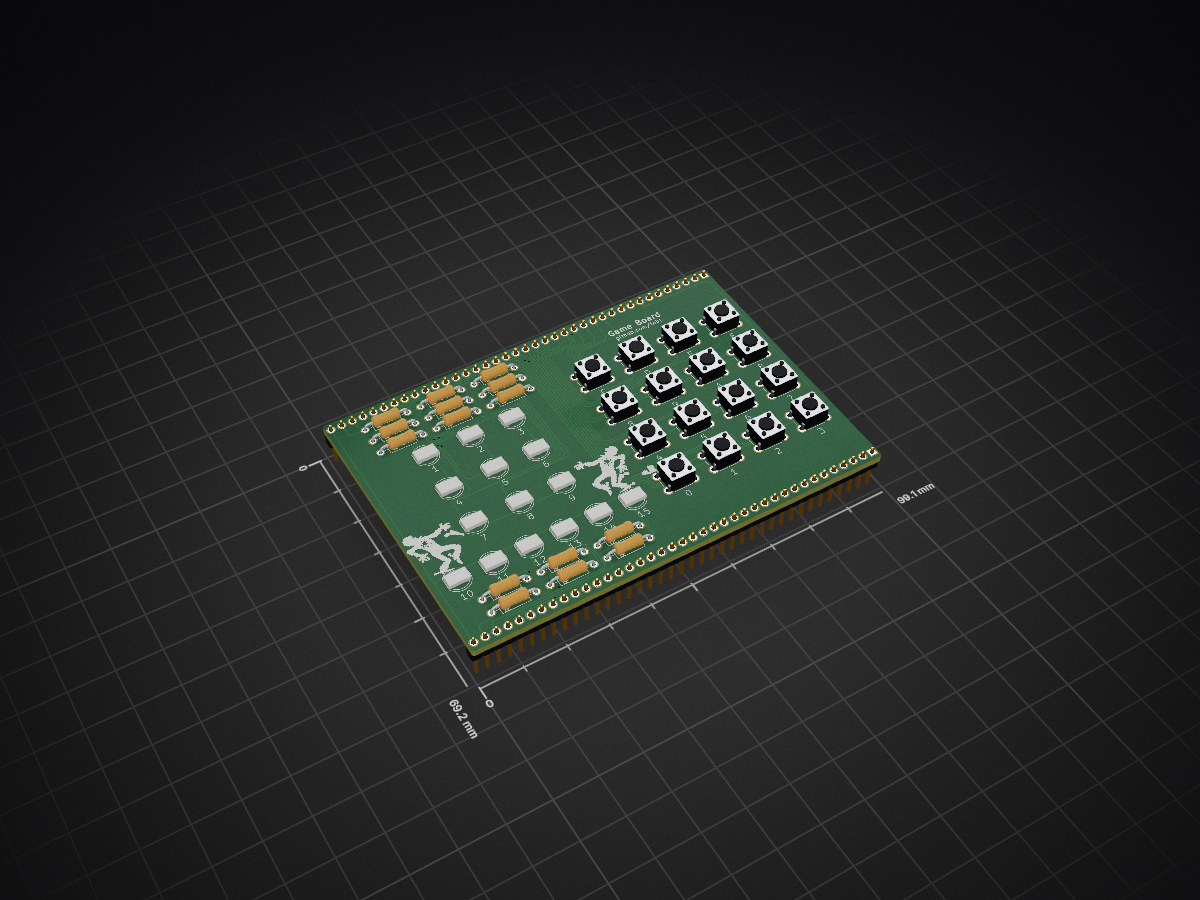
2 layers99.1 × 69.2 mmGame Board, the printed circuit board in 3D

Playing around with an Arduino and a breadboard is a lot of fun, but I wanted to include my retro-computer builds so I made the project boards to make this a lot easier (for me). Also includes a few projects, some of them in the form of PCBs as well!

Size
99.1 × 69.2 mm
Copper layers
2
Thickness
1.6 mm
Parts
51
Nets
49
Pads
202
Tracks, vias
499, 13
Pours
1
Routed
Yes
KiCad
KiCad 4
Created
10 Jan 2020
Updated
25 Jan 2021

Overview

Game Board is an open-source printed circuit board by tebl, from the tebl/RC-Project-Board repository on GitHub. It is a 2-layer board of 99.1 × 69.2 mm with 51 parts on 49 nets, routed with 499 tracks and 13 vias.

Its parts include 16 switches, 15 resistors, 15 diodes and 2 connectors. It belongs with the retro computing and games boards of this library.

README

README.md

RC Project Board

This year I went as far as getting myself one of those electronic games advent calendards, the kind where you get a book, a handful of components and then you get to build some a few different games using those components. Unfortunately it's one of those that only comes with a pre-programmed microcontroller and no sourcecode, so it never felt like I was building much of anything - just randomly inserting components into undocumented pins and then hope that the anonymous black box does most of the fun stuff!

Never got to the end of the book, if I'm going to build it then I'm going to build it using either an Arduino or one of my retro-computer builds - so, this project was created as a way of probably someday doing all of those things. This project is composed of two separate parts, the projet platforms boards that the retro-computer builds plugs into and the various projects that you either construct yourself on a breadboard or slot on top one of the provided PCB designs.

RC-ONE with project

Pictured above is how my RC-ONE looks while slotted into the 6502 Project Platform, the PB-002 Covox Sound project has been slotted on top instead of the usual breadboard. Below that is the 6502 Project Platform with a 400 point breadboard fitting neatly on the board, if you want more space to play around you could also use the 830 point breadboard with parts of it hanging over the sides - not pretty, but oh so practical!

6502 Project Platform

Project platforms

To keep things somewhat on the simple side of things I've decided to limit myself to just doing digital I/O, leaving all of the analog stuff at the door - probably a project for another rainy day! Therefore in the context of this project I'm defining a project platform as any system capable of providing at least 16 digital I/O lines, each consists of a dedicated PCB that should take care of connecting the things together in the fashion expected by each project. Sound difficult? That just means you're probably overthinking things, the general idea is to make it so that each project would look and connects the same way no matter the platform used.

The following project platforms have been made available, refer to the table below for an overview of platforms including a separate listing each of my retro-computers that can be used with that specific platform. Note that while I hope people'll build all of my designs, you'll only need a single platform board and one of the associated systems to connect to it to get started.

Projects

The projects are whatever you'd like to build for yourself, but if you're just looking for ideas on a few fun projects to play around with then I've probably got you covered as long as you're not looking for the most advanced stuff from someone who just dabbles in simple electronics. Most of the projects can be constructed on the breadboard by themselves by connecting the signals using female to male dupont wires (seems most reliable that way), but a few of the more advanced one will also come with their own PCB-designs that you can opt to build instead - these just slot on top of the platform board instead.

The breadboard oriented designs will be prefixed BB and a project number, similarly the ones with their own PCBs have been prefixed PB instead. The project number probably won't carry all that much meaning over time, so just pick something that sounds interesting and have a go at building it! Given the differences in platforms the code'll be somewhat or even completely different for each of the various systems, so there'll be varying amounts of code available for each - on the other hand, converting between them or coming up with your own versions of the code will probably be where most of the fun is at.

ProjectDescription
PB-001 Prototyping *Used when moving design from breadboard to a soldered together version
PB-002 Covox Sound *Build a Covox sound card (sort of)
PB-003 LED Cube *Build one of those fancy 4x4 LED cubes

*) Project has not been completely tested
Parts

51
QtyValueFootprintReferences
15330Resistors_THT:R_Axial_DIN0207_L6.3mm_D2.5mm_P10.16mm_HorizontalR1, R2, R3, R4, R5, R6, R7, R8, R9, R10, R11, R12, R13, R14, R15
15LEDLEDs:LED_D5.0mmD1, D2, D3, D4, D5, D6, D7, D8, D9, D10, D11, D12, D13, D14, D15
10Buttons_Switches_THT:SW_PUSH_6mmSW1
11Buttons_Switches_THT:SW_PUSH_6mmSW2
12Buttons_Switches_THT:SW_PUSH_6mmSW3
13Buttons_Switches_THT:SW_PUSH_6mmSW4
14Buttons_Switches_THT:SW_PUSH_6mmSW5
15Buttons_Switches_THT:SW_PUSH_6mmSW6
16Buttons_Switches_THT:SW_PUSH_6mmSW7
17Buttons_Switches_THT:SW_PUSH_6mmSW8
18Buttons_Switches_THT:SW_PUSH_6mmSW9
19Buttons_Switches_THT:SW_PUSH_6mmSW10
1AButtons_Switches_THT:SW_PUSH_6mmSW11
1BButtons_Switches_THT:SW_PUSH_6mmSW12
1BTMPin_Headers:Pin_Header_Straight_1x39_Pitch2.54mmJ2
1CButtons_Switches_THT:SW_PUSH_6mmSW13
1DButtons_Switches_THT:SW_PUSH_6mmSW14
1EButtons_Switches_THT:SW_PUSH_6mmSW15
1FButtons_Switches_THT:SW_PUSH_6mmSW16
1LOGOlogo:cowboy 3G***
1LOGOlogo:hatG***
1LOGOlogo:cowboy 4G***
1TOPPin_Headers:Pin_Header_Straight_1x39_Pitch2.54mmJ1

More from tebl/RC-Project-Board

6
  • 2 layers99.1 × 69.2 mmPB-002 Covox Sound, the printed circuit board in 3D

    PB-002 Covox Sound

    tebl/RC-Project-Board

    Playing around with an Arduino and a breadboard is a lot of fun, but I wanted to include my retro-computer builds so I made the project boards to make this a lot easier (for me).

    45 parts1
  • 2 layers99.1 × 69.2 mmPB LED Cube, the printed circuit board in 3D

    PB LED Cube

    tebl/RC-Project-Board

    Playing around with an Arduino and a breadboard is a lot of fun, but I wanted to include my retro-computer builds so I made the project boards to make this a lot easier (for me).

    43 parts1
  • 2 layers99.1 × 99.1 mmPP 6502 Game Board, the printed circuit board in 3D

    PP 6502 Game Board

    tebl/RC-Project-Board

    Playing around with an Arduino and a breadboard is a lot of fun, but I wanted to include my retro-computer builds so I made the project boards to make this a lot easier (for me).

    33 parts1
  • 2 layers99.1 × 99.1 mmPP 6502, the printed circuit board in 3D

    PP 6502

    tebl/RC-Project-Board

    Playing around with an Arduino and a breadboard is a lot of fun, but I wanted to include my retro-computer builds so I made the project boards to make this a lot easier (for me).

    21 parts1
  • 2 layers99.1 × 99.1 mmPP Arduino, the printed circuit board in 3D

    PP Arduino

    tebl/RC-Project-Board

    Playing around with an Arduino and a breadboard is a lot of fun, but I wanted to include my retro-computer builds so I made the project boards to make this a lot easier (for me).

    12 parts1
  • 2 layers99.1 × 23 mmPP Backplane Extension, the printed circuit board in 3D

    PP Backplane Extension

    tebl/RC-Project-Board

    Playing around with an Arduino and a breadboard is a lot of fun, but I wanted to include my retro-computer builds so I made the project boards to make this a lot easier (for me).

    7 parts1

Similar boards

  • 2 layers216.9 × 86.8 mmSweepv2, the printed circuit board in 3D

    Sweepv2

    davidphilipbarr/Sweep

    Sweep - a small promicro based keyboard inspired by the Ferris.

    51 parts2.1k
  • 2 layers49.4 × 94.2 mmPin board 1, the printed circuit board in 3D

    Pin board 1

    rusefi/rusefi

    rusefi - GPL internal combustion engine control unit

    51 parts1.2k
  • 2 layers72 × 42 mmNRF24 jammer, the printed circuit board in 3D

    NRF24 jammer

    W0rthlessS0ul/nRF24_jammer

    The nRF24 jammer is a powerful tool that requires an ESP32 and configurable numbers of NRF24 modules to assemble.

    51 parts1kMIT
  • 2 layers170 × 162 mmSnowflake, the printed circuit board in 3D

    Snowflake

    hackclub/OnBoard

    💡 Join 1,000 teenagers and make your first PCB with a $100 grant!

    51 parts915
  • 2 layers33 × 50 mmESP32-bat monitor latch, the printed circuit board in 3D

    ESP32-bat monitor latch

    pcbreflux/espressif

    all espressif stuff will committed here

    51 parts608GPL-3.0
  • 2 layersTUSS4470 shield, the printed circuit board in 3D

    TUSS4470 shield

    Neumi/open_echo

    Open Source echo sounder / depth sounder / SONAR for bathymetry and research. Arduino based and compatible.

    51 parts530
  • 2 layers45.7 × 123.5 mmMASTER ARM PANEL, the printed circuit board in 3D

    MASTER ARM PANEL

    jrsteensen/OpenHornet

    OpenHornet 1:1 F/A-18C Simulator Repository

    51 parts431
  • 2 layers50.8 × 69.2 mmUikit, the printed circuit board in 3D

    Uikit

    vsfteam/vsf

    Versaloon Software Framework -- a tiny preemptive-capable event-driven incremental software framework for embedded systems

    51 parts341Apache-2.0

Questions

How big is the Game Board PCB?

It measures 99.1 × 69.2 mm and has 2 copper layers, 1.6 mm thick.

What parts does the Game Board use?

51 parts. The full list of its parts is on this page, with links to each part's symbol and footprint where PCBKit's library has them.

Where can I download the Game Board KiCad files?

From the tebl/RC-Project-Board repository on GitHub, at the commit this page was made from: the board is projects/GB-001 Game Board/kicad/Game Board.kicad_pcb. PCBKit opens the board in the browser, with nothing to install.

Can I use the Game Board design in my own project?

Its repository states no licence, so its author keeps all rights: ask tebl before reusing the design.