2 layers180.1 × 180.3 mm

 swanmatch/amatelus731
big semi ergo keyboard
Amatelus73 is an open-source printed circuit board by swanmatch, from the swanmatch/amatelus73 repository on GitHub, published under the MIT licence. It is a 2-layer board of 362 × 104.8 mm with 237 parts on 170 nets, routed with 1,965 tracks and 177 vias.
Its parts include 74 diodes, 74 switches, 74 inductors, 2 connectors and 1 resistor. It belongs with the AVR (ATmega, ATtiny) boards of this library.
m.teiさんのセミエルゴレイアウトを参考に作成したシンメトリカルスタッガードキーボード。
RGBMATRIXに標準対応しているのも特徴。
| 品目 | 数量 | 備考 |
|---|---|---|
| PCB | 1枚 | |
| トッププレート | 1枚 | |
| ボトムプレート | 1枚 | |
| アクリル保護プレート | 2枚 | |
| ProMicro | 1個 | |
| ダイオード | 73個 | スピーカーを使う場合74個。 スルーホールは使えないので注意。 |
| LED(YS-SK6812mini) | 74個 | |
| Kailhソケット | 73個 | |
| M2L4ネジ | 18本 | |
| M2L7六角スペーサ | 5本 | |
| M2L8丸スペーサ | 4本 | |
| タクトスイッチ | 1個 | |
| ゴム足 | 4個 | |
| 2Uスタビライザー | 4個 | |
| MX互換スイッチ | 73個 | |
| キーキャップ | 73個 | |
| USBケーブル | 1本 |
| 品目 | 数量 | 備考 |
|---|---|---|
| コンスルー | 2本 | |
| 圧電サウンダ | 1個 | スピーカーオプション 型番: PKMCS1212E4000-R1 |
| 1kΩ抵抗 | 1個 | スピーカーオプション |
| OLED | 1個 | ピン、ソケットも。 |
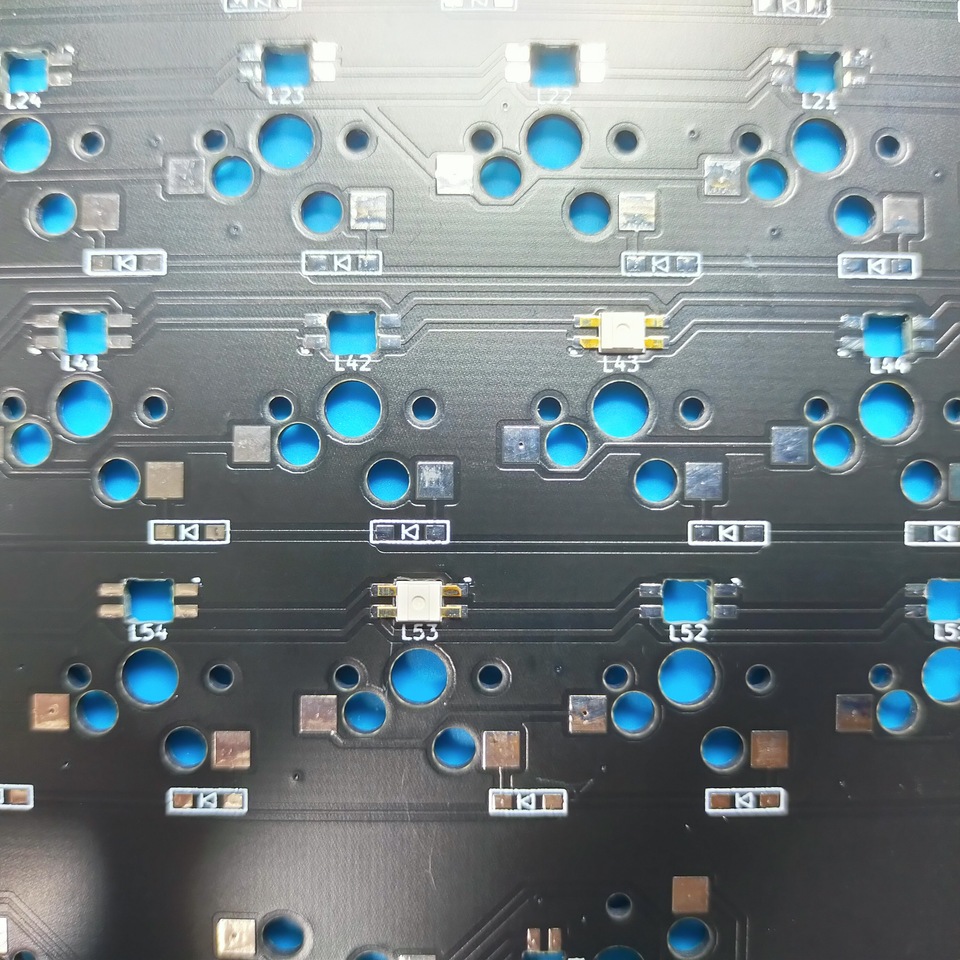
LEDをはんだ付けします。
小さくドットが入っているのが欠けている足に対応しています。
行ごと向きが違うので注意してください。
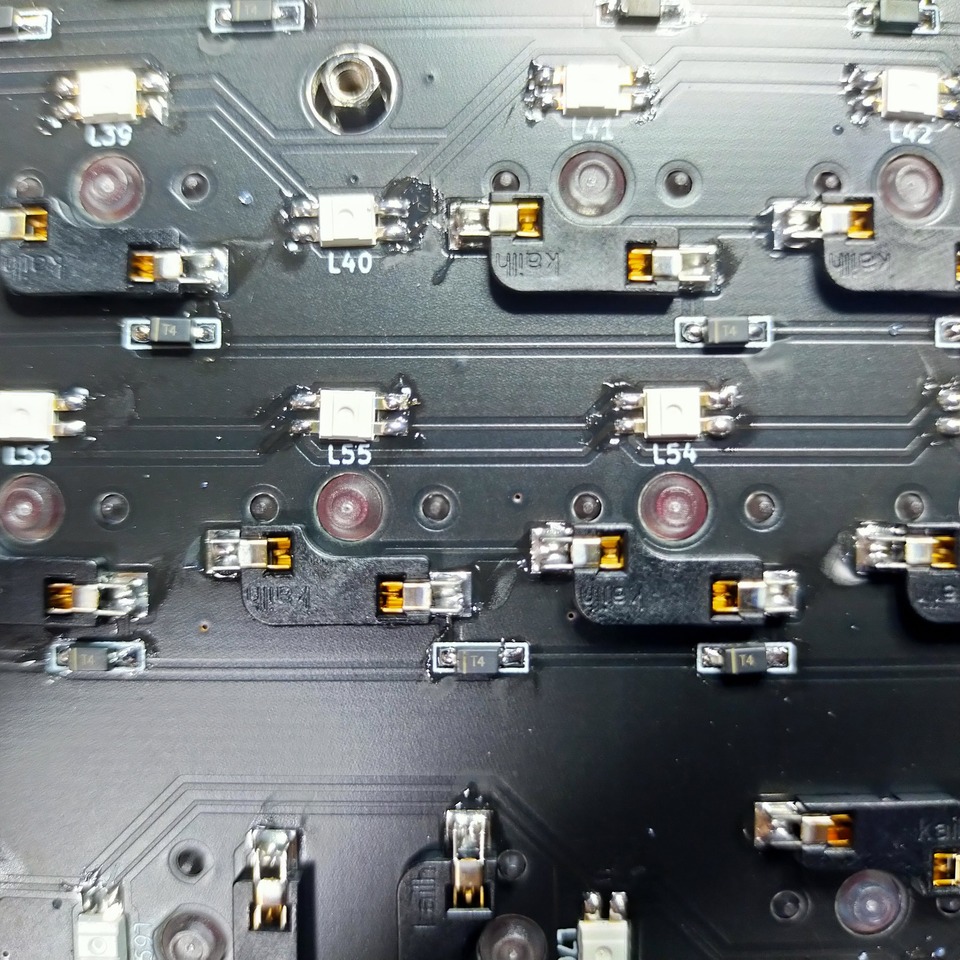
ダイオードをはんだ付けします。
向きに気をつけてください。
うっすら線が書いてあるほうが左です。
先に予備ハンダとしてどちらかのパッドにハンダを盛って、
予備ハンダを溶かすようにしてダイオードの片足をはんだ付けします。
この状態で横から見てダイオードが浮いていないことを確認してください。
浮いてしまっている場合はダイオードをピンセットで押さえつけながら、
はんだづけした部分を再度熱すればきれいになります。
浮いていないことを確認し、反対側をはんだ付けします。
ソケットをはんだ付けします。
反対側(表、スイッチ側)にひっくり返して、 タクトスイッチを差し込み、 再度裏面に戻してはんだ付けします。
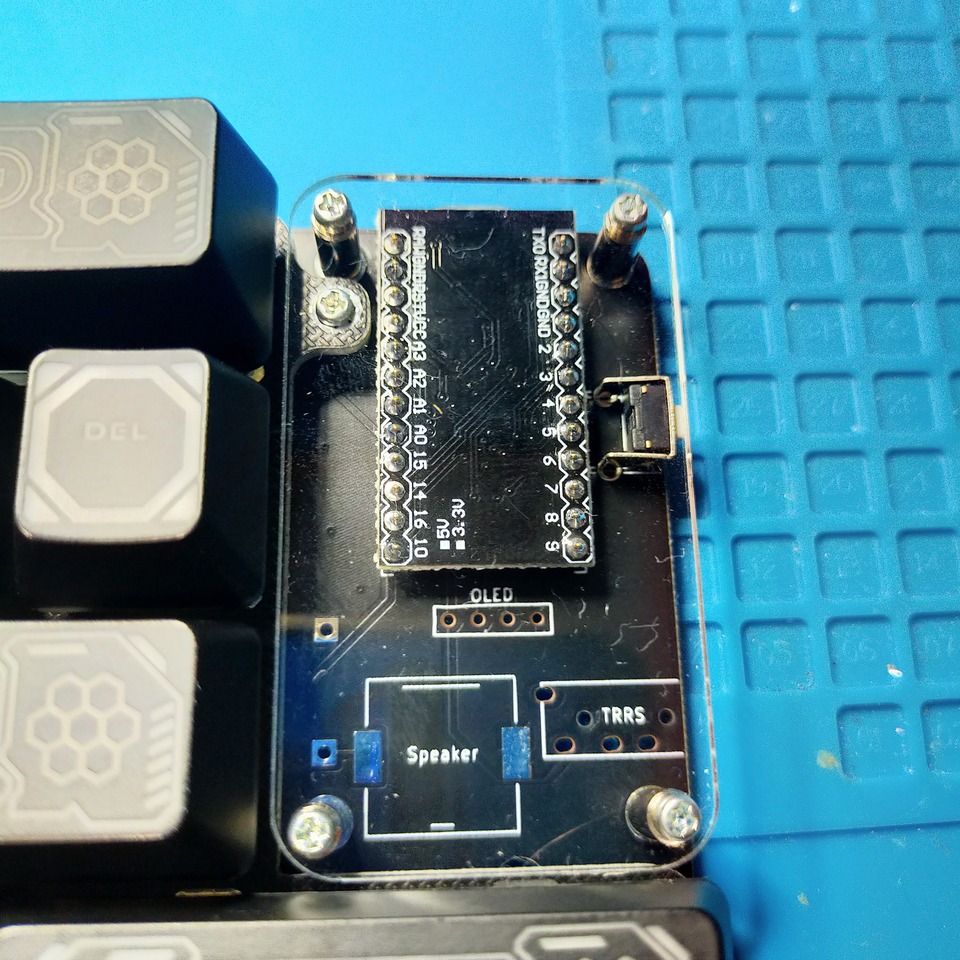
1kΩ抵抗、ダイオード、圧電サウンダをはんだ付けします。
ここだけは間違えるとリカバリが面倒なので、細心の注意をして作業にあたってください
コンスルーを使う場合はHelixのビルドガイドなどを参考にしてください。
また、ProMicroはあらかじめいわゆる「モゲ対策」をしておくといいです。
まず4角のピンをはんだ付けし、
ピンヘッダとプロマイクロが浮いていないことを確認して、
他のピンをはんだ付けします。
浮いてしまっていた場合、やけどに気を付けて、指で少し抑えながら、
浮いているピンにハンダをあてます。
裏面に戻し、表面と同様に4角からはんだ付けしていきます。
この段階で一度後述のLEDテスト用のファームウェアの書き込みをして導通テストしておくといいです。
問題なければ全LEDが点灯するはずです。
(RGB_MATRIXはキー押下に応じてLEDが光るモードがデフォルトになっているようなのでLED_testで確認するのが吉です。)
git clone https://github.com/swanmatch/qmk_firmware.git --recursive
cd qmk_firmware
make amatelus73:led_test:avrdudeOLEDにピンをはんだ付けし、基板側にソケットをはんだ付けします。 いずれも斜めになりやすいので注意してください。
スタビライザを組み立てて、回路基板にはめ込みます。
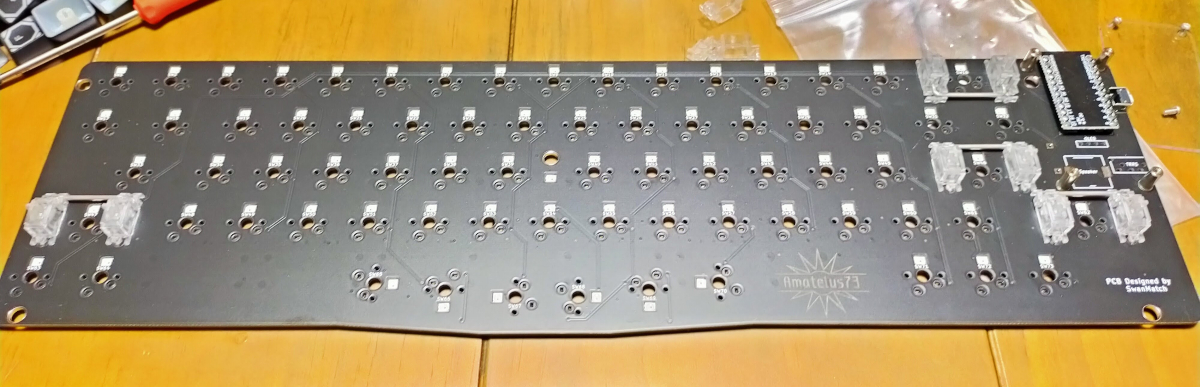
トッププレートにスイッチをはめて、PCBに刺します。
これも最初に4角からはめるといいです。
PCB裏側から丸スペーサーをネジ止めして、 表側に保護プレートを挟み込む形でPCネジで止めます。
ボトムプレートに六角スペーサーをネジ止めして、 本体にはめ込み、ネジ止めします。
ボトムプレートにゴム足を貼り付けてください。
ファームウェアの書き込みは以下のコマンドを叩きます。
QMKの環境構築についてはお使いのOSによって異なりなりますので、
公式ドキュメントを読んでください。
# LEDテストの書き込みを実施した場合は↓は不要
git clone https://github.com/swanmatch/qmk_firmware.git --recursive
cd qmk_firmware
make amatelus73:default:avrdude
# OLED ver
# amatelus73/oled:default:avrdude
# Audio ver
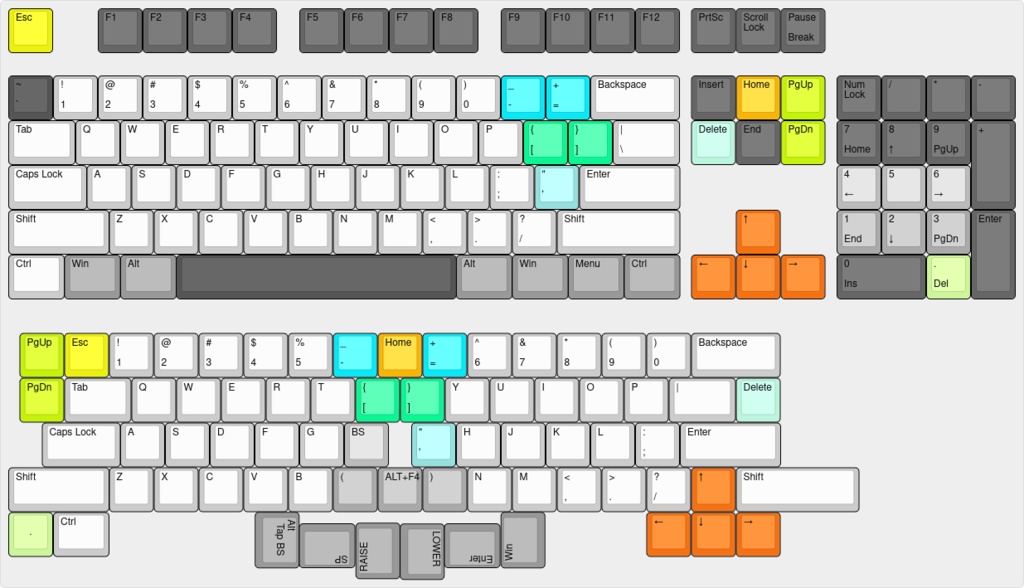
# amatelus73/audio:default:avrdudeキーキャップの取り付けは下記を推奨しています。
図はm.teiさんに作成いただきました。
Special Thanks!!
| Qty | Value | Footprint | References |
|---|---|---|---|
| 74 | D | keyboard:D3_SMD | D1, D2, D10, D11, D12, D13, D14, D15, D16, D17, D18, D19, D20, D21, D22, D23 +58 |
| 74 | YS-SK6812MINI | Keyboard:YS-SK6812MINI-E | L1, L2, L10, L11, L12, L13, L14, L15, L16, L17, L18, L19, L20, L21, L22, L23 +58 |
| 59 | SW_PUSH | Keyboard:MX_Hotswap_1u | SW1, SW2, SW10, SW11, SW12, SW13, SW14, SW15, SW17, SW19, SW20, SW21, SW22, SW23, SW24, SW25 +43 |
| 7 | SW_PUSH | Keyboard:MX_Hotswap_1.25u | SW64, SW65, SW66, SW67, SW68, SW69, SW70 |
| 5 | Val** | keyboard:HOLE | Hole1, Hole2, Hole3, Hole4, Hole5 |
| 4 | MountingHole_2.2mm_M2_Pad_Via | Mounting_Holes:MountingHole_2.2mm_M2_Pad_Via | SC1, SC2, SC3, SC4 |
| 2 | SW_PUSH | Keyboard:MX_Hotswap_1.5u | SW18, SW31 |
| 2 | SW_PUSH | Keyboard:MX_Hotswap_2.25u | SW46, SW47 |
| 1 | AudioJack4 | keyboard:MJ-4PP-9_1side | J2 |
| 1 | Conn_01x04 | keyboard:OLED_1side | J1 |
| 1 | LOGO | pcb:amatelus73 | G*** |
| 1 | ProMicro_r | keyboard:ProMicro_v3 | U1 |
| 1 | R | Resistors_Universal:Resistor_SMD+THTuniversal_1206_RM10_HandSoldering | R1 |
| 1 | SW_PUSH | Keyboard:MX_Hotswap_1.75u | SW33 |
| 1 | SW_PUSH | Button_Switch_THT:SW_Tactile_SPST_Angled_PTS645Vx31-2LFS | SW74 |
| 1 | SW_PUSH | Keyboard:MX_Hotswap_2.75u | SW62 |
| 1 | SW_PUSH | Keyboard:MX_Hotswap_2u_Reversed | SW16 |
| 1 | Speaker | keyboard:PKLCS1212E4001_HandSoldering | Speaker |
It measures 362 × 104.8 mm and has 2 copper layers, 1.6 mm thick.
237 parts. The full list of its parts is on this page, with links to each part's symbol and footprint where PCBKit's library has them.
From the swanmatch/amatelus73 repository on GitHub, at the commit this page was made from: the board is pcb/amatelus73.kicad_pcb. PCBKit opens the board in the browser, with nothing to install.
Its repository publishes it under the MIT licence: you may reuse it on that licence's terms (keep the author's notice, and for a copyleft licence share your changes alike).

DAlexis/caustic-lasertag-system
Caustic project is a full-featured indoor and outdoor lasertag system


jguillen-lab/BFS9000
Custom split ergonomic keyboard PCB based on Sofle Pico (RP2040/Pico). Adds detachable breakaway function row and lateral key packs, SK6803MINI-E per-key RGB, rear underglow (6 per half + 4 per pack), resistor-based…

Keyboard-PCB-Replica-Project/lzIron_RP2040
이 기판은 MX 버전이며, ISO 엔터 및 Alps를 지원하지 않습니다!


cqa02303/hidloom
HIDloom programmable keyboard software and reproducible appliance image