Skip to the content
PCBKitNew board
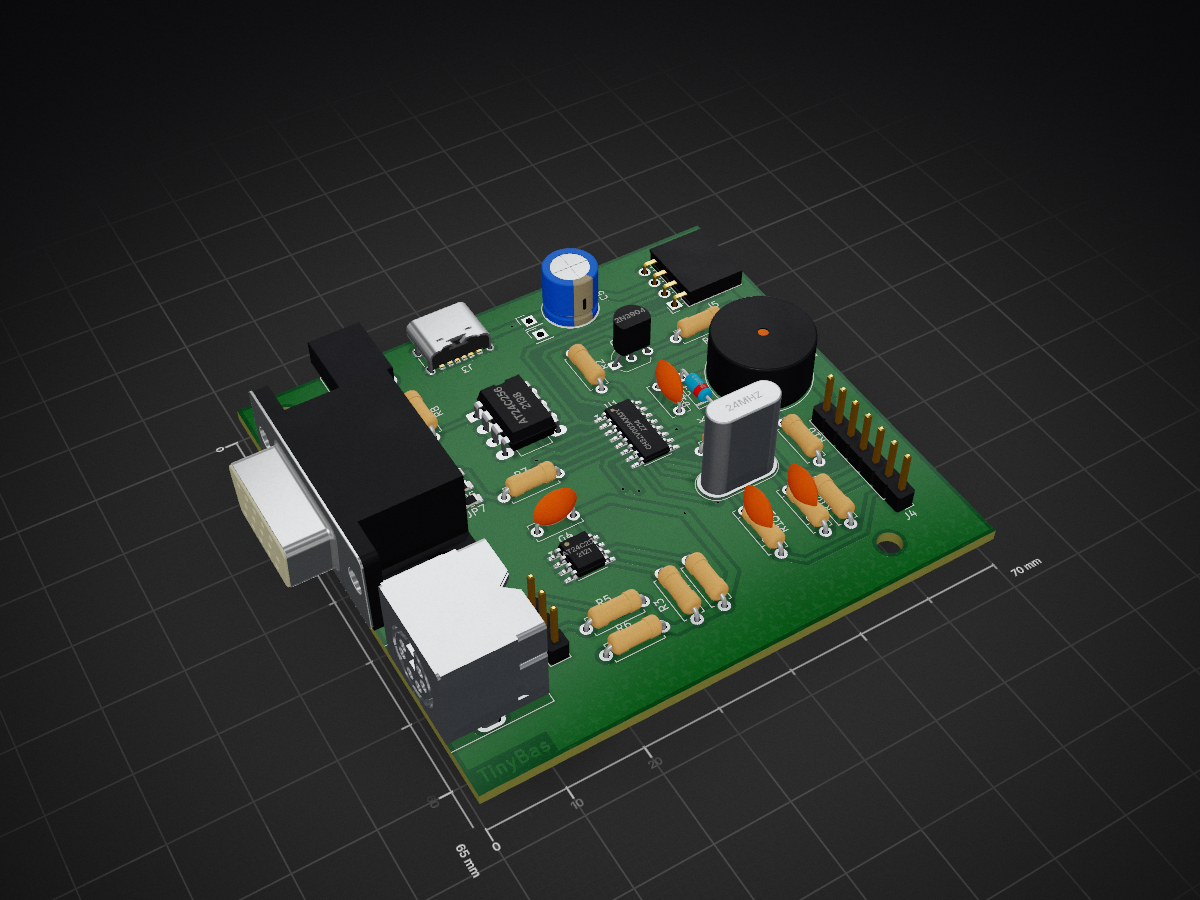
2 layers70 × 65 mmTinyBas, the printed circuit board in 3D

Small Tiny BASIC computer based on CH32V003

Size
70 × 65 mm
Copper layers
2
Thickness
1.6 mm
Parts
38
Nets
37
Pads
140
Tracks, vias
330, 9
Pours
1
Routed
Yes
KiCad
KiCad 9.0 (file 20241229)
Created
18 Jul 2025
Updated
8 Mar 2026

Overview

TinyBas is an open-source printed circuit board by Stan6314, from the Stan6314/TinyBasRV repository on GitHub, published under the GPL-3.0 licence. It is a 2-layer board of 70 × 65 mm with 38 parts on 37 nets, routed with 330 tracks and 9 vias.

It is built around the AT24C256N. Its parts include 13 resistors, 9 connectors, 5 capacitors, 3 ICs and 1 diode. It belongs with the RISC-V boards of this library.

Main components

1

README

README.md

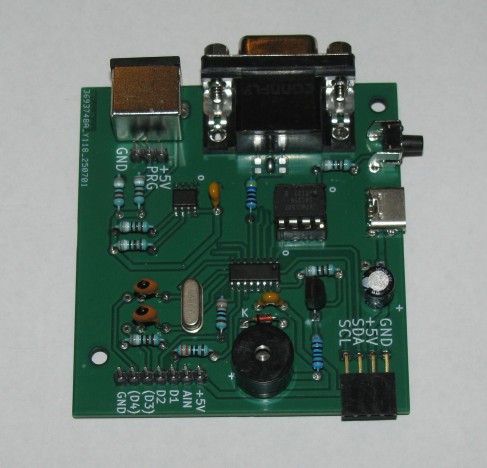
Microcomputer TinyBasRV
screenshot

The TinyBasRV microcomputer is a very simple device that even an electrical engineering beginner should be able to assemble and put into operation. It resembles simple 8-bit computers from the 1980s. After assembly, it can be programmed very easily using the Tiny BASIC language, which should be manageable even for those who have never programmed before. The basis is a small 32-bit RISC-V processor cooperating with serial I2C memory, where the user-created program is stored.

A microcomputer is suitable for the first introduction to computing technology when teaching hardware and software. It can be used not only for educational purposes, but can also be used as a control element for simple electronic devices.

Technical data for TinyBasRV

  • TinyBasHW_KiCad - HW documents (schematic and printed circuit board) in KiCad 9.0 format
  • src - Source files for TinyBasRV for CH32V003 created in MounRiver 2.10 environment
  • Bin - Compiled binary content in HEX format for direct loading into CH32V003 memory
  • Manuals - Manuals for HW, Tiny BASIC programming language and its examples and advice for beginners
  • EEPROM_examples - Contents of serial EEPROM memory in HEX format with examples of 8 ready-made Tiny BASIC sample programs for loading into microcomputer memory

Requirements for building and operating a TinyBasRV

  • Printed circuit board
  • Electrical components according to the list in the TinyBasHW manual
  • WCHLinkE programmer for programming CH32V003
  • Monitor with VGA input
  • Keyboard with PS2 connector
  • 5V power supply

Using a microcomputer

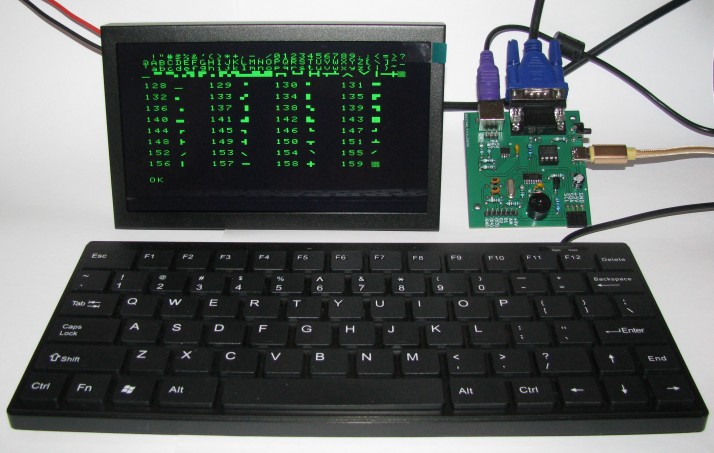
The assembled microcomputer only requires a 5 V power supply and a VGA monitor and PS2 keyboard connection. It is possible to use both a modern monitor and keyboard...
screenshot

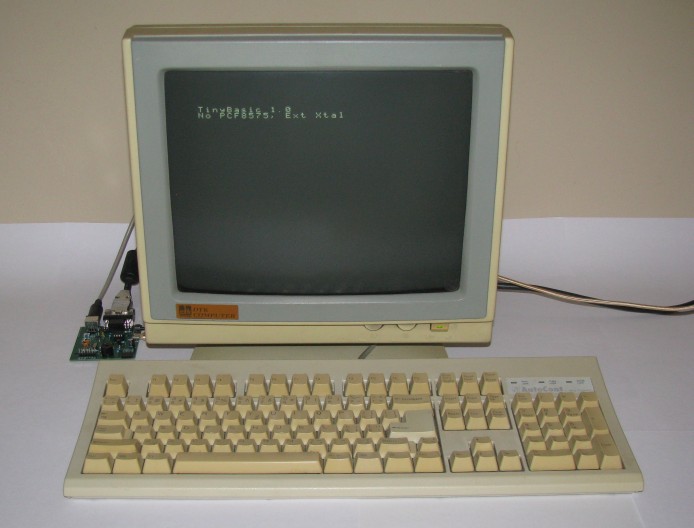
... so you can also create an old "retro" computer (if you can still find historical computer parts).
screenshot

After debugging the program, the TinyBasRV microcomputer can work independently without a monitor and keyboard and control, for example, some LED lighting effects.


Mikropočítač TinyBasRV

screenshot

Mikropočítač TinyBasRV je velmi jednoduché zařízení, které by měl dokázat sestavit a uvést do provozu i elektrotechnický začátečník. Podobá se jednoduchým 8bitovým počítačům z 80tých let. Po sestavení jej lze velmi jednoduše programovat pomocí jazyka Tiny BASIC, který by měl zvládnout i ten, kdo dříve neprogramoval. Základem je malý 32bitový RISC-V procesor spolupracující se sériovou I2C pamětí, kam se ukládá uživatelem tvořený program.

Mikropočítač je vhodný pro první seznámení s výpočetní technikou při výuce technického i programového vybavení. Může být použit nejen pro výukové účely, ale lze jej nasadit jako řídicí prvek pro jednoduché elektronické přístroje.

Technické podklady pro TinyBasRV

  • TinyBasHW_KiCad - HW podklady (schéma a plošný spoj) ve formátu programu KiCad 9.0
  • src - Zdrojové soubory k TinyBasRV pro CH32V003 vytvořené v prostředí MounRiver 2.10
  • Bin - Přeložený binární obsah ve formátu HEX pro přímé nahrání do paměti CH32V003
  • Manuals - Manuály pro HW, programovací jazyk Tiny BASIC a jeho příklady a rady pro začátečníky
  • EEPROM_examples - Obsah sériové EEPROM paměti ve formátu HEX s příklady 8 hotových ukázkových programů Tiny BASIC pro nahrání do paměti mikropočítače

Požadavky pro stavbu a provoz TinyBasRV

  • Deska plošného spoje
  • Elektrotechnické součástky podle seznamu v manuálu TinyBasHW
  • Programátor WCHLinkE pro naprogramování CH32V003
  • Monitor s VGA vstupem
  • Klávesnice s konektorem PS2
  • Napájecí zdroj 5 V

Použití mikropočítače

Sestavený mikropočítač vyžaduje pouze napájecí zdroj 5 V a připojení VGA monitoru a PS2 klávesnice. Je možné použít jak moderní monitor a klávesnici...

screenshot

... tak si vytvořit i starý "retro" počítač (pokud ještě najdete dnes již historické počítačové díly).

screenshot

Po odladění programu, může mikropočítač TinyBasRV pracovat samostatně bez monitoru a klávesnice a řídit např. nějaké světelné LED efekty.
Parts

38
QtyValueFootprintReferences
73K9Resistor_THT:R_Axial_DIN0207_L6.3mm_D2.5mm_P7.62mm_HorizontalR2, R3, R4, R5, R6, R8, R9
4330RResistor_THT:R_Axial_DIN0207_L6.3mm_D2.5mm_P7.62mm_HorizontalR10, R11, R12, R13
3Conn_01x01_PinConnector_PinHeader_2.54mm:PinHeader_1x01_P2.54mm_VerticalJ7, J8, J9
3SolderJumper_2_OpenResistor_SMD:R_0805_2012Metric_Pad1.20x1.40mm_HandSolderJP5, JP6, JP7
2100nCapacitor_THT:C_Disc_D6.0mm_W2.5mm_P5.00mmC3, C4
233pCapacitor_THT:C_Disc_D6.0mm_W2.5mm_P5.00mmC1, C2
1100RResistor_THT:R_Axial_DIN0207_L6.3mm_D2.5mm_P7.62mm_HorizontalR1
1100uCapacitor_THT:CP_Radial_D7.5mm_P2.50mmC5
11N4148Diode_THT:D_DO-35_SOD27_P7.62mm_HorizontalD1
124MHzCrystal:Crystal_HC49-U_VerticalY1
12N3904Package_TO_SOT_THT:TO-92_Inline_WideQ1
1470RResistor_THT:R_Axial_DIN0207_L6.3mm_D2.5mm_P7.62mm_HorizontalR7
1AT24C256Package_DIP:DIP-8_W7.62mm_LongPadsU3
1AT24C256Package_SO:SOIC-8_3.9x4.9mm_P1.27mmU2
1CH32V003AxMxPackage_SO:SOP-16_3.9x9.9mm_P1.27mmU1
1Conn_01x03_PinConnector_PinHeader_2.54mm:PinHeader_1x03_P2.54mm_VerticalJ6
1Conn_01x04_SocketConnector_PinSocket_2.54mm:PinSocket_1x04_P2.54mm_HorizontalJ5
1Conn_01x07_PinConnector_PinHeader_2.54mm:PinHeader_1x07_P2.54mm_VerticalJ4
1DE15_Socket_HighDensity_MountingHolesConnector_Dsub:DSUB-15-HD_Socket_Horizontal_P2.29x2.54mm_EdgePinOffset8.35mm_Housed_MountingHolesOffset10.89mmJ1
1Mini-DIN-6Moje:Connector_Mini-DIN_Female_6Pin_2rowsJ2
1SW_PushButton_Switch_THT:SW_Tactile_SKHH_AngledSW1
1SpeakerBuzzer_Beeper:Indicator_PUI_AI-1440-TWT-24V-2-RLS1
1USB_C_6PConnector_USB:USB_C_Receptacle_GCT_USB4125-xx-x_6P_TopMnt_HorizontalJ3

Questions

How big is the TinyBas PCB?

It measures 70 × 65 mm and has 2 copper layers, 1.6 mm thick.

What parts does the TinyBas use?

38 parts, built around the AT24C256N. The full list of its parts is on this page, with links to each part's symbol and footprint where PCBKit's library has them.

Where can I download the TinyBas KiCad files?

From the Stan6314/TinyBasRV repository on GitHub, at the commit this page was made from: the board is TinyBasHW_KiCad/TinyBas.kicad_pcb and its schematic TinyBasHW_KiCad/TinyBas.kicad_sch. PCBKit opens the board in the browser, with nothing to install.

Can I use the TinyBas design in my own project?

Its repository publishes it under the GPL-3.0 licence: you may reuse it on that licence's terms (keep the author's notice, and for a copyleft licence share your changes alike).

Similar boards

  • 2 layers33.7 × 36.6 mmHexyMicSMD, the printed circuit board in 3D

    HexyMicSMD

    AlexJMcIntyre/HexyHexyMic

    If you're here, there's a good chance you've picked up one of my HexyHexyMic Hexpansions. I hope I got the chance to say hello! If not, you can find me on Mastodon: @GlitchEngine@mastodon.social.

    11 parts5
  • 2 layers102.4 × 77.4 mmScheda PSE, the printed circuit board in 3D

    Scheda PSE

    Eduzyolo/PSE_project

    This is the official repo for the PSE project

    176 parts1
  • 4 layers40 × 36 mmMX IMU, the printed circuit board in 3D

    MX IMU

    lhaijun/MX_IMU

    55 parts1
  • 4 layers50 × 50 mmSTM32-DevBoard, the printed circuit board in 3D

    STM32-DevBoard

    s-grundner/STM32-DevBoard

    STM32 Breakout Board with various Sensors

    106 parts1
  • 2 layers99.1 × 99.1 mmFs6809sbc, the printed circuit board in 3D

    Fs6809sbc

    elekras/fs6809sbc

    A simple 6809 single board computer

    82 parts
  • 2 layers83 × 32 mmSchematics, the printed circuit board in 3D

    Schematics

    nicki419/Open-3-Step

    (WIP) Open-Source Circuit and code for custom built 120/240V 3-step (or n-step) light bulb dimmer working by turning off/on the light switch quickly to switch between brightness levels.

    24 partsApache-2.0
  • 2 layers90 × 36 mmAmbient, the printed circuit board in 3D

    Ambient

    RRomaNN/ambient-rgb-led

    This is a prototype of the LED backlight controller.

    51 parts
  • 4 layers44 × 33 mmAnastasia, the printed circuit board in 3D

    Anastasia

    Viva-la-Insomnia/OSHW-Smartwatch

    Contribute by contacting us / sending in a pull request. Welcome additions: integration of https://github.com/NordicSemiconductor/ble-sdk-efm32/, USB code.

    99 parts