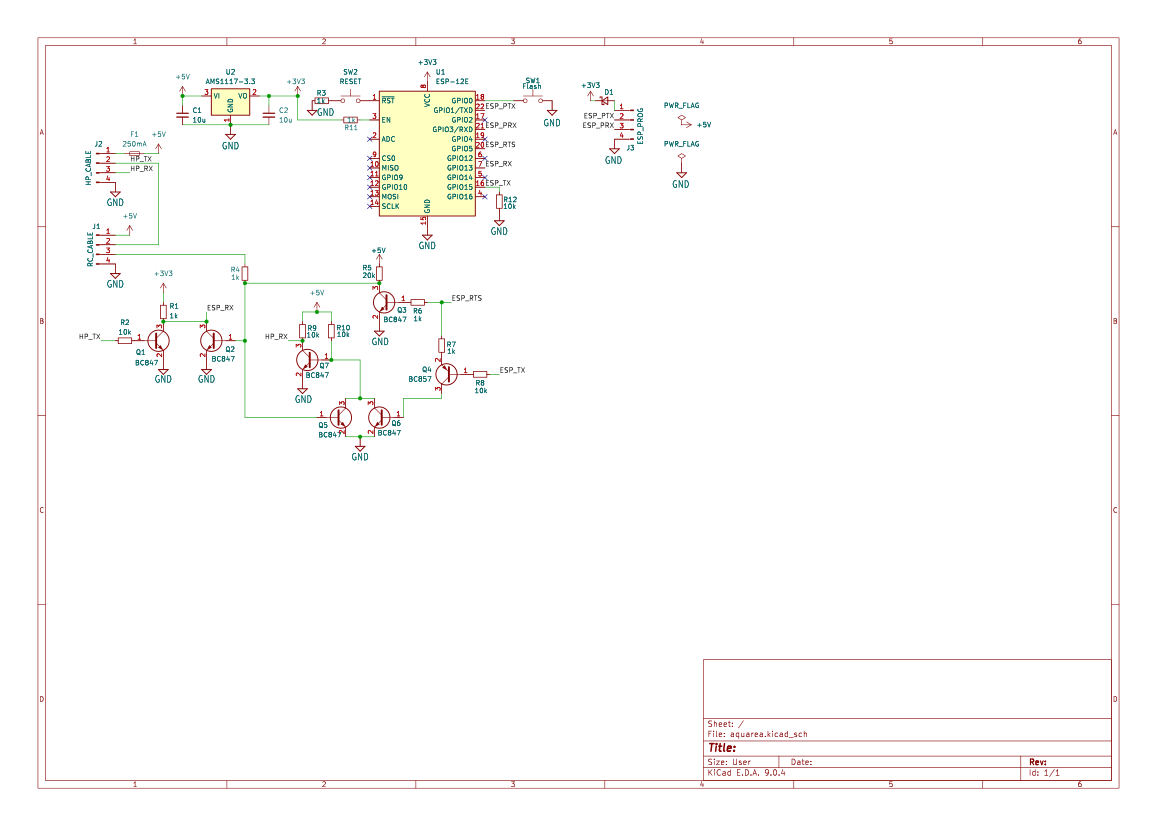
I used hardware serial on pins GPIO15/GPIO13 and one pin for RTS from a GPIO5 Mini ESP board. In a 'normal' situation, the ESP12E only listens to communication between the remote and the heat pump, so you can have…
Aquarea is an open-source printed circuit board by slqa, from the slqa/aquarea_esphome repository on GitHub. It is a 2-layer board of 41 × 28 mm with 30 parts on 36 nets, routed with 227 tracks and 46 vias.
It is built around the ESP-12E, AMS1117-3.3 and BC847, with the BC857 among its other parts. Its parts include 12 resistors, 7 transistors, 3 connectors, 2 capacitors and 2 ICs. It belongs with the interfaces and adapters boards and the ESP8266 boards of this library.
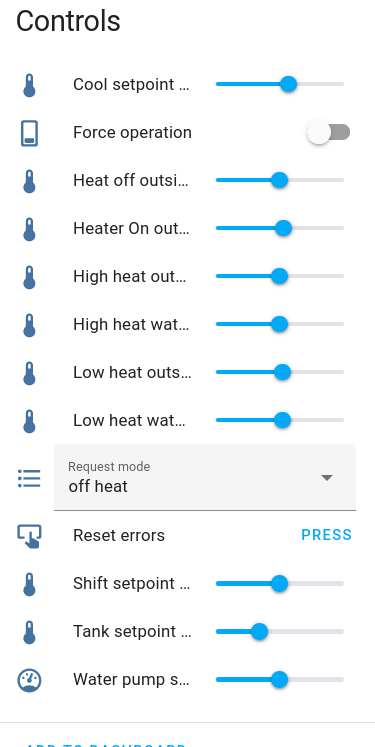
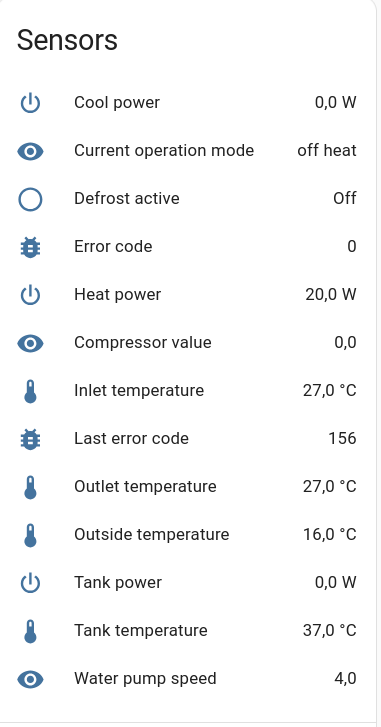
This project allows for controlling Aquarea F-series heat pumps directly from Home Assistant via standard ESPHome controls.
For it to function, special hardware is needed, which you will have to place between the remote control and the heat pump.
Thanks to this device, you are able to monitor heat pump states and issue your own commands.
I used hardware serial on pins GPIO15/GPIO13 and one pin for RTS from a GPIO5 Mini ESP board. In a 'normal' situation, the ESP12E only listens to communication between the remote and the heat pump, so you can have entity updates.
When you want to issue a state change from Home Assistant, the RTS pin is set, blocking communication from the remote to the heat pump. The ESP12E then sends the command and waits for confirmation.
After sending commands, it returns to the 'normal' state.
The Panasonic UART protocol has a baud_rate of 960, data_bits of 8, stop_bits of 1, parity of EVEN, and is inverted. My version of the bridge device realizes inversion at the hardware level, so there is no such setting in the YAML UART configuration.
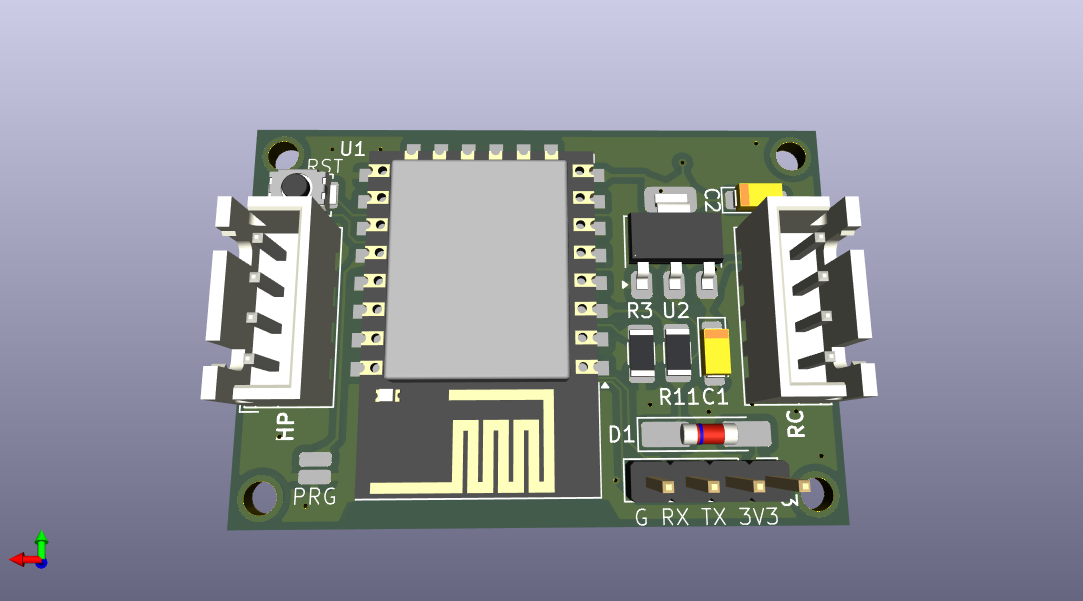
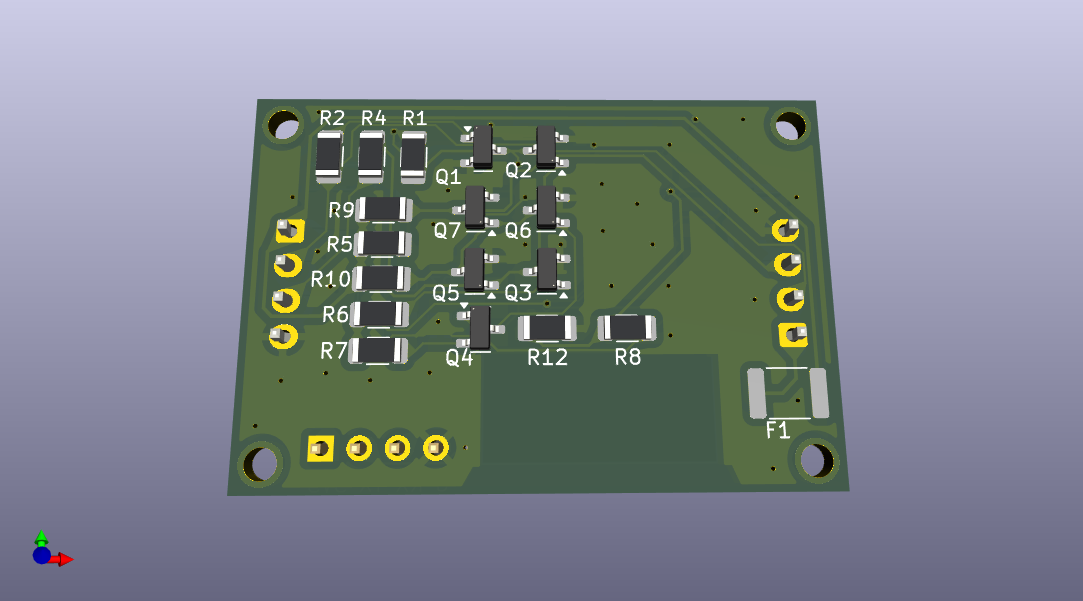
Bridge PCB using ESP12E:
How to use
Follow normal ESPHome steps
bash
docker pull ghcr.io/esphome/esphome
docker run --rm -v "${PWD}":/config -it ghcr.io/esphome/esphome compile aquarea.yaml
docker run --rm -v "${PWD}":/config -it ghcr.io/esphome/esphome run aquarea.yaml
💾 Flashing Firmware via UART
Follow these steps to successfully flash your device's firmware using a UART adapter.
1. Wiring and Connection
Connect your UART adapter (or an ESP board with a USB level shifter) to the board's gold pin connector using the following pins:
Pin
Function
Adapter Connection
3.3V
Power
Connect to 3.3V on the adapter.
TX
Transmit
Connect to RX on the adapter.
RX
Receive
Connect to TX on the adapter.
Gnd
Ground
Connect to Gnd on the adapter.
⚠️ IMPORTANT: If the PCB is still powered by the heat pump, DO NOT CONNECT the 3.3V pin from your adapter.
2. Entering Program Mode (Flash Mode)
To put the board into Flash Mode:
Short the PRG point: Use a screwdriver or jumper wire to short the PRG test point (sometimes marked as old SW1).
Power Cycle: While the PRG point is still shorted, quickly power cycle the PCB. You can do this by:
Disconnecting and immediately reconnecting the power 3.3V pin.
Unplugging and replugging the main heat pump connector from the PCB.
Cycling the main power to the heat pump unit.
Release Short: Once the power cycle is complete, release the short on the PRG point.
The device is now in Flash Mode and ready to accept new firmware.
THIS SOFTWARE IS PROVIDED "AS IS", WITHOUT WARRANTY OF ANY KIND, EXPRESS OR IMPLIED, INCLUDING BUT NOT LIMITED TO THE WARRANTIES OF MERCHANTABILITY, FITNESS FOR A PARTICULAR PURPOSE AND NONINFRINGEMENT. IN NO EVENT SHALL THE AUTHORS OR COPYRIGHT HOLDERS BE LIABLE FOR ANY CLAIM, DAMAGES OR OTHER LIABILITY, WHETHER IN AN ACTION OF CONTRACT, TORT OR OTHERWISE, ARISING FROM, OUT OF OR IN CONNECTION WITH THE SOFTWARE OR THE USE OR OTHER DEALINGS IN THE SOFTWARE.
You are solely responsible for any damage to your property, data, or third-party devices that results from the use or misuse of this software. By using this software, you agree to assume all risks associated with its use.
It measures 41 × 28 mm and has 2 copper layers, 1.6 mm thick.
What parts does the Aquarea use?
30 parts, built around the ESP-12E, AMS1117-3.3, BC847 and BC857. The full list of its parts is on this page, with links to each part's symbol and footprint where PCBKit's library has them.
Where can I download the Aquarea KiCad files?
From the slqa/aquarea_esphome repository on GitHub, at the commit this page was made from: the board is schematic/aquarea/aquarea.kicad_pcb and its schematic schematic/aquarea/aquarea.kicad_sch. PCBKit opens the board in the browser, with nothing to install.
Can I use the Aquarea design in my own project?
Its repository states no licence, so its author keeps all rights: ask slqa before reusing the design.
Solar energy is the cleanest and most available renewable energy source. The Modern technology can harness this energy for a variety of uses, including producing electricity, providing light and heating water for…