

2 layers119.6 × 106.5 mm
TapeLooper MainBoard
TheSlowGrowth/TapeLooper
A digital tape looper module for Eurorack or standalone use, built on the Daisy Seed.
243 parts10

 SloBloLabs/LivSynth7
Watch the related [Demo Video] on Youtube for a workout in musical context.
LivSynth Hardware is an open-source printed circuit board by SloBloLabs, from the SloBloLabs/LivSynth repository on GitHub, published under the MIT licence. It is a 2-layer board of 230 × 159.9 mm with 320 parts on 314 nets, routed with 2,120 tracks and 1,327 vias.
It is built around the PCA9685PW and 74HC165D. Its parts include 131 resistors, 64 capacitors, 16 transistors, 16 connectors and 10 diodes.
Watch the related Demo Video on Youtube for a workout in musical context.

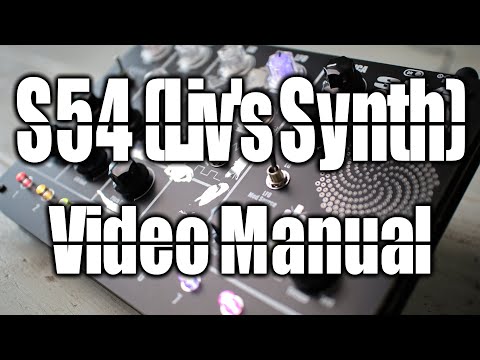
Watch the corresponding Video Manual on Youtube for a detailed feature explanation.
How to convert a CubeMX / CubeIDE project to GNU ARM Toolchain with CMake, openocd and VS Code
Prerequisites
Available on PATH
VS Code extensions
Workflow
Copy to project directory:
then
Tested on
2022-03-08: There is an issue using ARM Toolchain 11.2.1: https://community.arm.com/support-forums/f/compilers-and-libraries-forum/52377/internal-compiler-errors-with-arm-none-eabi-gcc-11-2-2022-02-on-macs-with-apple-silicon Stick with 10.3 for now!! 2022-11-13: The issue is solved within Toolchain version 11.3.1
Upload to github
--
Update github access token
--
Bake a new release on Github: git tag // e.g. v0.2.1 git push origin
--
Composite USB interface:
1 configuration 3 interfaces (2CDC + 1MIDI) 6 endpoints
CDC:
MIDI:
Use the ibom tool inside the hardware section of the repository to track your work!
dfu-util -a 0 -s 0x08000000 -D <path to LivSynth.bin>dfu-util -a 0 -s 0x08000000 -D build/LivSynth.bin
dfu-util 0.11
Copyright 2005-2009 Weston Schmidt, Harald Welte and OpenMoko Inc.
Copyright 2010-2021 Tormod Volden and Stefan Schmidt
This program is Free Software and has ABSOLUTELY NO WARRANTY
Please report bugs to http://sourceforge.net/p/dfu-util/tickets/
dfu-util: Warning: Invalid DFU suffix signature
dfu-util: A valid DFU suffix will be required in a future dfu-util release
Opening DFU capable USB device...
Device ID 0483:df11
Device DFU version 011a
Claiming USB DFU Interface...
Setting Alternate Interface #0 ...
Determining device status...
DFU state(10) = dfuERROR, status(10) = Device's firmware is corrupt. It cannot return to run-time (non-DFU) operations
Clearing status
Determining device status...
DFU state(2) = dfuIDLE, status(0) = No error condition is present
DFU mode device DFU version 011a
Device returned transfer size 2048
DfuSe interface name: "Internal Flash "
Downloading element to address = 0x08000000, size = 49412Hint: if you are building the firmware from the repo, the DFU command is called by simply writing
make dfu| Qty | Value | Footprint | References |
|---|---|---|---|
| 30 | 100K | Resistor_THT:R_Axial_DIN0207_L6.3mm_D2.5mm_P7.62mm_Horizontal | R1, R2, R3, R4, R10, R11, R12, R13, R19, R21, R22, R26, R32, R37, R38, R39 +14 |
| 20 | 100n | Capacitor_THT:C_Rect_L7.2mm_W2.5mm_P5.00mm_FKS2_FKP2_MKS2_MKP2 | C3, C4, C12, C16, C17, C18, C26, C27, C30, C31, C34, C35, C37, C43, C58, C59 +4 |
| 19 | 220 | Resistor_THT:R_Axial_DIN0207_L6.3mm_D2.5mm_P7.62mm_Horizontal | R14, R88, R91, R100, R101, R102, R103, R104, R117, R119, R121, R123, R125, R127, R129, R131 +3 |
| 17 | 10K | Resistor_THT:R_Axial_DIN0207_L6.3mm_D2.5mm_P7.62mm_Horizontal | R29, R30, R34, R68, R69, R73, R105, R106, R107, R108, R109, R110, R111, R112, R113, R114 +1 |
| 14 | 2N3904 | Package_TO_SOT_THT:TO-92_Inline | Q1, Q2, Q4, Q5, Q6, Q7, Q10, Q11, Q12, Q13, Q14, Q15, Q16, Q17 |
| 12 | Jumper | Connector_PinHeader_2.54mm:PinHeader_1x02_P2.54mm_Vertical | J8, J9, J10, J11, J13, J14, J15, J16, J17, J18, J19, J22 |
| 9 | 470 | Resistor_THT:R_Axial_DIN0207_L6.3mm_D2.5mm_P7.62mm_Horizontal | R90, R116, R118, R120, R122, R124, R126, R128, R130 |
| 9 | TC002-N11AS2XT-RGB | SloBlo:TC002-N11AS2XT-RGB | RGB_Pot1, RGB_Pot2, RGB_Pot3, RGB_Pot4, RGB_Pot5, RGB_Pot6, RGB_Pot7, RGB_Pot8, RGB_Pot9 |
| 8 | 100K | SloBlo:Alpha_RD901F | RV3, RV8, RV13, RV14, RV18, RV19, RV20, RV22 |
| 8 | 1K | Resistor_THT:R_Axial_DIN0207_L6.3mm_D2.5mm_P7.62mm_Horizontal | R15, R16, R25, R27, R35, R45, R46, R48 |
| 7 | 1u | Capacitor_THT:C_Rect_L7.2mm_W5.5mm_P5.00mm_FKS2_FKP2_MKS2_MKP2 | C1, C2, C9, C19, C32, C33, C41 |
| 6 | 100n | Capacitor_SMD:C_0603_1608Metric_Pad1.08x0.95mm_HandSolder | C38, C40, C42, C48, C50, C51 |
| 6 | 2K | Resistor_THT:R_Axial_DIN0207_L6.3mm_D2.5mm_P7.62mm_Horizontal | R24, R31, R33, R36, R42, R54 |
| 6 | LED | LED_THT:LED_D5.0mm | D1, D2, D5, D8, D9, D10 |
| 5 | 100K | SloBlo:RV141F-40-20BL | RV5, RV6, RV7, RV10, RV11 |
| 5 | 4K7 | Resistor_THT:R_Axial_DIN0207_L6.3mm_D2.5mm_P7.62mm_Horizontal | R28, R52, R74, R92, R93 |
| 5 | NetTie_2 | NetTie:NetTie-2_SMD_Pad0.5mm | NT1, NT2, NT3, NT4, NT5 |
| 5 | TL074 | Package_SO:SOIC-14_3.9x8.7mm_P1.27mm | U1, U2, U4, U5, U6 |
| 4 | 100 | Resistor_THT:R_Axial_DIN0207_L6.3mm_D2.5mm_P7.62mm_Horizontal | R67, R70, R75, R76 |
| 4 | 100K | SloBlo:Potentiometer_Bourns_3296W_Vertical | RV2, RV15, RV16, RV17 |
| 4 | MountingHole | MountingHole:MountingHole_3.2mm_M3 | H1, H2, H5, H6 |
| 3 | 10n | Capacitor_THT:C_Rect_L7.2mm_W2.5mm_P5.00mm_FKS2_FKP2_MKS2_MKP2 | C13, C21, C36 |
| 3 | 10u | Capacitor_THT:CP_Radial_D8.0mm_P3.50mm | C15, C45, C49 |
| 3 | 1N4148 | Diode_THT:D_DO-35_SOD27_P7.62mm_Horizontal | D6, D7, D11 |
| 3 | 22u | Capacitor_SMD:C_0805_2012Metric_Pad1.18x1.45mm_HandSolder | C53, C54, C55 |
| 3 | 270n | Capacitor_THT:C_Rect_L7.2mm_W4.5mm_P5.00mm_FKS2_FKP2_MKS2_MKP2 | C14, C23, C24 |
| 3 | 47K | Resistor_THT:R_Axial_DIN0207_L6.3mm_D2.5mm_P7.62mm_Horizontal | R17, R18, R59 |
| 3 | JLCPCB_Toolinghole | SloBlo:JLCPCB_ToolingHole | H3, H4, H7 |
| 3 | PJ398SM | SloBlo:Thonkiconn_PJ398SM | J1, J2, J3 |
| 3 | SW_SPDT | SloBlo:SW_Toggle_MS500 | SW1, SW3, SW4 |
| 2 | 10K | SloBlo:RV141F-40-20BL | RV4, RV9 |
| 2 | 10u | Capacitor_SMD:C_0805_2012Metric_Pad1.18x1.45mm_HandSolder | C63, C64 |
| 2 | 10u | Capacitor_SMD:C_0603_1608Metric_Pad1.08x0.95mm_HandSolder | C56, C60 |
| 2 | 1M | Resistor_THT:R_Axial_DIN0207_L6.3mm_D2.5mm_P7.62mm_Horizontal | R62, R63 |
| 2 | 1n | Capacitor_THT:C_Rect_L7.2mm_W2.5mm_P5.00mm_FKS2_FKP2_MKS2_MKP2 | C5, C20 |
| 2 | 1p | Capacitor_THT:C_Disc_D3.0mm_W1.6mm_P2.50mm | C8, C11 |
| 2 | 2.2u | Capacitor_SMD:C_0603_1608Metric_Pad1.08x0.95mm_HandSolder | C39, C46 |
| 2 | 20K | Resistor_THT:R_Axial_DIN0207_L6.3mm_D2.5mm_P7.62mm_Horizontal | R7, R9 |
| 2 | 26p | Capacitor_SMD:C_0603_1608Metric_Pad1.08x0.95mm_HandSolder | C44, C47 |
| 2 | 2K7 | Resistor_THT:R_Axial_DIN0207_L6.3mm_D2.5mm_P7.62mm_Horizontal | R85, R86 |
| 2 | 2N3906 | Package_TO_SOT_THT:TO-92_Inline | Q8, Q9 |
| 2 | 360 | Resistor_THT:R_Axial_DIN0207_L6.3mm_D2.5mm_P7.62mm_Horizontal | R5, R6 |
| 2 | 390 | Resistor_THT:R_Axial_DIN0207_L6.3mm_D2.5mm_P7.62mm_Horizontal | R8, R65 |
| 2 | 470K | Resistor_THT:R_Axial_DIN0207_L6.3mm_D2.5mm_P7.62mm_Horizontal | R23, R43 |
| 2 | 74HC165 | Package_SO:SOIC-16_3.9x9.9mm_P1.27mm | locked, U14 |
| 2 | PCA9685PW | Package_SO:TSSOP-28_4.4x9.7mm_P0.65mm | U10, U11 |
| 2 | SW_SPDT | Button_Switch_THT:SW_E-Switch_EG1224_SPDT_Angled | SW7, SW8 |
| 1 | 100 | SloBlo:Potentiometer_Bourns_3296W_Vertical | RV12 |
| 1 | 100K | Resistor_SMD:R_0603_1608Metric_Pad0.98x0.95mm_HandSolder | R96 |
| 1 | 100R | Resistor_THT:R_Axial_DIN0207_L6.3mm_D2.5mm_P7.62mm_Horizontal | R50 |
| 1 | 100k | Resistor_THT:R_Axial_DIN0207_L6.3mm_D2.5mm_P7.62mm_Horizontal | R60 |
| 1 | 100n | Capacitor_SMD:C_0402_1005Metric_Pad0.74x0.62mm_HandSolder | C57 |
| 1 | 10K | SloBlo:Alpha_RD901F | RV21 |
| 1 | 10K | Resistor_SMD:R_0603_1608Metric_Pad0.98x0.95mm_HandSolder | R115 |
| 1 | 10R | Resistor_THT:R_Axial_DIN0207_L6.3mm_D2.5mm_P7.62mm_Horizontal | R61 |
| 1 | 120R@100MHz | Inductor_SMD:L_0603_1608Metric | FB1 |
| 1 | 150K | Resistor_THT:R_Axial_DIN0207_L6.3mm_D2.5mm_P7.62mm_Horizontal | R58 |
| 1 | 1K | SloBlo:Potentiometer_Bourns_3296W_Vertical | RV1 |
| 1 | 1u5 | Inductor_SMD:L_Sunlord_SWPA5020S | L1 |
| 1 | 22u | Capacitor_THT:CP_Radial_D8.0mm_P3.50mm | C52 |
| 1 | 24K | Resistor_THT:R_Axial_DIN0207_L6.3mm_D2.5mm_P7.62mm_Horizontal | R57 |
| 1 | 270n | Capacitor_THT:C_Rect_L7.2mm_W5.5mm_P5.00mm_FKS2_FKP2_MKS2_MKP2 | C25 |
| 1 | 2K 3300ppm LT16S202F33 | Resistor_THT:R_Axial_DIN0207_L6.3mm_D2.5mm_P7.62mm_Horizontal | TH1 |
| 1 | 2K2 | Resistor_THT:R_Axial_DIN0207_L6.3mm_D2.5mm_P7.62mm_Horizontal | R55 |
| 1 | 330K | Resistor_THT:R_Axial_DIN0207_L6.3mm_D2.5mm_P7.62mm_Horizontal | R84 |
| 1 | 33u | Capacitor_THT:CP_Radial_D8.0mm_P3.50mm | C10 |
| 1 | 39K | Resistor_SMD:R_0603_1608Metric_Pad0.98x0.95mm_HandSolder | R95 |
| 1 | 3V3 | Connector_PinHeader_2.54mm:PinHeader_1x02_P2.54mm_Vertical | J24 |
| 1 | 402K | Resistor_SMD:R_0603_1608Metric_Pad0.98x0.95mm_HandSolder | R94 |
| 1 | 470u | Capacitor_THT:CP_Radial_D8.0mm_P3.50mm | C29 |
| 1 | 47p | Capacitor_THT:C_Disc_D3.0mm_W1.6mm_P2.50mm | C28 |
| 1 | 4k7 | Resistor_THT:R_Axial_DIN0207_L6.3mm_D2.5mm_P7.62mm_Horizontal | R77 |
| 1 | 4u7 | Capacitor_THT:CP_Radial_D8.0mm_P3.50mm | C22 |
| 1 | 68K | Resistor_THT:R_Axial_DIN0207_L6.3mm_D2.5mm_P7.62mm_Horizontal | R44 |
| 1 | 68k | Resistor_THT:R_Axial_DIN0207_L6.3mm_D2.5mm_P7.62mm_Horizontal | R71 |
| 1 | 6K2 | Resistor_THT:R_Axial_DIN0207_L6.3mm_D2.5mm_P7.62mm_Horizontal | R41 |
| 1 | 820K | Resistor_THT:R_Axial_DIN0207_L6.3mm_D2.5mm_P7.62mm_Horizontal | R49 |
| 1 | 82K | Resistor_THT:R_Axial_DIN0207_L6.3mm_D2.5mm_P7.62mm_Horizontal | R20 |
| 1 | 8K2 | Resistor_THT:R_Axial_DIN0207_L6.3mm_D2.5mm_P7.62mm_Horizontal | R53 |
| 1 | 8V2 | Diode_SMD:D_SOD-123 | D4 |
The 297 most common of 320 parts.
It measures 230 × 159.9 mm and has 2 copper layers, 1.6 mm thick.
320 parts, built around the PCA9685PW and 74HC165D. The full list of its parts is on this page, with links to each part's symbol and footprint where PCBKit's library has them.
From the SloBloLabs/LivSynth repository on GitHub, at the commit this page was made from: the board is hardware/Mainboard/LivSynth_Hardware.kicad_pcb and its schematic hardware/Mainboard/EG.kicad_sch. PCBKit opens the board in the browser, with nothing to install.
Its repository publishes it under the MIT licence: you may reuse it on that licence's terms (keep the author's notice, and for a copyleft licence share your changes alike).
TheSlowGrowth/TapeLooper
A digital tape looper module for Eurorack or standalone use, built on the Daisy Seed.

nasa-jpl/open-source-rover
A build-it-yourself, 6-wheel rover based on the rovers on Mars!

pms67/HadesFCS
Complete flight control system designed from scratch. Hardware designed with KiCad.


Brobiwann/ESP-spider
The ESP-Spider is a quadruped robot inspired by the miniKame (https://github.com/JavierIH/miniKame) . Like the miniKame, it uses sinusoidal functions to control servo positions, but the design and code were developed…


RobertPHeller/RPi-RRCircuits
A collection of circuit designs for various MCUs, not just Raspberry Pis relating to Model Railroading