
2 layers50 × 47.5 mm
Gfc
atx/gps-freq-counter
Frequency counter using a GPS receiver PPS output as its reference
101 parts6MIT

 RTES-Group/DigitSynth8
A real-time audio effects processor built on Raspberry Pi — apply filters and effects to live audio using MIDI control messages.
DigitSynth is an open-source printed circuit board by RTES-Group, from the RTES-Group/DigitSynth repository on GitHub, published under the MIT licence. It is a 2-layer board of 65 × 56.5 mm with 56 parts on 63 nets, routed with 306 tracks and 30 vias.
It is built around the BZX84C5V6. Its parts include 17 resistors, 9 connectors, 1 capacitor, 1 IC and 1 diode. It belongs with the audio and music boards of this library.
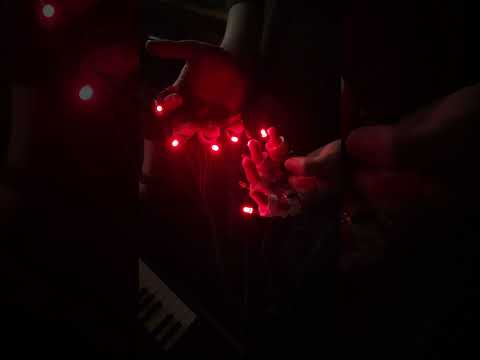
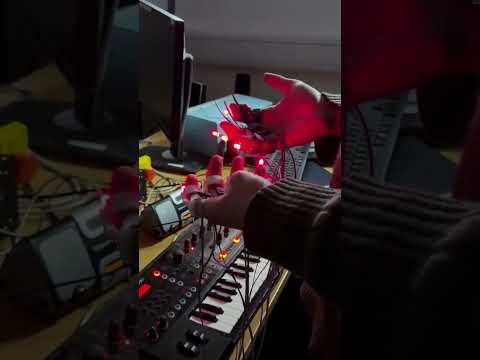
DigitSynth is a wearable MIDI controller that interacts with the Roland JD-Xi synthesiser. It allows the user to trigger chords and shape the resulting sound in real time using finger movements.
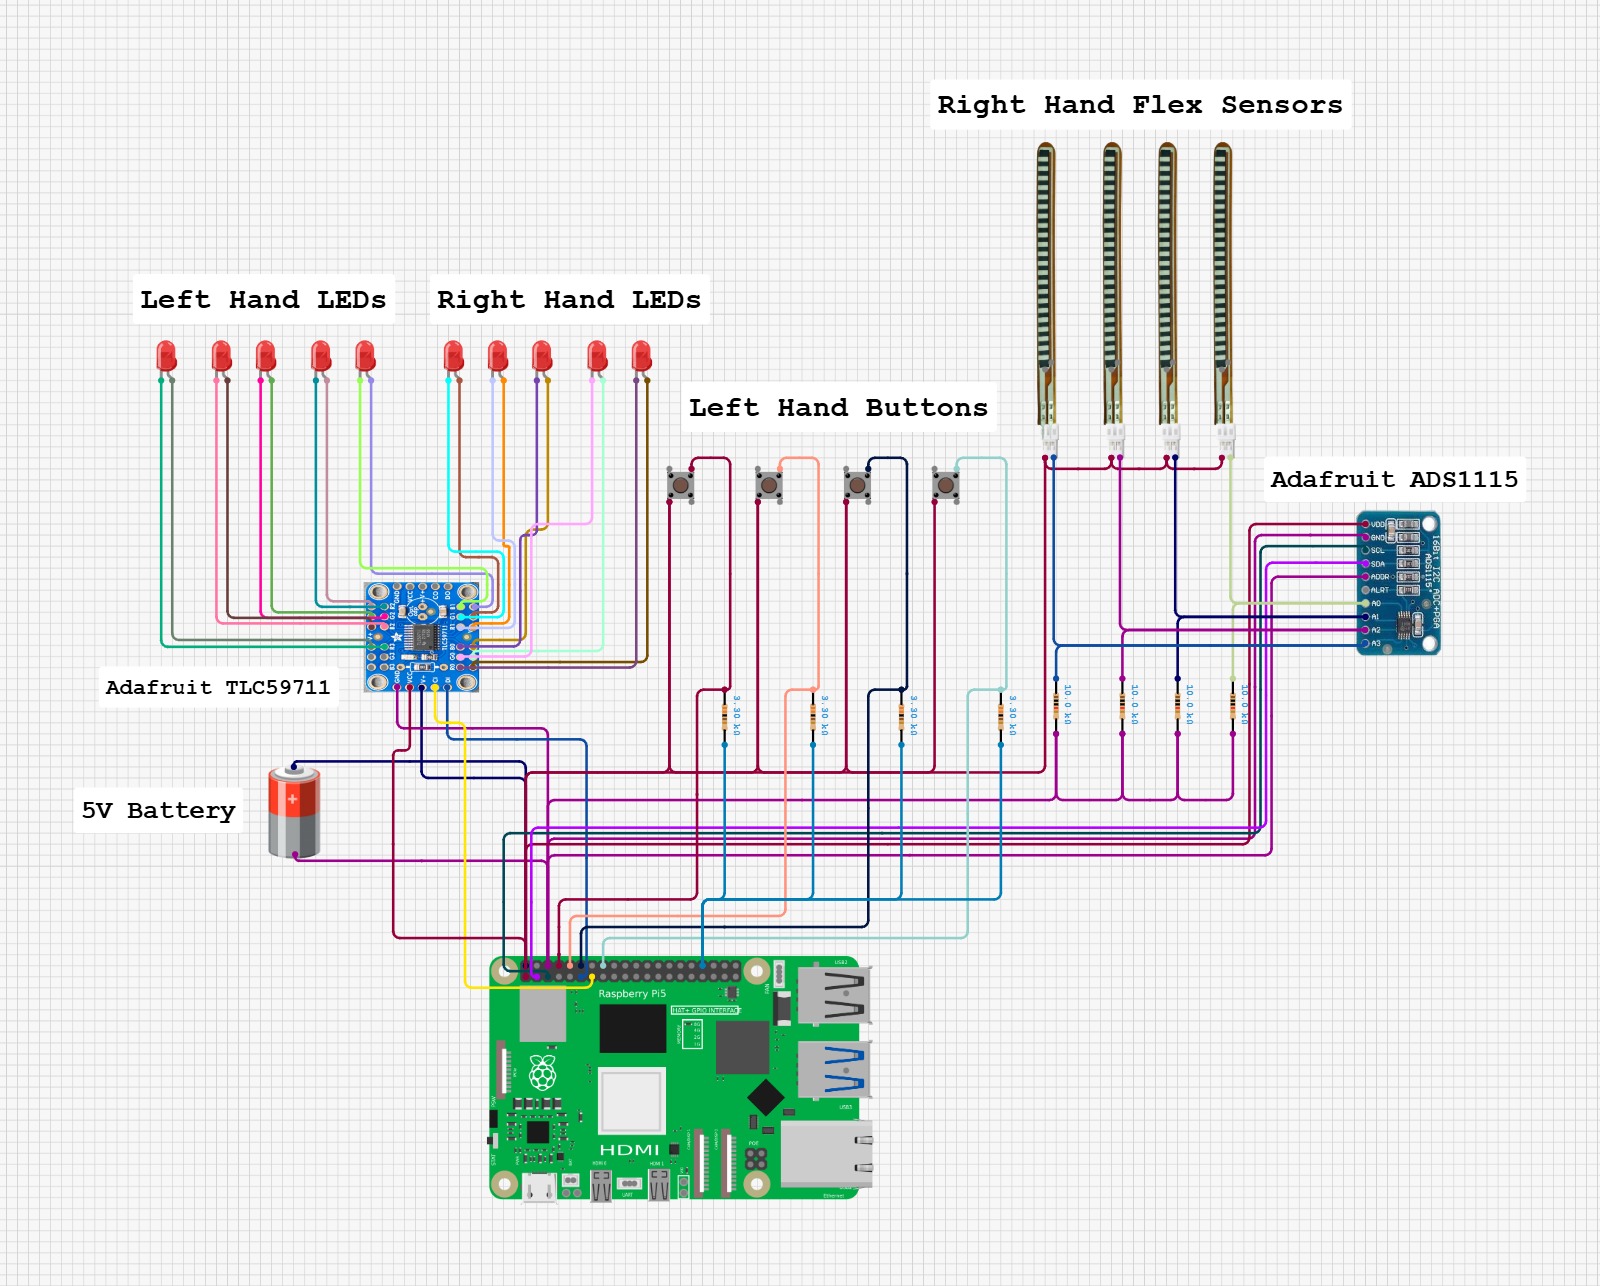
The table below outlines the hardware components used in this project. Exact component matches are not required, and suitable alternatives will yield comparable results. However, as the software has been developed specifically for the Raspberry Pi, it is strongly recommended to retain this as the target platform.
| Component | Part Number | Quantity | Approx. Cost (unit) |
|---|---|---|---|
| Raspberry Pi 5 | Pi 5 4GB | 1 | £105.60 |
| Adafruit ADS1115 | 1085 | 1 | £11.18 |
| Adafruit TLC59711 | 1455 | 1 | £6.73 |
| Spectra Symbol Flex Sensor FLX | FLX-L-055-123-MP | 4 | £8.51 |
| Tactile Switch, 4.3mm | MCDTS2-1N | 4 | £0.17 |
| Kingbright L-7113IT 5mm 2V Red LED 80mcd | 56-0250 | 8 | £0.08 |
| Pisugar S Plus 5000 mAh Raspberry Pi UPS | Pisugar S Plus | 1 | £29.99 |
A MIDI-receiving device is required to complete the setup, either a hardware synthesiser or a software synthesiser running on a connected laptop. In this project, a Roland JD-Xi synthesiser was used, receiving MIDI directly from the Raspberry Pi over USB-B.

Our build system is CMake, but we provide a simple top-level Makefile to make things easy. Feel free to run the cmake commands manually if you are so inclined. The install-deps.sh script will automatically install dependencies required by DigitSynth.
A simple install can be performed using the .deb package in the latest release. Download digitsynth-aarch64.deb, then run bash sudo dpkg -i digitsynth-aarch64.deb in your terminal after navigating to the directory into which the archive was downloaded. The standalone binary can also be found in the release. Note that dependencies still need to be installed.
git clone https://github.com/RTES-Group/DigitSynth.git
cd DigitSynth
OR
Find the latest release on the right-hand side of this page. Download either the .tar.gz or .zip. After downloading and navigating to the download directory:
zipunzip DigitSynth-xx.xx.xx.zip
cd DigitSynth-xx.xx.xxtar.gztar -xf DigitSynth-xx.xx.xx.tar.gz
cd DigitSynth-xx.xx.xx| Library | Purpose | Source |
|---|---|---|
| IIR Filter Library | Digital IIR filter design and processing | berndporr/iir1 |
| RtMidi | Real-time MIDI input/output | thestk/rtmidi |
| ADS1115 API | Flex sensor measurement | berndporr/rpi_ads1115 |
| libgpiod | GPIO management | ligpiod |
| libasound2-dev | ALSA development headers | libasound2-dev |
Simply run the install-deps.sh script:
./install-deps.shSPI must be enabled before the project will run:
sudo raspi-config
# Navigate to: Interface Options → SPI → Enable
# Navigate to: Interface Options → I2C → Enablecd application/
makebuild/digitsynthTo run unit tests:
make testA full user guide covering button modes, controls, and MIDI mapping is available here:
| Demo 1 | LED Mode Demo | Demo 2 |
|---|---|---|
 |  |  |
Follow our build journey on Instagram: 
We are also awaiting a write-up on Hackaday.com about our project, so keep an eye out on their blog!
See the issues tab for a list of potential contributions. In particular, we would welcome expanding support for other synths.
This project is licensed under the MIT License — see the LICENSE file for details.
You are free to use, modify, and distribute this project. We just ask that you credit the original authors.
Developed by:
As part of the Real-Time Embedded Systems module at University of Glasgow, 2026.
| Qty | Value | Footprint | References |
|---|---|---|---|
| 8 | TestPoint | TestPoint:TestPoint_THTPad_D1.0mm_Drill0.5mm | TP1, TP2, TP3, TP4, TP5, TP6, TP7, TP8 |
| 7 | 10k | Resistor_SMD:R_0603_1608Metric | R5, R6, R7, R12, R13, R14, R15 |
| 6 | Conn_01x02_Pin | Connector_Molex:Molex_KK-254_AE-6410-02A_1x02_P2.54mm_Vertical | J1, J2, J3, J4, J6, J9 |
| 5 | 100n | Capacitor_SMD:C_0603_1608Metric | C_DVDD_1, C3, C4, C5, C6 |
| 4 | 0.33u | Capacitor_SMD:C_0603_1608Metric | C_FILT1, C_FILT2, C_FILT3, C_FILT4 |
| 4 | 12k | Resistor_SMD:R_0603_1608Metric | R8, R9, R10, R11 |
| 4 | 1k | Resistor_SMD:R_0603_1608Metric | R1, R2, R3, R4 |
| 4 | MountingHole | MountingHole:MountingHole_2.7mm_M2.5 | H1, H2, H3, H4 |
| 2 | 5K1 | Resistor_SMD:R_0603_1608Metric | R16, R17 |
| 2 | Jumper_2_Open | Jumper:SolderJumper-2_P1.3mm_Open_RoundedPad1.0x1.5mm | JP1, JP2 |
| 1 | 0.1u | Capacitor_SMD:C_0603_1608Metric | C_AVDD_1 |
| 1 | 100nF | Capacitor_SMD:C_0603_1608Metric | C1 |
| 1 | 10u | Capacitor_SMD:C_0805_2012Metric | C_AVDD_2 |
| 1 | 330Ω | Inductor_SMD:L_0603_1608Metric | FB1 |
| 1 | ADS1256IDBR | Package_SO:SSOP-28_5.3x10.2mm_P0.65mm | U1 |
| 1 | BZX84C5V6 | Package_TO_SOT_SMD:SOT-23 | D1 |
| 1 | Conn_01x05_Pin | Connector_Molex:Molex_KK-254_AE-6410-05A_1x05_P2.54mm_Vertical | J5 |
| 1 | Conn_01x08 | Connector_Molex:Molex_KK-254_AE-6410-08A_1x08_P2.54mm_Vertical | J7 |
| 1 | THD-20-R | Connector_PinHeader_2.54mm:PinHeader_2x20_P2.54mm_Vertical | J_RPI1 |
| 1 | USB_C_Receptacle_USB2.0_JAE | footprints:JAE_DX07S016JA1R1500 | J8 |
It measures 65 × 56.5 mm and has 2 copper layers, 1.6 mm thick.
56 parts, built around the BZX84C5V6. The full list of its parts is on this page, with links to each part's symbol and footprint where PCBKit's library has them.
From the RTES-Group/DigitSynth repository on GitHub, at the commit this page was made from: the board is DigitSynth-Schematic/DigitSynth.kicad_pcb and its schematic DigitSynth-Schematic/ADC_Flex.kicad_sch. PCBKit opens the board in the browser, with nothing to install.
Its repository publishes it under the MIT licence: you may reuse it on that licence's terms (keep the author's notice, and for a copyleft licence share your changes alike).
atx/gps-freq-counter
Frequency counter using a GPS receiver PPS output as its reference


ephemeridis/GRBL_board
This is a PCB designed to run GRBL, an open source CNC control software that is designed and optimised for Arduino.

iakop/E5SPK_ClassD
Class D Amplifier project for the 5th semester course, Switched Power Circuits. By Jacob Bechmann Pedersen and Mikkel Bjerg Petersen.

OLIMEX/OLINUXINO
OLINUXINO is Open Source / Open Hardware, low cost from EUR 24 Linux Industrial grade Single Board Computer capable to operate -25+85C

hackclub/OnBoard
💡 Join 1,000 teenagers and make your first PCB with a $100 grant!
