4 layers170 × 101 mm
 RishitJain-dev/Flightime
A quadcopter with a custom PCB, gyroscope and accelerometer, all within a 3d printed PLA Aero case!
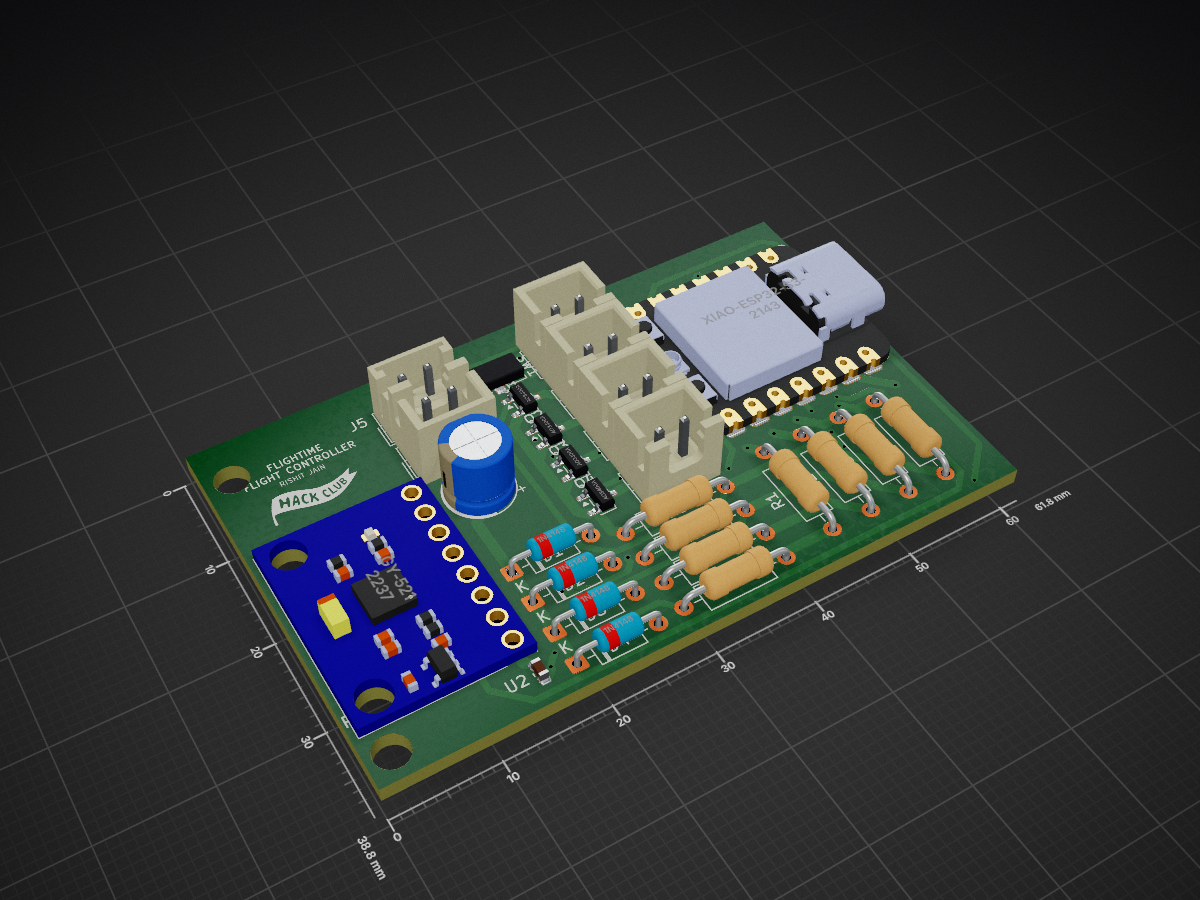
Flightime is an open-source printed circuit board by RishitJain-dev, from the RishitJain-dev/Flightime repository on GitHub. It is a 2-layer board of 61.8 × 38.8 mm with 30 parts on 35 nets, routed with 285 tracks and 43 vias.
It is built around the AO3400A and 220UF 10V 5*7. Its parts include 8 resistors, 6 connectors, 4 diodes, 4 transistors and 2 capacitors. It belongs with the robots and motor control boards and the ESP32 boards of this library.

Flightime is a custom designed drone with a PLA Aero frame, 4 8520 brushed motors, and a PCB flight controller with a OV2640 camera mounted on the XIAO ESP32 S3 SENSE
Weighs: 132.6g
I designed this as an example project for Lift Off, where you design a drone, and get the components to build it and if its a great project, then even a drone controller!
The PCB was made in KiCAD! It has:
The CAD was designed exclusively in Onshape. The 2 parts fit together with 4 M3 screws and nuts, it doesn't require any heatset inserts, you screw directly into the PLA.
There are cut-outs in each piece so that wires can fit through. This is a pusher drone, the motors are press fit and the propellers face towards the ground.
Use the schematic diagram on Kicanvas to solder one side of the wires to the board before assembly. Then place the board, mount it using the screws and nuts and take the wires to the motors and solder the other side there.
We move by slowing down certain motors and speeding up others, this causes it to lean and tilt towards the direction its meant to be going, and begins to accelerate. In the final firmware, it will be controlled through bluetooth on a computer or phone.
Here are some renders I made in Onshape!
| Qty | Value | Footprint | References |
|---|---|---|---|
| 4 | 100k | Resistor_THT:R_Axial_DIN0207_L6.3mm_D2.5mm_P10.16mm_Horizontal | R5, R6, R7, R8 |
| 4 | 100ohm | Resistor_THT:R_Axial_DIN0207_L6.3mm_D2.5mm_P10.16mm_Horizontal | R1, R2, R3, R4 |
| 4 | 1N4148 | Diode_THT:D_DO-35_SOD27_P7.62mm_Horizontal | D1, D2, D3, D4 |
| 4 | AO3400A | Package_TO_SOT_SMD:SOT-23 | Q1, Q2, Q3, Q4 |
| 4 | JST_02 | Connector_JST:JST_EH_B2B-EH-A_1x02_P2.50mm_Vertical | J1, J2, J3, J4 |
| 2 | Conn_01x02_Pin | Connector_JST:JST_EH_B2B-EH-A_1x02_P2.50mm_Vertical | J5, J6 |
| 1 | |||
| 1 | 0.1uF | PCM_SparkFun-Capacitor:C_0603_1608Metric | C2 |
| 1 | 220uF_10V | Capacitor_THT:CP_Radial_D6.3mm_P2.50mm | C1 |
| 1 | GY-521 | GY-521:MODULE_GY-521 | U2 |
| 1 | LOGO | LOGO | G*** |
| 1 | SW_Nidec_CAS-120A1 | Button_Switch_SMD:Nidec_Copal_CAS-120A | SW1 |
| 1 | XIAO-ESP32-S3-SMD | Seeed_Studio_XIAO_Series:XIAO-ESP32-S3-SMD | U1 |
The 29 most common of 30 parts.
It measures 61.8 × 38.8 mm and has 2 copper layers, 1.6 mm thick.
30 parts, built around the AO3400A and 220UF 10V 5*7. The full list of its parts is on this page, with links to each part's symbol and footprint where PCBKit's library has them.
From the RishitJain-dev/Flightime repository on GitHub, at the commit this page was made from: the board is PCB/Flightime.kicad_pcb and its schematic PCB/Flightime.kicad_sch. PCBKit opens the board in the browser, with nothing to install.
Its repository states no licence, so its author keeps all rights: ask RishitJain-dev before reusing the design.


hubertciebiada/open-ambient-sensor
OAS — Open Ambient Sensor: DIY multi-sensor indoor environmental monitor (CO2, PM, VOC/NOx, temperature/humidity, mmWave presence) on ESP32-C6 with ESPHome / Home Assistant integration


