4 layers44.4 × 34 mm

 ReflexCreations/multi-midi8
(Hardware): A MIDI input box with buffered multiple outputs.
Multi midi is an open-source printed circuit board by ReflexCreations, from the ReflexCreations/multi-midi repository on GitHub, published under the MIT licence. It is a 2-layer board of 101.2 × 71.1 mm with 60 parts on 47 nets, routed with 392 tracks and 23 vias.
It is built around the LM358, SDFL2012S100KTF and 1N4148W. Its parts include 18 resistors, 18 inductors, 13 connectors, 6 capacitors and 3 ICs. It belongs with the audio and music boards of this library.


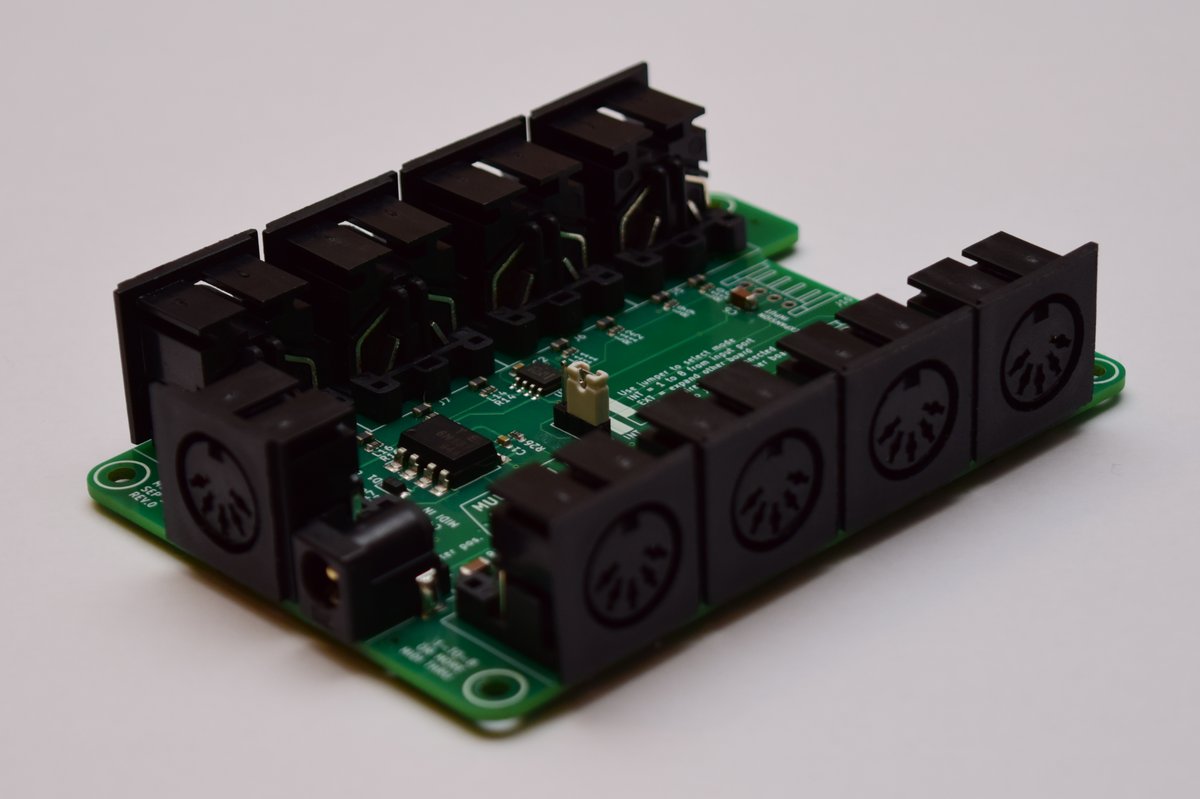
Multi-MIDI is a 1-to-8 or more MIDI thru box. This is definitely not a novel idea, but it's mainly for fun and to keep it cheap. Everything here was made with open source software and with the publicly available MIDI specifications.
All the files are available, so you can make your own. In brief, what you'll need to get the full thing:
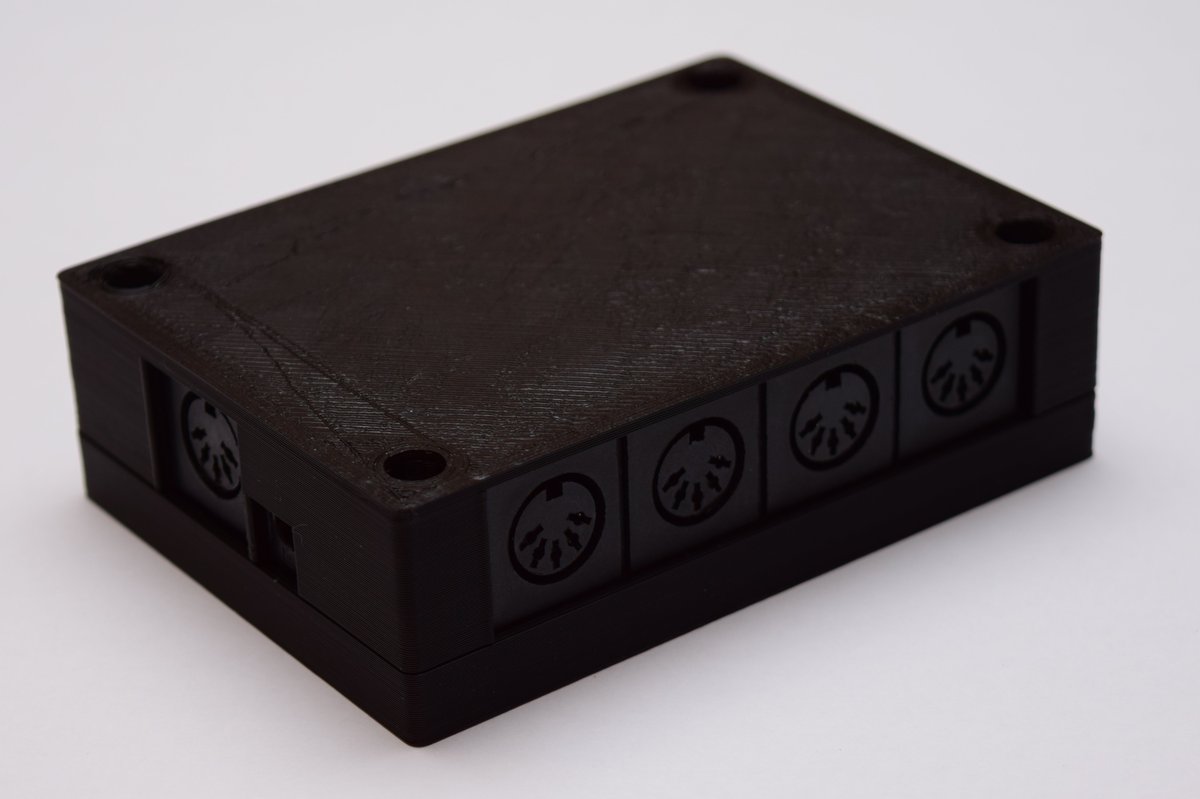
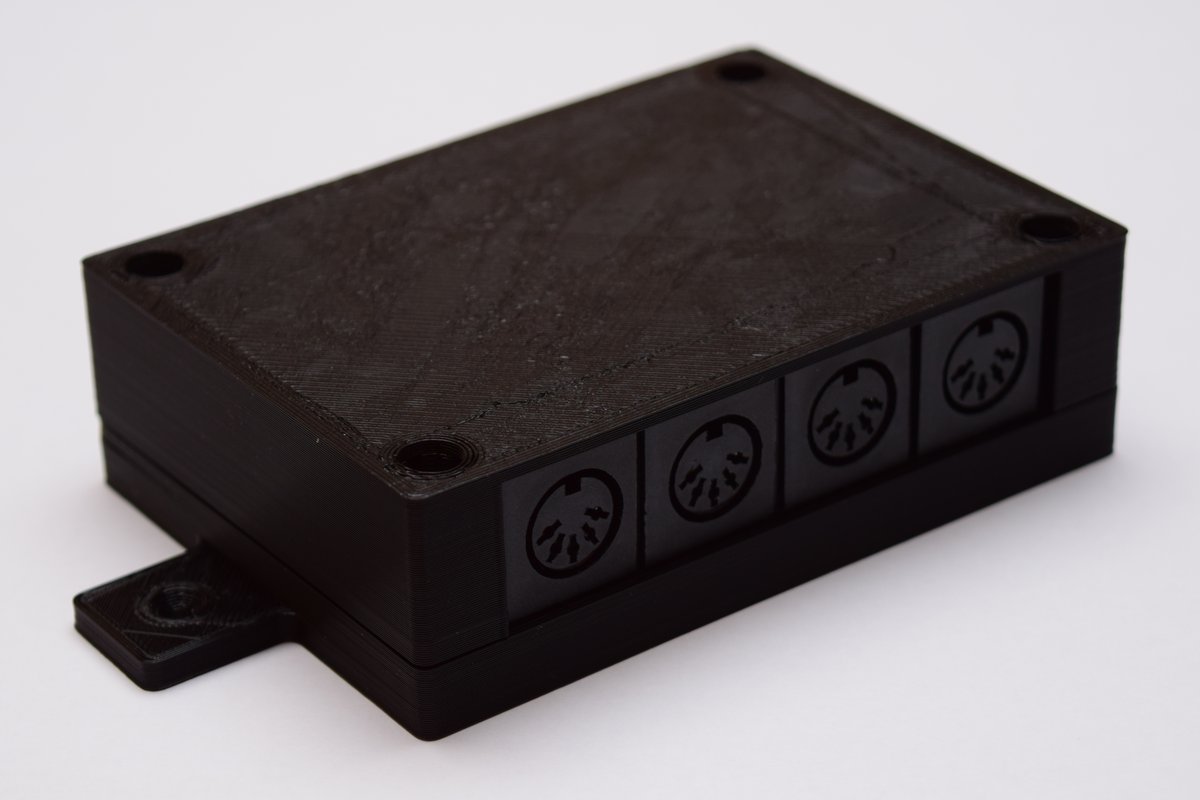
The tab shown above is for mounting, for example, to the back of a cabinet.
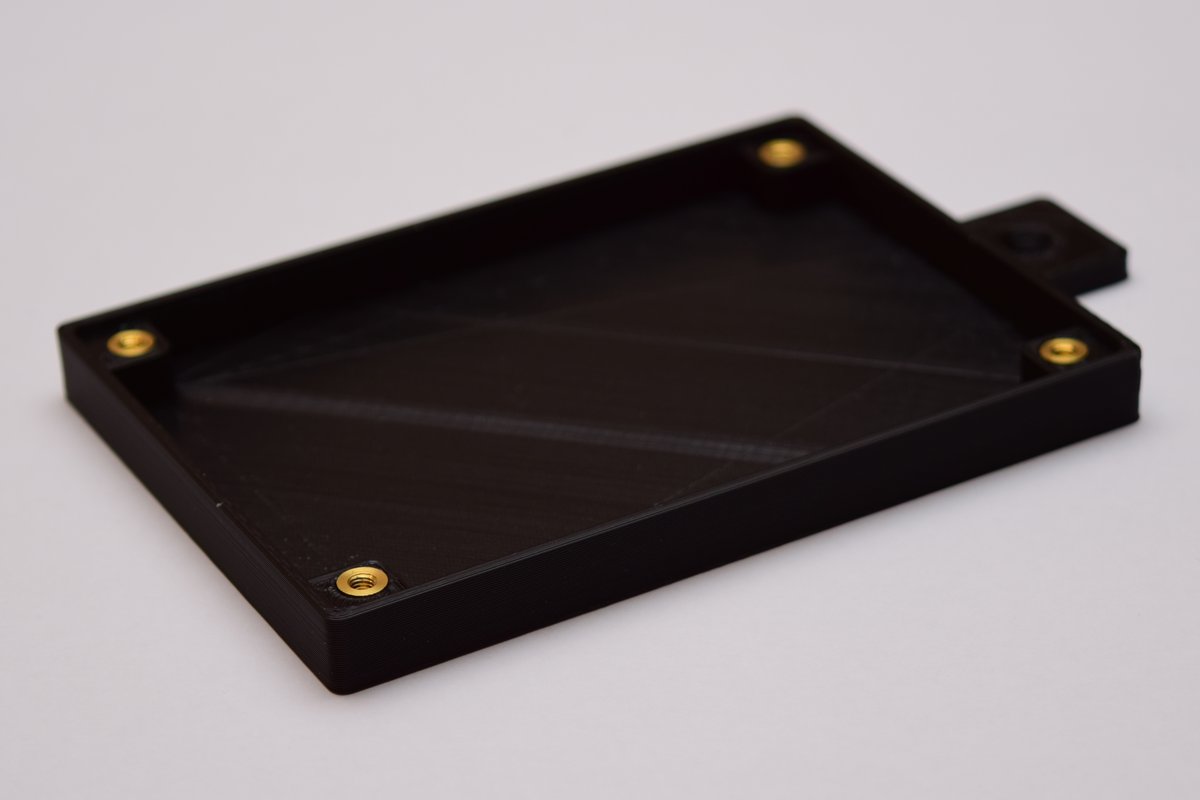
Heat-set threaded inserts go into the bottom part of the case's screwholes, allowing the use of M3 machine screws to assemble the box.
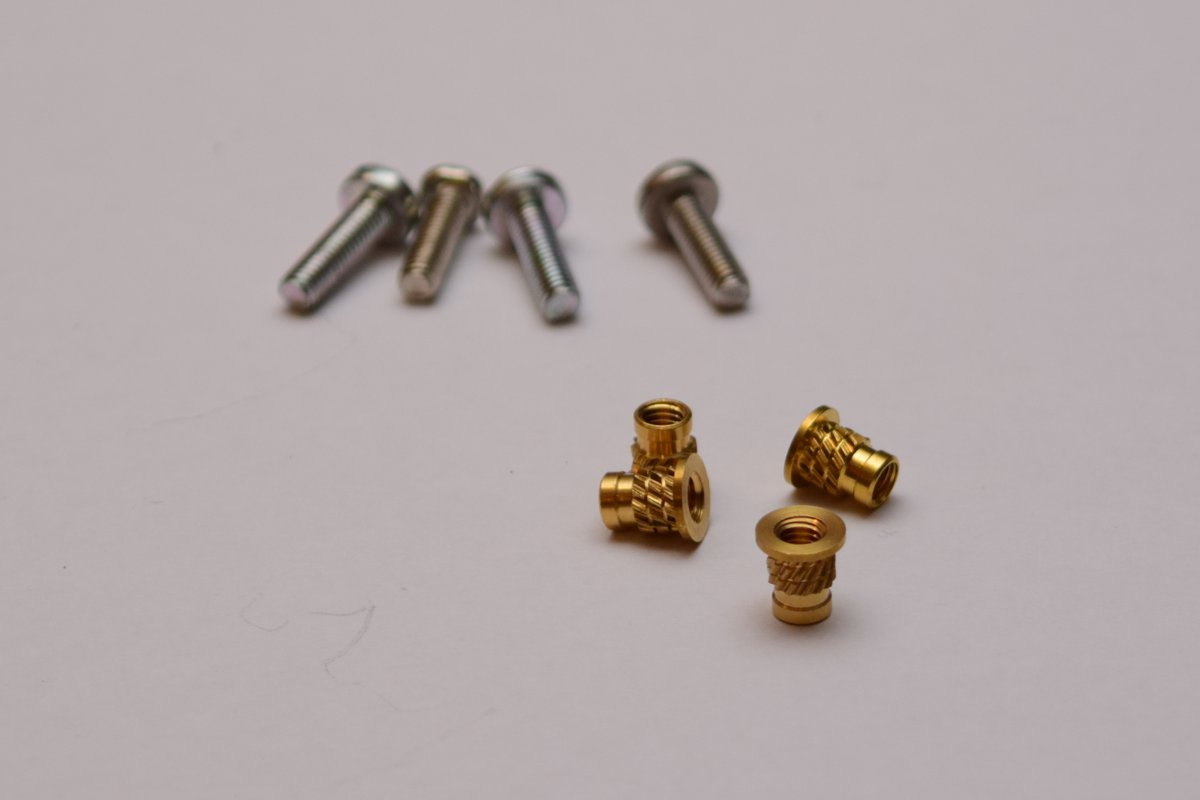
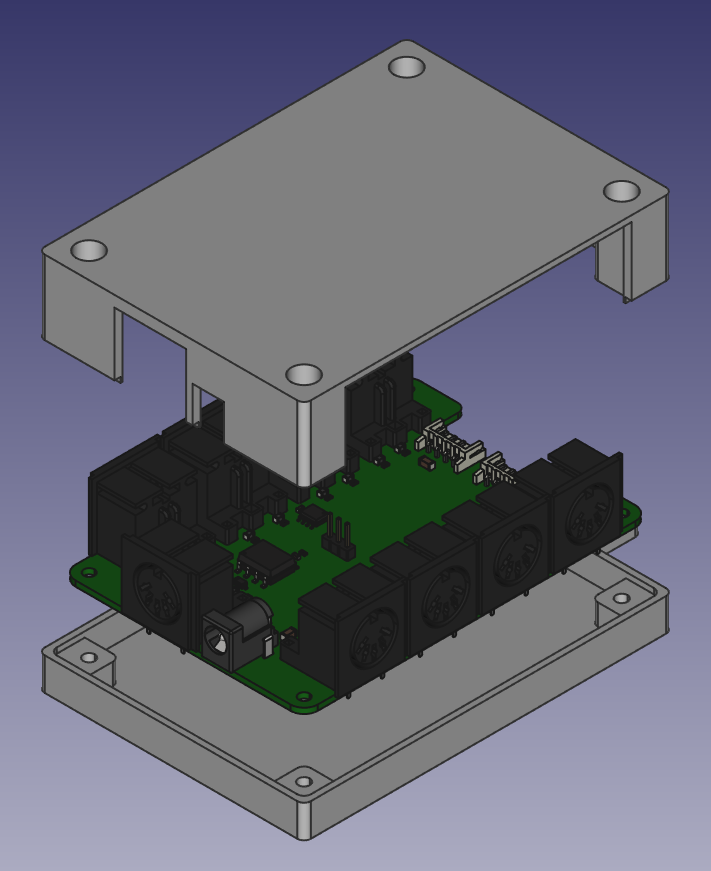
Exploded view of the case and circuit board, in FreeCAD
The least-work way is to order the Printed Circuit board (PCB) assembled from JLCPCB. You can also order a bare board from any PCB prototyping place, and then source and solder all the components yourself.
Go to the Latest release and download the .zip file ending in .gerber.zip. This contains all the PCB fabrication outputs from KiCAD. Alternatively, clone or download this repository, open the project from the pcb/multi-midi folder in KiCad and export the gerber files yourself.
Download the BOM file, ending in .jlc.bom.csv. This contains a list of all the parts that JLCPCB will supply and install themselves.
Download the "centroid" position file, ending in .jlc.top-pos.csv. This contains the positions and orientations for the parts JLCPCB will assemble.
If you want, you can generate the latter two files yourself, but this is trickier than generating the gerber files since a 3rd party script needs to be installed, and output files manually edited to work with JLCPCB. Documentation: How to generate the BOM and Centroid file from KiCAD
.gerber.zip file from above.jlc.bom.csv file.jlc.top-pos.csv file from earlierThe remaining parts are as follows:
Deltron 671-0501 or equivalent. Some possible sources:
Wurth Elektronik 694106301002 Some possible sources:
If you plan to connect more than one board together, you'll also want some connectors for the right hand side:
2x JST PH 4 way Right angle connector: JST S4B-PH-K-S(LF)(SN) Possible sources:
8x JST PH Crimp contact JST BPH-002T-P0.5S Possible sources:
Wire (24 AWG thickness), enough for 4 lengths of however long you want the connecting cable to be - can be found on eBay, Amazon, various electric supplies stores
A crimping tool like Fdit SN-28B
Alternatively, find some pre-crimped cables, possibly on aliexpress; then you don't need the crimp contacts, wire, and crimping tool.
Fairly evident where each of them go, though a more detailed guide here could be helpful. Pull requests welcome. :-)
If you're not planning to expand the board with another, you can leave out the JST connectors. In stead of the 3 pin header + jumper, you can use a spare piece of wire or component lead cutoff, and connect the bottom two holes for the pin header connector that way.
On the pin header in the middle of the board, push a jumper down over the bottom two pins, as demonstrated on the board, for "INT" mode.
To power this thing you need a power supply that outputs 5V. The rated current is pretty irrelevant as this circuit will not draw more than 100 milliamps. To be compatible with the barrel jack on the board, it needs a barrel connector with a pin size of 2.1mm (2mm works too) and outer diameter of 5mm. It needs to be center positive. Generally can be found on eBay or Amazon or any number of places. One of those with switchable connectors can also work. A USB charger + a USB->barrel connector cable would also work just fine.
Let's first define a few terms:
With that out of the way, here's how you use the Multi-MIDI:
If you have two of these boards, you can connect them together in 2 possible configurations:
Let's define "board 1" as the first board where you've got MIDI input and the power supply connected.
"Board 2" will be the one we're connecting up to board 1 to expand its functionality.
Note that at this time, there is only a case design for a single board. If you decide to stack more than one board to create an expanded device, you may want to adapt the case design to be larger, to accomodate both. There is a clearing provided in the PCB design to allow connecting cables between the boards internal to a box, for this purpose.
At this time, it's unknown what common issues might occur in this process. If you're having any issues, please open an issue on GitHub and we can help resolve it / potentially improve documentation.
A CSV file for this table is also available in the release downloads.
| Quantity | Reference | Value | Footprint | LCSC Component No. | Mfr. Part No. |
|---|---|---|---|---|---|
| 4 | C1 – C4 | 100n | 0603 / 1608Metric | C14663 | |
| 2 | C5 - C6 | 47u | 1206 / 3216 Metric | C96123 | |
| 1 | D1 | 1N4148W | SOD-123 | C81598 | |
| 2 | J10 - J11 | Conn_01x04_Male | JST_EH_S4B-EH_1x04_P2.50mm_Horizontal | JST S4B-PH-K-S(LF)(SN) | |
| 1 | J12 | Barrel_Jack_Switch | BarrelJack_Wuerth_6941xx301002 | Wurth 694106301002 | |
| 1 | J13 | Conn_01x03_Male | PinHeader_1x03_P2.54mm_Vertical | ||
| 9 | J1 – J9 | DIN-5_180degree | Custom: Deltron 671-0501 | Deltron 671-0501 | |
| 18 | L1 - L18 | SDFL2012S100KTF | 0805 / 2012 Metric | C1046 | |
| 17 | R1 – R17 | 220 | 0603 / 1608 Metric | C22962 | |
| 1 | R26 | 10k | 0603 / 1608 Metric | C25804 | |
| 2 | U1 – U2 | LM358 | SOIC-8_3.9x4.9mm_P1.27mm | C7950 | |
| 1 | U3 | 6N137 | SSO-8_6.7x9.8mm_P2.54mm_Clearance8mm | C110020 |
As per the MIDI electrical spec, a MIDI input should be driven through an opto-isolator. In this case that's the 6N137. The MIDI input signal
drives just the LED in the opto-isolator, so it is completely electrically isolated from the rest of the circuit.
D1 is a protection diode, connected the opposite way compared to the opto-isolator's diode. This provides a short-circuit path in case the incoming MIDI is polarised the wrong way,
ensuring the opto-isolator doesn't get reverse-biased, and potentially broken.
The output of the opto-isolator is connected to opamps (LM358) set up in a voltage follower configuration. These act as buffers for the signal, able to drive a bit more current than the opto-isolator can supply. The circuit is set up to supply the signal for 2 outputs per voltage follower; so for all 8, 4 opamps are needed.
Further, there are 220 ohm resistors to limit the current through the opto-isolator diode on the receiving end, as well as small inductors which are meant to filter out high frequency noise, such as from low quality power supplies.
A jumper in the middle of the board selects which source of MIDI should be buffered out to the output ports. Either "INT" (MIDI coming in from the on-board MIDI in port through the opto-isolator, or "EXT", coming in through the "Expansion input" connector. Not connecting a jumper to either will result in no MIDI making it to the output ports.
| Qty | Value | Footprint | References |
|---|---|---|---|
| 18 | SDFL2012S100KTF | Inductor_SMD:L_0805_2012Metric | L1, L2, L3, L4, L5, L6, L7, L10, L11, L12, L13, L14, L15, L16, L17, L18 +2 |
| 17 | 220 | Resistor_SMD:R_0603_1608Metric | R1, R2, R3, R4, R5, R6, R7, R8, R10, R11, R12, R13, R14, R15, R16, R17 +1 |
| 9 | DIN-5_180degree | multi-midi:DIN-5 | J1, J2, J3, J4, J5, J6, J7, J8, J9 |
| 4 | 100n | Capacitor_SMD:C_0603_1608Metric | C1, C2, C3, C4 |
| 2 | 47n | Capacitor_SMD:C_1206_3216Metric | C5, C6 |
| 2 | Conn_01x04_Male | Connector_JST:JST_EH_S4B-EH_1x04_P2.50mm_Horizontal | J10, J11 |
| 2 | LM358 | Package_SO:SOIC-8_3.9x4.9mm_P1.27mm | U1, U2 |
| 1 | 10k | Resistor_SMD:R_0603_1608Metric | R26 |
| 1 | 1N4148W | Diode_SMD:D_SOD-123 | D1 |
| 1 | 6N137 | Package_SO:SSO-8_6.7x9.8mm_P2.54mm_Clearance8mm | U3 |
| 1 | Barrel_Jack_Switch | Connector_BarrelJack:BarrelJack_Wuerth_6941xx301002 | J12 |
| 1 | Conn_01x03_Male | Connector_PinHeader_2.54mm:PinHeader_1x03_P2.54mm_Vertical | J13 |
| 1 | LOGO | multi-midi:logo-mono-12.1-3.3 | G*** |
It measures 101.2 × 71.1 mm and has 2 copper layers, 1.6 mm thick.
60 parts, built around the LM358, SDFL2012S100KTF and 1N4148W. The full list of its parts is on this page, with links to each part's symbol and footprint where PCBKit's library has them.
From the ReflexCreations/multi-midi repository on GitHub, at the commit this page was made from: the board is pcb/multi-midi/multi-midi.kicad_pcb. PCBKit opens the board in the browser, with nothing to install.
Its repository publishes it under the MIT licence: you may reuse it on that licence's terms (keep the author's notice, and for a copyleft licence share your changes alike).

mgkoenig/lyft
LYFT is a sophisticated remote control for your IKEA BEKANT desk.


Millisman/EG8010
Collection of designs for the EG8010 (ASIC for single-phase SPWM control H-bridge)

fwachsmuth/Filmkorn-Raw-Scanner
The Filmkorn Raw Scanner, turning 8mm and 16mm films into lossless 12-bit CinemaDNG


4rynv/VacDepoctrl
Open source firmware for a automation of vacuum systems controlled using Raspberry pi