

2 layers165.1 × 110 mm
Bachelor's Thesis 2026
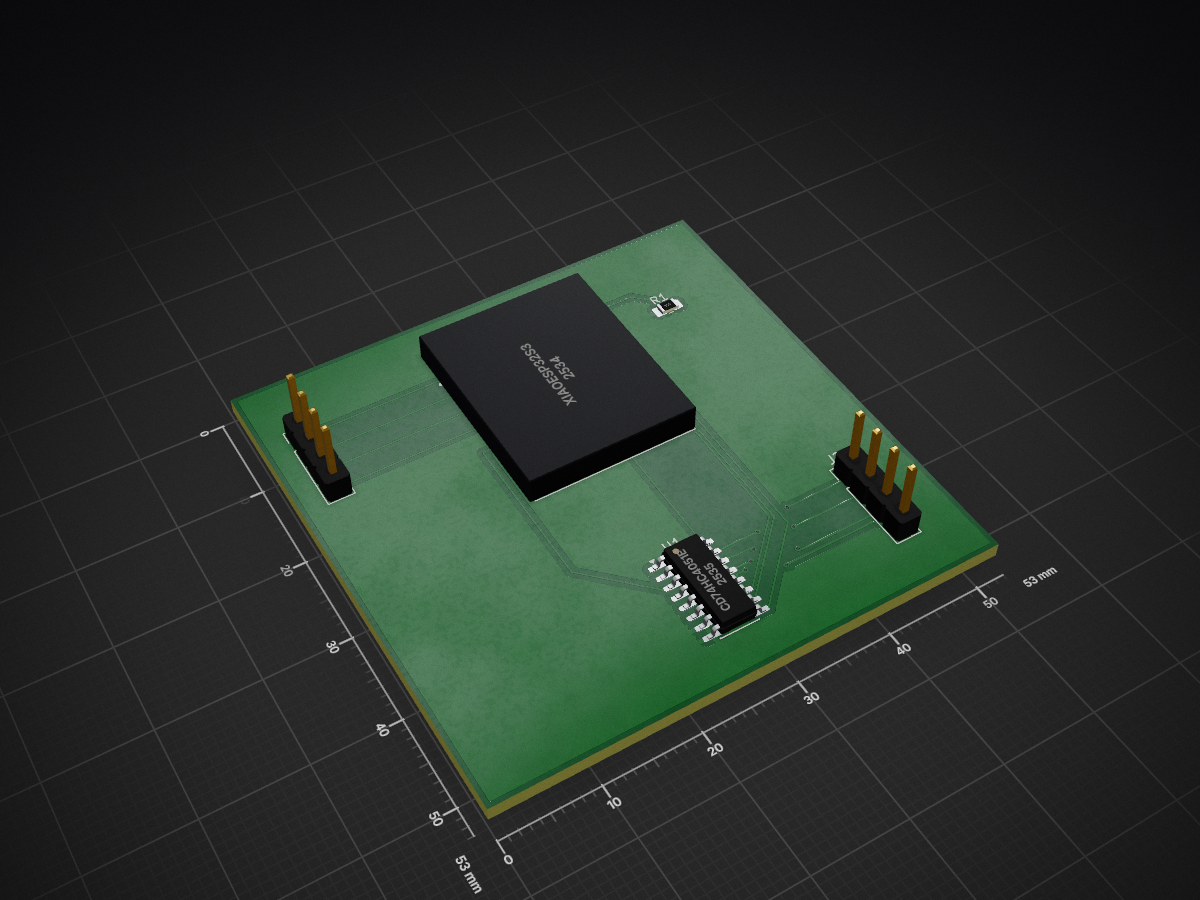
KandityöSchematic is an open-source printed circuit board by rafinjahan, from the rafinjahan/Object_Detection_Using_A_Smart_Pressure_Sensing_Textile_Mat repository on GitHub. It is a 2-layer board of 53 × 53 mm with 5 parts on 23 nets, routed with 62 tracks and 8 vias.
It is built around the CD74HC4051E. Its parts include 2 ICs, 2 connectors and 1 resistor. It belongs with the ESP32 boards of this library.
This repository contains the Python code and dataset for my bachelor thesis. The project uses a 4x4 woven piezoresistive pressure mat to classify everyday kitchen objects. It uses a Random Forest machine learning model to read the pressure footprint and total weight. I designed a custom printed circuit board using KiCad to upgrade the original breadboard prototype. This custom PCB connects the textile mat directly to the microcontroller and multiplexer for a reliable system. You can see 3D screenshots of the finished board in the images folder.
code/ contains all Python scripts.data/ contains CSV datasets and measurement files.hardware/ contains the KiCad PCB project and Gerber manufacturing files and the 3D model of the PCB.images/ contains generated PNG plots and confusion matrices.thesis/ contains thesis-related files.data/tablecloth_dataset_flattened.csv contains the recorded dataset of physical placements.code/thesis_project.py reads serial data and saves new placements to the dataset.code/live_classifier.py trains the model and shows real time predictions on a heatmap.code/confusin_matrix_result.py calculates grouped cross validation accuracy and generates the confusion matrix.The microcontroller scans the 16 sensor nodes on the fabric. Custom data acquisition software stabilizes the analog signals and filters out background noise. The system sends the pressure data to a computer for real time visualization and recording. The Python script reads this data stream and updates a visual heatmap. The system includes a noise limit of 150 ADC units. When the pressure goes above this limit the Random Forest model predicts which object is on the mat.
The dataset includes eight different classes.
Future improvements could include increasing the spatial resolution of the textile sensor. Another step is deploying the trained classifier directly on the microcontroller using a TinyML framework to improve user privacy.
The physical setup requires connecting the textile matrix to the microcontroller and multiplexer.
Before running the Python scripts, you must program the microcontroller and verify it is reading the sensors correctly.
.ino file in the Arduino IDE and upload it to the microcontroller.The software pipeline requires Python 3 and several scientific computing libraries.
pip install pandas numpy scikit-learn matplotlib pyserial
The data collection script reads raw analog values from the serial port and visualizes the spatial pressure distribution.
python data_collection.py.tablecloth_dataset_flattened.csv.The machine learning model uses the collected CSV dataset to train the Random Forest classifier.
python model_evaluation.py.| Qty | Value | Footprint | References |
|---|---|---|---|
| 1 | (D0-D3) | Connector_PinHeader_2.54mm:PinHeader_1x04_P2.54mm_Vertical | J1 |
| 1 | (Y0-Y3) | Connector_PinHeader_2.54mm:PinHeader_1x04_P2.54mm_Vertical | J2 |
| 1 | 10k | Resistor_SMD:R_0805_2012Metric_Pad1.20x1.40mm_HandSolder | R1 |
| 1 | CD74HC4051E | Package_SO:SOIC-16_3.9x9.9mm_P1.27mm | U1 |
| 1 | XIAOESP32S3 | Library:MODULE_XIAO_ESP32_S3 | U2 |


Javitax47/NLTL_Lite
Implementación pasiva de cinemática relativista general Agujeros negros · Agujeros blancos · Arrastre de marco · Proceso de Penrose · Lensing gravitacional · Solitones PCB 150 × 150 mm · 857 componentes · 37…


FreeYourStream/freedeck-hardware
all the stuff you need to build your own FreeDeck

It measures 53 × 53 mm and has 2 copper layers, 1.6 mm thick.
5 parts, built around the CD74HC4051E. The full list of its parts is on this page, with links to each part's symbol and footprint where PCBKit's library has them.
From the rafinjahan/Object_Detection_Using_A_Smart_Pressure_Sensing_Textile_Mat repository on GitHub, at the commit this page was made from: the board is hardware/kandityöSchematic.kicad_pcb and its schematic hardware/kandityöSchematic.kicad_sch. PCBKit opens the board in the browser, with nothing to install.
Its repository states no licence, so its author keeps all rights: ask rafinjahan before reusing the design.