Micro mouse prashant
Meshmerize MicroMouse Project
- Size
- 95.8 × 73 mm
- Copper layers
- 2
- Thickness
- 1.6 mm
- Parts
- 28
- Nets
- 36
- Pads
- 106
- Tracks, vias
- 158, 12
- Pours
- 5
- Routed
- Yes
- KiCad
- KiCad 9.0 (file 20241229)
- Created
- 26 Mar 2025
- Updated
- 25 Sep 2025
Overview
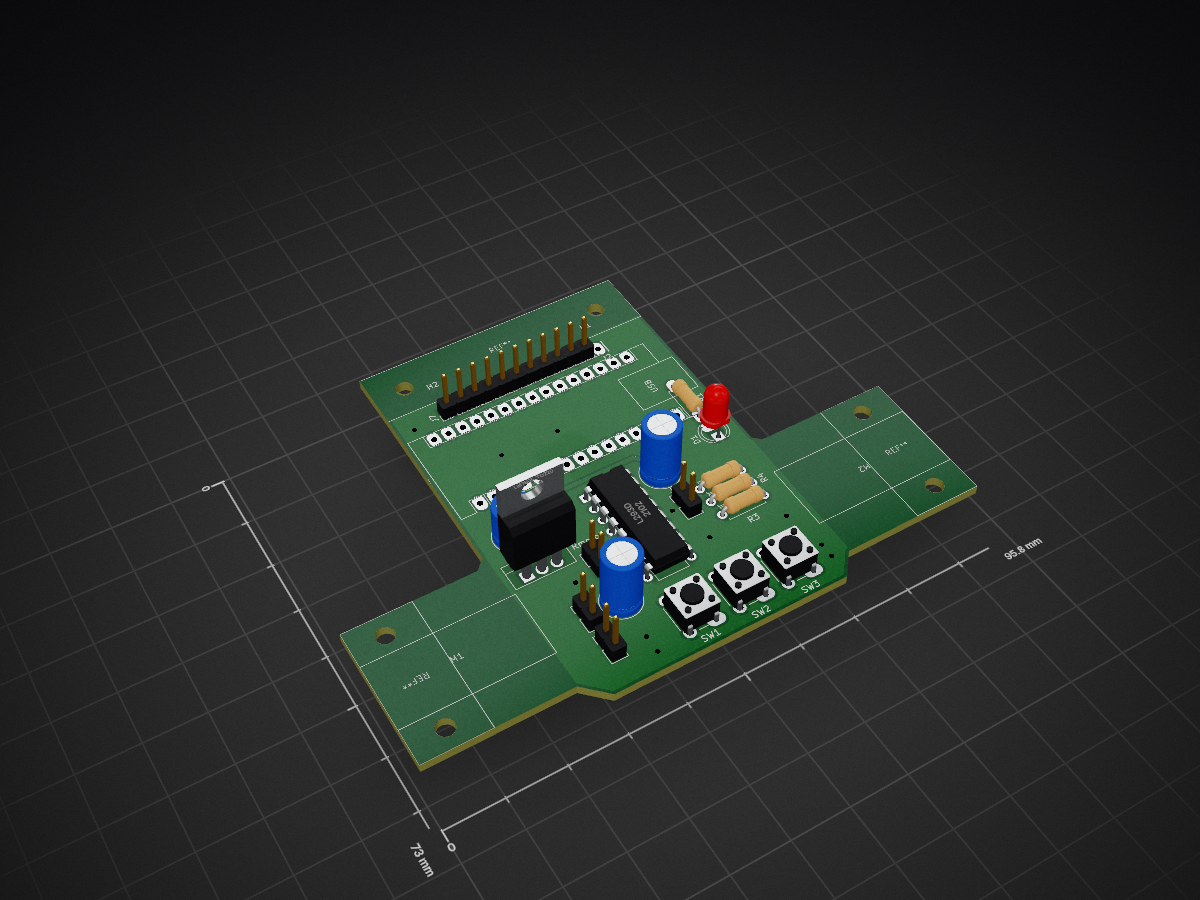
Micro mouse prashant is an open-source printed circuit board by prashantbhandary, from the prashantbhandary/MicroMouse-LineMaze repository on GitHub. It is a 2-layer board of 95.8 × 73 mm with 28 parts on 36 nets, routed with 158 tracks and 12 vias.
It is built around the L293D. Its parts include 6 connectors, 4 resistors, 3 capacitors, 3 switches and 2 ICs. It belongs with the ESP32 and AVR (ATmega, ATtiny) boards of this library.
Main components
1README
README.md🤖 Meshmerize MicroMouse Project
A comprehensive autonomous line-following and maze-solving robot project featuring multiple hardware iterations, advanced algorithms, and professional PCB designs.
🏆 Competition Achievements
Our MicroMouse has proven its excellence in prestigious robotics competitions:
- 🥇 1st Place - Locus, Pulchowk Campus
- 🥈 2nd Place - Delta 5.0, Dharan IOE
- 🏅 5th Place - Techfest, IIT Bombay 2024
Certificate of Achievement from IIT Bombay Techfest 2024
📋 Table of Contents
- 🎯 Project Overview
- ✨ Key Features
- 🔧 Hardware Versions
- 💻 Software Architecture
- 🚀 Getting Started
- 📁 Repository Structure
- 🛠️ Installation & Setup
- 🎮 Usage Instructions
- 🧠 Algorithms & Control Systems
- 📷 Project Gallery
- 🤝 Contributing
- 📄 License
🎯 Project Overview
The Meshmerize MicroMouse is an autonomous robot designed to navigate line-following courses and solve complex mazes. This project showcases the evolution of robotics engineering through multiple hardware iterations, from Arduino Nano-based prototypes to advanced ESP32-powered systems.
What Makes This Project Special?
- Multiple Hardware Generations: Evolution from v1.0 to v3.1 with continuous improvements
- Dual Platform Support: Both Arduino Nano and ESP32 implementations
- Professional PCB Design: Custom-designed circuit boards using KiCad
- Advanced Algorithms: LSRB maze-solving with optimized PID control
- Competition-Tested: Proven performance in national and international competitions
✨ Key Features
🎯 Navigation Capabilities
- Line Following: Precise black/white line detection and following
- Maze Solving: Autonomous exploration and shortest path execution
- Multi-Surface Support: Adaptable to different track conditions
⚡ Performance Optimization
- PID Control System: Smooth and accurate movement control
- Speed Management: Adaptive speed control for different track sections
- Sensor Calibration: Advanced sensor tuning for reliable detection
🔧 Hardware Excellence
- Custom PCB Design: Professional circuit board layouts
- Modular Architecture: Easy maintenance and upgrades
- Power Management: Efficient voltage regulation for all components
🔧 Hardware Versions
Arduino Nano Series
Version 1.0 - Prototype
- Microcontroller: Arduino Nano
- Motor Driver: L293D
- Sensors: QTR-8A analog sensor array
- Status: Initial prototype and testing phase
Version 2.0 - Enhanced Performance
- Microcontroller: Arduino Nano (optimized)
- Motor Driver: SparkFun TB6612FNG
- Sensors: 8-channel QTR sensor array
- Improvements: Better motor control, enhanced PID tuning
- PCB: Custom-designed v2.0 PCB
Version 3.0/3.1 - Professional Grade
- Microcontroller: Arduino Nano
- Features: Professional PCB design with improved layout
- Status: Competition-ready version
ESP32 Series
ESP32 Version 1.0
- Microcontroller: ESP32 DevKit
- Development: PlatformIO-based development
- Features:
- Wireless capabilities
- Higher processing power
- Advanced sensor integration
- PCB: Custom ESP32-based PCB design
💻 Software Architecture
Programming Platforms
- Arduino IDE: Traditional Arduino Nano development
- PlatformIO: Advanced ESP32 development with better library management
Key Libraries
#include <SparkFun_TB6612.h> // Motor control library
#include <QTRSensors.h> // Sensor array libraryAlgorithm Implementation
- LSRB Algorithm: Left-Straight-Right-Back priority maze solving
- PID Control: Proportional-Integral-Derivative control for smooth movement
- Path Optimization: Shortest path calculation and execution
🚀 Getting Started
Prerequisites
- Arduino IDE or PlatformIO
- USB cable for programming
- Basic electronics knowledge
- Robotics track or maze for testing
Quick Setup
-
Clone the repository
bash git clone https://github.com/prashantbhandary/Meshmerize-MicroMouse-.git cd Meshmerize-MicroMouse- -
Choose your platform
- For Arduino Nano: Navigate to
ArduinoNano/folder - For ESP32: Navigate to
Esp32/folder
- For Arduino Nano: Navigate to
-
Select the appropriate version
- Pick the version that matches your hardware setup
- Latest versions recommended for best performance
📁 Repository Structure
📦 Meshmerize-MicroMouse-
├── 🔧 ArduinoNano/
│ ├── 🧪 arduno_nano_v1_TestingCode/
│ │ ├── arduino_sensor_test2.0/
│ │ ├── black_line_maze_2.0/
│ │ ├── motor-testing/
│ │ └── night_nano/
│ ├── 📋 micro_mouse_v1-files/
│ │ ├── codes/ (Line follower, maze solving, testing)
│ │ └── design/ (3D models, PCB files)
│ ├── 🚀 micro_mouse_v2-files/
│ │ ├── BlackLineMazeFinal_v2-Code/
│ │ ├── LineFollowerPid_v2-Code/
│ │ ├── WhiteLineMazeFinal_v2-Code/
│ │ └── micro_mouse_v2-pcb/
│ └── 🏆 micro_mouse_v3_files/
│ ├── micro_mouse_prashant/
│ ├── micro_mouse_v3.0-PCB/
│ └── micro_mouse_v3.1-PCB/
├── 📡 Esp32/
│ ├── LineFolloweEsp32_v1_code/
│ ├── micromouseEsp32_v1_PCB/
│ └── testing_esp32_v1_code/
├── 📸 IMG/🛠️ Installation & Setup
For Arduino Nano Versions
-
Install Required Libraries
text - SparkFun TB6612 Motor Driver Library - QTRSensors Library -
Hardware Setup
- Connect QTR sensors to analog pins A0-A7
- Wire motor drivers according to pin definitions
- Connect control switches and LED indicators
-
Upload Code
- Open the desired version in Arduino IDE
- Select Arduino Nano board
- Upload the code
For ESP32 Version
-
PlatformIO Setup
bash cd Esp32/LineFolloweEsp32_v1_code/Micromouse/ pio run --target upload -
Hardware Configuration
- Follow ESP32 pin definitions in the code
- Ensure proper power supply (3.3V/5V compatibility)
🎮 Usage Instructions
Initial Setup
-
Calibration Phase
- Press switch 1 to start sensor calibration
- Move the robot over the line during calibration
- LED indicator confirms successful calibration
-
Mode Selection
- Switch 2: Left-hand rule (LHS) priority
- Switch 3: Right-hand rule (RHS) priority
-
Start Operation
- Press switch 1 again to begin line following/maze solving
- Robot will autonomously navigate the course
Operating Modes
Line Following Mode
- Robot follows black line on white surface (or vice versa)
- PID control ensures smooth tracking
- Adaptive speed control for optimal performance
Maze Solving Mode
- Exploration Phase: Robot maps the entire maze
- Optimization Phase: Calculates shortest path
- Execution Phase: Runs the optimized route
🧠 Algorithms & Control Systems
LSRB Algorithm (Left-Straight-Right-Back)
// Priority decision making
if (left_path_available) {
turn_left();
} else if (straight_path_available) {
move_forward();
} else if (right_path_available) {
turn_right();
} else {
turn_back(); // Dead end
}PID Control System
// PID calculation for smooth movement
error = sensor_position - desired_position;
derivative = error - lastError;
correction = (kp * error) + (kd * derivative);
motor_speed_adjustment = base_speed ± correction;Key Parameters
- Base Speed: 130-255 (adjustable per version)
- Kp (Proportional): 0.05-0.151 (tuned per hardware)
- Kd (Derivative): 0.1-0.8 (optimized for stability)
📷 Project Gallery
🤖 Robot Images
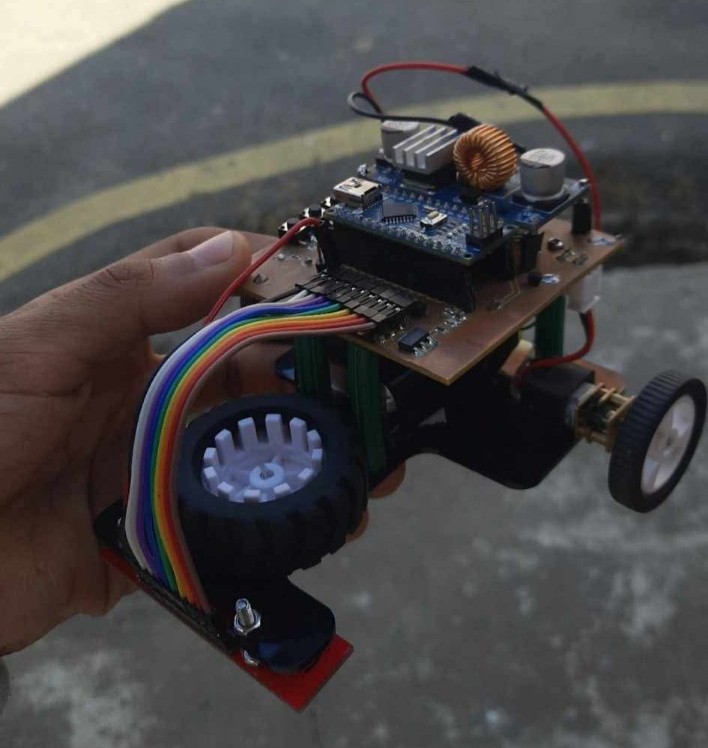
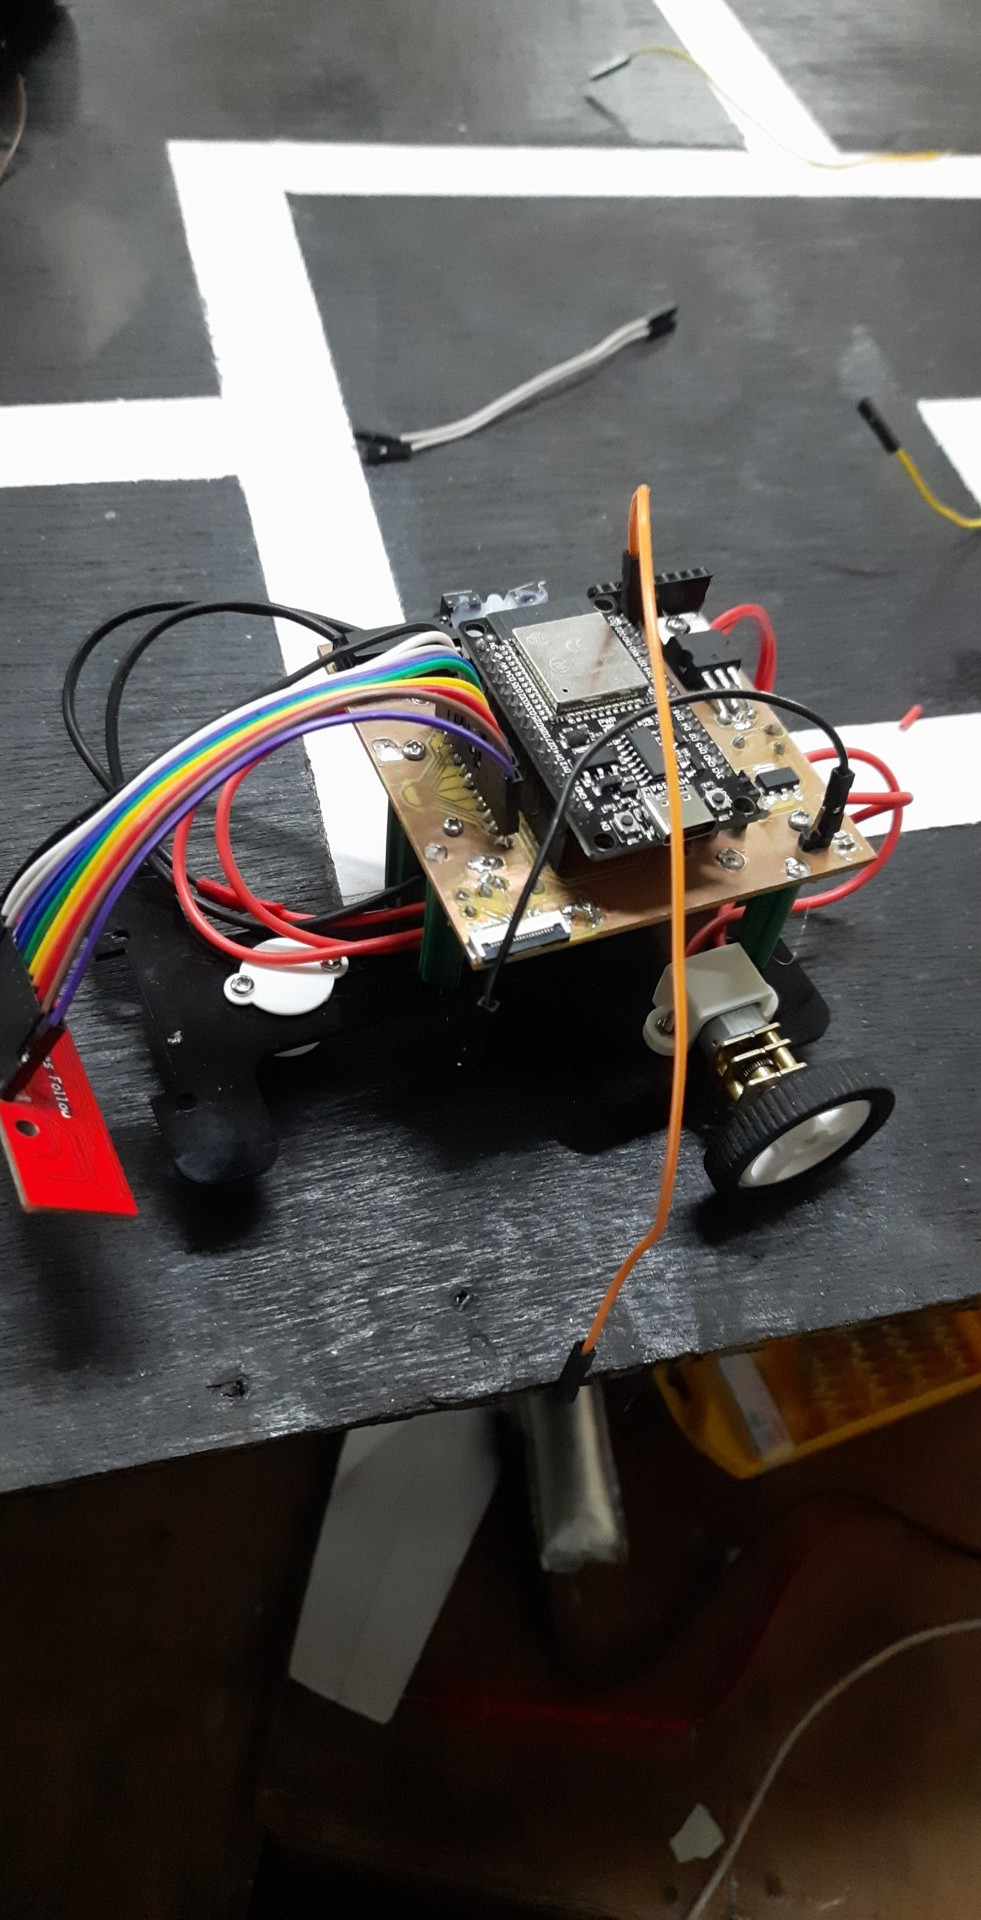
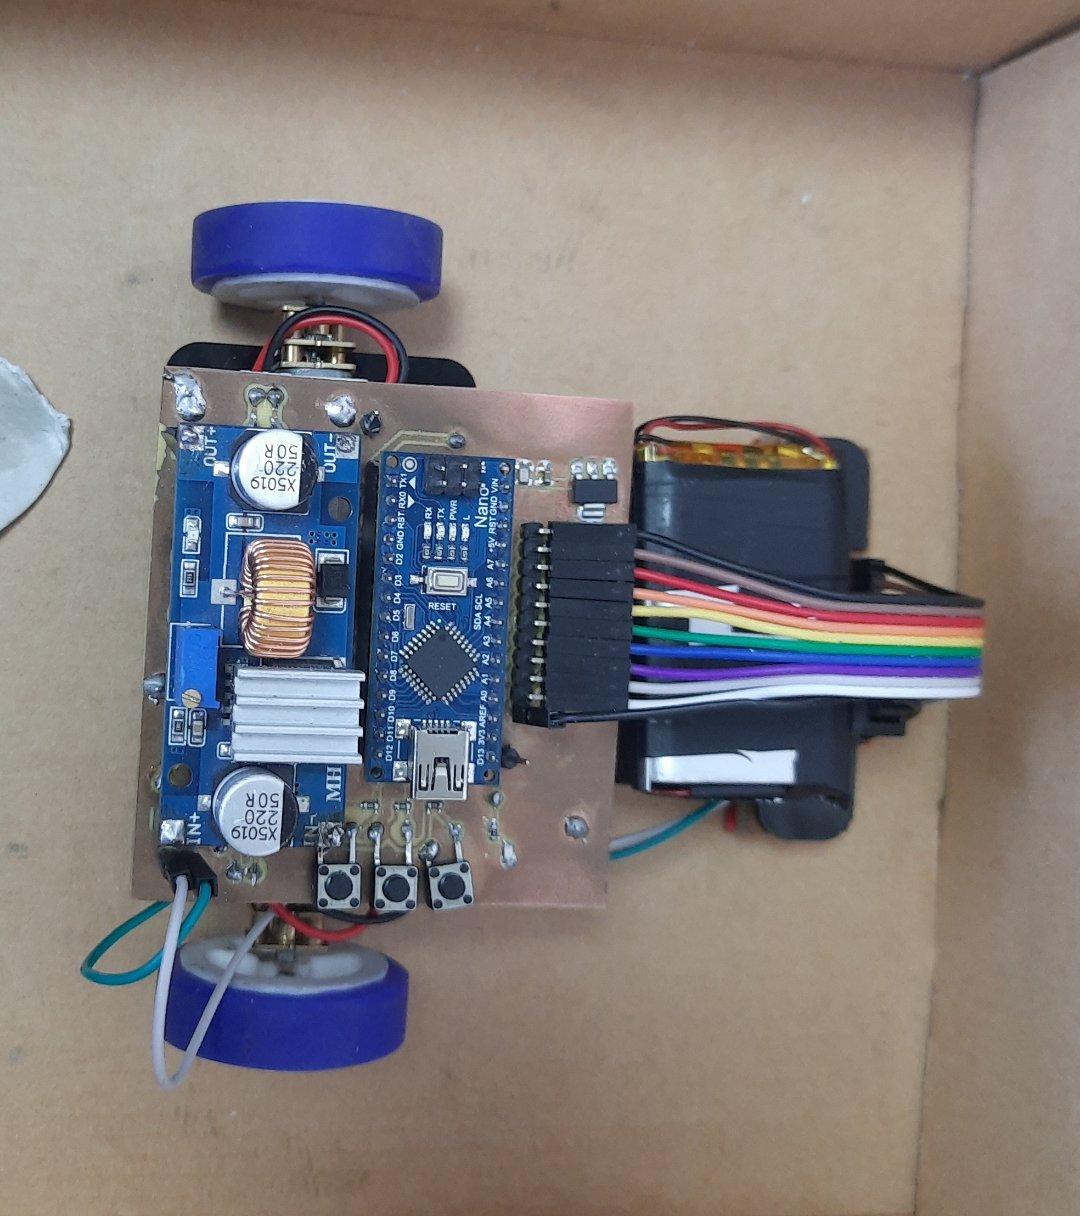
![]() | ![]() |
|---|---|
| Side Profile | Front View |
Competition Ready Configuration
🎥 Demo Videos
▶️ Watch MicroMouse in Action
Live demonstration from IIT Bombay competition
▶️ Advanced Maze Solving Demo
Complex maze navigation showcase
🤝 Contributing
We welcome contributions to improve the MicroMouse project! Here's how you can help:
Ways to Contribute
- 🐛 Bug Reports: Found an issue? Let us know!
- 💡 Feature Requests: Suggest new capabilities
- 🔧 Code Improvements: Optimize algorithms or add new features
- 📚 Documentation: Help improve guides and tutorials
- 🔬 Testing: Try different hardware configurations
Development Setup
- Fork the repository
- Create a feature branch (
git checkout -b feature/AmazingFeature) - Make your changes
- Test thoroughly with hardware
- Commit your changes (
git commit -m 'Add AmazingFeature') - Push to the branch (
git push origin feature/AmazingFeature) - Open a Pull Request
📞 Contact & Support
- Project Maintainer: Prashant Bhandary
- GitHub: @prashantbhandary
- Repository: Meshmerize-MicroMouse-
- Portfolio Website: 🌐 bhandari-prashant.com.np
Getting Help
- 📋 Issues: Use GitHub Issues for bug reports
- 💬 Discussions: Join repository discussions for general questions
- 📖 Wiki: Check the wiki for detailed guides (coming soon)
📄 License
This project is licensed under the MIT License - see the LICENSE file for details.
What this means:
- ✅ Use in personal and commercial projects
- ✅ Modify and distribute freely
- ✅ Include in other projects
- 📋 Attribution required
🌟 Star this project if you found it helpful!
Made with ❤️ by the Robotics Team, WRC
"Engineering the future, one algorithm at a time."
Achievements:
- Winner at Locus 2025, Pulchowk IOE.
- 1st Runner-up at Delta 5.0 ERC, Dharan IOE.
- Top 5 finish at Techfest, IIT Bombay 2024 amidst tough competition.
This project was a huge learning experience, teaching us valuable lessons in algorithm optimization, hardware design, and problem-solving.
Special Thanks:
- Teammates and Mentors: Aabiskar Regmi, Sanjog Sapkota, Siddartha Gupta
Can’t wait to tackle even bigger challenges next! 🚀
Parts
28| Qty | Value | Footprint | References |
|---|---|---|---|
| 3 | 10K | Resistor_THT:R_Axial_DIN0207_L6.3mm_D2.5mm_P7.62mm_Horizontal | R2, R3, R4 |
| 3 | SW_Push | Button_Switch_THT:SW_PUSH_6mm | SW1, SW2, SW3 |
| 2 | 1uF | Capacitor_THT:C_Radial_D6.3mm_H11.0mm_P2.50mm | C3, C4 |
| 2 | Conn_01x01_Pin | Connector_PinHeader_2.54mm:PinHeader_1x01_P2.54mm_Vertical | J1, J2 |
| 2 | MountingHole | MountingHole:MountingHole_2.5mm | H1, H2 |
| 2 | Power | Connector_PinHeader_2.54mm:PinHeader_1x02_P2.54mm_Vertical | J5, J6 |
| 2 | n20 | prashantkicadlibrary:N20 Gear Motor | M1, M2 |
| 1 | 1uF | Capacitor_THT:C_Radial_D6.3mm_H7.0mm_P2.50mm | C1 |
| 1 | Arduino_Nano_v3.x | prashantkicadlibrary:Arduino_Nano | A1 |
| 1 | Conn_01x11_Pin | Connector_PinHeader_2.54mm:PinHeader_1x11_P2.54mm_Vertical | J7 |
| 1 | L293D | Package_DIP:DIP-16_W7.62mm | U1 |
| 1 | LED | LED_THT:LED_D4.0mm | D1 |
| 1 | LM7805_TO220 | Package_TO_SOT_THT:TO-220-3_Vertical | U2 |
| 1 | Motor Left | Connector_PinHeader_2.54mm:PinHeader_1x02_P2.54mm_Vertical | J3 |
| 1 | Motor Right | Connector_PinHeader_2.54mm:PinHeader_1x02_P2.54mm_Vertical | Rmotor |
| 1 | R | Resistor_THT:R_Axial_DIN0207_L6.3mm_D2.5mm_P7.62mm_Horizontal | R1 |
The 25 most common of 28 parts.
More from prashantbhandary/MicroMouse-LineMaze
4- 2 layers73 × 68.5 mm
- 2 layers72.5 × 73.9 mm

- 2 layers57 × 49.4 mm

- 2 layers74 × 60.3 mm

Similar boards
- 2 layers178 × 145 mm

Ultra DB X51 v1
ExploreEmbedded/8051_DevelopmentBoard
Design files and sample code for 8051 development Ultra Boards
145 parts70 - 2 layers84.3 × 58.4 mm

EnocderDriver
NikodemBartnik/Small-Projects
All of smaller projects (Arduino, PCBs, electronics, code)
35 parts55 - 2 layers56.4 × 72.6 mm

Ras pi hat
geno543/Redropi_highway
the project aims to detect asteroids and meteor movement using high-quality cameras and radar detection methods using an AI model for accurate analysis, and it classifies bodies be in three categories: non-meteor…
8 parts13 - 2 layers87.5 × 70 mm

- 2 layers92.5 × 62.5 mm

DropGenPCB
harrislab-brown/DropGen
DropGen uses a fluid reservoir and a piezoelectric buzzer to precisely and repeatably dispense small droplets on demand.
25 parts12CC-BY-SA-4.0 - 2 layers47.5 × 49.5 mm

- 2 layers120.7 × 184.1 mm

- 2 layers90 × 53.4 mm

Questions
How big is the Micro mouse prashant PCB?
It measures 95.8 × 73 mm and has 2 copper layers, 1.6 mm thick.
What parts does the Micro mouse prashant use?
28 parts, built around the L293D. The full list of its parts is on this page, with links to each part's symbol and footprint where PCBKit's library has them.
Where can I download the Micro mouse prashant KiCad files?
From the prashantbhandary/MicroMouse-LineMaze repository on GitHub, at the commit this page was made from: the board is ArduinoNano/micro_mouse_v3_files/micro_mouse_prashant/micro_mouse_prashant/micro_mouse_prashant.kicad_pcb and its schematic ArduinoNano/micro_mouse_v1-files/design/Ckt_PCB_files/Micro_mouse1.kicad_sch. PCBKit opens the board in the browser, with nothing to install.
Can I use the Micro mouse prashant design in my own project?
Its repository states no licence, so its author keeps all rights: ask prashantbhandary before reusing the design.