Skip to the content
PCBKitNew board
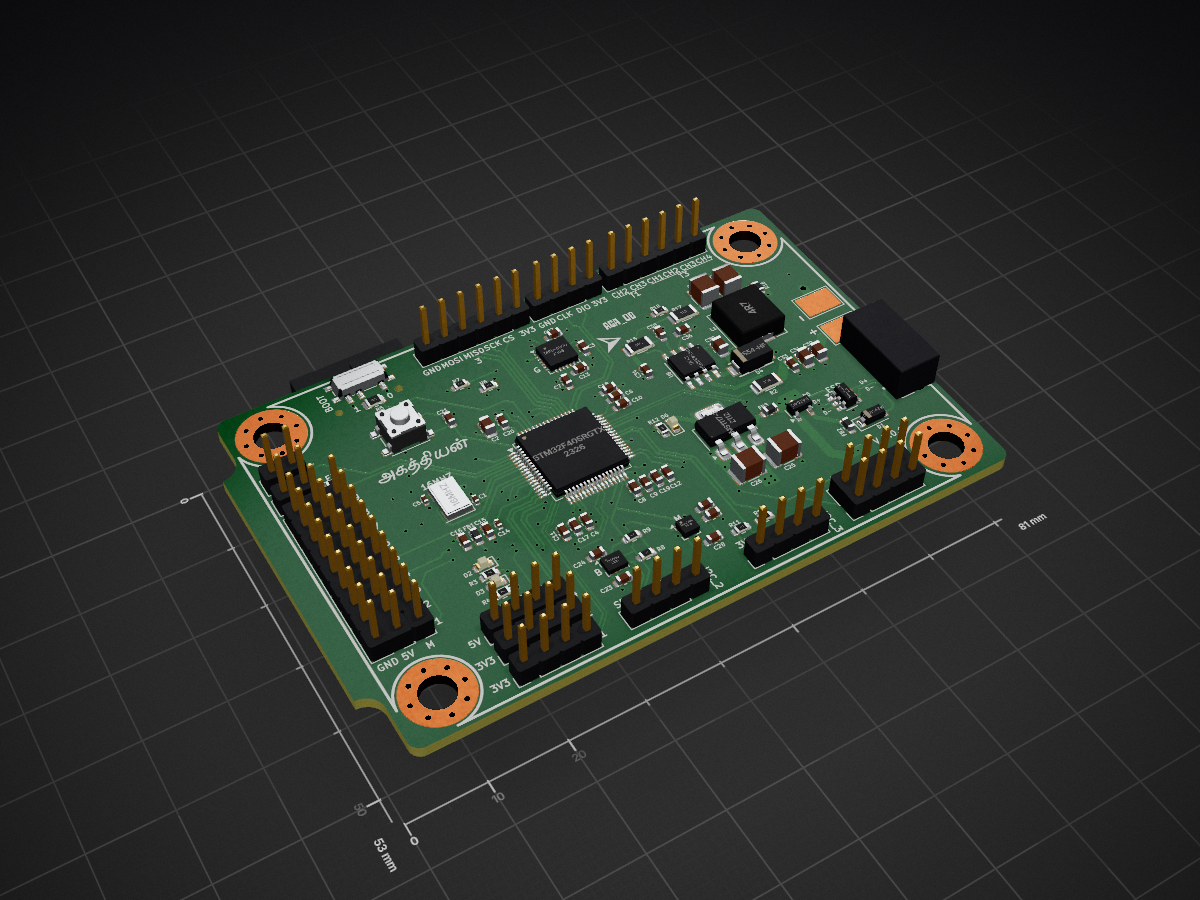
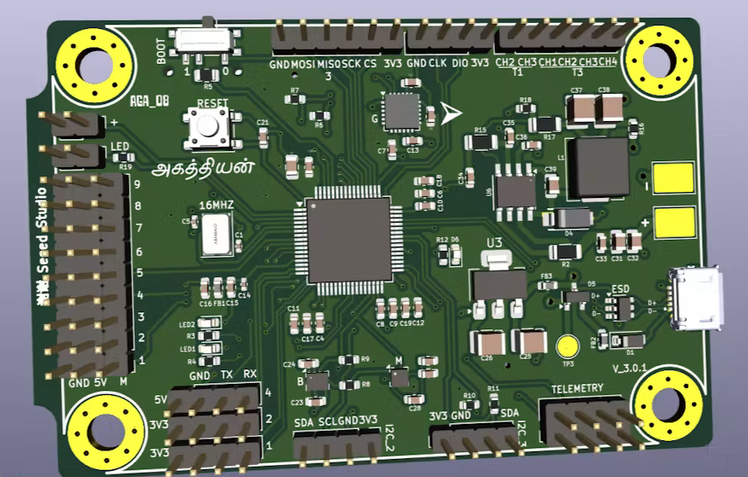
4 layers81 × 53 mmPratham, the printed circuit board in 3D

A basic PCB design which contains all components for a solo yet affordable basic drone controller

Size
81 × 53 mm
Copper layers
4
Thickness
1.6 mm
Parts
102
Nets
96
Pads
425
Tracks, vias
888, 135
Pours
7
Routed
Yes
KiCad
KiCad 9.0 (file 20241229)
Created
6 Oct 2026
Updated
11 Oct 2026

Overview

Pratham is an open-source printed circuit board by PeriwalPratham, from the PeriwalPratham/FlightController repository on GitHub, published under the MIT licence. It is a 4-layer board of 81 × 53 mm with 102 parts on 96 nets, routed with 888 tracks and 135 vias.

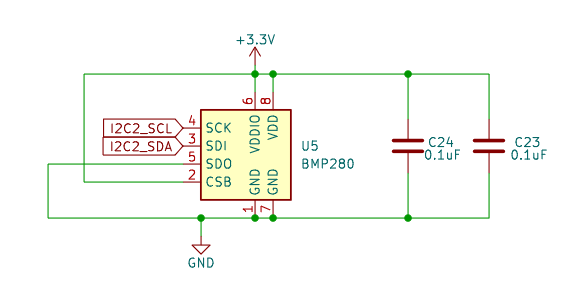
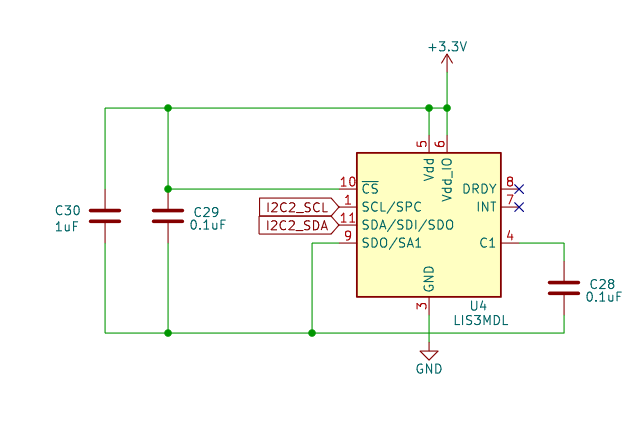
It is built around the BMP280, LIS3MDL and TPS5431DDA, with the AMS1117-3.3, MPU-6050 and USBLC6-2SC6 among its other parts. Its parts include 39 capacitors, 17 resistors, 16 connectors, 7 ICs and 6 diodes. It belongs with the STM32 boards of this library.

Main components

9

README

README.md

FlightController

A basic PCB design which contains all components for a solo yet affordable basic drone controller

Basic flight controller – devlog

2026-10-11 – One could really say It took half my life away

15h

One could really say It took half my life away

To start of week 1 I wanted to try out something I have dreamed of making A flight controller for a drone, the only problem being I have never used Any pcb software. The First step was to download which took longer than usual because I use linux and did not realize that there is a downloadable appimage anyhow this took around an hour

Screenshot From 2026-10-09 20-32-44

After this I went onto the official webpage to maybe read as the youtube tutorials seem quite outdated

Screenshot From 2026-10-11 21-02-02

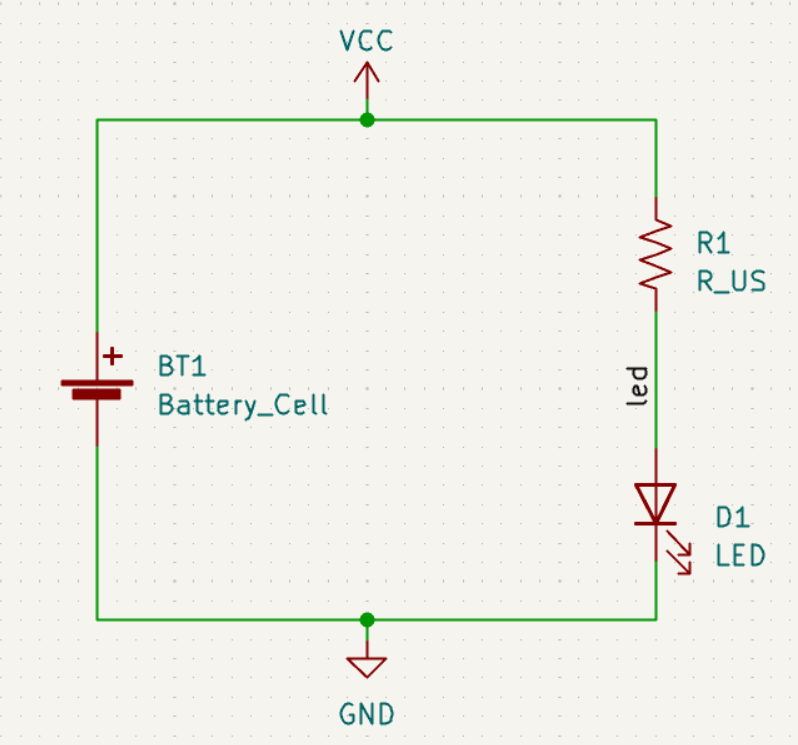
made my first circuit and read some documentation!

image

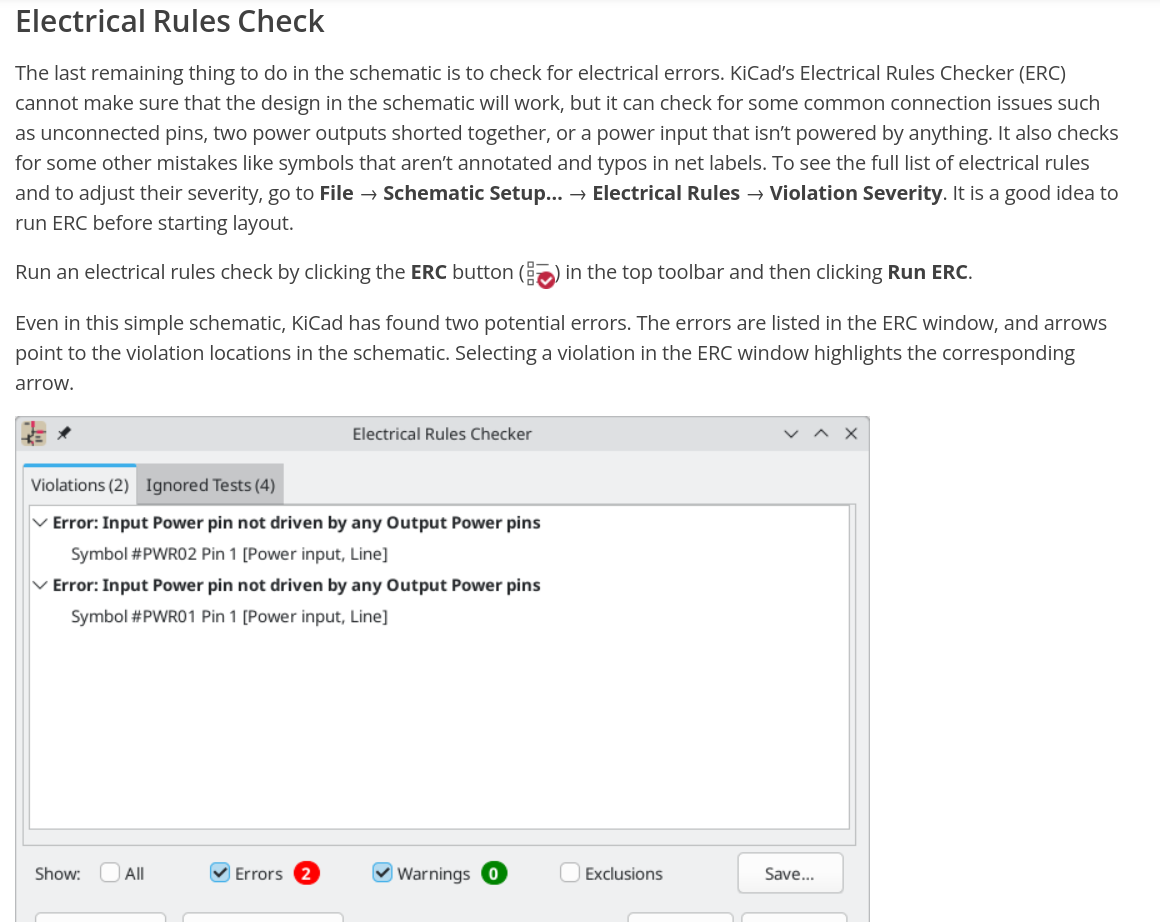
Learnt about the ERC (from future me I already know this is going to save my life)

Now that I had learnt some stuff I needed to actually understand what i would build So after some quick googling I learn the major components I would need. Luckily I had used the MPU6050 And some Idea about the other sensors so it did not overwhelm me. Next I checked out some designs to understand a bit more

image

The design I choose

Now lets start building!

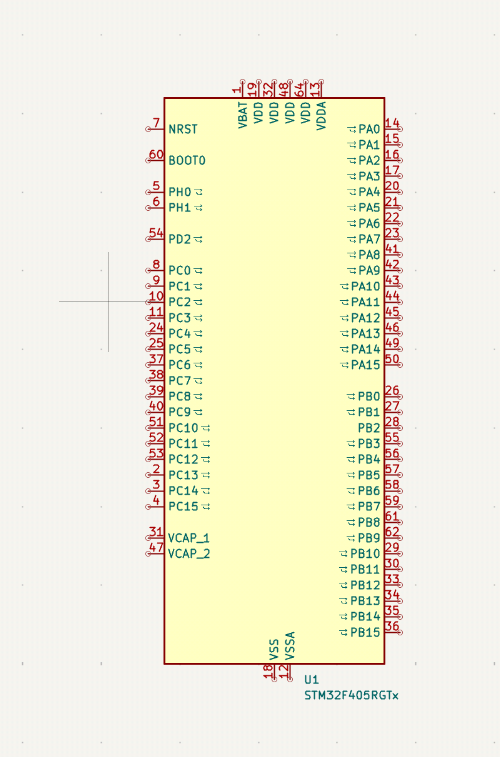
First we got the microprocessor

image

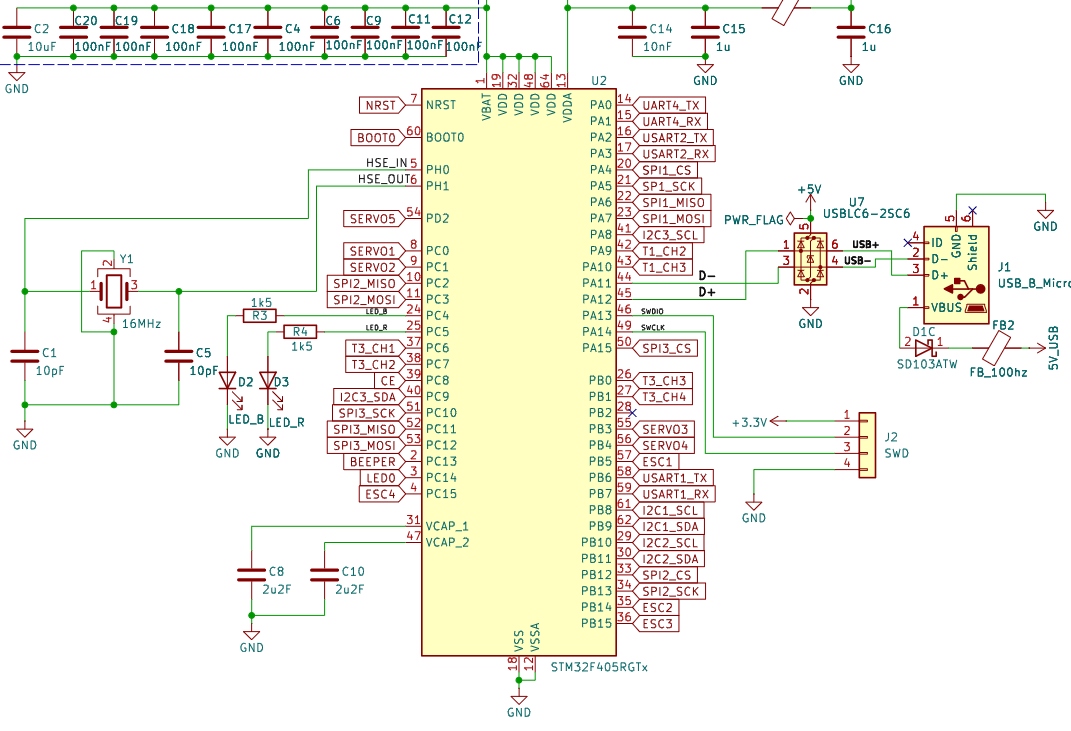
Adding in all the connections for it image

After the first one which took almost 3hrs because honestly there is too much and I still am learning about some of it luckily now I knew my way around stuff so it would become faster

Next adding everything else

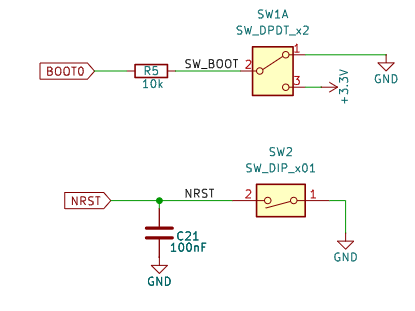
The simple stuff:

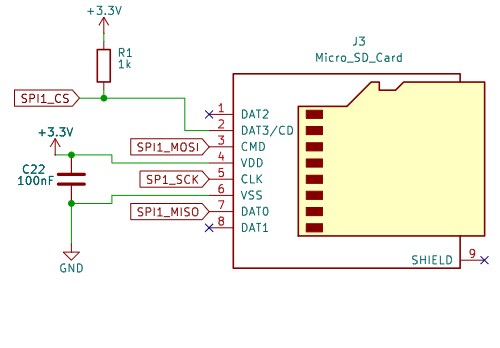
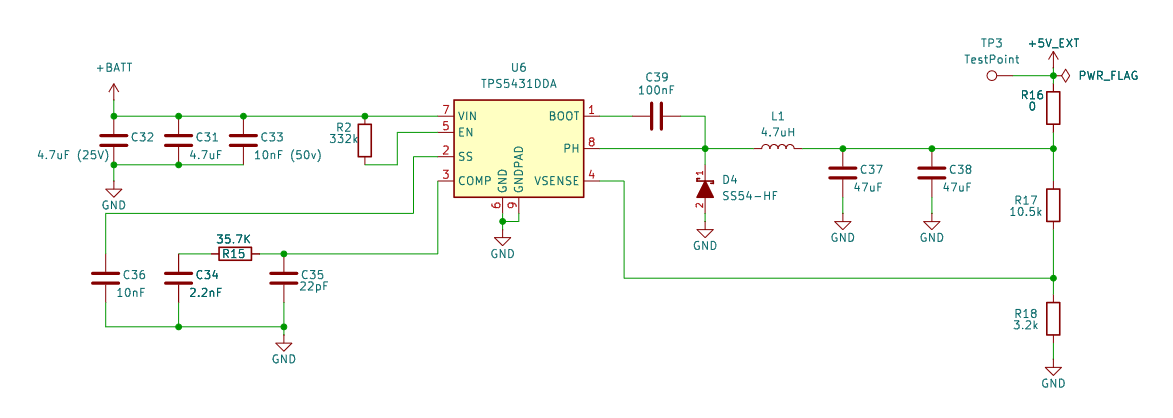
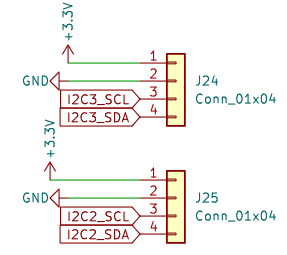
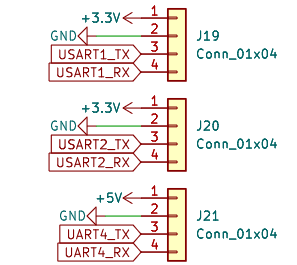
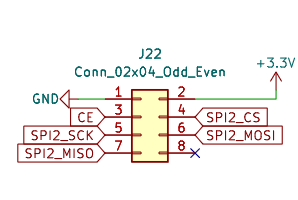
image Less simple stuff image My favorite I love buck converters image Data communication and others :

image

image

image Finally the Inputs aka sensors The holy mpu6050(I wish gyro drift did not exist) image
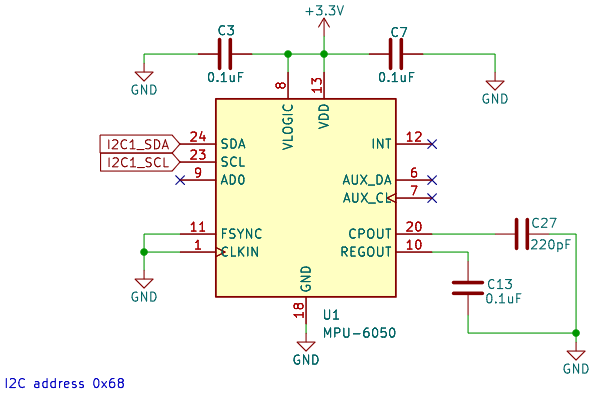
image

image

NEXT up the wiring see u there !

Parts

102
QtyValueFootprintReferences
11100nFCapacitor_SMD:C_0603_1608MetricC4, C6, C9, C11, C12, C17, C18, C19, C20, C21, C22
70.1uFCapacitor_SMD:C_0603_1608MetricC3, C7, C13, C23, C24, C28, C29
64k7Resistor_SMD:R_0603_1608MetricR6, R7, R8, R9, R10, R11
6LOGOLOGOG***, G***, G***, G***, G***, G***
5Conn_01x04Connector_PinHeader_2.54mm:PinHeader_1x04_P2.54mm_VerticalJ19, J20, J21, J24, J25
41k5Resistor_SMD:R_0603_1608MetricR3, R4, R12, R19
4MountingHoleMountingHole:MountingHole_4.3mm_M4_Pad_ViaH1, H2, H3, H4
210pFCapacitor_SMD:C_0402_1005MetricC1, C5
21uCapacitor_SMD:C_0603_1608MetricC15, C16
222uFCapacitor_SMD:C_1210_3225MetricC25, C26
22u2FCapacitor_SMD:C_0603_1608MetricC8, C10
247uFCapacitor_SMD:C_1210_3225MetricC37, C38
2Conn_01x02Connector_PinHeader_2.54mm:PinHeader_1x02_P2.54mm_VerticalJ26, J28
2Conn_01x06Connector_PinHeader_2.54mm:PinHeader_1x06_P2.54mm_VerticalJ4, J23
2FB_100hzInductor_SMD:L_0603_1608MetricFB2, FB3
2LED_RLED_SMD:LED_0603_1608MetricD3, D6
10Resistor_SMD:R_0603_1608MetricR16
110.5kResistor_SMD:R_1206_3216MetricR17
1100nFCapacitor_SMD:C_0805_2012MetricC39
110kResistor_SMD:R_0805_2012MetricR5
110nFCapacitor_SMD:C_0603_1608MetricC36
110nFCapacitor_SMD:C_0402_1005MetricC14
110nF (50v)Capacitor_SMD:C_0603_1608MetricC33
110uFCapacitor_SMD:C_0805_2012MetricC2
116MHzCrystal:Crystal_SMD_5032-4Pin_5.0x3.2mmY1
11kResistor_SMD:R_0603_1608MetricR1
11uFCapacitor_SMD:C_0603_1608MetricC30
12.2nFCapacitor_SMD:C_0603_1608MetricC34
1220pFCapacitor_SMD:C_0603_1608MetricC27
122pFCapacitor_SMD:C_0603_1608MetricC35
13.2kResistor_SMD:R_0603_1608MetricR18
1332kResistor_SMD:R_1206_3216MetricR2
135.7KResistor_SMD:R_1206_3216MetricR15
14.7uFCapacitor_SMD:C_0805_2012MetricC31
14.7uF (25V)Capacitor_SMD:C_0805_2012MetricC32
14.7uHInductor_SMD:L_KOHERelec_MDA7030L1
1AMS1117-3.3Package_TO_SOT_SMD:SOT-223-3_TabPin2U3
1BAT54CPackage_TO_SOT_SMD:SOT-23D5
1BMP280Package_LGA:Bosch_LGA-8_2x2.5mm_P0.65mm_ClockwisePinNumberingU5
1Conn_01x02TestPoint:TestPoint_Pad_4.0x4.0mmJ29
1Conn_02x04_Odd_EvenConnector_PinHeader_2.54mm:PinHeader_2x04_P2.54mm_VerticalJ22
1Conn_02x09_Odd_EvenConnector_PinHeader_2.54mm:PinHeader_2x09_P2.54mm_VerticalJ18
1FerriteBead 120MHzInductor_SMD:L_0603_1608MetricFB1
1GPIOConnector_PinHeader_2.54mm:PinHeader_1x09_P2.54mm_VerticalJ17
1LED_BLED_SMD:LED_0603_1608MetricD2
1LIS3MDLPackage_LGA:LGA-12_2x2mm_P0.5mmU4
1MPU-6050Sensor_Motion:InvenSense_QFN-24_4x4mm_P0.5mmU1
1Micro_SD_Cardfootprints:CUI_MSD-1-AJ3
1SD103ATWDiode_SMD:D_SOD-123D1
1SS54-HFfootprints:DIOM5025X220ND4
1STM32F405RGTxPackage_QFP:LQFP-64_10x10mm_P0.5mmU2
1SWDConnector_PinHeader_2.54mm:PinHeader_1x04_P2.54mm_VerticalJ2
1SW_DIP_x01Button_Switch_SMD:SW_SPST_PTS647_Sx38SW2
1SW_DPDT_x2Button_Switch_SMD:SW_SPDT_PCM12SW1
1TPS5431DDAPackage_SO:TI_SO-PowerPAD-8_ThermalViasU6
1USBLC6-2SC6Package_TO_SOT_SMD:SOT-23-6U7
1USB_B_Microfootprints:AMPHENOL_10118194-0011LFJ1

Questions

How big is the Pratham PCB?

It measures 81 × 53 mm and has 4 copper layers, 1.6 mm thick.

What parts does the Pratham use?

102 parts, built around the BMP280, LIS3MDL, TPS5431DDA and AMS1117-3.3. The full list of its parts is on this page, with links to each part's symbol and footprint where PCBKit's library has them.

Where can I download the Pratham KiCad files?

From the PeriwalPratham/FlightController repository on GitHub, at the commit this page was made from: the board is pcb/Pratham.kicad_pcb and its schematic pcb/Pratham.kicad_sch. PCBKit opens the board in the browser, with nothing to install.

Can I use the Pratham design in my own project?

Its repository publishes it under the MIT licence: you may reuse it on that licence's terms (keep the author's notice, and for a copyleft licence share your changes alike).

Similar boards

  • 4 layers71.4 × 80.3 mmEx2, the printed circuit board in 3D

    Ex2

    zaidhajji/Custom-Flight-Controller-Design-STM32F407-KiCad

    Designed a custom flight controller board from schematic to layout: STM32F407VGTx MCU, MPU6050 IMU, BMP280 barometer, MicroSD logging, 6 servo/ESC outputs, and dual-stage power regulation.

    93 parts
  • 2 layers100 × 100 mmEv smart, the printed circuit board in 3D

    Ev smart

    Khoapham2004/ESP32-to-ESP-NOW-Control

    The second repository contains the hardware design of the robot. It is mostly based on the 2025 version, with updated sensors, the BTS signal removed from the previous design, and a PCB that primarily uses SMD…

    96 parts
  • 4 layers64 × 60 mmDronemagnav, the printed circuit board in 3D

    Dronemagnav

    ajisrawi/dronemagnav

    Magnetic-anomaly navigation (MagNav) board + firmware for drones: ESP32-S3, BMI088, LIS3MDL, BMP280, u-blox GNSS, WDMAM map matching, particle filter, MAVLink, phone route planner. Proprietary - all rights reserved.

    60 parts11
  • 2 layers100 × 100 mmTemp pro, the printed circuit board in 3D

    Temp pro

    CrafterSteve/ESP32_Temp_Con

    An temperture control device, based on ESP32. With custom PCB board, it can fit an ESP32-DevKit as controller, DAC and ADC is done on board, as well as, a 5 to +-12v power supply..

    134 parts
  • 4 layers62.2 × 54.6 mmFlight ControllerV1.0, the printed circuit board in 3D

    Flight ControllerV1.0

    alihaanc/SKYKILLER-Development-Board

    Drone and Rocket Development PCB board

    59 parts2
  • 2 layers120 × 70 mmProtected buck, the printed circuit board in 3D

    Protected buck

    Shanshan3133/automated-hardware-validation-framework

    KiCad protected buck converter with Python-based automated hardware validation, fault injection, and CI reporting

    35 parts
  • 2 layers41 × 55 mmStm32, the printed circuit board in 3D

    Stm32

    zaidhajji/STM32F030C8T6-MCU-Circuit

    Custom STM32 Board Design with KiCad

    40 parts