2 layers103.6 × 74.9 mm

 palazzol/demon7
Debugger/Monitor for small "computers"
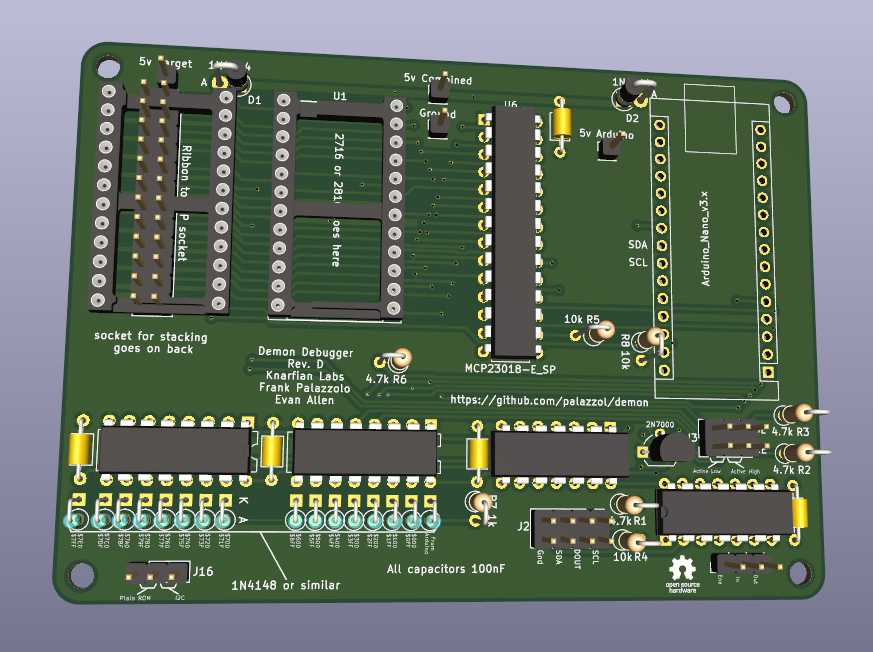
Io i2c is an open-source printed circuit board by palazzol, from the palazzol/demon repository on GitHub. It is a 2-layer board of 103.6 × 74.9 mm with 60 parts on 91 nets, routed with 639 tracks and 65 vias.
It is built around the 74HCT125PW, 74HCT138D and 74HCT74D. Its parts include 19 diodes, 13 connectors, 9 resistors, 6 ICs and 5 capacitors. It belongs with the interfaces and adapters boards and the AVR (ATmega, ATtiny) boards of this library.


Debugger/Monitor for small "computers"
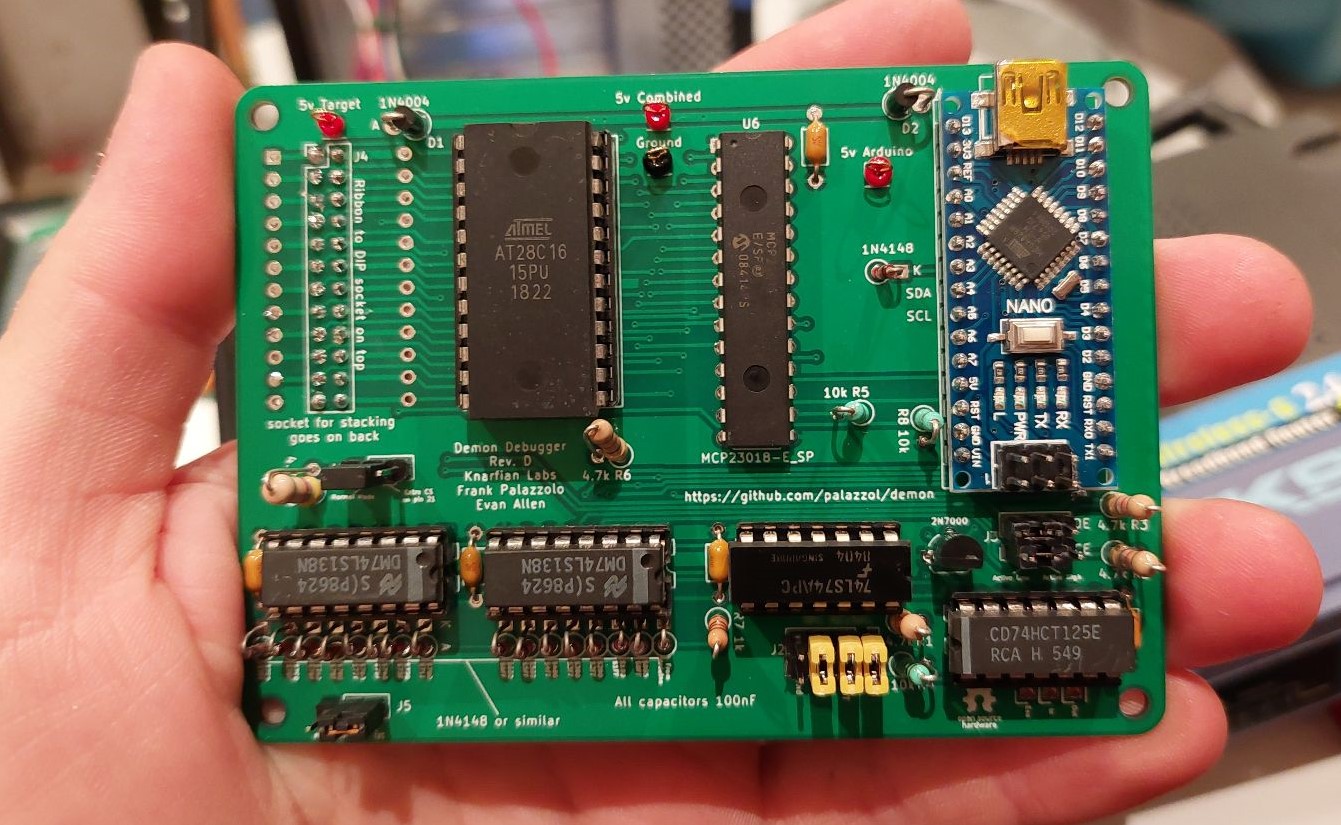
We would like to port this to more systems, and/or help others fix their old things. Please let us know if you need any help getting this system going, should you choose to give it a try!
Demon Debugger is a tool that can be used to repair and reverse-engineer devices with 8 and 16 bit CPUs, such as arcade machines, console games, embedded computers, single board computers, etc. It provides a debugging console, and so is especially useful for systems that lack a working one.
It has been ported to Z80-based, 6502-based, 6800-based, 6809-based, and CP1610-based systems. There are ports underway to other CPU architectures.
Unfortunately, Demon Debugger can't be used on a totally broken system. The target system must have a working CPU, and at least a small amount of ROM and RAM. However, we have found that for most hardware, it's really not too hard to get a system to this point.
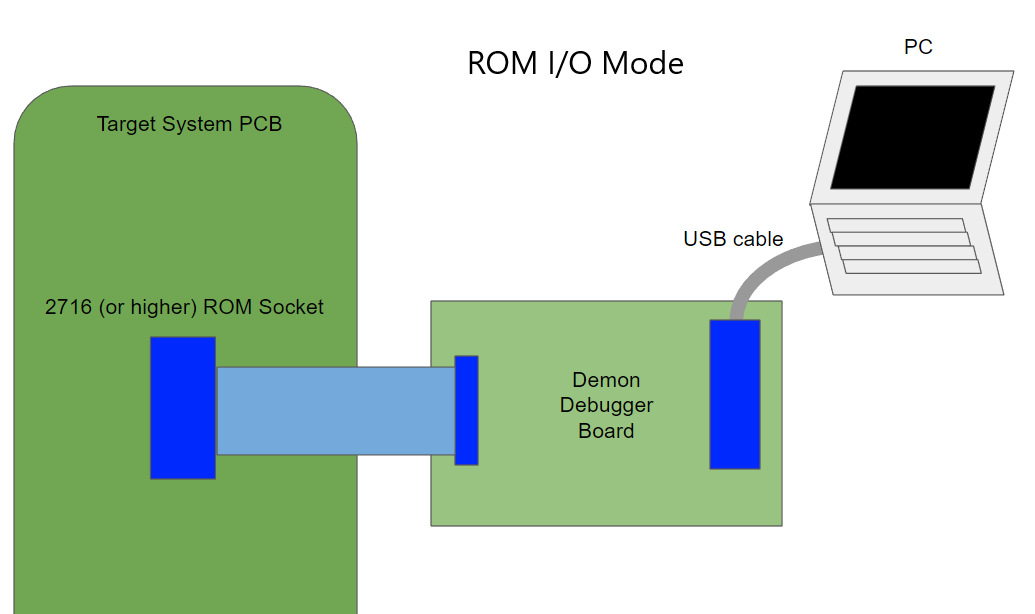
In ROM I/O mode, The Demon Debugger board cable plugs into a socket on the target system, in place of a standard JEDEC ROM/EPROM chip. Then, your PC can communicate with the target over serial, using a standard USB connection.
If your target system is already supported, there will be a target image already built, which you can upload onto your target.
To support a totally new target system, a small amount of tweaking may need to be done to the assembly code for your target. Generally, if you know the memory map for your system, this is really easy to do.
The Demon Debugger system has evolved over time. If you have a Demon Debugger board, you can use ROM I/O mode with prebuilt target code, and get started right away, without any other tools. If you need to support a new target, you can still use ROM I/O mode, once you build a new target code.
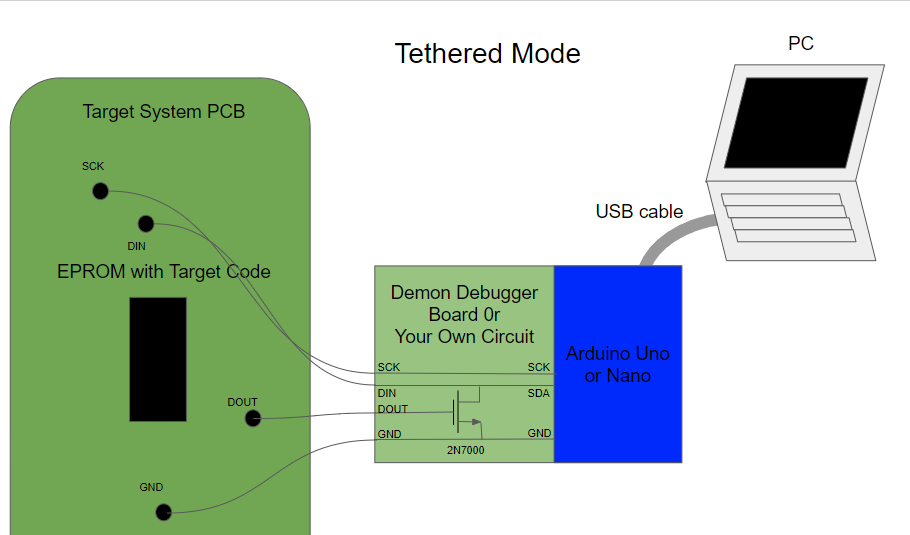
If you don't have a Demon Debugger board, you can still use the Demon Debugger system in Tethered mode, provided you have a few other capabilities. It requires only an Arduino Nano/Uno, a single transistor, and the ability to program an EPROM chip. You need to identify points on your target which can be used (2 outputs, 1 input, and a ground), wire up your modified Arduino accordingly, and modify the communication routines in the target to use those points. There are a few examples in the repo of doing this.
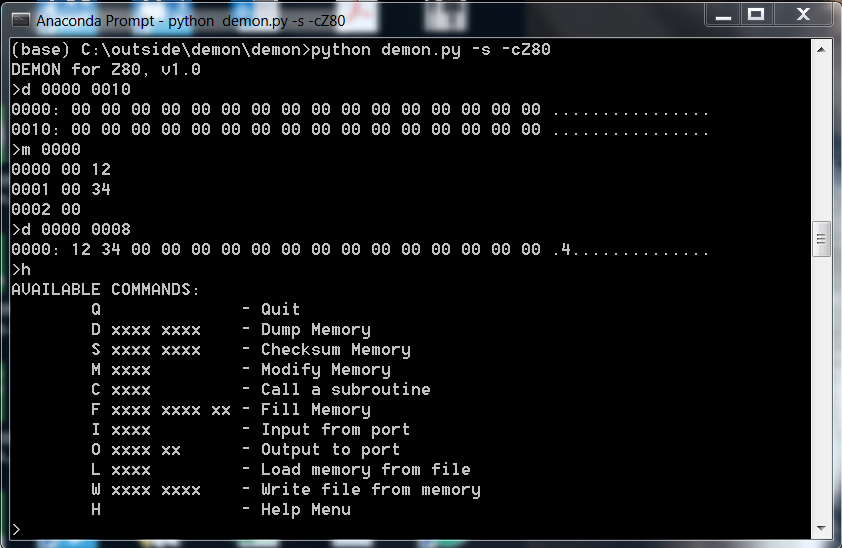
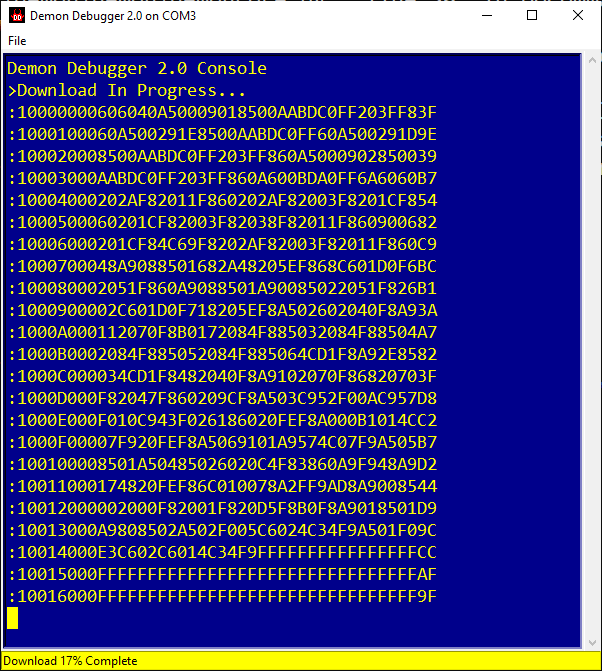
For now, please see the file demonapi.py
Tethered Mode - Sega Sound Board test Quality is not very good, but the Arduino module is next to the laptop
Intellivision Demo Better quality, no Arduino needed using native serialport on the LTO Flash cart.
| Qty | Value | Footprint | References |
|---|---|---|---|
| 17 | 1N4148 | Diode_THT:D_DO-35_SOD27_P2.54mm_Vertical_KathodeUp | D3, D4, D5, D6, D7, D8, D10, D11, D12, D13, D14, D15, D16, D17, D18, D19 +1 |
| 7 | Conn_01x01 | Connector_PinHeader_2.54mm:PinHeader_1x01_P2.54mm_Vertical | J6, J7, J8, J12, J13, J14, J15 |
| 5 | 0.1uF | Capacitor_THT:C_Axial_L3.8mm_D2.6mm_P7.50mm_Horizontal | C1, C2, C3, C4, C5 |
| 5 | 4.7k | Resistor_THT:R_Axial_DIN0207_L6.3mm_D2.5mm_P2.54mm_Vertical | R1, R2, R3, R6, R9 |
| 3 | 10k | Resistor_THT:R_Axial_DIN0207_L6.3mm_D2.5mm_P2.54mm_Vertical | R4, R5, R8 |
| 2 | 1N4004 | Diode_THT:D_DO-41_SOD81_P2.54mm_Vertical_AnodeUp | D1, D2 |
| 2 | 74HCT138 | Package_DIP:DIP-16_W7.62mm | U4, U7 |
| 1 | 1k | Resistor_THT:R_Axial_DIN0207_L6.3mm_D2.5mm_P2.54mm_Vertical | R7 |
| 1 | 2716 | Package_DIP:DIP-24_W15.24mm_Socket | U1 |
| 1 | 2N7000 | Package_TO_SOT_THT:TO-92_Wide | Q1 |
| 1 | 74HCT125 | Package_DIP:DIP-14_W7.62mm | U3 |
| 1 | 74HCT74 | Package_DIP:DIP-14_W7.62mm | U2 |
| 1 | Arduino_Nano_v3.x | Module:Arduino_Nano | A1 |
| 1 | Jumper Block | Connector_PinHeader_2.54mm:PinHeader_2x04_P2.54mm_Vertical | J2 |
| 1 | Jumper Block | Connector_PinHeader_2.54mm:PinHeader_2x03_P2.54mm_Vertical | J3 |
| 1 | LOGO | Evan's misc parts:Evan Logo | G*** |
| 1 | LOGO | Evan's misc parts:OSHW gear | G*** |
| 1 | MCP23018-E_SP | Package_DIP:DIP-28_W7.62mm | U6 |
| 1 | Target Interface, 2716 Pinout | Connector_PinHeader_2.54mm:PinHeader_2x12_P2.54mm_Vertical | J4 |
| 1 | Target Interface, 2716 Pinout | Package_DIP:DIP-24_W15.24mm_Socket | J16 |
| 1 | extra CS | Connector_PinHeader_2.54mm:PinHeader_1x03_P2.54mm_Vertical | J1 |
| 1 | read region | Connector_PinHeader_2.54mm:PinHeader_1x03_P2.54mm_Vertical | J5 |
The 56 most common of 60 parts.


leomil72/LM80C
A Z80-based homebrew computer withTMS9918, AY-3-8910, Z80 CTC, Z80 PIO, and Z80 SIO


schlae/snark-barker-mca
A Sound Blaster compatible sound card for Micro Channel bus computers


AlexColello/discrete-nes
A discrete logic implementation of the Nintendo Entertainment System where EVERY single gate output and EVERY memory bit is visible via LED. Watch a complete NES flip every bit in real-time.


electrified/rc2014-ym2149
KiCad schematics and gerbers for a YM sound card for the RC2014. See it in action here: https://www.youtube.com/watch?v=-iLwi9FagFE

It measures 103.6 × 74.9 mm and has 2 copper layers, 1.6 mm thick.
60 parts, built around the 74HCT125PW, 74HCT138D and 74HCT74D. The full list of its parts is on this page, with links to each part's symbol and footprint where PCBKit's library has them.
From the palazzol/demon repository on GitHub, at the commit this page was made from: the board is hardware/io_revD/io_i2c.kicad_pcb and its schematic hardware/DIP28 to TC53257F/DIP28 to TC53257F.kicad_sch. PCBKit opens the board in the browser, with nothing to install.
Its repository states no licence, so its author keeps all rights: ask palazzol before reusing the design.