2 layers460.9 × 228.8 mm
DC-34-Badge panel
Cyber-Professionals-Enthusiast-Club/DC-34-Badge
CPEC Badge Kicad design files for DEFCON 34
276 parts3

 openenergymonitor/emonWiFi1
This small adapter allows OpenEnergyMonitor products to be used with a WiFi connection. The module is fully supported by ESPHome and is compatible with many endpoints, for example emonCMS, Home Assistant, and MQTT.
EmonWiFi is an open-source printed circuit board by openenergymonitor, from the openenergymonitor/emonWiFi repository on GitHub, published under the CC-BY-SA-4.0 licence. It is a 2-layer board of 33.5 × 22 mm with 18 parts on 46 nets, routed with 110 tracks and 23 vias.
It is built around the ESP32-C3-MINI-1, AP2112K-3.3 and UJ20-C-H-G-SMT-5-P16-TR. Its parts include 6 resistors, 4 capacitors, 4 connectors, 2 ICs and 1 diode. It belongs with the home automation and IoT boards and the ESP32 and RISC-V boards of this library.

This small adapter allows OpenEnergyMonitor products to be used with a WiFi connection. The module is fully supported by ESPHome and is compatible with many endpoints, for example emonCMS, Home Assistant, and MQTT.
It is available for the following OpenEnergyMonitor products:
The adapter uses an Espressif ESP32-C3 and connects to the emonTx's serial port.
[!WARNING] You must not connect the USB-C port of the emonWiFi while the emonWiFi is plugged into an emonTx. Doing so can cause damage to your emonTx.
You need to fit the connectors that correspond to the device you are attaching it to. There are different headers for each of the boards listed above. The headers face downwards, away from the side with the USB-C socket.
For an emonPi3 and emonTx6, a 2x5 pin header is installed in the position marked Pi3.
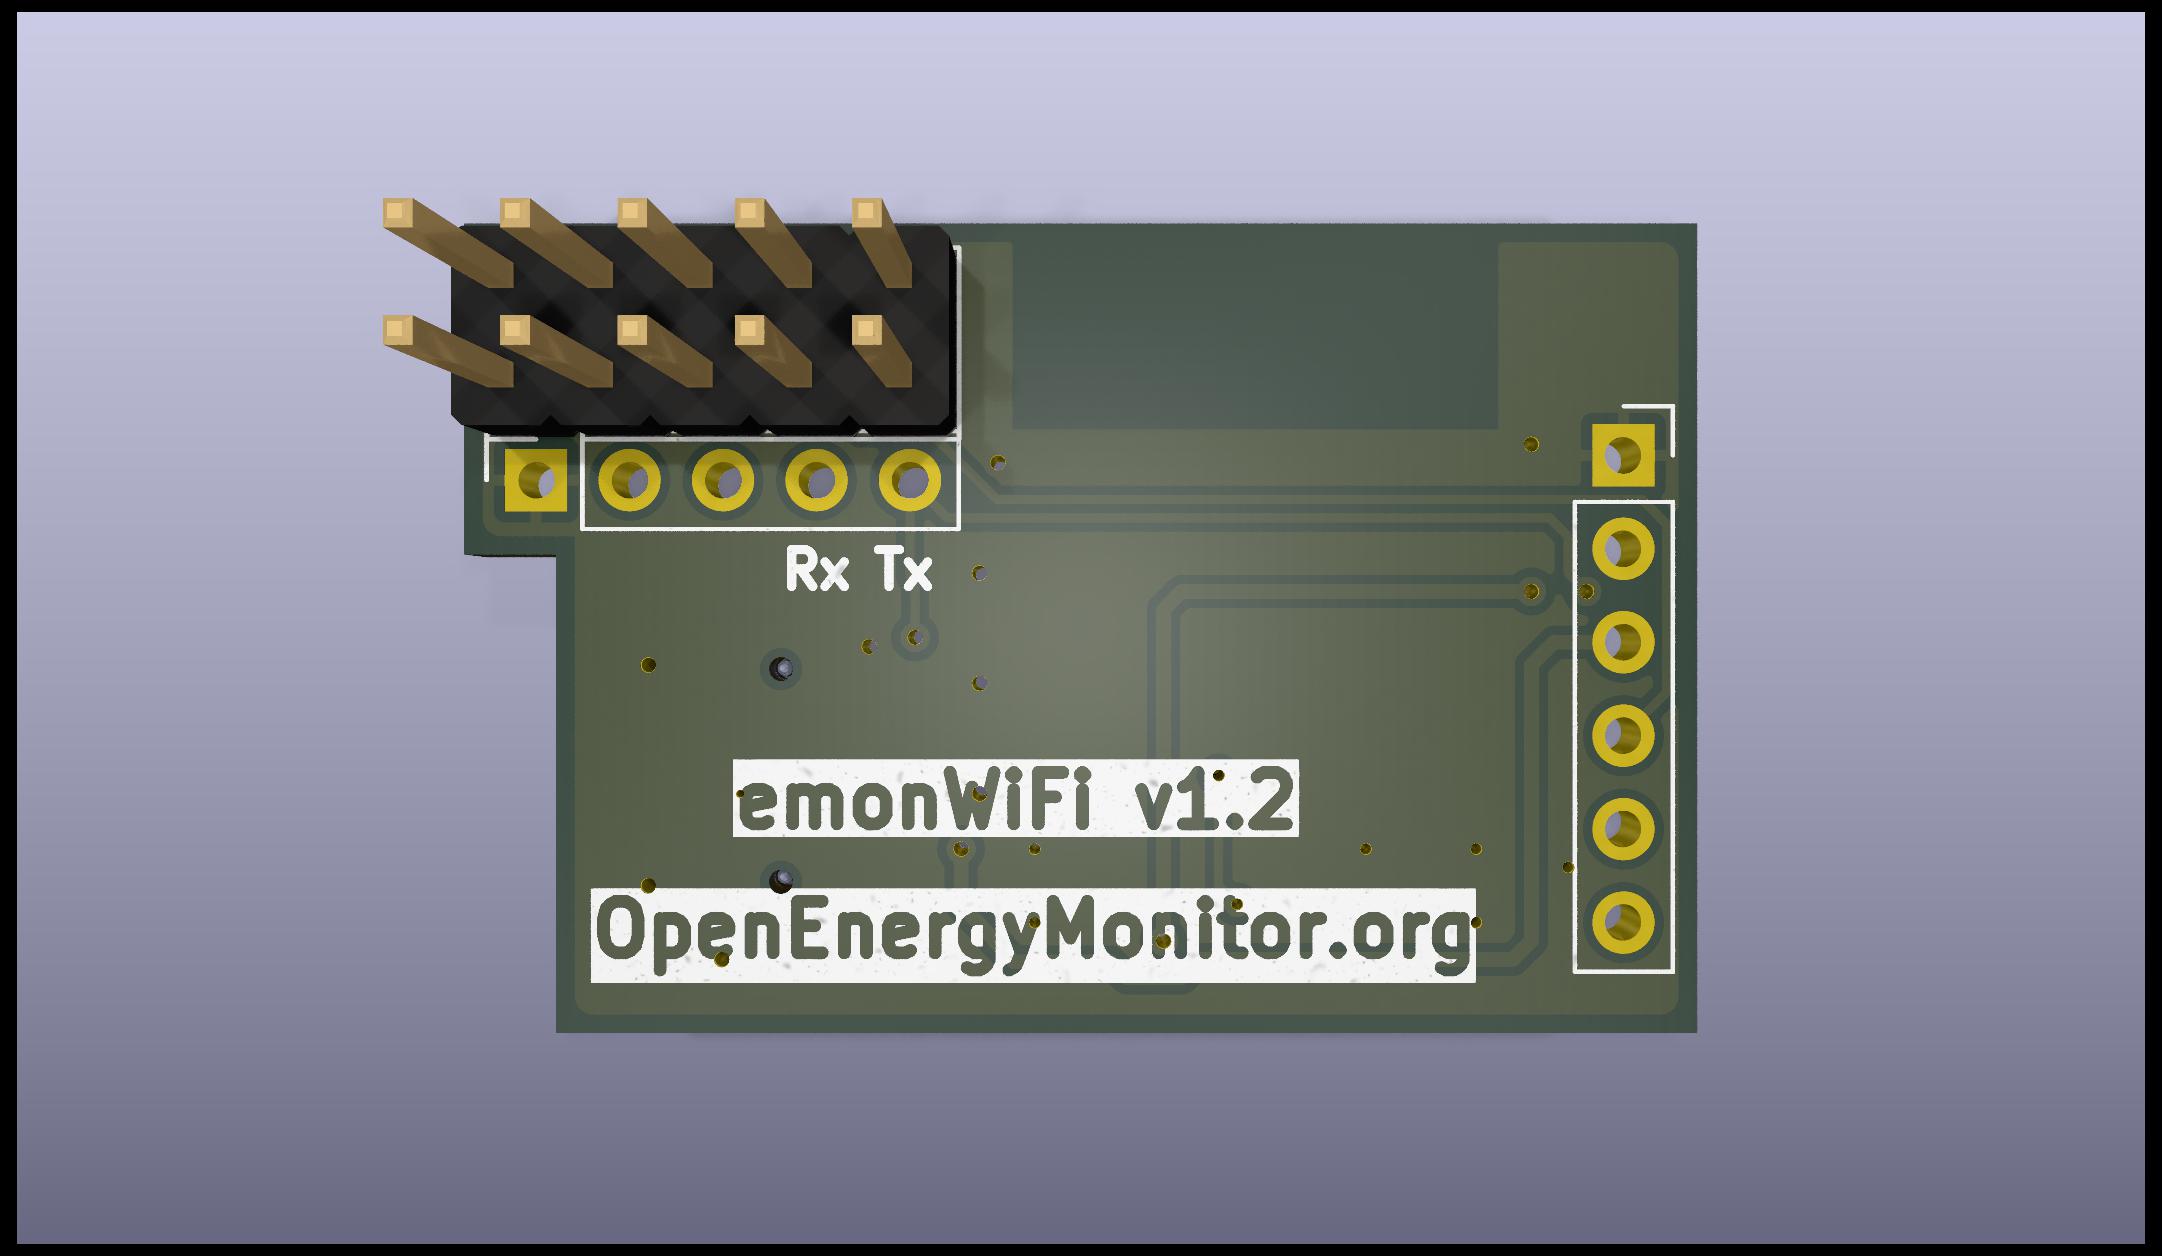
For an emonPi2 and emonTx5, a 5 position socket is installed in the position marked Pi2.
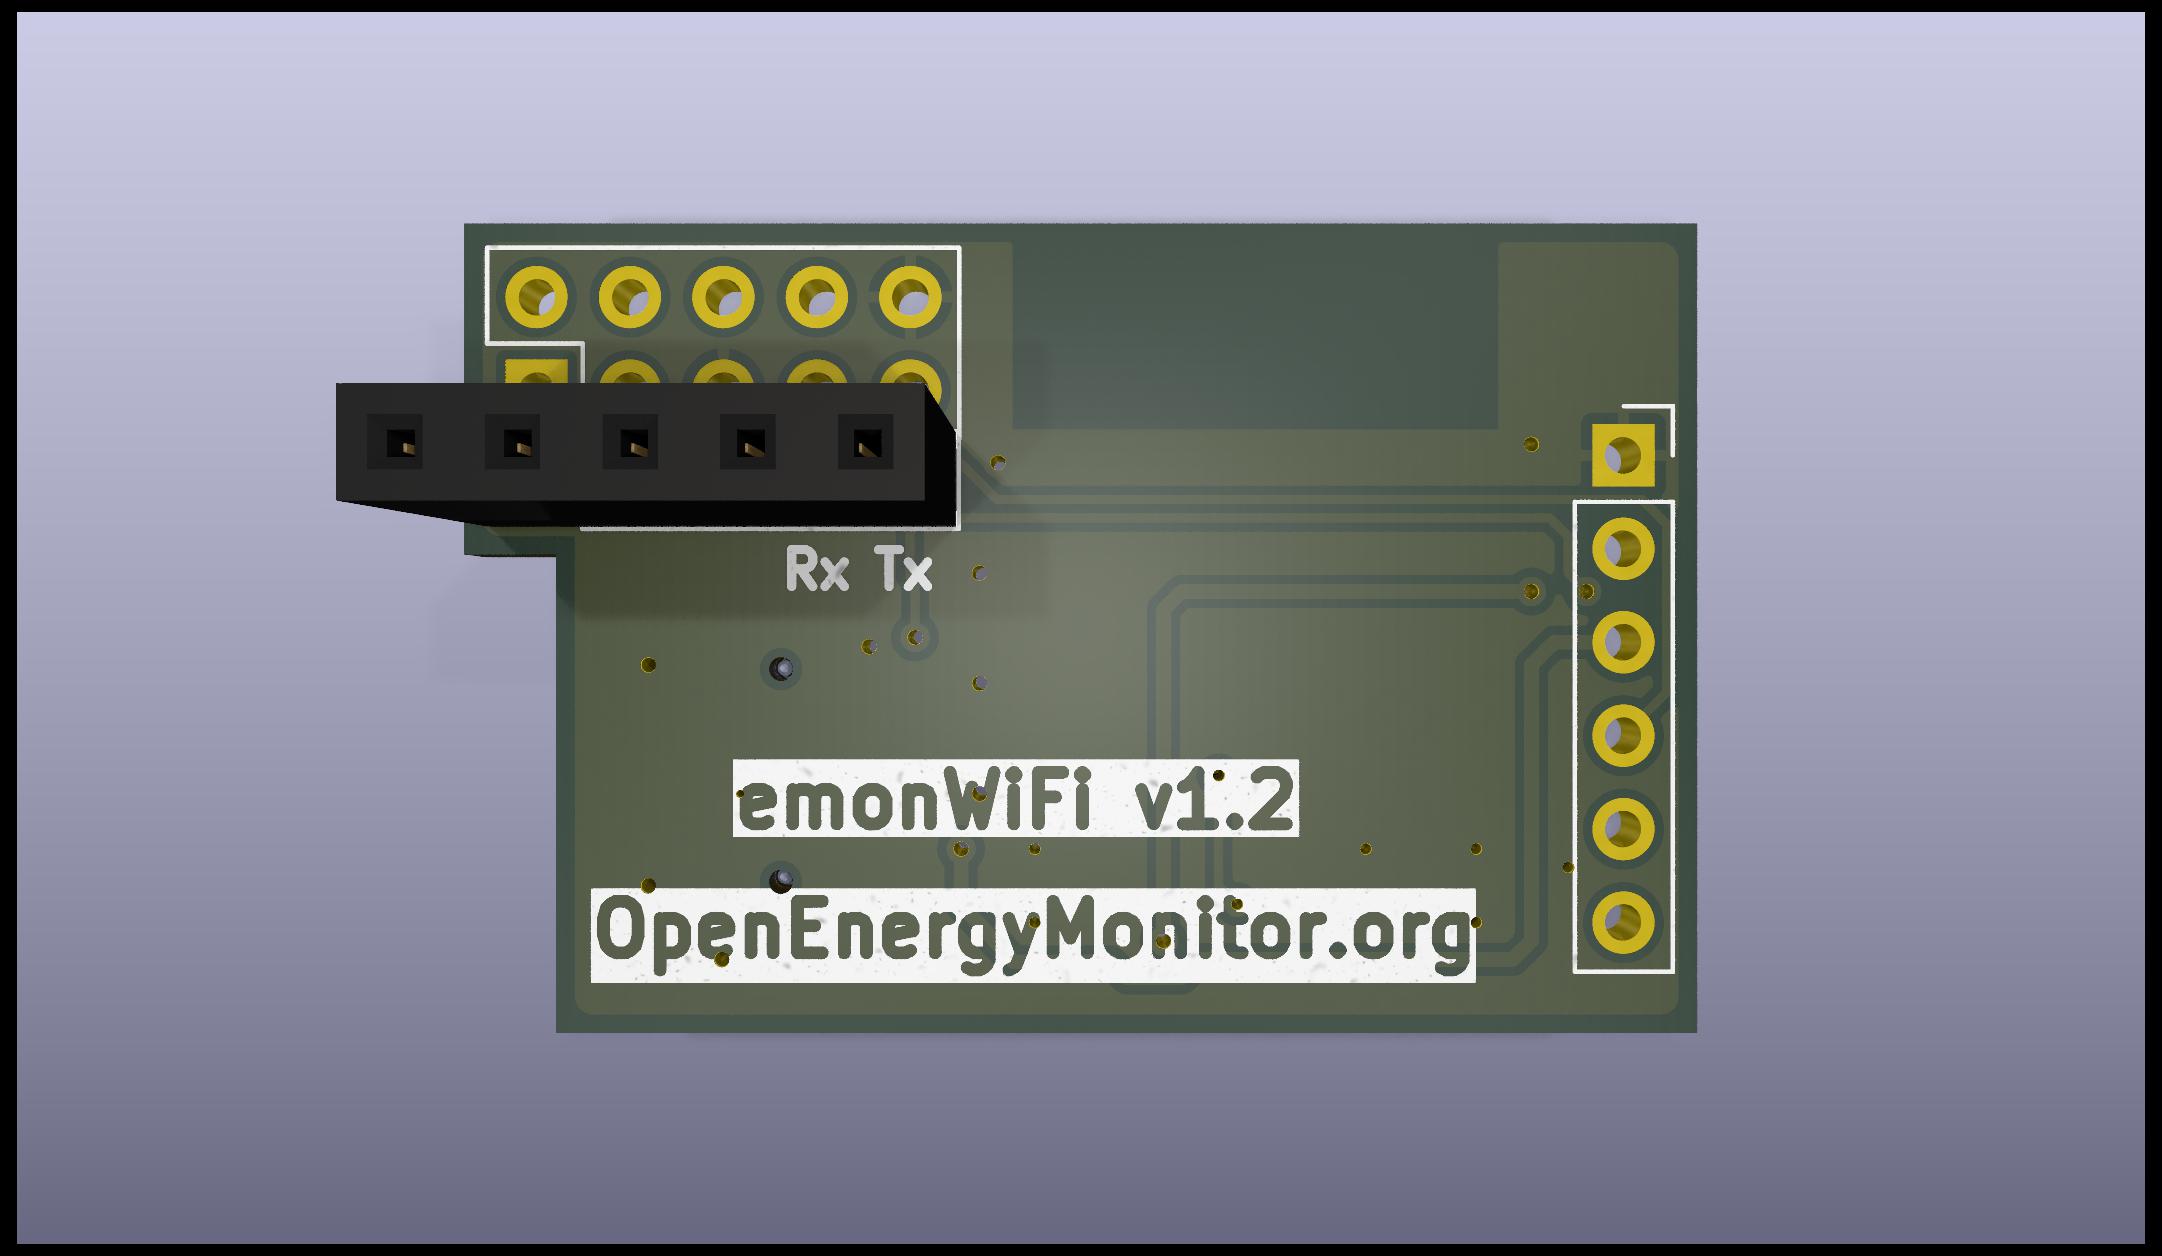
For an emonTx4, a 6 position socket is installed in the position marked Tx4.
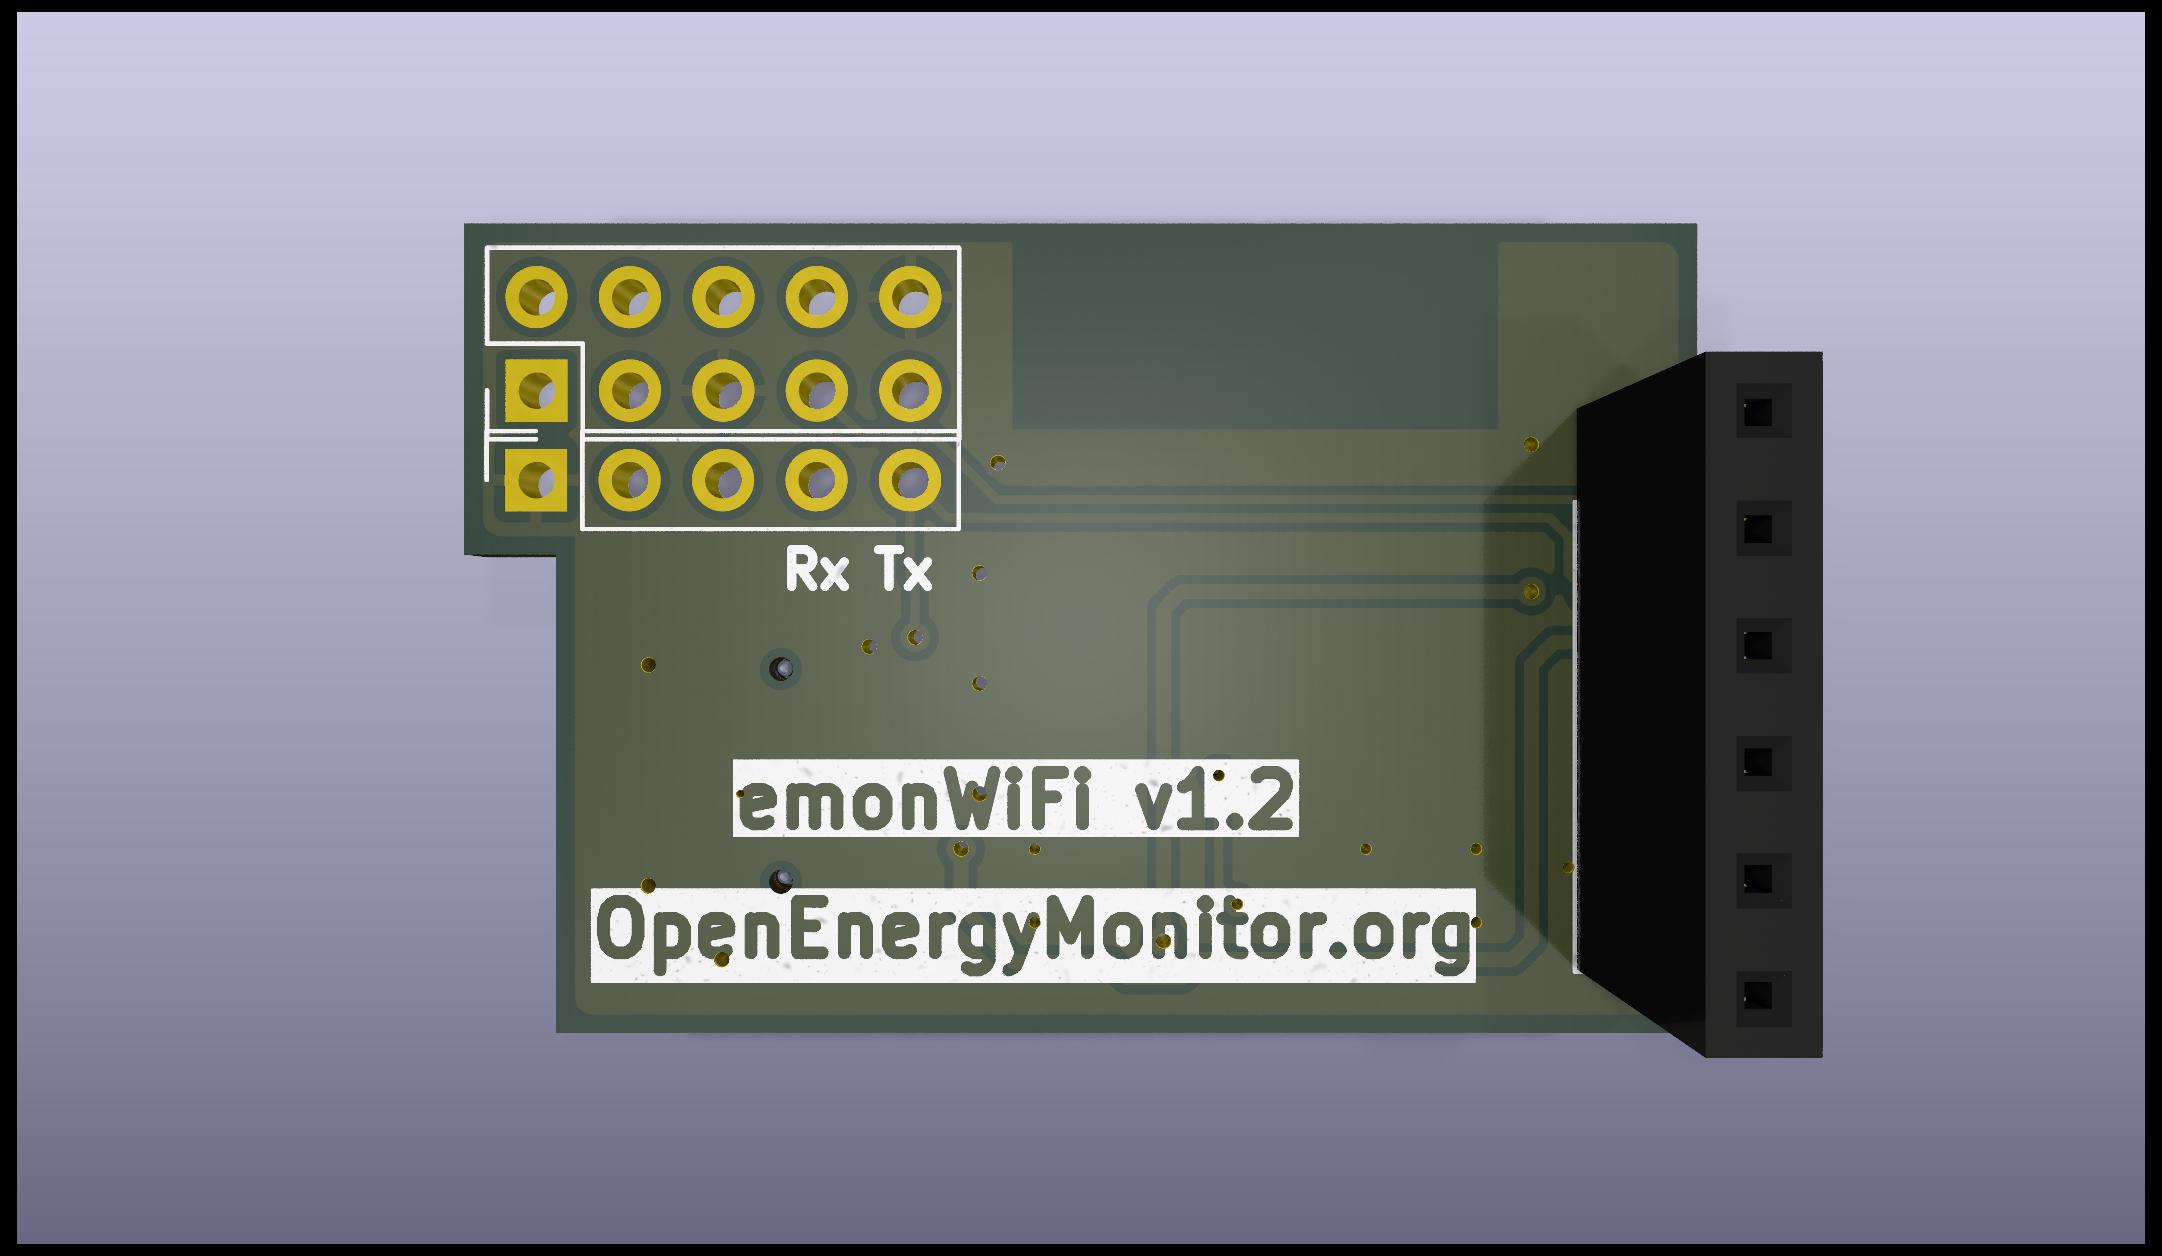
[!WARNING] You must remove power from the emonTx before installing the emonWiFi. Failure to do so can result in damage to either or both of the devices.
[!WARNING] Ensure you have placed the emonWiFi into the correct position for your emonTx before applying power. Failure to do so can result in damage to either or both of the devices.
[!NOTE] If you want to configure the emonTx4 over the WiFi connection, you must remove the solder bridge marked
JP6. With this removed, you will not be able to configure the emonTx4 using the USB-C port.
With the emonTx4's USB-C port facing downwards, insert the emonWiFi into the 6 pins in the centre left. The emonWiFi's USB-C port should face to the right.
[!NOTE] If you want to configure the emonTx5 over the WiFi connection, you must cut the pad marked
USB_TX. With this cut, you will not be able to configure the emonTx5 using the USB-C port. You can restore this functionality by applying a small solder bridge over theUSB_TXpads.
With the emonTx5's USB-C port to the right, insert the emonWiFi into the pins below the Raspberry Pi socket as far to the right as possible with the emonWiFi's USB-C port also to the right.
With the emonTx6's USB-C port to the right, insert the emonWiFi into the 40pin socket towards the bottom as far to the right as possible with the emonWiFi's USB-C port also to the right.
[!WARNING] You must not connect the USB-C port of the emonWiFi while the emonWiFi is plugged into an emonTx. Doing so can cause damage to your emonTx.
To install firmware for the first time, hold down the push button on the emonWiFi while plugging in the USB-C cable. This puts the ESP32 module into bootloader mode which allows firmware to be uploaded over the USB connection. After the first upload, you can use OTA updates.
The emonWiFi is natively supported by ESPHome. See the ESPHome emonTx component documentation for configuration details. This does not mean you need to use Home Assistant. The ESPHome firmware will communicate directly with emoncms by MQTT or HTTP(S).
If you are new to ESPHome it is worth noting that there is no prebuilt firmware image to download and then configure as there is with frameworks like Tasmota. You define the firmware using an ESPHome YAML configuration, which is then compiled and installed on the device. The first installation is performed over USB; subsequent updates can be installed over Wi-Fi using OTA.
To build the ESPHome firmware for the emonWiFi you will need the ESPHome Device Builder. You can find in-depth instructions on how to install and use that here.
The ESPHome configuration snippet for the emonWiFi is:
esphome:
  name: emonwifi
  friendly_name: emonWiFi

esp32:
  board: esp32-c3-devkitm-1
  framework:
    type: esp-idf

uart:
  id: emontx_uart # using UART2
  rx_pin: GPIO20
  tx_pin: GPIO21
  baud_rate: 115200
  rx_buffer_size: 2048
The YAML file that defines the ESPHome Device is where each of the sensors is declared. The tag_name attribute maps to the channels reported on the emonTx.
An example sensor definition would look like:
emontx:

sensor:
  - platform: emontx
    tag_name: "V1"  # Use "V1"-"V3" for multi-phase; see Sensor Indexing for "Vrms" (single-phase)
    name: "Voltage"
  - platform: emontx
    tag_name: "P1"
    name: "Power CT1"
  - platform: emontx
    tag_name: "E1"
    name: "Energy CT1"
You do not need to integrate the emonWiFi running ESPHome with any larger home automation system. The configuration for an emonWiFi connected to an emonTx is documented in the Home Assistant integration documentation.
To configure the emonTx you will need to issue commands to it via the UART connection from the emonWiFi. Details of these commands are documented here, or you can send a ? command and the emonTx will respond with the command list.
They can be issued using the emontx.send_command Action or via components like Serial Proxy.
To get data from your emonTx into Home Assistant you will need the ESPHome Device Builder and the ESPHome Home Assistant App. Note that in earlier versions of Home Assistant that Apps were known as Add-ons and you may see that still in some documentation.
The Device Builder lets you set up the emonWiFi as an ESPHome device. The ESPHome integration allows the ESPHome device to communicate with Home Assistant.
To be able to configure the emonTx via the emonWiFi within Home Assistant you will need emonPi/Tx Configuration for Home Assistant and make additional ESPHome configuration changes to include the emontx_ha_bridge component.
There are detailed instructions on how to set all this up in the project's README.md
| Qty | Value | Footprint | References |
|---|---|---|---|
| 3 | 10K | Resistor_SMD:R_0402_1005Metric | R2, R3, R4 |
| 2 | 100n | Capacitor_SMD:C_0402_1005Metric | C1, C3 |
| 2 | 4u7 | Capacitor_SMD:C_0603_1608Metric | C4, C5 |
| 2 | 5K1 | Resistor_SMD:R_0402_1005Metric | R5, R6 |
| 1 | 1K | Resistor_SMD:R_0402_1005Metric | R1 |
| 1 | AP2112K-3.3 | Package_TO_SOT_SMD:SOT-23-5 | U2 |
| 1 | Conn_01x05 | Connector_PinSocket_2.54mm:PinSocket_1x05_P2.54mm_Vertical | J3 |
| 1 | Conn_01x06 | Connector_PinSocket_2.54mm:PinSocket_1x06_P2.54mm_Vertical | J4 |
| 1 | Conn_02x05_Odd_Even | Connector_PinHeader_2.54mm:PinHeader_2x05_P2.54mm_Vertical | J1 |
| 1 | ESP32-C3-MINI-1 | PCM_Espressif:ESP32-C3-MINI-1 | U1 |
| 1 | LED | LED_SMD:LED_0603_1608Metric | D1 |
| 1 | SW_Push | Button_Switch_SMD:SW_Tactile_SPST_NO_Straight_CK_PTS636Sx25SMTRLFS | SW1 |
| 1 | USB_C_Receptacle_USB2.0 | Connector_USB:USB_C_Receptacle_GCT_USB4110 | J2 |
It measures 33.5 × 22 mm and has 2 copper layers, 1.6 mm thick.
18 parts, built around the ESP32-C3-MINI-1, AP2112K-3.3 and UJ20-C-H-G-SMT-5-P16-TR. The full list of its parts is on this page, with links to each part's symbol and footprint where PCBKit's library has them.
From the openenergymonitor/emonWiFi repository on GitHub, at the commit this page was made from: the board is pcb/emonWiFi.kicad_pcb and its schematic pcb/emonWiFi.kicad_sch. PCBKit opens the board in the browser, with nothing to install.
Its repository publishes it under the CC-BY-SA-4.0 licence: you may reuse it on that licence's terms (keep the author's notice, and for a copyleft licence share your changes alike).
Cyber-Professionals-Enthusiast-Club/DC-34-Badge
CPEC Badge Kicad design files for DEFCON 34

LouisVizard/NavBoard
A full navigation solution featuring MCU, GNSS receiver, RF transceiver, and 9-DOF IMU

CU-Rocketry/flight_computer
Competition Flight Computer Module 25-26


LastZactionHero/infinite-keyboard
Infinite Keyboard is a portable musical scratchpad. It continously captures of every note played on the integrated keyboard as MIDI data, saved directly to an SD card.


pashamray/rak4630_interface
An open-source hardware breakout / interface board for the RAK4630 LoRa module (Nordic nRF52840 + Semtech SX1262), designed in KiCad 9.