2 layers124.3 × 131.7 mm
MegaDuck SJC
ManCloud/MegaDuck_SJC
WIP - Reverse Engineering Project of the MegaDuck Super Junior Computer
102 parts2GPL-3.0

 nickbild/555_doom_pcb1
The circuit plays the opening riff from "At Doom's Gate" without a microcontroller, computer, or any software.
555 doom kicad is an open-source printed circuit board by nickbild, from the nickbild/555_doom_pcb repository on GitHub, published under the MIT licence. It is a 4-layer board of 92.7 × 63.1 mm with 89 parts on 85 nets, routed with 502 tracks and 59 vias.
It is built around the LM386, CD4066BE and NE555P, with the 74HC14 and 74LS161DC among its other parts. Its parts include 33 resistors, 21 diodes, 14 capacitors, 8 ICs and 2 transistors.


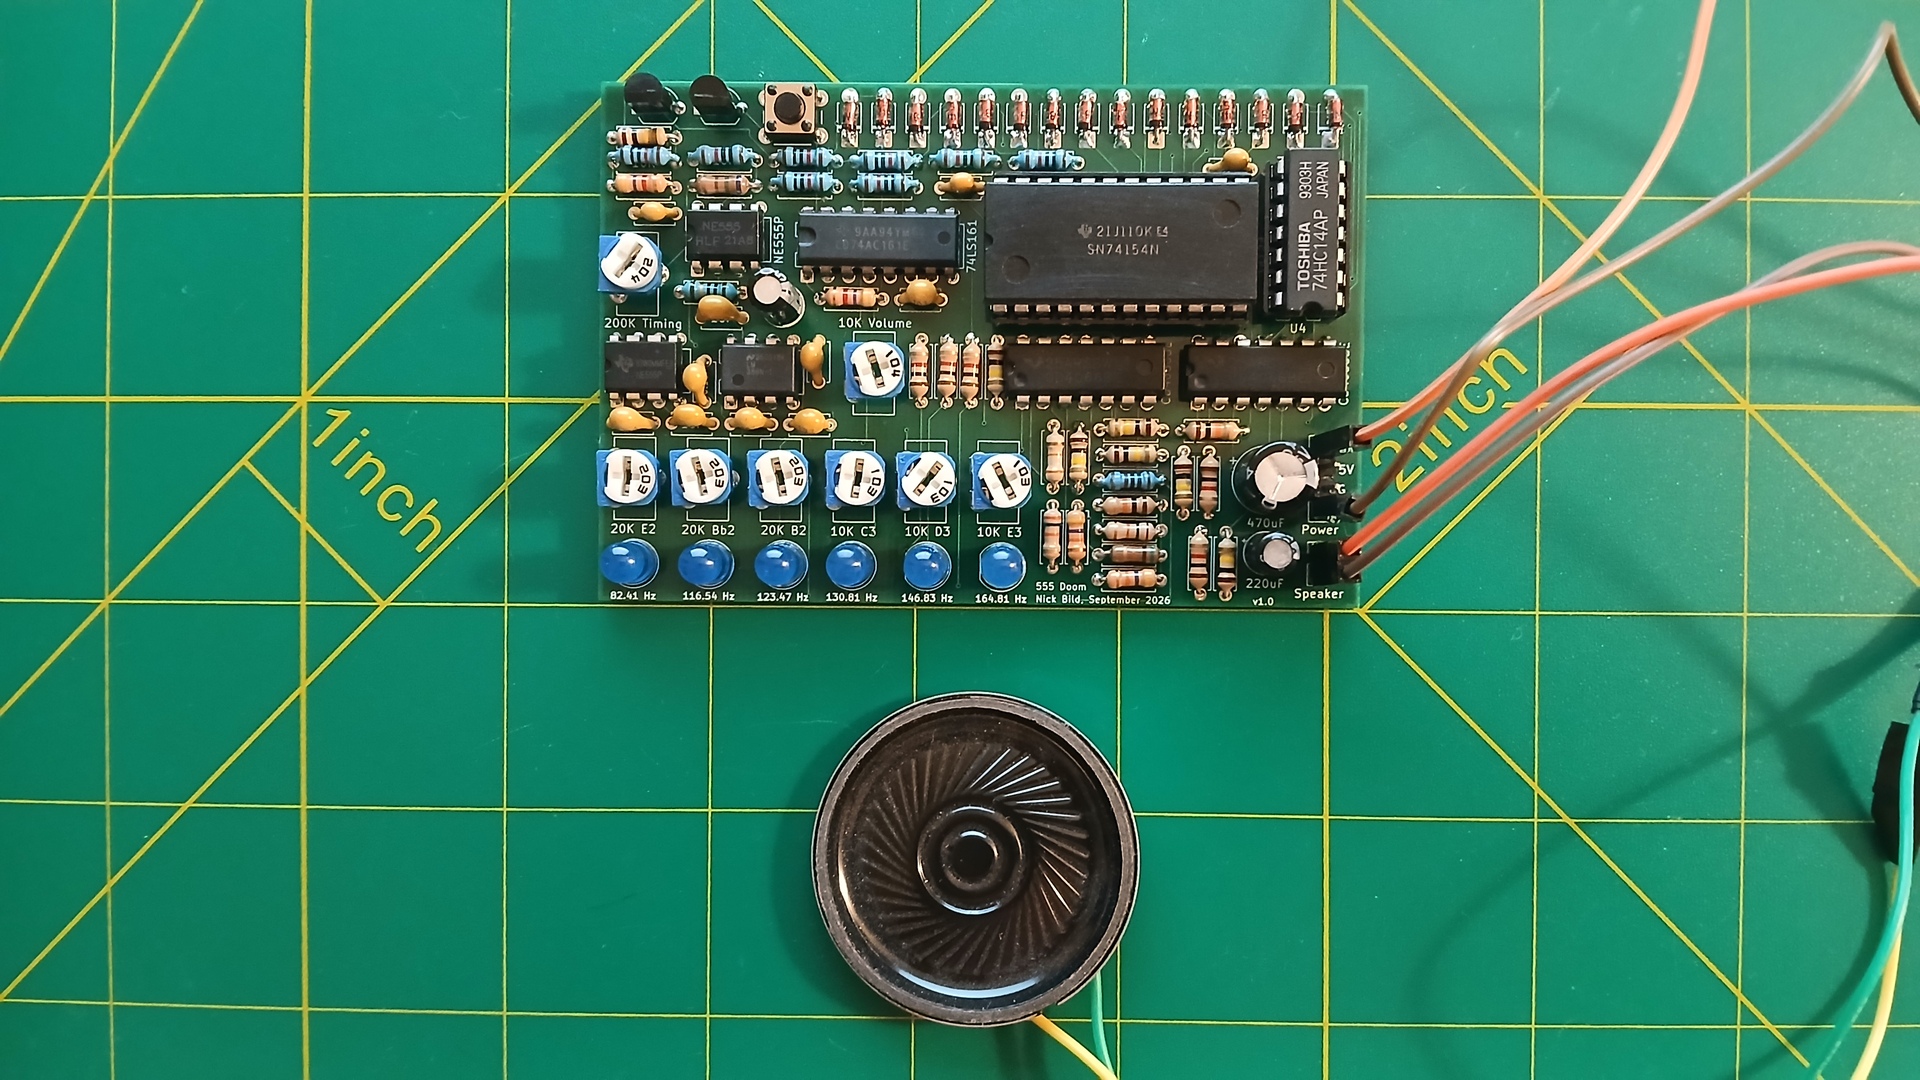
This circuit plays the opening riff from "At Doom's Gate" using 555 timers, 7400-series logic, and some resistors and capacitors. It does that without a microcontroller, computer, or any software whatsoever.
The first version was built on breadboards, but I wanted to turn it into something more permanent.
The new version puts the entire circuit on a custom PCB. I also replaced the PAM8302 module with an LM386 audio amplifier and added six LEDs that show which musical note is currently being played.
The KiCad design files can be downloaded here.
Check out the video on YouTube:
The basic operation hasn't changed from the breadboard version.
The circuit can be divided into five main sections:
The signal moves through the circuit like this:
555 tempo clock
      |
      v
   74LS161
binary counter
      |
      v
   74LS154
4-to-16 decoder
      |
      v
1N4148 diode matrix
      |
      v
   74HCT14
      |
      +----> note LEDs
      |
      v
2 x CD4066
analog switches
      |
      v
555 audio oscillatorThe first NE555 is configured as an astable oscillator. A capacitor repeatedly charges and discharges through its timing resistors, causing the output to continuously switch between high and low.
This oscillator runs at approximately 7.33 Hz, producing a new clock pulse about every 136 milliseconds. A trimmer potentiometer allows the tempo to be adjusted while measuring the output frequency with a multimeter, oscilloscope, or logic analyzer.
This 555 doesn't generate any sound. It simply tells the rest of the circuit when it is time to advance to the next note.
The clock signal goes into a 74LS161N four-bit binary counter. Each pulse increments the counter by one.
Its four outputs feed a 74LS154N 4-to-16 decoder. The decoder turns the binary count into individual outputs, giving the circuit a separate electrical signal for every position in the riff.
The 74LS154 outputs are active-low. When the counter is at zero, Y0 goes low. On the next count, Y1 goes low, followed by Y2, Y3, and so on.
There are 16 possible states, but this section of the riff only uses 15. Y15 is therefore connected through a pair of 2N3904 transistors to the active-low CLEAR input of the counter. Reaching Y15 resets the 74LS161 to zero, and the sequence begins again.
A pushbutton provides a way to reset the sequence manually as well.
Knowing the current position isn't enough. The circuit also needs to know which note belongs there.
That's the job of the 1N4148 diode matrix.
There are 15 positions in the sequence but only six different pitches:
Each decoder output is connected through a diode to one of six note buses. If several positions play E2, for example, all of those decoder outputs have diodes leading to the E2 bus.
The diode matrix is effectively the circuit's musical memory. There isn't a ROM containing a list of notes or software deciding what comes next. The sequence is encoded directly into the wiring.
Each note bus normally sits high through a pull-up resistor. When a decoder output is selected, it goes low and pulls the appropriate note bus low through its diode.
The CD4066 analog switches used in the next stage need an active-high control signal, so the six note buses first pass through a 74HCT14 hex Schmitt-trigger inverter.
A selected note enters the HCT14 low and comes out high.
Each of those six outputs controls one bilateral switch inside a pair of CD4066 chips. Each switch, in turn, connects a different resistor and trimmer combination into the timing network of the second 555.
Only one pitch network is selected at a time.
The second 555 is another astable oscillator, but this one runs at audio frequencies. Its timing capacitor charges and discharges through the selected resistance, determining the frequency produced at its output.
Larger resistance values produce lower frequencies, while smaller values produce higher frequencies. That's how the same 555 can generate all six notes.
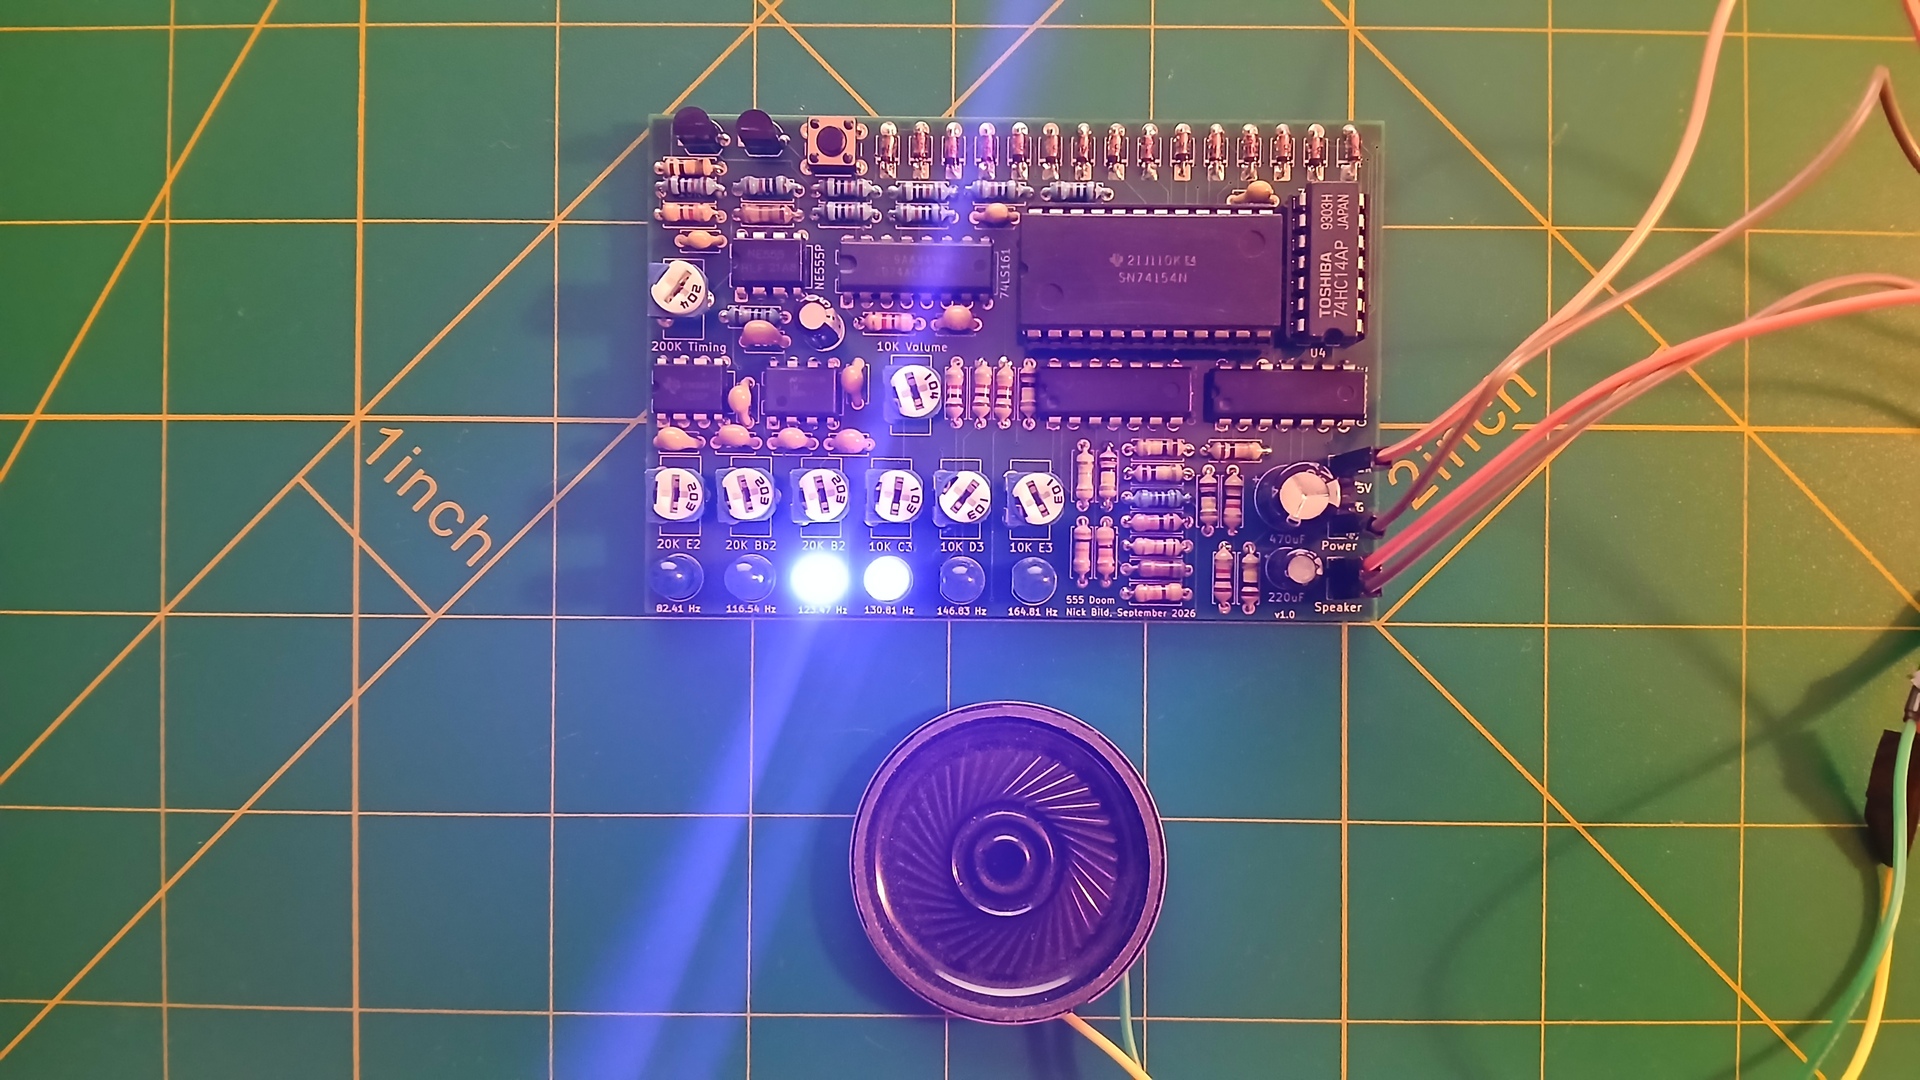
The PCB version adds an LED for each of the six pitches.
These are connected to the active-high note-select outputs from the 74HCT14. When one of those outputs goes high to activate its CD4066 switch, it also illuminates the corresponding LED.
That means you can now watch the circuit step through the music as well as hear it.
Connecting the indicators here also keeps them away from the second 555's analog timing network. The LEDs are monitoring the digital control signals rather than loading the resistor and capacitor network that determines pitch.
The pitch resistors get the oscillator reasonably close to the desired frequencies, but fixed resistor values aren't accurate enough to tune the circuit by themselves. Component tolerances, the timing capacitor, the 555, and the CD4066 switches can all affect the final frequency.
Each pitch therefore has its own trimmer potentiometer.
The easiest way to tune them is to temporarily take the sequencer out of the equation and manually activate each CD4066 switch.
Turn off the power before removing or installing an IC.
First, remove the 74HCT14 from its socket. This disconnects the normal note-select signals from the six CD4066 control inputs. Each of those inputs has a 100 kΩ pull-down resistor, so with the HCT14 removed, all six switches default to off.
Power the board again and connect the ground lead of a frequency meter, multimeter with frequency mode, oscilloscope, or logic analyzer to circuit ground. Measure the output at pin 3 of the audio 555.
To tune a pitch, connect +5 V to the CD4066 control input for that note. This turns on only that analog switch and connects its resistor network to the audio 555.
The oscillator should now continuously generate that note.
Adjust the corresponding trimmer until the measured frequency is as close as possible to the target.
Repeat the process for all six pitches.
| Note | Target Frequency | CD4066 | Control Pin to +5 V |
|---|---|---|---|
| E2 | 82.41 Hz | CD4066 #1 | Pin 13 |
| B♭2 | 116.54 Hz | CD4066 #1 | Pin 5 |
| B2 | 123.47 Hz | CD4066 #1 | Pin 6 |
| C3 | 130.81 Hz | CD4066 #1 | Pin 12 |
| D3 | 146.83 Hz | CD4066 #2 | Pin 13 |
| E3 | 164.81 Hz | CD4066 #2 | Pin 5 |
For each note, temporarily connect +5 V to the control pin shown above, adjust that note's trimmer while watching the measured frequency, and stop when it matches the target as closely as possible.
Remove the +5 V connection before moving on to the next note. Only one CD4066 control input should be driven high at a time.
Once all six pitches are tuned, turn the power off, reinstall the 74HCT14 in the correct orientation, and power the board back up. The sequencer can now select the calibrated pitches automatically.
The same basic approach can be used to set the tempo. Measure pin 3 of the tempo 555 and adjust its trimmer until the clock is approximately 7.33 Hz.
The breadboard prototype used a PAM8302 amplifier breakout board. It worked well, but using a module on the finished PCB seemed unnecessary when the amplifier could be built directly into the board. It also doesn't quite match the retro feel of the rest of the circuit.
I replaced it with an LM386, a small audio amplifier IC that only requires a handful of external components.
The square-wave output from the audio 555 passes through a coupling capacitor and a volume potentiometer before reaching the LM386 input. The coupling capacitor blocks the DC component of the 555 output, while the potentiometer allows the signal level — and therefore the volume — to be adjusted.
The LM386 amplifies that signal enough to drive the speaker. Its output passes through a large electrolytic coupling capacitor before reaching the speaker, since unlike the PAM8302 module, the LM386 output has a DC bias that needs to be blocked.
| Qty | Value | Footprint | References |
|---|---|---|---|
| 15 | 1N4148 | Diode_THT:D_T-1_P5.08mm_Horizontal | D1, D2, D3, D4, D5, D6, D7, D8, D9, D10, D11, D12, D13, D14, D15 |
| 10 | 10K | Resistor_THT:R_Axial_DIN0207_L6.3mm_D2.5mm_P7.62mm_Horizontal | R2, R5, R7, R8, R9, R10, R11, R12, R13, R26 |
| 7 | 100K | Resistor_THT:R_Axial_DIN0207_L6.3mm_D2.5mm_P7.62mm_Horizontal | R4, R14, R16, R18, R20, R22, R24 |
| 6 | 0.1uF | Capacitor_THT:C_Disc_D4.7mm_W2.5mm_P5.00mm | C1, C4, C6, C7, C8, C13 |
| 6 | 1K | Resistor_THT:R_Axial_DIN0207_L6.3mm_D2.5mm_P7.62mm_Horizontal | R15, R17, R19, R21, R23, R25 |
| 2 | 0.01uF | Capacitor_THT:C_Disc_D4.7mm_W2.5mm_P5.00mm | C3, C10 |
| 2 | 1uF | Capacitor_THT:C_Disc_D4.7mm_W2.5mm_P5.00mm | C2, C9 |
| 2 | 2N3904 | Package_TO_SOT_THT:TO-92_Inline_Wide | Q1, Q2 |
| 2 | 4.7K | Resistor_THT:R_Axial_DIN0207_L6.3mm_D2.5mm_P7.62mm_Horizontal | R3, R6 |
| 2 | 47K | Resistor_THT:R_Axial_DIN0207_L6.3mm_D2.5mm_P7.62mm_Horizontal | R29, R30 |
| 2 | CD4066BE | Package_DIP:DIP-14_W7.62mm | U5, U6 |
| 2 | NE555P | Package_DIP:DIP-8_W7.62mm | U1, U7 |
| 1 | 10 | Resistor_THT:R_Axial_DIN0207_L6.3mm_D2.5mm_P7.62mm_Horizontal | R33 |
| 1 | 100K Volume | Potentiometer_THT:Potentiometer_ACP_CA9-H5_Horizontal | RV8 |
| 1 | 100uF | Capacitor_THT:CP_Radial_D5.0mm_P2.50mm | C14 |
| 1 | 10K C3 | Potentiometer_THT:Potentiometer_ACP_CA9-H5_Horizontal | RV5 |
| 1 | 10K D3 | Potentiometer_THT:Potentiometer_ACP_CA9-H5_Horizontal | RV6 |
| 1 | 10K E3 | Potentiometer_THT:Potentiometer_ACP_CA9-H5_Horizontal | RV7 |
| 1 | 200K Timing | Potentiometer_THT:Potentiometer_ACP_CA9-H5_Horizontal | RV1 |
| 1 | 20K B2 | Potentiometer_THT:Potentiometer_ACP_CA9-H5_Horizontal | RV4 |
| 1 | 20K Bb2 | Potentiometer_THT:Potentiometer_ACP_CA9-H5_Horizontal | RV3 |
| 1 | 20K E2 | Potentiometer_THT:Potentiometer_ACP_CA9-H5_Horizontal | RV2 |
| 1 | 220uF | Capacitor_THT:CP_Radial_D5.0mm_P2.50mm | C11 |
| 1 | 33K | Resistor_THT:R_Axial_DIN0207_L6.3mm_D2.5mm_P7.62mm_Horizontal | R32 |
| 1 | 39K | Resistor_THT:R_Axial_DIN0207_L6.3mm_D2.5mm_P7.62mm_Horizontal | R31 |
| 1 | 470uF | Capacitor_THT:CP_Radial_D8.0mm_P2.50mm | C5 |
| 1 | 47nF | Capacitor_THT:C_Disc_D4.7mm_W2.5mm_P5.00mm | C12 |
| 1 | 51K | Resistor_THT:R_Axial_DIN0207_L6.3mm_D2.5mm_P7.62mm_Horizontal | R28 |
| 1 | 74154 | Package_DIP:DIP-24_W15.24mm | U3 |
| 1 | 74HC14 | Package_DIP:DIP-14_W7.62mm | U4 |
| 1 | 74LS161 | Package_DIP:DIP-16_W7.62mm | U2 |
| 1 | 75K | Resistor_THT:R_Axial_DIN0207_L6.3mm_D2.5mm_P7.62mm_Horizontal | R27 |
| 1 | 768 | Resistor_THT:R_Axial_DIN0207_L6.3mm_D2.5mm_P7.62mm_Horizontal | R1 |
| 1 | LED B2 | LED_THT:LED_D5.0mm | D18 |
| 1 | LED Bb2 | LED_THT:LED_D5.0mm | D17 |
| 1 | LED C3 | LED_THT:LED_D5.0mm | D19 |
| 1 | LED D3 | LED_THT:LED_D5.0mm | D20 |
| 1 | LED E2 | LED_THT:LED_D5.0mm | D16 |
| 1 | LED E3 | LED_THT:LED_D5.0mm | D21 |
| 1 | LM386 | Package_DIP:DIP-8_W7.62mm | U8 |
| 1 | Power | Connector_PinHeader_2.54mm:PinHeader_1x04_P2.54mm_Vertical | J1 |
| 1 | SW_Push | Button_Switch_THT:SW_PUSH_6mm_H7.3mm | SW1 |
| 1 | Speaker | Connector_PinHeader_2.54mm:PinHeader_1x02_P2.54mm_Vertical | J2 |
ManCloud/MegaDuck_SJC
WIP - Reverse Engineering Project of the MegaDuck Super Junior Computer


mnaberez/pedisk2
Reverse engineering the CGRS Microtech PEDISK II disk system for Commodore PET/CBM computers


GeraKuznetsov/M68K-MBC
A M68k Multi-Board Computer design. The design basics is as follows: 1) A backplane PCB contains the majority of the bus, such as the address and data lines. 2) Cards slot into the backplane.

levvayner/VGA_PLD
If choosing the former, follow Atmel's instructions using the included .pld files. If chosing the latter, you can open the workspace and you will see both projects. You can build and deploy the projects right from Code!

It measures 92.7 × 63.1 mm and has 4 copper layers, 1.6 mm thick.
89 parts, built around the LM386, CD4066BE, NE555P and 74HC14. The full list of its parts is on this page, with links to each part's symbol and footprint where PCBKit's library has them.
From the nickbild/555_doom_pcb repository on GitHub, at the commit this page was made from: the board is 555_doom_kicad/555_doom_kicad.kicad_pcb and its schematic 555_doom_kicad/555_doom_kicad.kicad_sch. PCBKit opens the board in the browser, with nothing to install.
Its repository publishes it under the MIT licence: you may reuse it on that licence's terms (keep the author's notice, and for a copyleft licence share your changes alike).