
4 layers45 × 41 mm
Osw
Open-Smartwatch/open-smartwatch-gps
Hardware design files for the GPS version of the open-smartwatch
70 parts243GPL-3.0
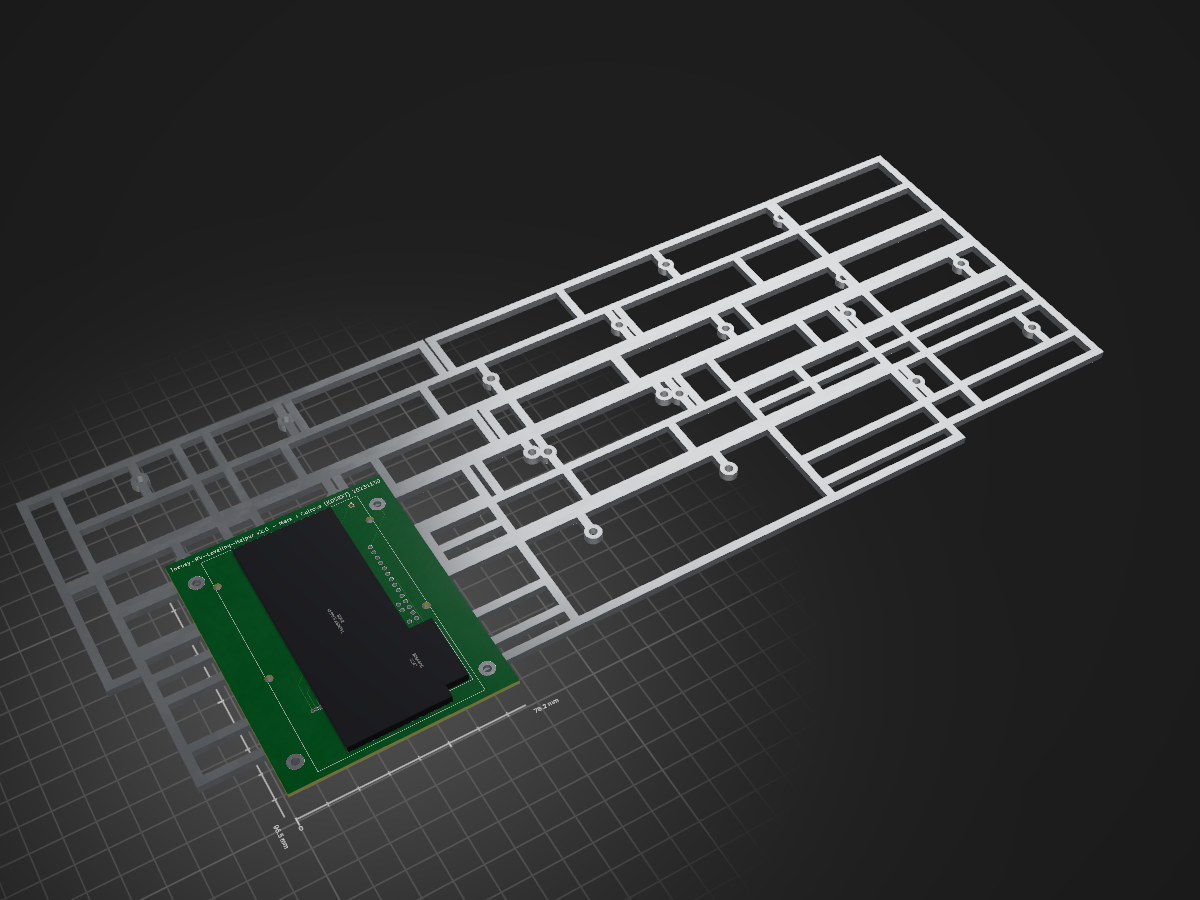
 mjculross/Teensy-RV-Leveling-Helper21
RV LEveling Helper using Teensy 4.0 + BMA400 Triple Axis Accelerometer Breakout + ILI9341 Color 320x240 TFT Touchscreen display
Teensy RV Leveling Helper v2 is an open-source printed circuit board by mjculross, from the mjculross/Teensy-RV-Leveling-Helper repository on GitHub, published under the MIT licence. It is a 2-layer board of 76.2 × 96.5 mm with 21 parts on 64 nets, routed with 153 tracks and 0 vias.
It is built around the BMA400. Its parts include 5 resistors, 4 ICs, 2 transistors and 2 connectors. It belongs with the NXP (LPC, Kinetis, i.MX RT) boards of this library.
Teensy RV Leveling Helper using Teensy 4.0 + BMA400 Triple Axis Accelerometer Breakout + ILI9341 Color 320x240 TFT Touchscreen display + NRF24L01 radio
This project came about after we acquired a used RV motorhome & I quickly grew tired of the following process of attempting to level the RV:
Using the TRLH makes this process much more convenient & quick as follows:
This project incorporates the following:
HARDWARE:
  Teensy 4.0
     available from PJRC.com https://www.pjrc.com/teensy-4-0/

  ILI9341 Color 320x240 TFT Touchscreen display
     available from PJRC.com https://www.pjrc.com/store/display_ili9341_touch.html

  HiLetgo NRF24L01+ Wireless Transceiver Module 2.4GHz
     available from https://www.amazon.com/gp/product/B00LX47OCY

  BMA400 Triple Axis Accelerometer Breakout
     available from Sparkfun https://www.sparkfun.com/products/21208

  PowerBoost 1000 Charger - Rechargeable 5V Lipo USB Boost @ 1A - 1000C
     available from Adafruit https://www.adafruit.com/product/2465

  Lithium Ion Polymer Battery - 3.7v 2500mAh
     available from Adafruit https://www.adafruit.com/product/328
This project uses touchscreen input & color display to create a visual (graphical) indication of how many inches of leveling blocks are required to be put under each wheel of an RV to level it
This project uses the ILI9341_t3 library, which has been optimized for use with the Teensy TFT display, as well as the XPT2046_Touchscreen.h touchscreen library for that same display
This project (optionally) uses the NRF24L01 wireless transceiver module to allow two TRLH units to communicate, using one as the inside unit taking measurements, and the other as a remote display
This project specifically uses the SparkFun BMA400 support library (SparkFun_BMA400_Arduino_Library.h) which can be added using the Arduino IDE library manager.
This project allows & stores configurable wheel base (front to back wheels distance) from 60" to 255".
This project allows & stores configurable wheel distance (front wheels, left to right distance) from 60" to 84".
Internet reference (with equation derivation) for transforming accelerometer x,y,z vector data into pitch & roll angles:
https://mwrona.com/posts/accel-roll-pitch/The specific DPDT switch that I use for power control (& for which the 3D printed case is designed) is the Carling Technologies 62115929-0-0-V, available from digikey as part number 432-1252-ND (https://www.digikey.com/en/products/detail/carling-technologies/62115929-0-0-V/3025077).
An Adafruit microUSB panel mount extension cable Product ID 3258 (https://www.adafruit.com/product/3258) is mounted on the side wall of the case. The cable is split such that the USB 5VDC line connects to the USB input pin on the Adafruit PowerBoost 1000C to provide power & battery charging, while the remaining GROUND, D-, & D+ signals connect to the microUSB connector on the Teensy to allow (re)programming without opening the case.
This project implements the following:
  1) read the XYZ vector from the BMA400 triple axis accelerometer breakout
  2) use the XYZ vector to calculate PITCH and ROLL values for the current plane of the RV/trailer orientation
  3) use the calculated PITCH and ROLL values to determine the highest wheel/point (which will not require any blocks)
  4) use the calculated PITCH and ROLL values to determine the number of inches of blocks required for the remaining wheels/points to achieve "level"
  5) update the display with the current results once per second (& average all values otherwise)
  6) repeat
UPDATE NOTES for version 1.6 dated 07/20/2024 @0635:
Updated TRAILER MODE such that is now indicates LOWER or RAISE values up to 24" for the hitch, and RAISE values up to 12" for the wheels.
UPDATE NOTES for version 1.4 dated 04/05/2024 @1335:
Now, two units can be used & they talk to each other using NRF24L01 wireless modules. The first unit powered on will assume that it is the "INSIDE" unit (which is actually reading its onboard BMA400 accelerometer & displaying the leveling recommendations from the calculated pitch & roll). The second unit will assume that it is the "OUTSIDE" unit (which is ignoring its onboard BMA400, and is instead displaying the leveling recommendations calculated using the pitch & roll data received over the NRF24L01 wireless link from the "INSIDE" unit). This way, leveling can be achieved without the need for running back & forth between inside (to look at the Teensy-RV-Leveling-Helper) & outside (to make adjustments). Any unit can also be used by itself...it does not have to have a partner to work. The latest firmware also automatically detects the lack of the NRF24L01 module & operates successfully without the radio as a standalone unit.
EASTER EGG: If you hold down on the battery status display box for 5-seconds, the unit will change from RV LEVELING MODE to LED COLOR CONTROLLER MODE. In this mode, with a WS2812B LED strip powered from the 5VDC supply & common ground with the Teensy, tie the data line to PIN 8 & the RV Leveling Helper can also be used to create custom LED patterns, with the ability to control the mode (MARQUIS, CYCLE, FADE, CROSSFADE, ZIPPER, & RANDOM), the brightness, the radio power level (for using another unit as a remote control), the radio channel (to put the LED COLOR CONTROLLER MODE on a different radio channel from the RV LEVELING MODE to minimize interference between them). Up to ten different custom patterns can be stored in EEPROM for quick recall. Each pattern can be from two to thirty-two LEDs in length. Each LED can be set to any of over sixteen million colors. You can also customize the speed for each pattern individually, as well as the direction of movement (FORWARD / REVERSE). An RV Leveling Helper which is being operated in LED COLOR CONTROLLER MODE need not have the TFT Color Touchscreen installed/connected. By shorting PIN 10 on the Teensy to ground, an RV Leveling Helper unit can be forced into LED COLOR CONTROLLER MODE (specifically for the case where you have an RV Leveling helper unit that does not have a display connected by which to change between the two modes, essentially making it a dedicated, stand-alone LED COLOR CONTROLLER). For the RV Leveling Helper with a TFT Color Touchscreen installed/connected and operting in the LED COLOR CONTROLLER MODE, holding down on the battery display box for 5-seconds will change it back to RV LEVELING MODE. So, you now have two-controllers-in-one with this new capability.
RV LEVELING CONTROLLER OPERATIONAL MODE:
This project can be switched between the following primary modes of operation:
MECHANICAL ASSEMBLY & CALIBRATION:
For information on mechanical assembly and/or calibration, see the "readme" file in the "photos" folder.
ORDERING INFO:
The compact PCB is available from OshPark here: https://oshpark.com/projects/CN9rpz97/order
CONTACT INFO:
If you have any questions, suggestions for improvement, and most especially any bug reports, please contact me at kd5rxt@arrl.net
| Qty | Value | Footprint | References |
|---|---|---|---|
| 2 | 2K2 | Resistor_THT:R_Axial_DIN0204_L3.6mm_D1.6mm_P5.08mm_Horizontal | R4, R5 |
| 1 | 1M | Resistor_THT:R_Axial_DIN0204_L3.6mm_D1.6mm_P5.08mm_Horizontal | R1 |
| 1 | 22K | Resistor_THT:R_Axial_DIN0204_L3.6mm_D1.6mm_P5.08mm_Horizontal | R3 |
| 1 | 2N3904 | Package_TO_SOT_THT:TO-92_Inline | Q1 |
| 1 | 2N3906 | Package_TO_SOT_THT:TO-92_Inline | Q2 |
| 1 | 470K | Resistor_THT:R_Axial_DIN0204_L3.6mm_D1.6mm_P5.08mm_Horizontal | R2 |
| 1 | BATT-a | MountingHole:MountingHole_2.7mm | H1 |
| 1 | BATT-b | MountingHole:MountingHole_2.7mm | H2 |
| 1 | BATT-c | MountingHole:MountingHole_2.7mm | H3 |
| 1 | BATT-d | MountingHole:MountingHole_2.7mm | H4 |
| 1 | BMA400 | MJC:BMA400 | U3 |
| 1 | DISABLE SW | Connector_PinHeader_2.54mm:PinHeader_1x02_P2.54mm_Vertical | J2 |
| 1 | PCB-a | MountingHole:MountingHole_2.7mm_M2.5_Pad_TopBottom | H5 |
| 1 | PCB-b | MountingHole:MountingHole_2.7mm_M2.5_Pad_TopBottom | H6 |
| 1 | PCB-c | MountingHole:MountingHole_2.7mm_M2.5_Pad_TopBottom | H7 |
| 1 | PCB-d | MountingHole:MountingHole_2.7mm_M2.5_Pad_TopBottom | H8 |
| 1 | Powerboost1000C | MJC:PowerBoost1000C | U1 |
| 1 | Teensy ILI9341 | MJC:ILI9341 | U4 |
| 1 | Teensy4.0 | teensy:Teensy40 | U2 |
| 1 | USB VIN | Connector_PinHeader_2.54mm:PinHeader_1x01_P2.54mm_Vertical | J1 |
Open-Smartwatch/open-smartwatch-gps
Hardware design files for the GPS version of the open-smartwatch


uw-x/clearbuds-hw
Errata: The design contains some errors that can be addressed in future revisions. The errors do not affect function, but do affect robustness. 1. Add 0.1uF decoupling capacitor to PDM mic (ICS-41350) Vcc. 2.

timohueser/OpenBikeComputer
Open source Bikecomputer with a focus on exploration and adventure.


TUDSSL/FreeBie
To compile FreeBie runtime we used the GNU Arm Embedded Toolchain (9.3.1) and CMake (3.19.1) to build the project. To program the MCU we used the J-Link debug probe with the accompanying J-Link software.


It measures 76.2 × 96.5 mm and has 2 copper layers, 1.6 mm thick.
21 parts, built around the BMA400. The full list of its parts is on this page, with links to each part's symbol and footprint where PCBKit's library has them.
From the mjculross/Teensy-RV-Leveling-Helper repository on GitHub, at the commit this page was made from: the board is KiCAD 7.0/Teensy-RV-Leveling-Helper-v2-20231130/Teensy-RV-Leveling-Helper-v2.kicad_pcb and its schematic KiCAD 7.0/Teensy-RV-Leveling-Helper-v2-20231130/Teensy-RV-Leveling-Helper-v2.kicad_sch. PCBKit opens the board in the browser, with nothing to install.
Its repository publishes it under the MIT licence: you may reuse it on that licence's terms (keep the author's notice, and for a copyleft licence share your changes alike).