
2 layers83.3 × 65.3 mm
SimonShield
github-linguist/linguist
Language Savant. If your repository's language is being reported incorrectly, send us a pull request!
46 parts14kMIT

A custom, 36-key wireless split ergonomic keyboard. Features low-profile Choc switches, a hot-swappable PCB, ZMK firmware, and a 3D-printed travel case.
Tile is an open-source printed circuit board by milosz77665, from the milosz77665/tile-keyboard repository on GitHub. It is a 2-layer board of 124.4 × 111.1 mm with 46 parts on 41 nets, routed with 379 tracks and 16 vias.
Its parts include 18 diodes and 18 switches. It belongs with the keyboards and input boards and the nRF52 and nRF5x boards of this library.
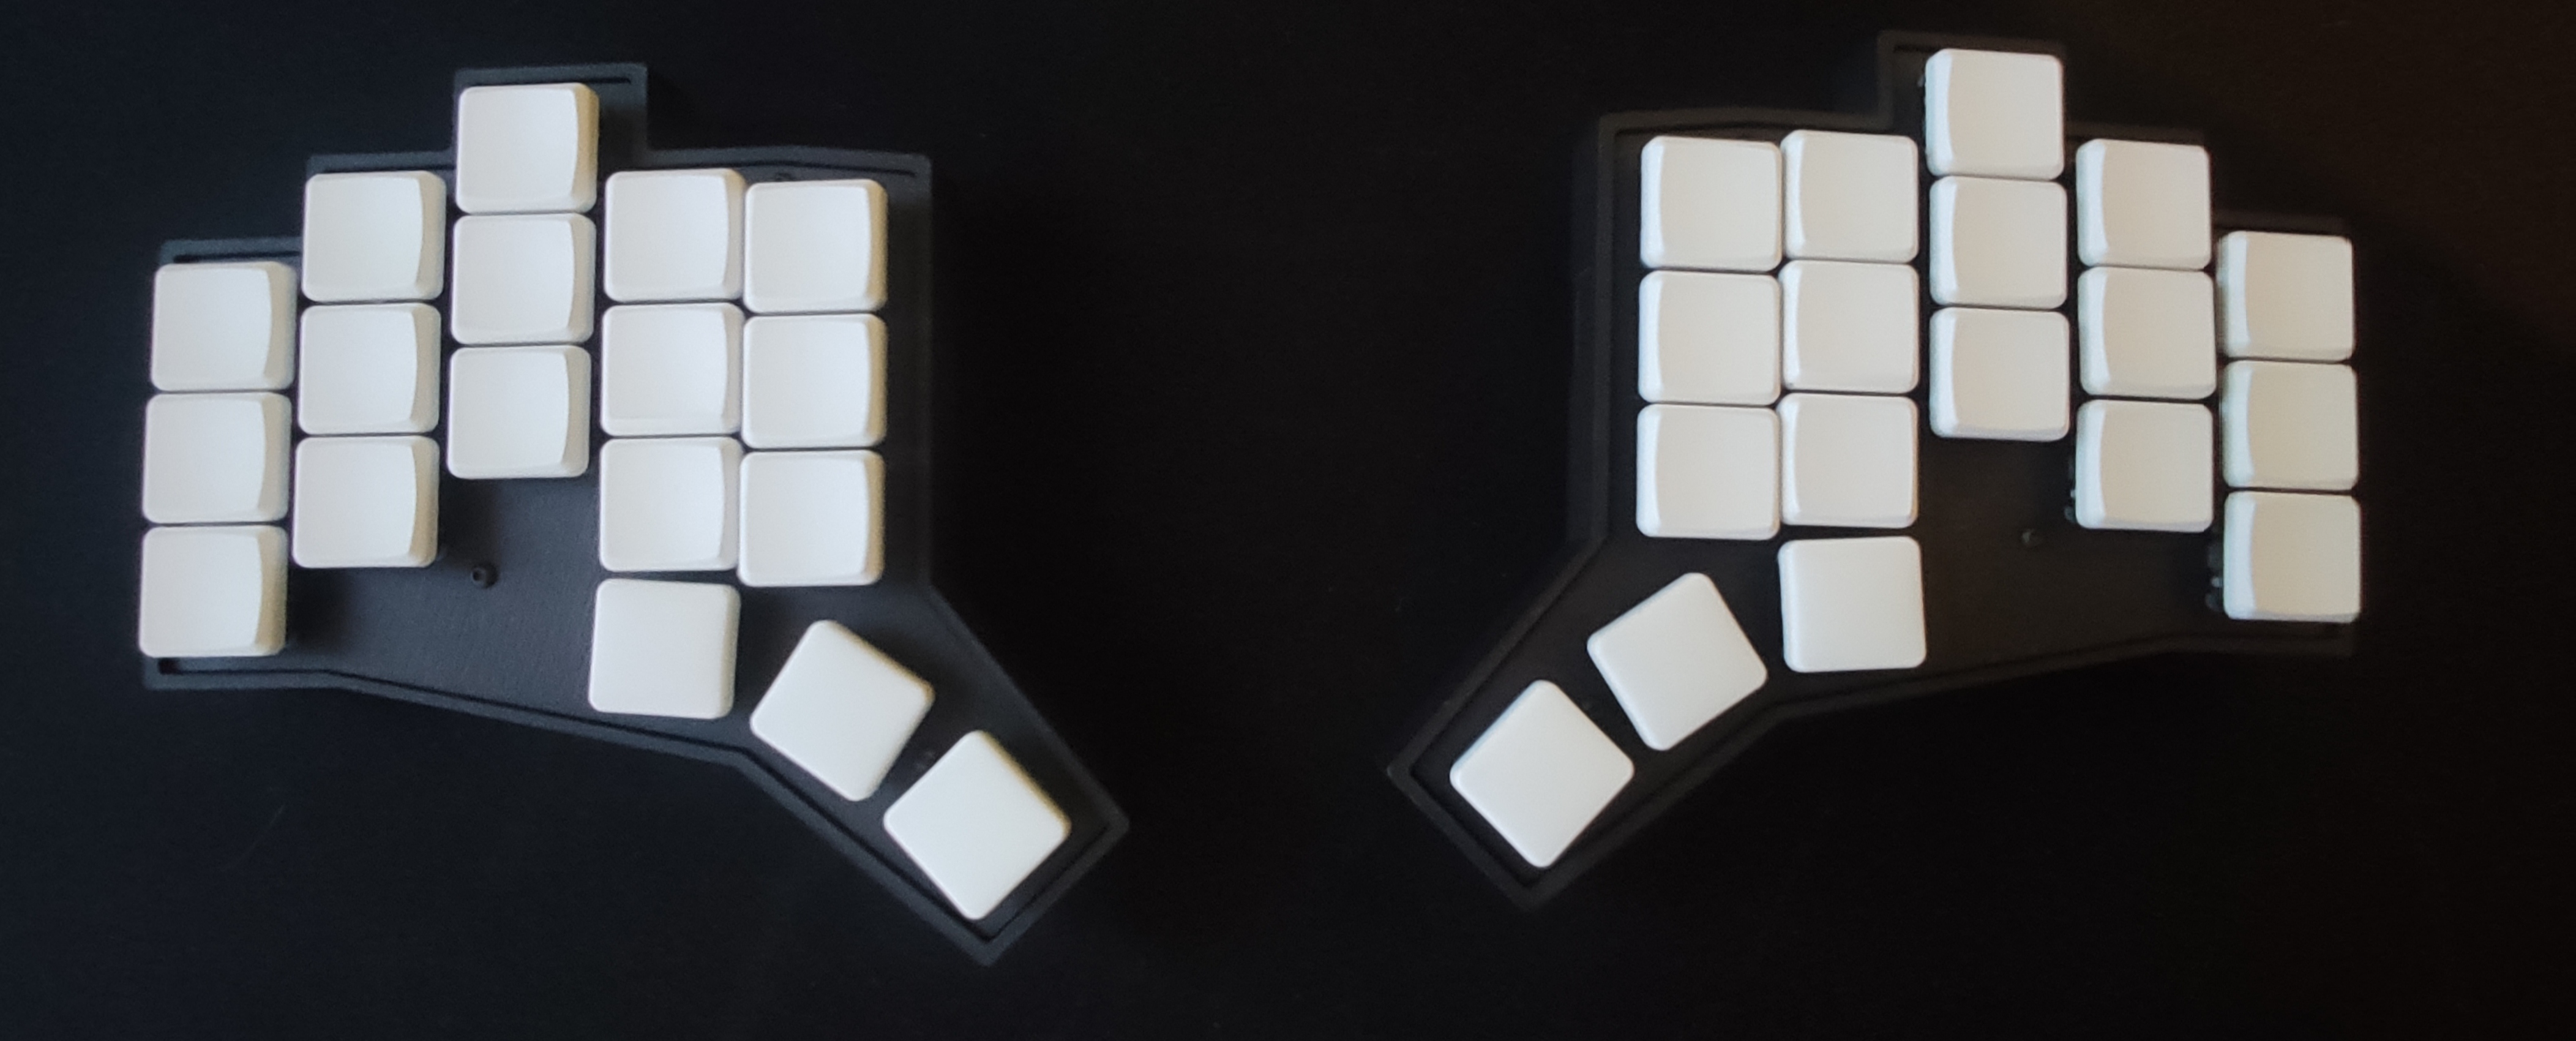
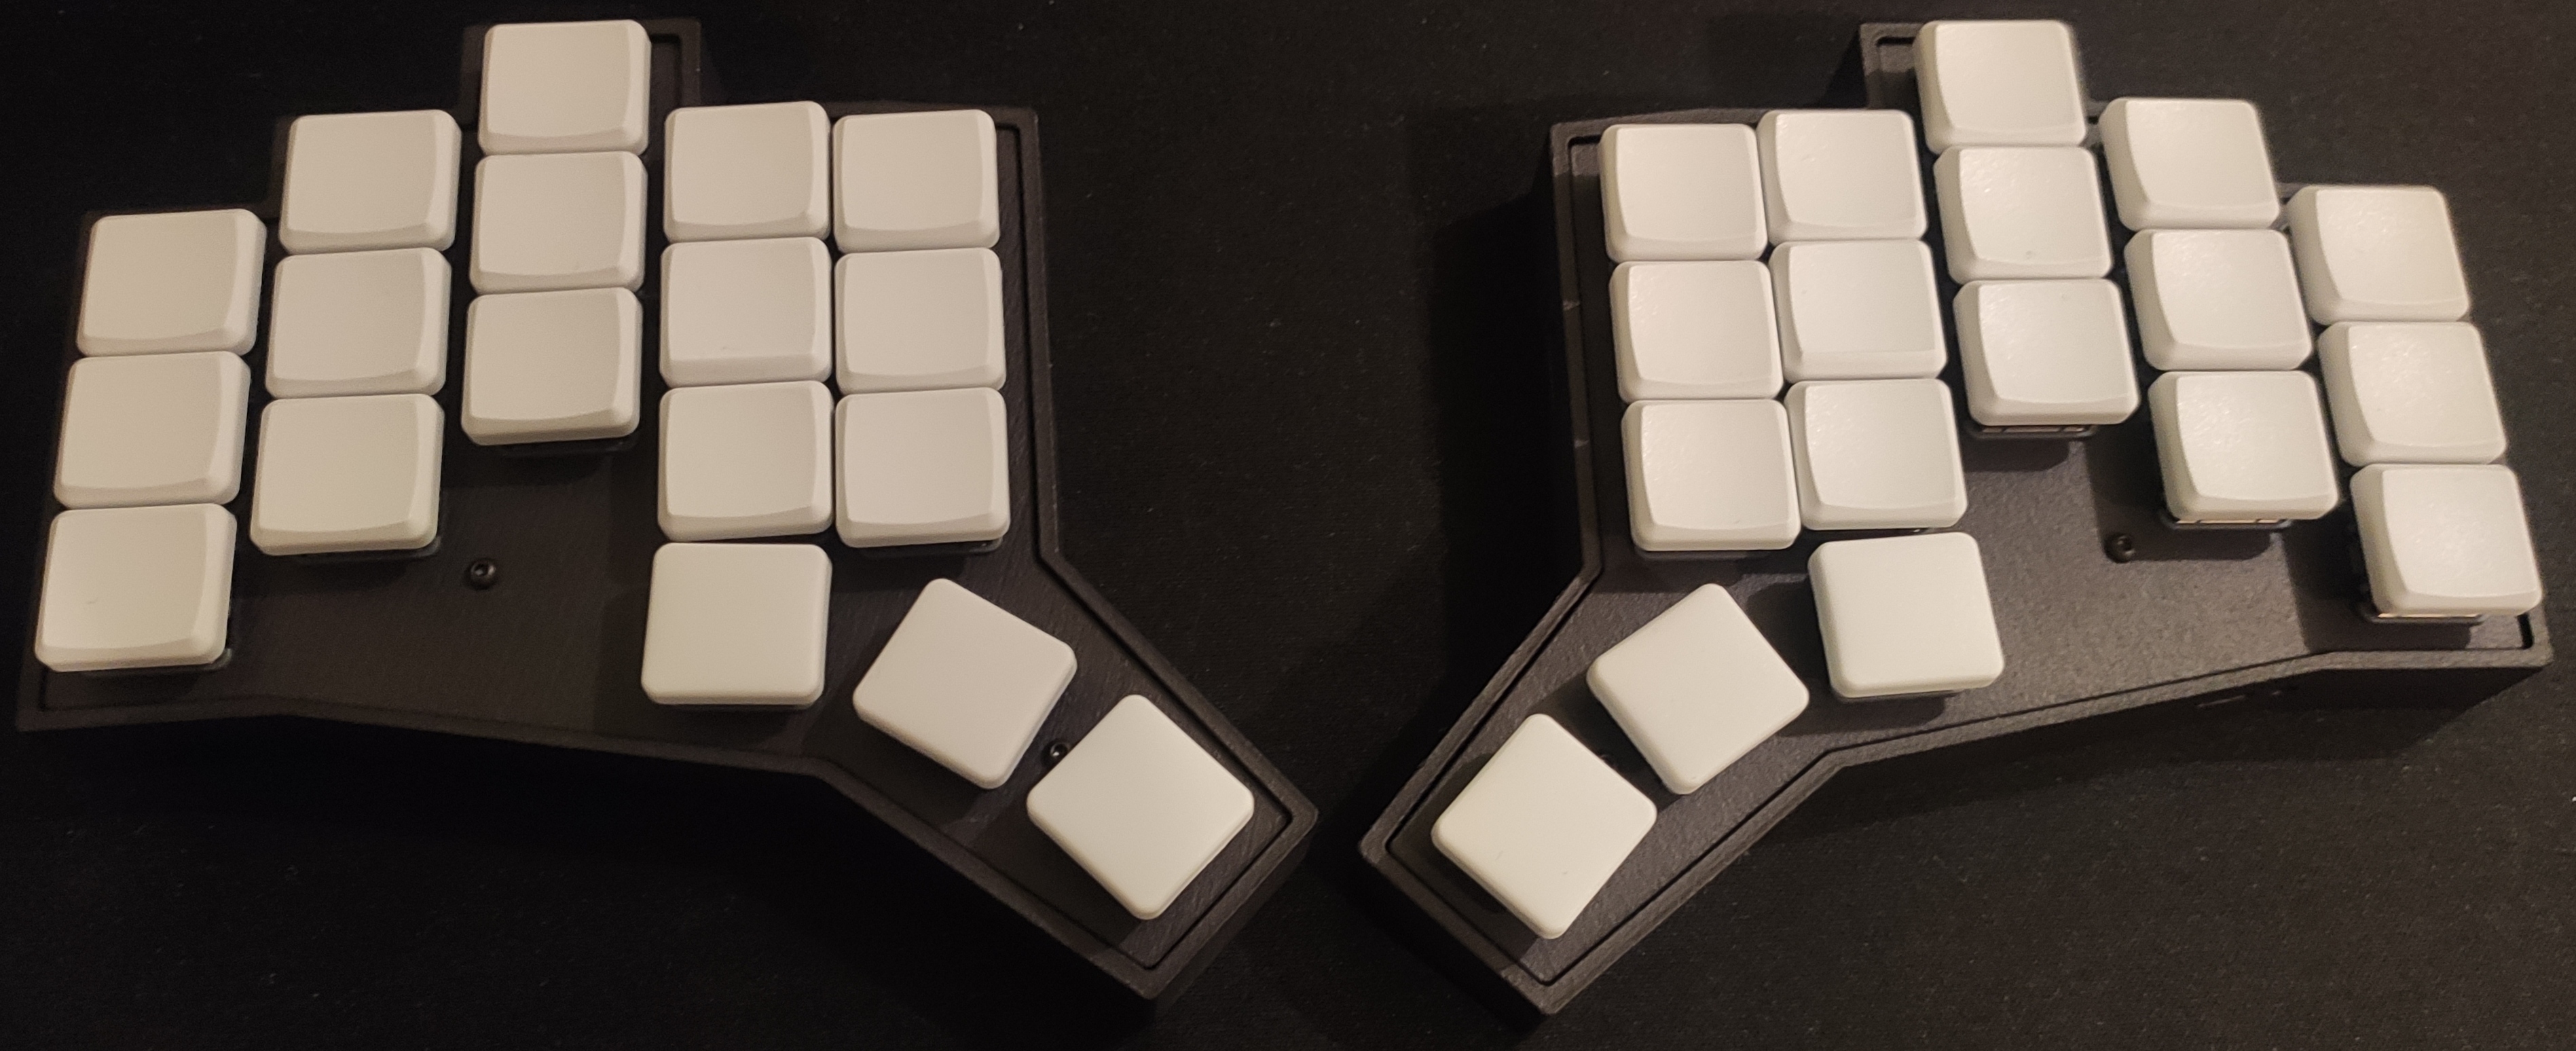
Tile is a custom, 36-key wireless split ergonomic keyboard designed and built from scratch. I created this project to achieve a highly personalized, minimalist typing experience that fits my specific workflow.
The primary goal was to create a fully wireless experience with an ergonomic layout featuring:
This keyboard is designed to be compact, portable, and comfortable.
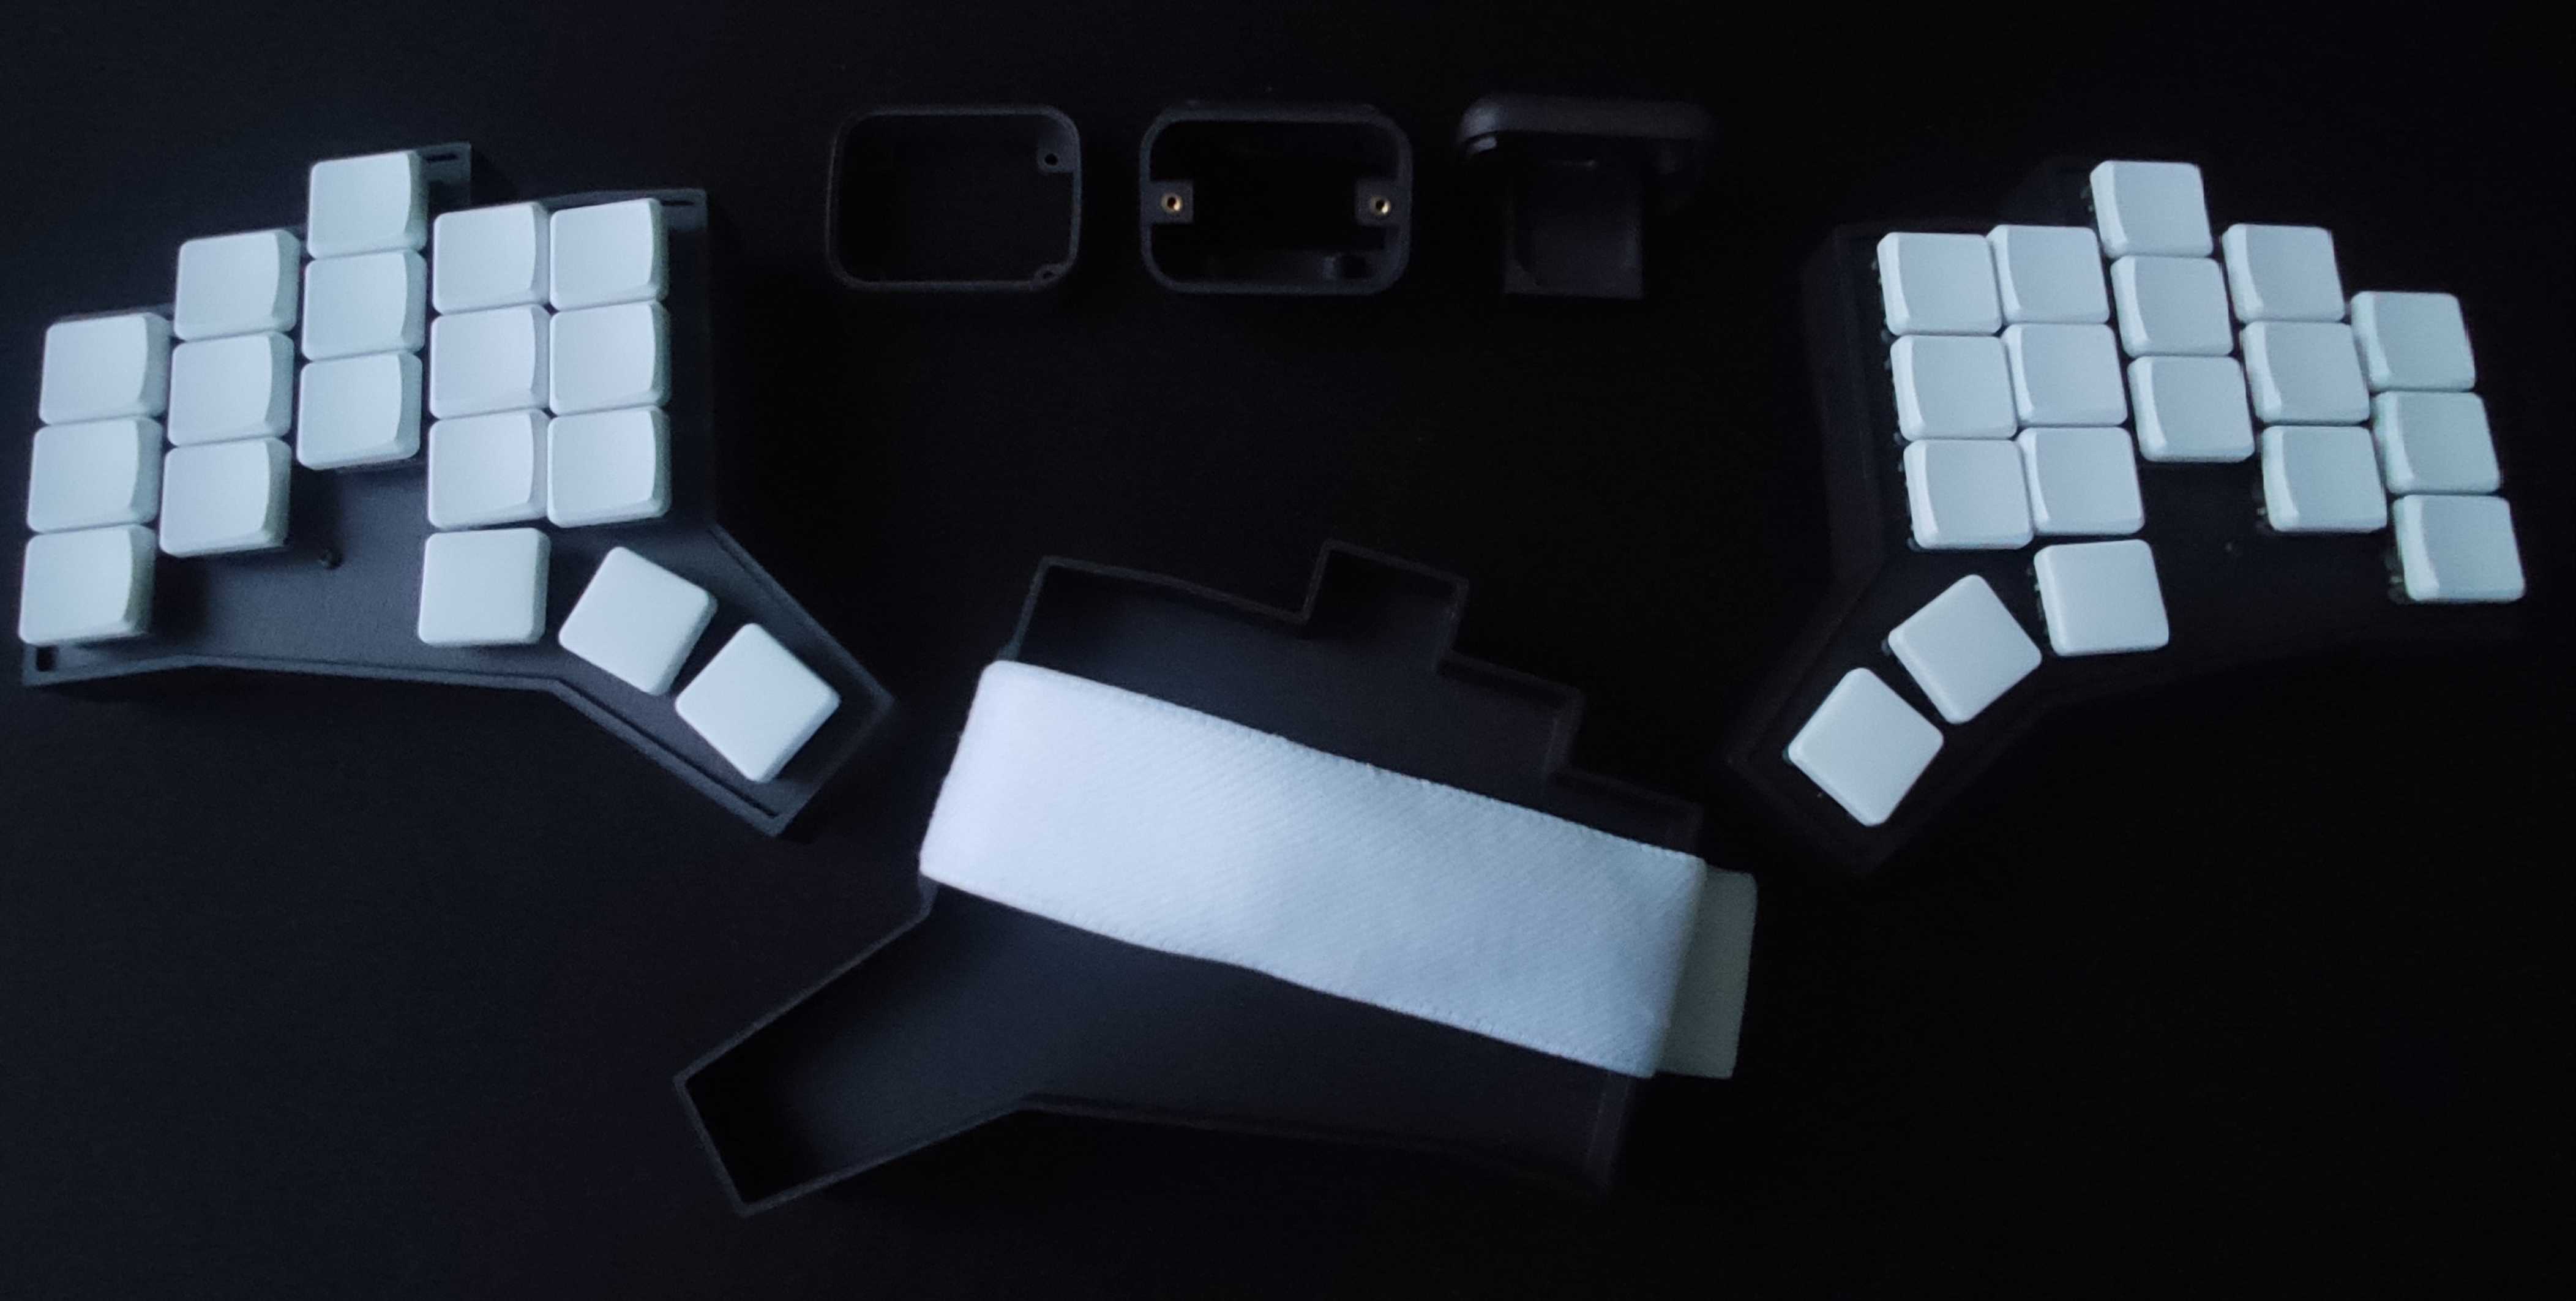
tile-keyboard/
├── config.yaml           # Ergogen keyboard configuration
├── LICENSE               # License of this project
├── README.md             # This file
├── .gitignore            # Git ignore rules
├── footprints/           # Custom Ergogen footprints (KiCad)
├── pcbs/                 # KiCad PCB projects
├── images/               # Tile keyboard images
├── cases/                # 3D printed case source files
├── production/           # Ready-to-use production files (STL, Gerbers)
└── outlines/ # 2D exports for referenceTo build the fully wireless Tile keyboard, you will need the following components. The quantities listed below are sufficient to complete both the left and right halves.
| Component | Quantity | Notes |
|---|---|---|
| PCBs | 2x | Custom Tile PCBs (ready-to-manufacture Gerber files can be found in production/pcbs) |
| Case | 2x | 3D printed (Left & Right) (ready-to-print STL files can be found in production/cases) |
| Plate | 2x | 3D printed with spacers (ready-to-print STL files can be found in production/cases) |
| Etui | 1x | 3D printed carrying case (ready-to-print STL files can be found in production/cases) |
| Microcontrollers | 2x | nice!nano v2 (nRF52840) |
| Set of MCU Sockets and Pins | 2x | 2x12 pins and 2x12 sockets per set (recommended for hot-swappable MCU) |
| Switches | 36x | Kailh Choc (I used Ambients Silent Twilight) |
| Keycaps | 36x | Kailh Choc-compatible keycaps (I used MBK keycaps) |
| Hot-Swap Sockets | 36x | Kailh Choc hot-swap sockets |
| Diodes | 36x | SMD Diodes SOD123 |
| Batteries | 2x | 3.7V Li-Po 1000mAh (5cm x 3.4cm x 0.52cm or smaller) |
| Battery Connectors | 2x | JST-PH 2-pin sockets |
| Power Switches | 2x | I used Shouhan MSK12C02 |
| Reset Switches | 2x | I used ALPS SKRTLAE010 |
| Component | Quantity | Notes |
|---|---|---|
| Screws | 12x | M2x6mm |
| Threaded Inserts | 12x | M2 x 2.5mm x 3.5mm brass inserts |
| Rubber Feet | 4x | Adhesive for bottom case stability |
| Tenting Legs | 4x | If you need an additional tenting angle |
| Knitted elastic | 1x | Elastic is needed to wrap around the etui to hold both halves together. I used 3cm x ~30cm white elastic |
Ultimately, I decided not to build the Prospector ZMK dongle as I wanted my keyboard to be more portable. However, I had already modified the 3D printed case (to fit my specific screws and threaded inserts) in advance, so I've included these files in my project for anyone interested.
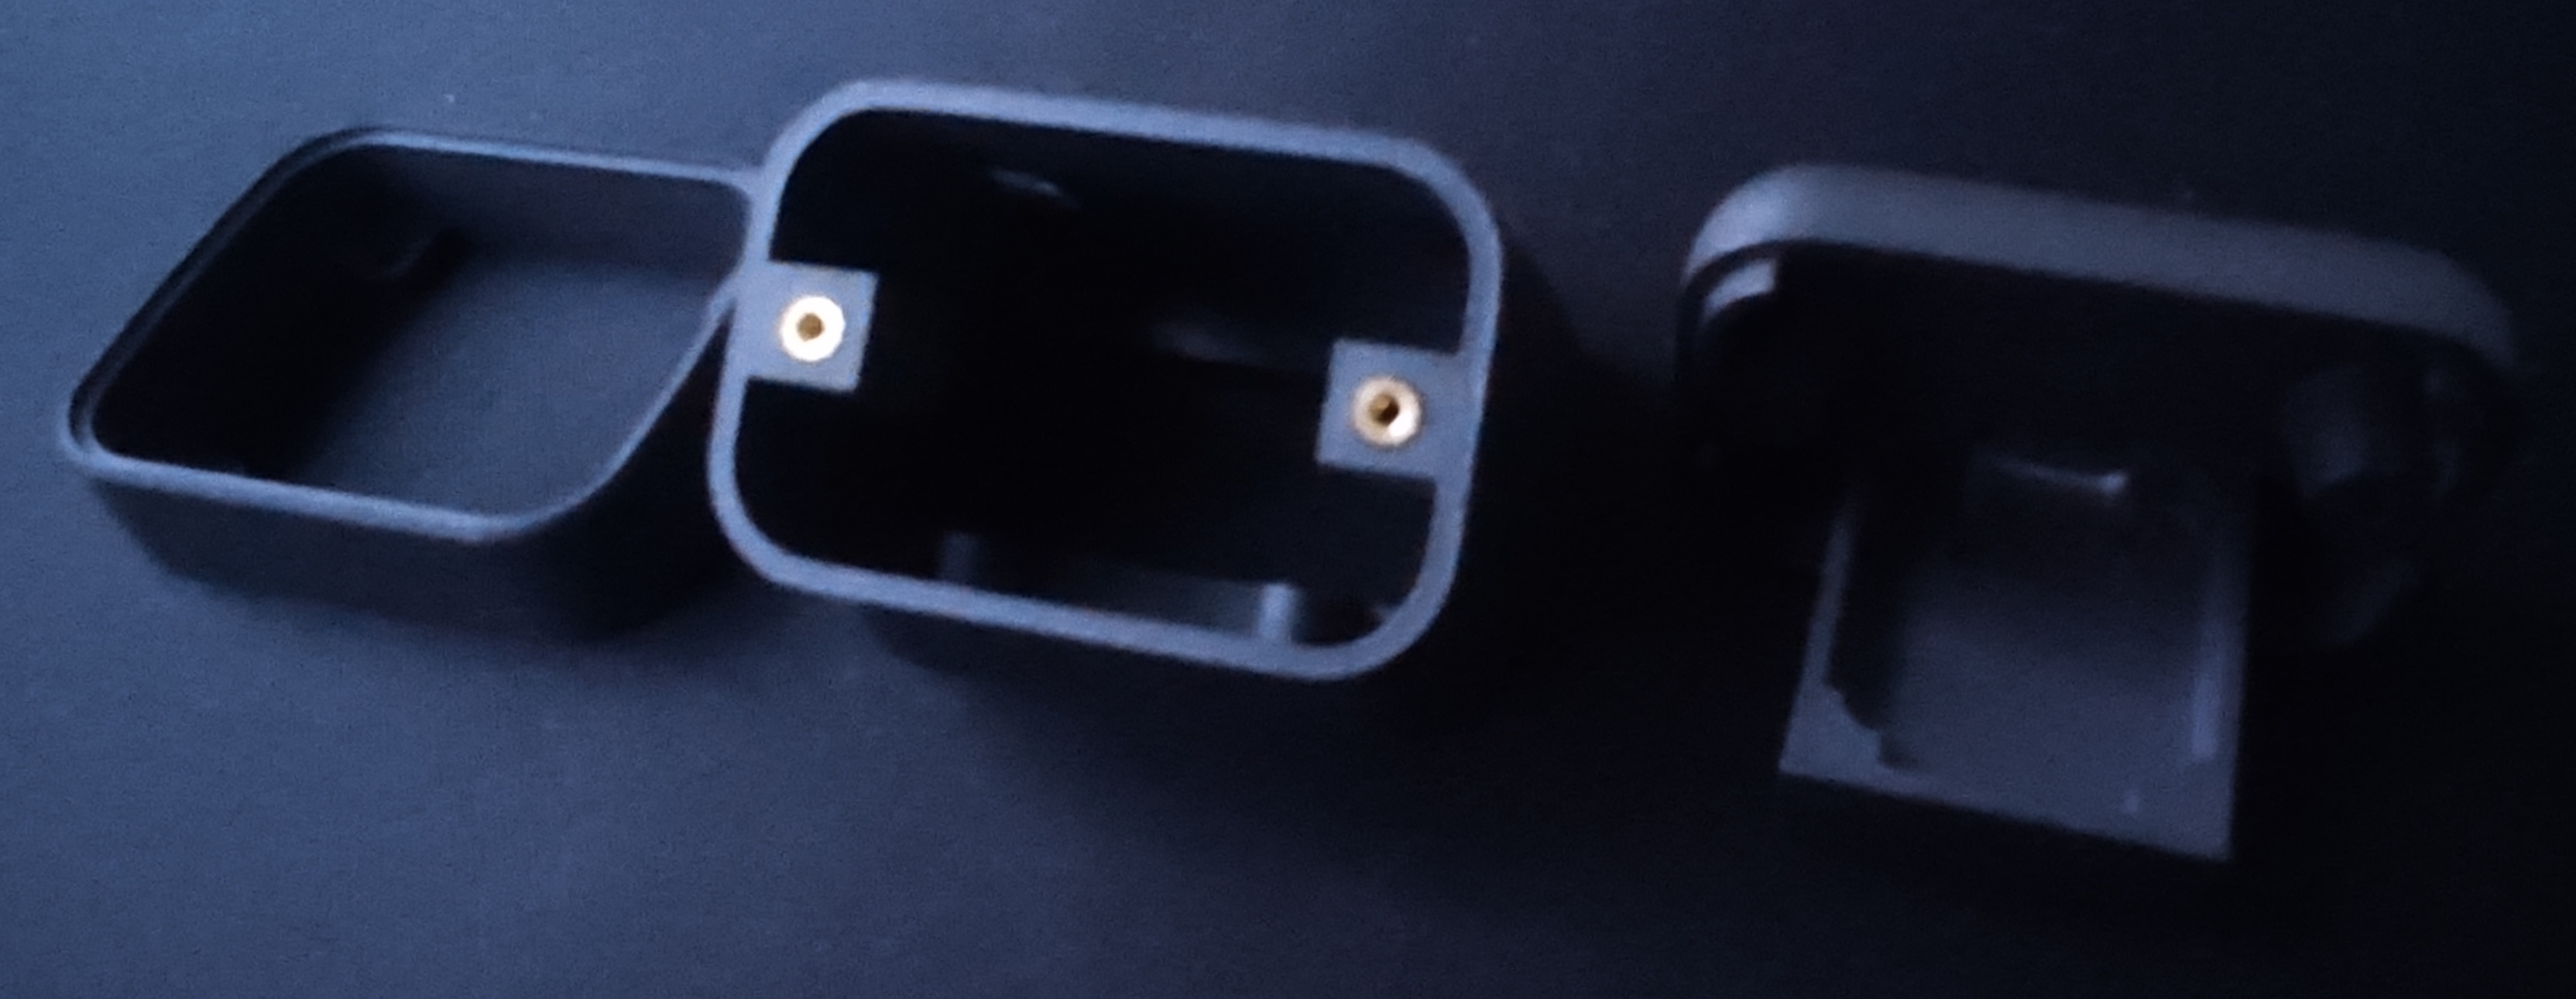
| Component | Quantity | Notes |
|---|---|---|
| Case | 1x | Modified 3D model can be found in production/cases/prospector |
| Microcontroller | 1x | Seeed Xiao BLE nRF52840 |
| Round LCD display | 1x | Waveshare 1.69inch round LCD display with touch panel |
| Wires | ~20x | For internal connections |
| Screws | 6x | M2x6mm |
| Threaded Inserts | 2x | M2 x 2.5 x 3.5 brass inserts |
Below is the recommended build order based on my assembly process. For through-hole components, make sure to snip the legs flush with the PCB using flush cutters or scissors so the switch plate sits perfectly flat. I highly recommend using a multimeter for debugging along the way. The build process consists of several stages:
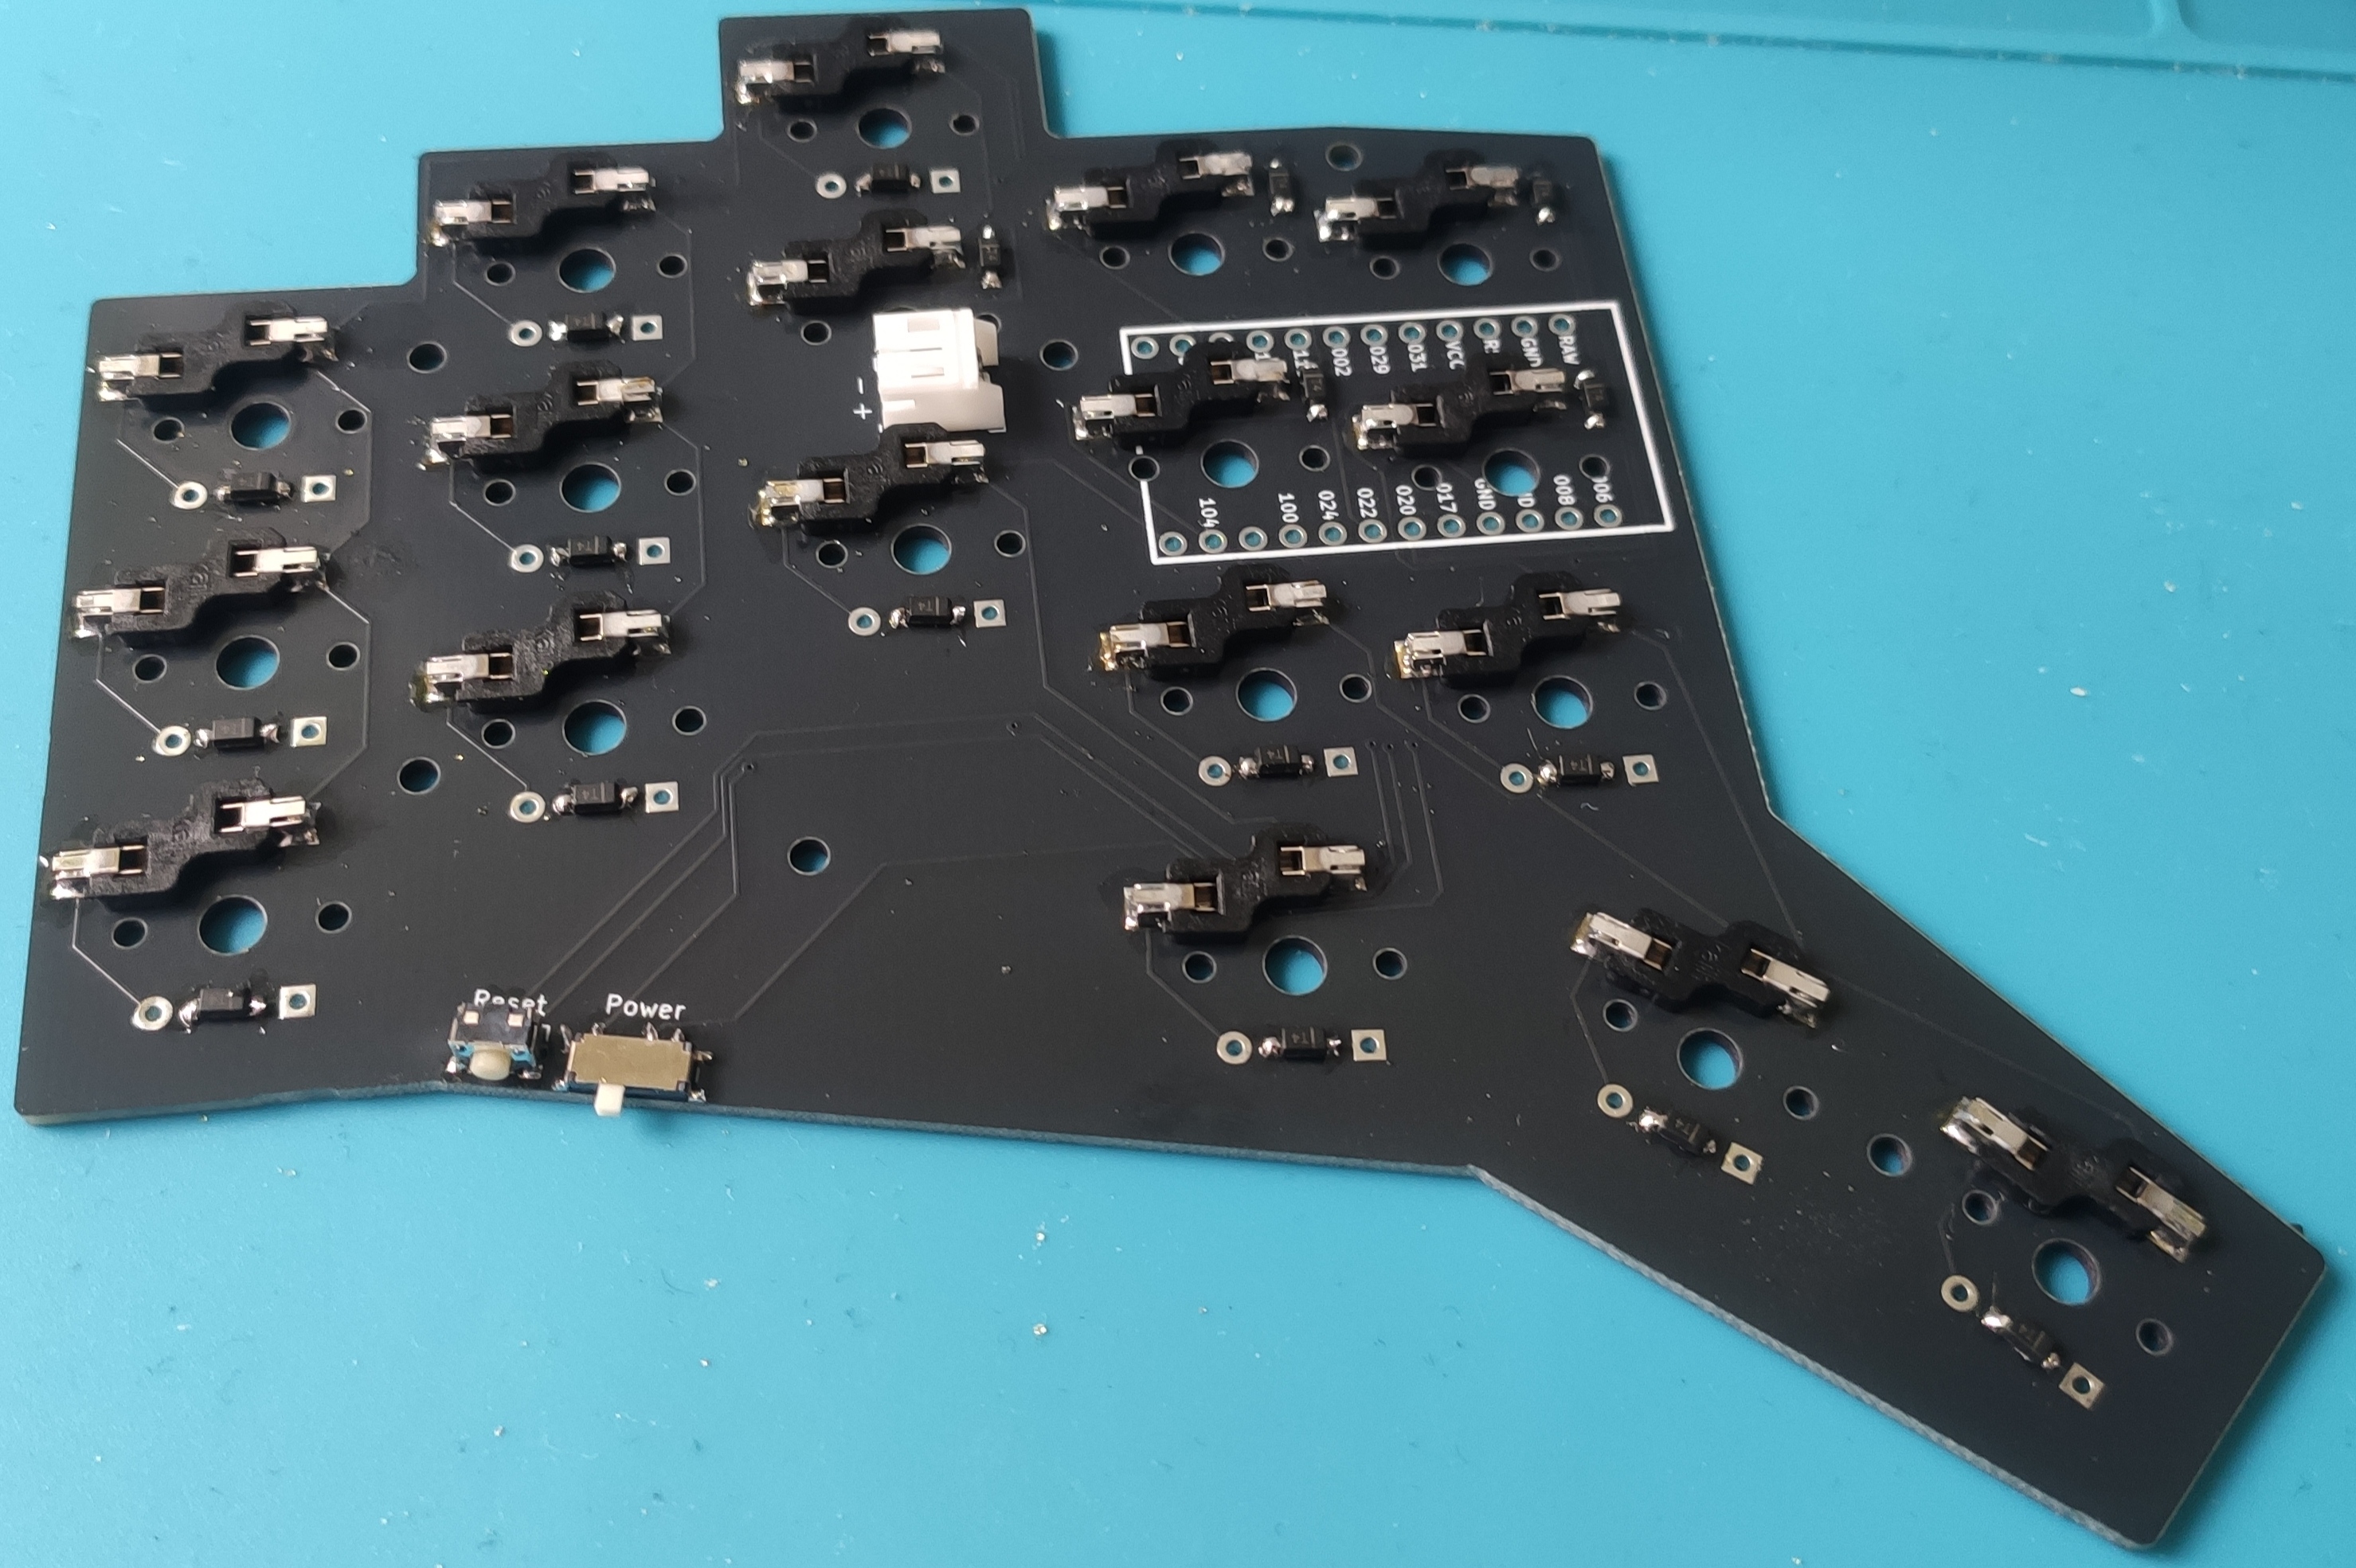
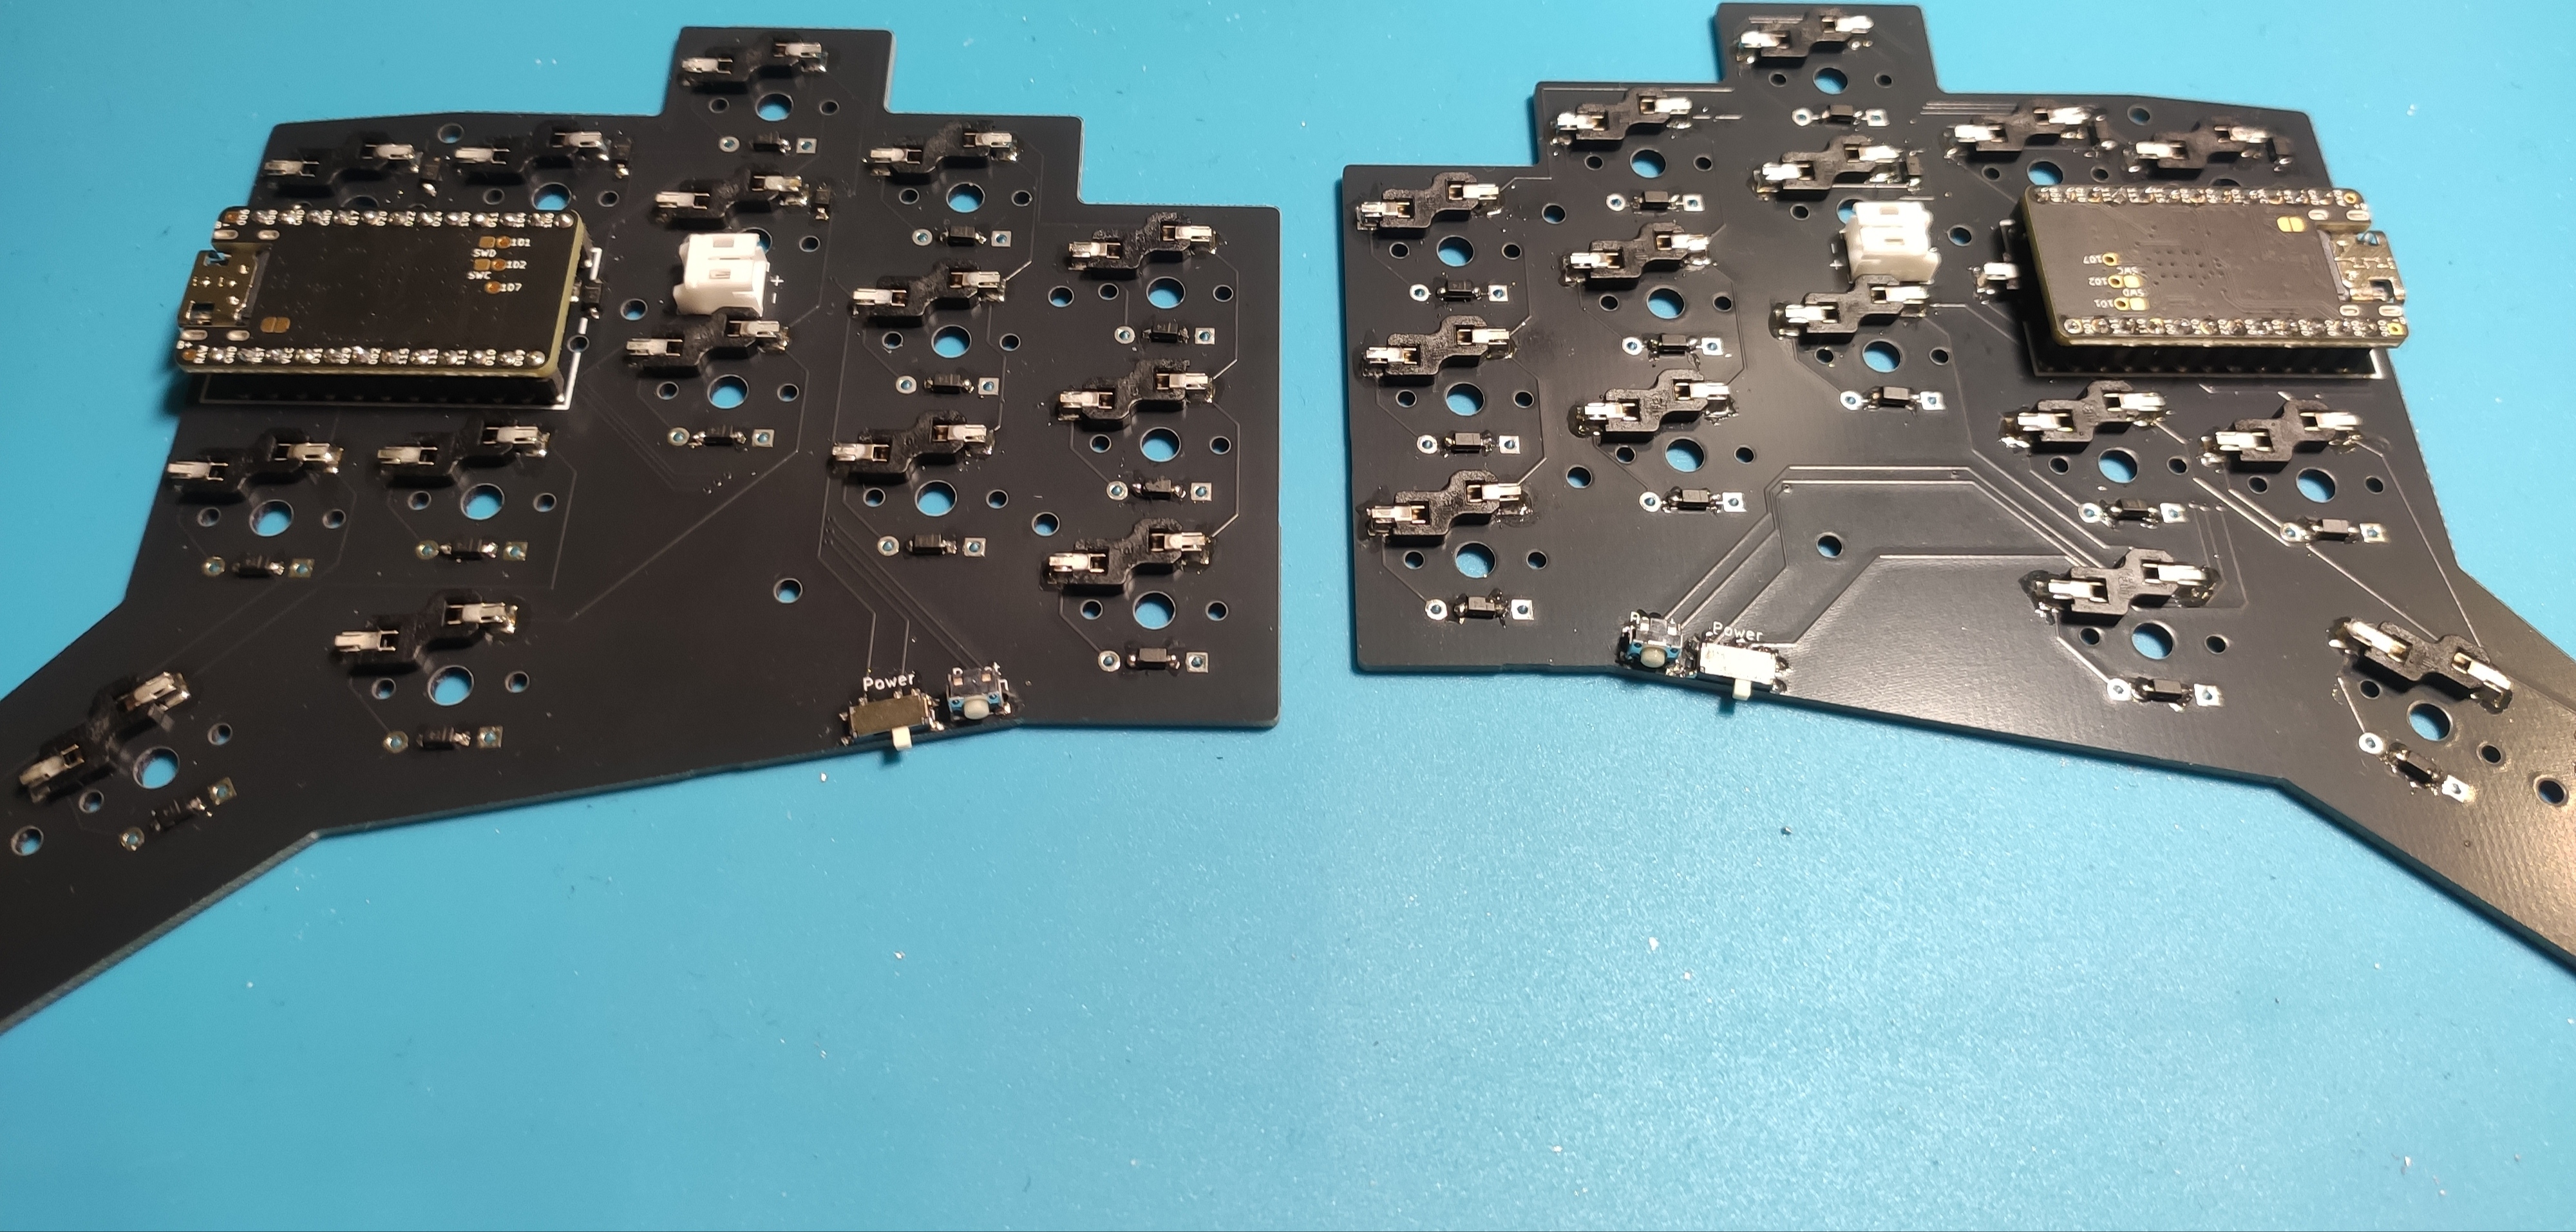
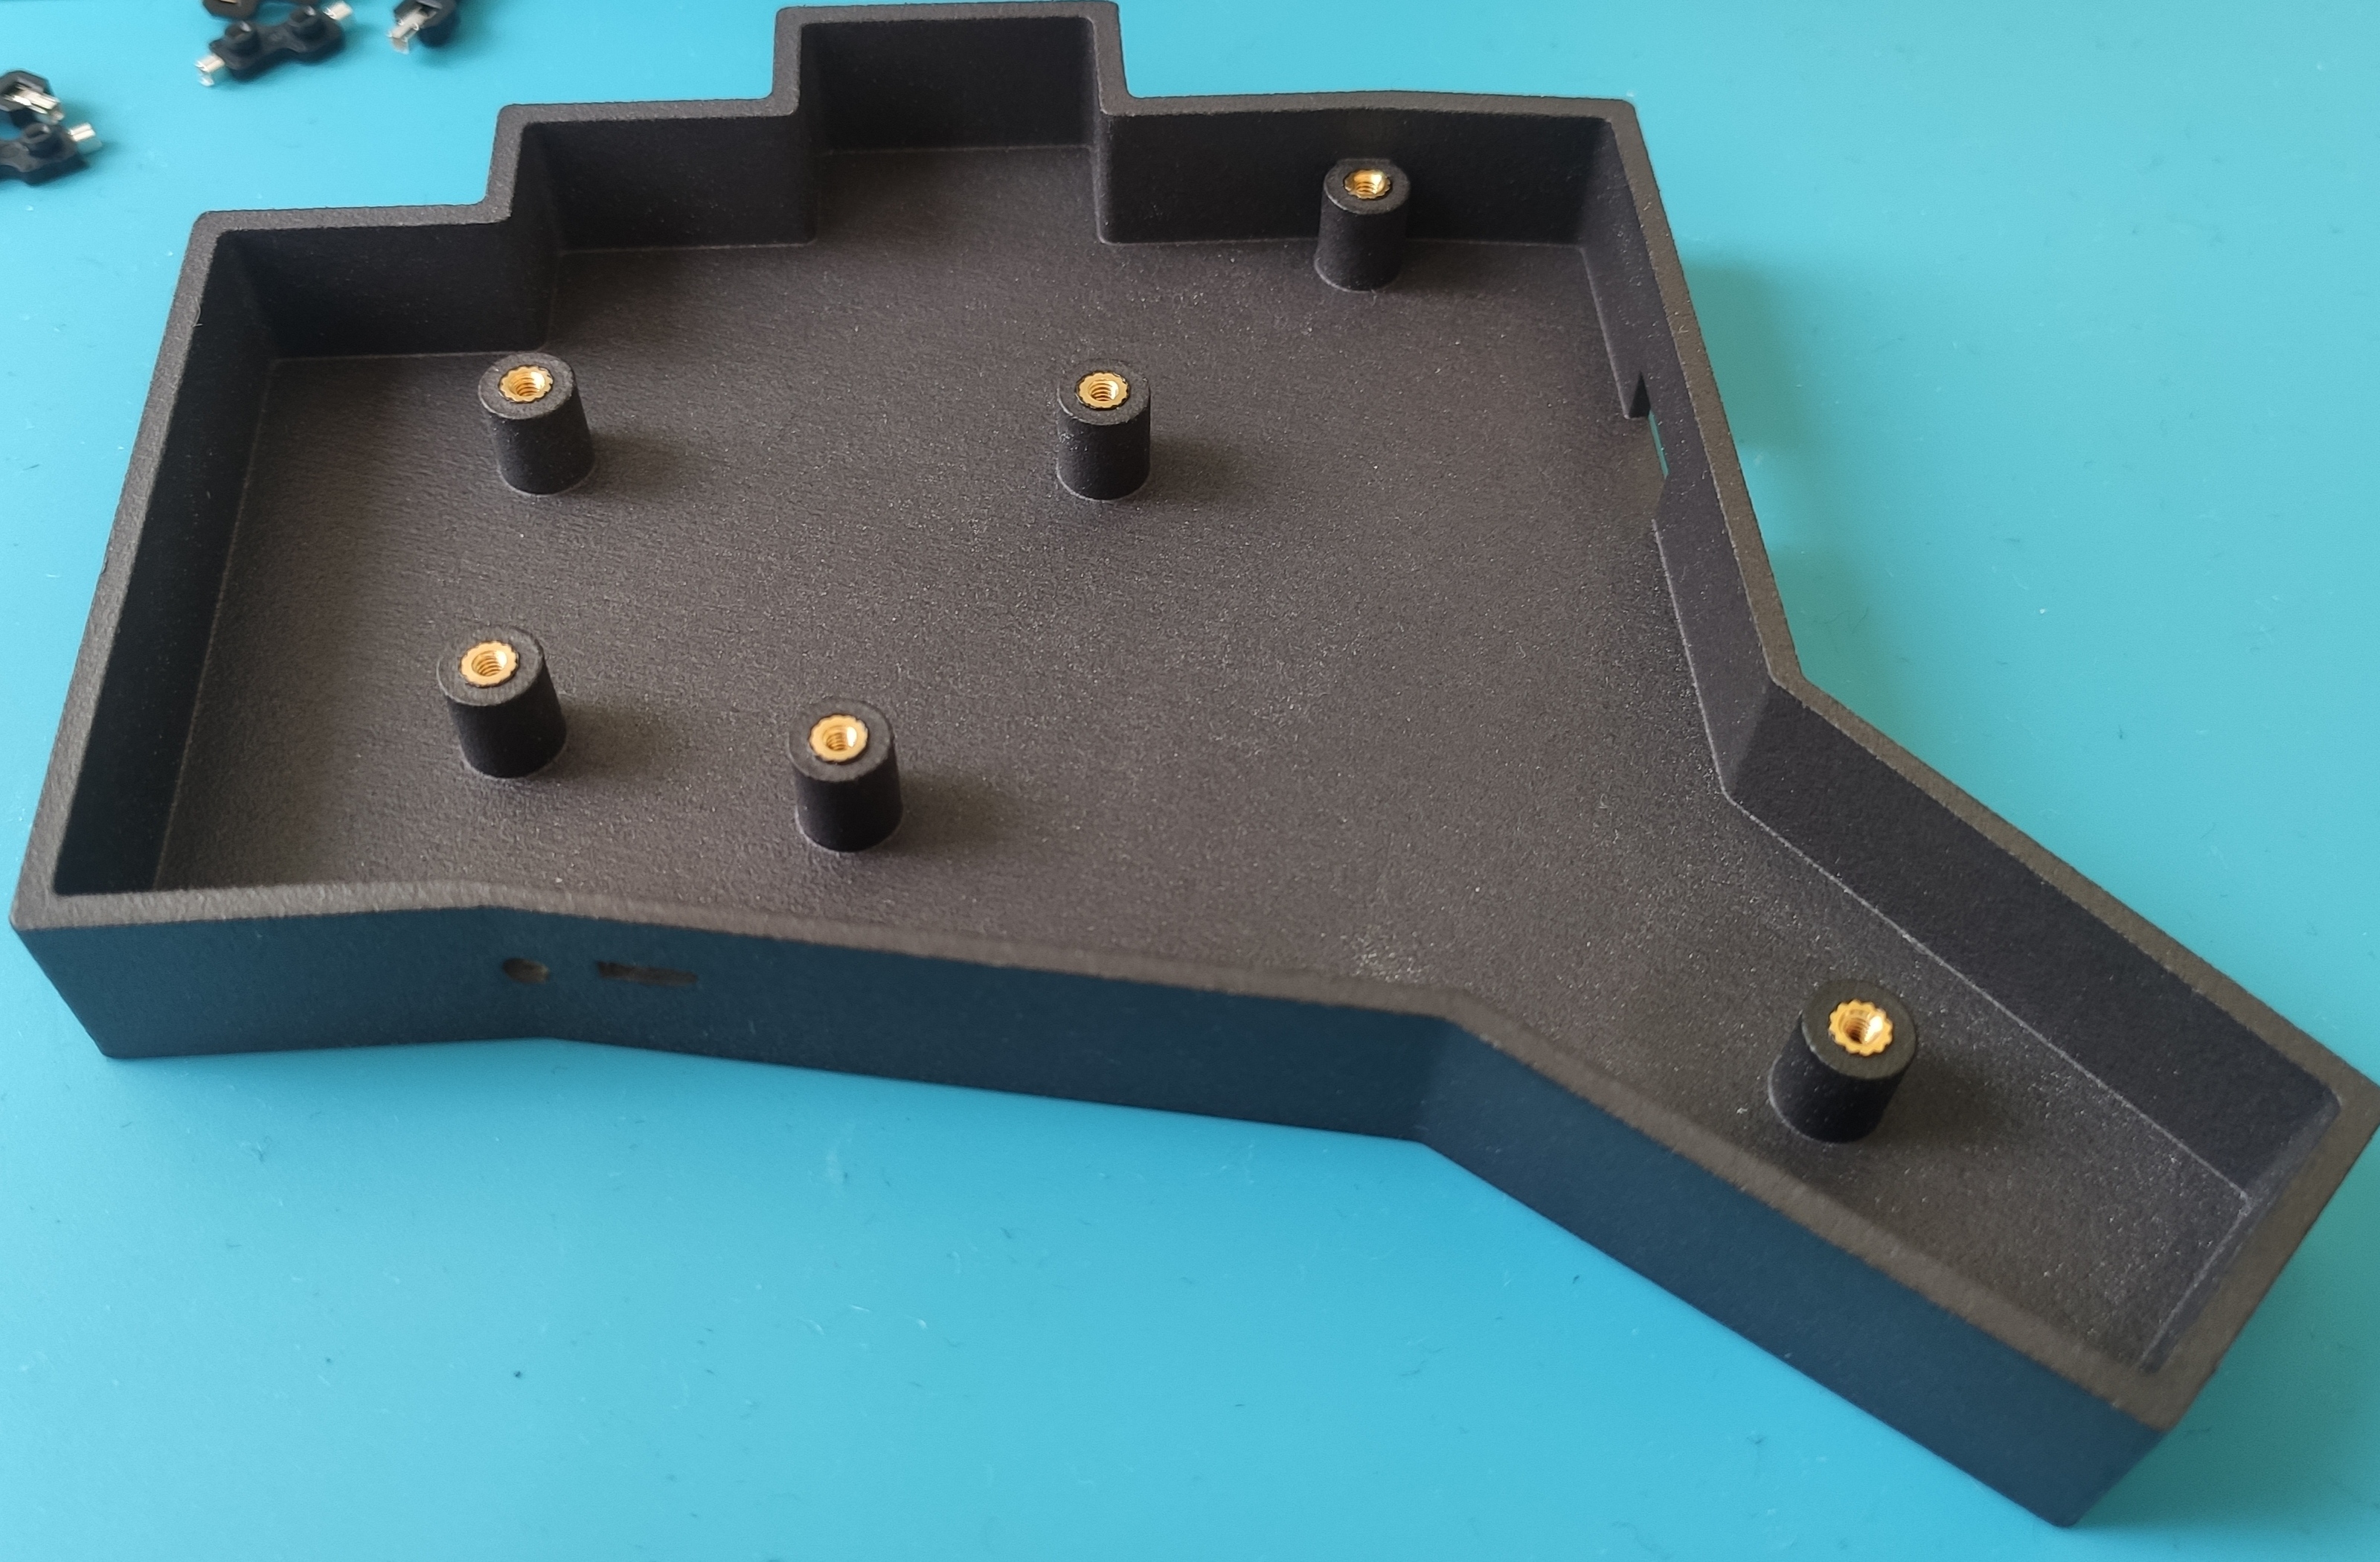
Install threaded inserts - Heat them with a soldering iron and press them into the holes
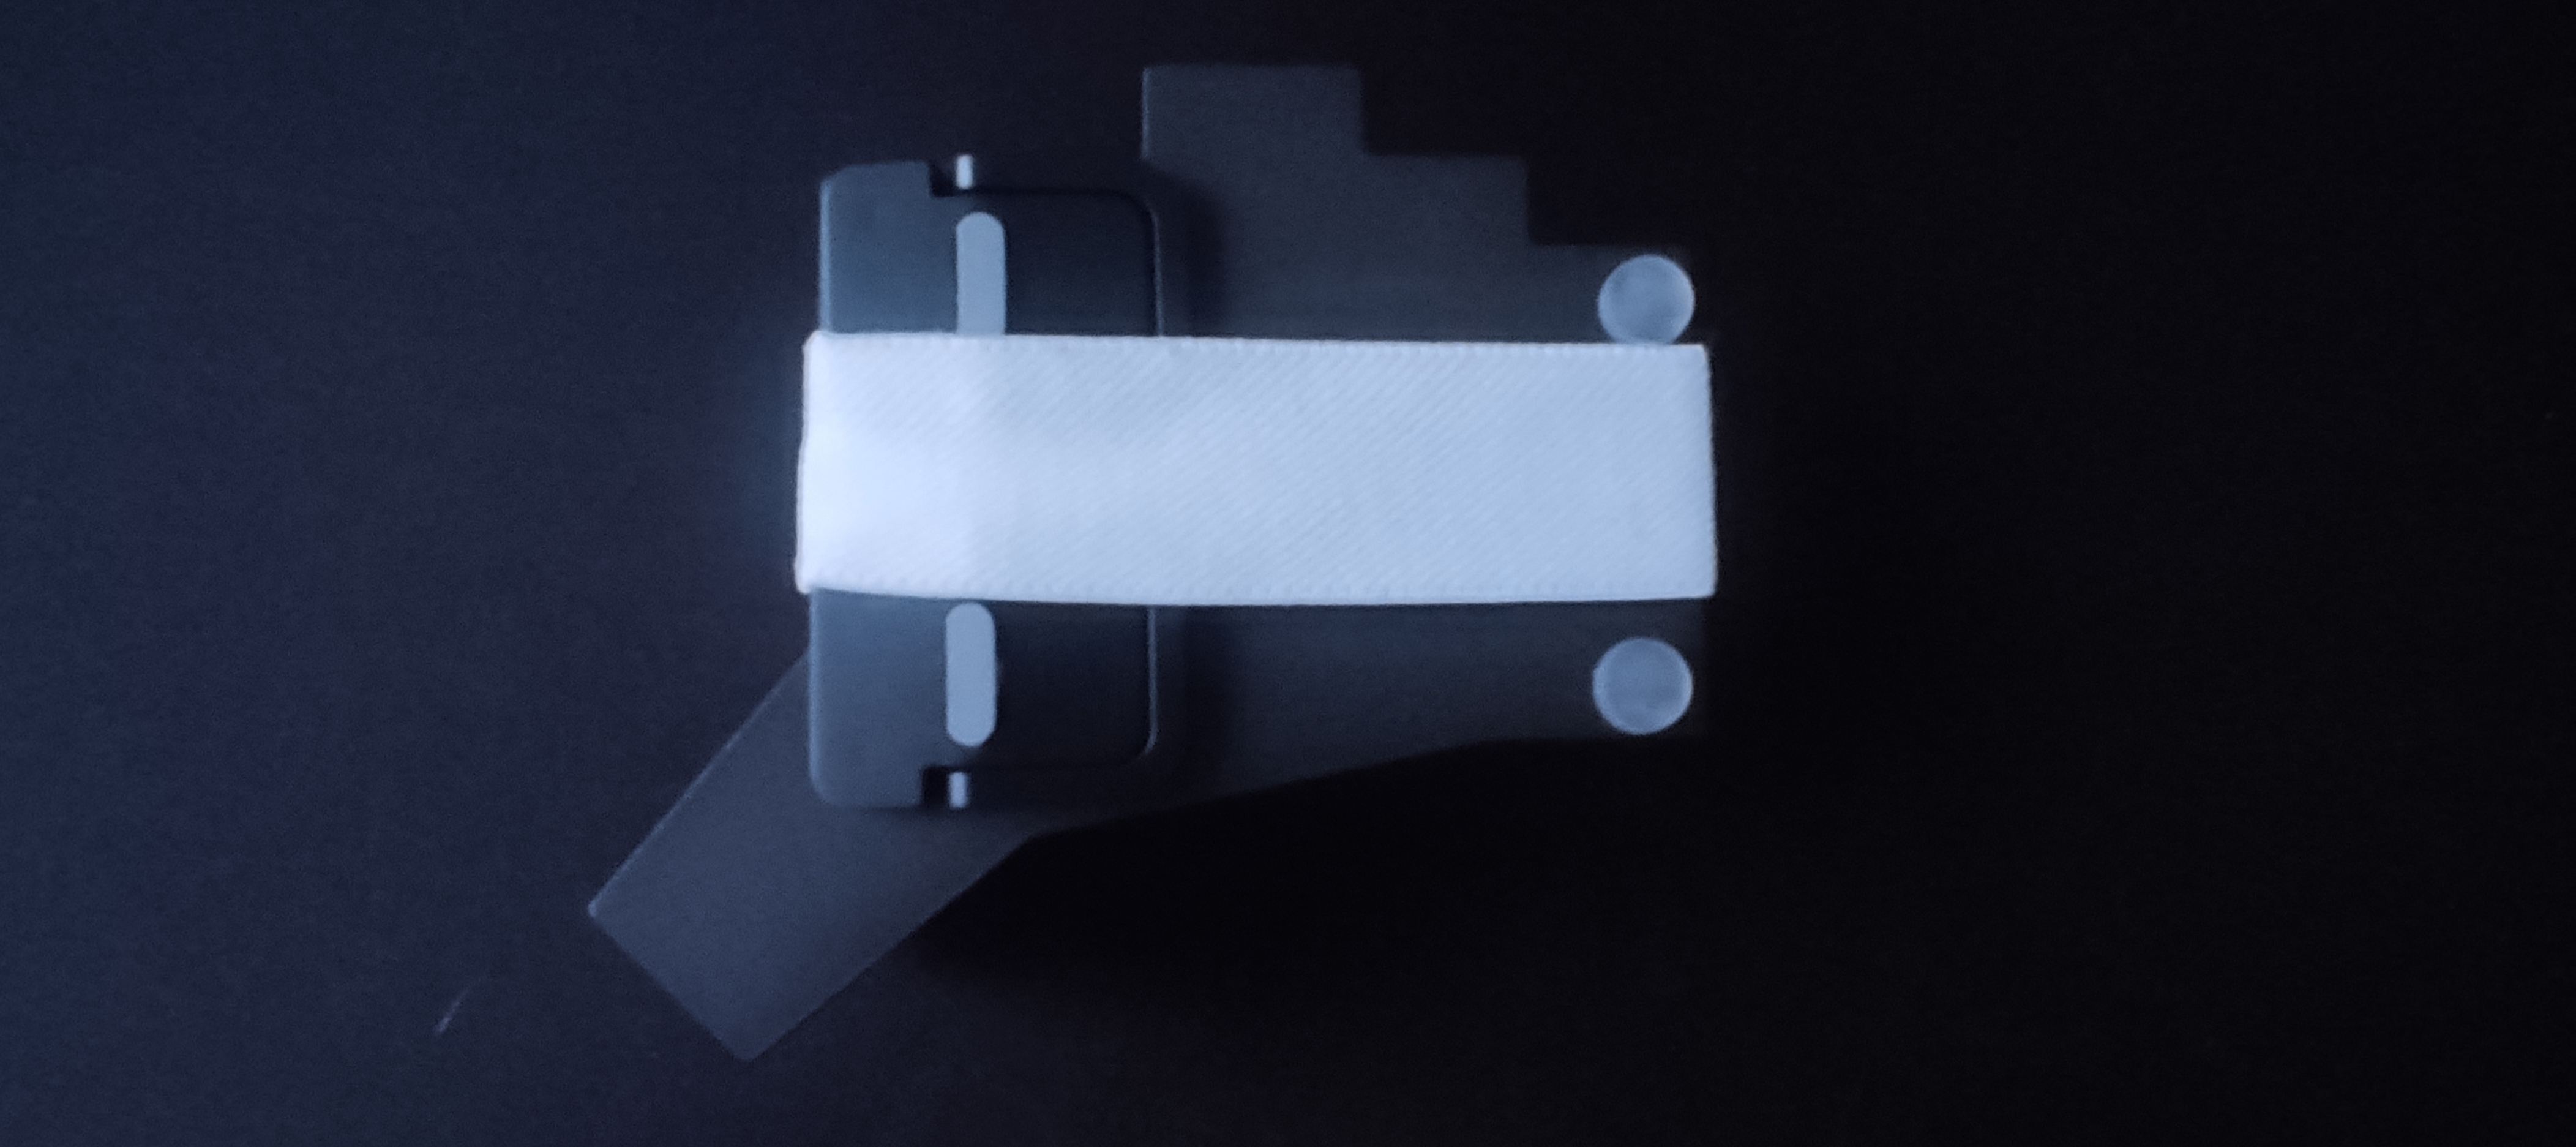
Thread the elastic through the holes and sew both ends together
My ZMK config can be found here: tile-zmk-config
| Qty | Value | Footprint | References |
|---|---|---|---|
| 18 | PG1350 | S1, S2, S3, S4, S5, S6, S7, S10, S11, S12, S13, S14, S15, S16, S17, S18 +2 | |
| 13 | ComboDiode | D1, D2, D3, D4, D5, D6, D7, D8, D9, D10, D11, D12, D13 | |
| 5 | ceoloide:diode_tht_sod123 | D14, D15, D16, D17, D18 | |
| 5 | ceoloide:mounting_hole_npth | MH1, MH2, MH3, MH4, MH5 | |
| 1 | ceoloide:battery_connector_jst_ph_2 | JST1 | |
| 1 | |||
| 1 | SW_Push_1P1T-MP_NO_Horizontal_Alps_SKRTLAE010 | Button_Switch_SMD:SW_Push_1P1T-MP_NO_Horizontal_Alps_SKRTLAE010 | Reset |
| 1 | SW_SPDT_Shouhan_MSK12C02 | Button_Switch_SMD:SW_SPDT_Shouhan_MSK12C02 | Power |
| 1 | nice_nano | nice_nano | MCU1 |
github-linguist/linguist
Language Savant. If your repository's language is being reported incorrectly, send us a pull request!

byrantech/laptop
anyon_e, a highly integrated, high end, open source laptop. Attempt the impossible.

VoronDesign/Voron-Hardware
Cool Hardware designed by the Voron Design group


hackclub/OnBoard
💡 Join 1,000 teenagers and make your first PCB with a $100 grant!


OLIMEX/DIY-LAPTOP
Do It Yourself Open Source Hardware and Software Modular Hacker's Friendly Laptop
It measures 124.4 × 111.1 mm and has 2 copper layers, 1.6 mm thick.
46 parts. The full list of its parts is on this page, with links to each part's symbol and footprint where PCBKit's library has them.
From the milosz77665/tile-keyboard repository on GitHub, at the commit this page was made from: the board is pcbs/tile/tile.kicad_pcb. PCBKit opens the board in the browser, with nothing to install.
Its repository states no licence, so its author keeps all rights: ask milosz77665 before reusing the design.