

2 layers40 × 55.5 mm

 Jacube1234/Static-Speaker
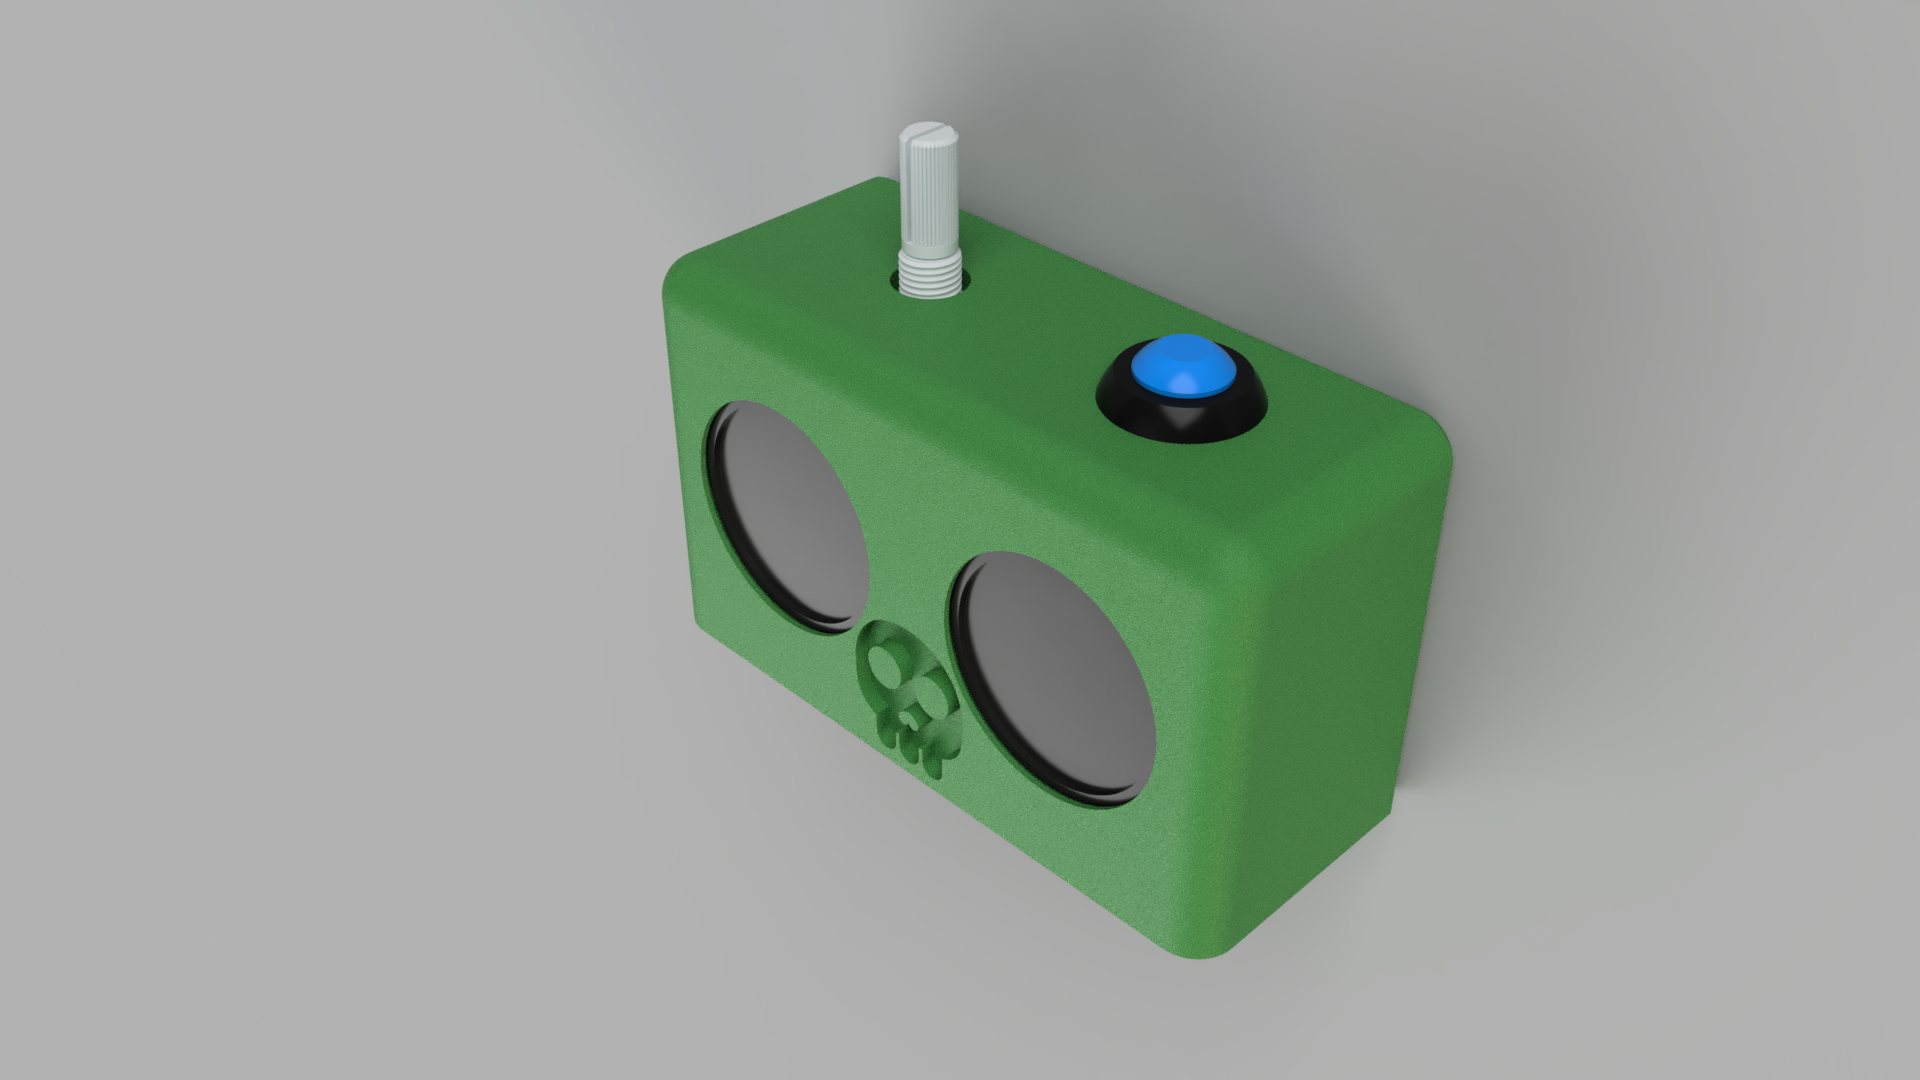
Custom radio combined with a speaker.
Radio Speaker is an open-source printed circuit board by Jacube1234, from the Jacube1234/Static-Speaker repository on GitHub. It is a 2-layer board of 73.2 × 39 mm with 25 parts on 32 nets, routed with 141 tracks and 1 via.
It is built around the TDA2822NBD and PJ-3200. Its parts include 6 resistors, 5 capacitors, 4 ICs, 3 connectors and 1 switch. It belongs with the radio and wireless and audio and music boards and the RP2040 boards of this library.
View PCB on KiCanvas
This is my custom radio combined with a speaker designed for the YSWS Static I chose this project to upgrade the standard kit by integrating an M18 Bluetooth module alongside the original RDA5807 FM radio chip, transforming it into a permanent Bluetooth speaker for my bedroom while keeping the physical over-the-air FM radio chip!
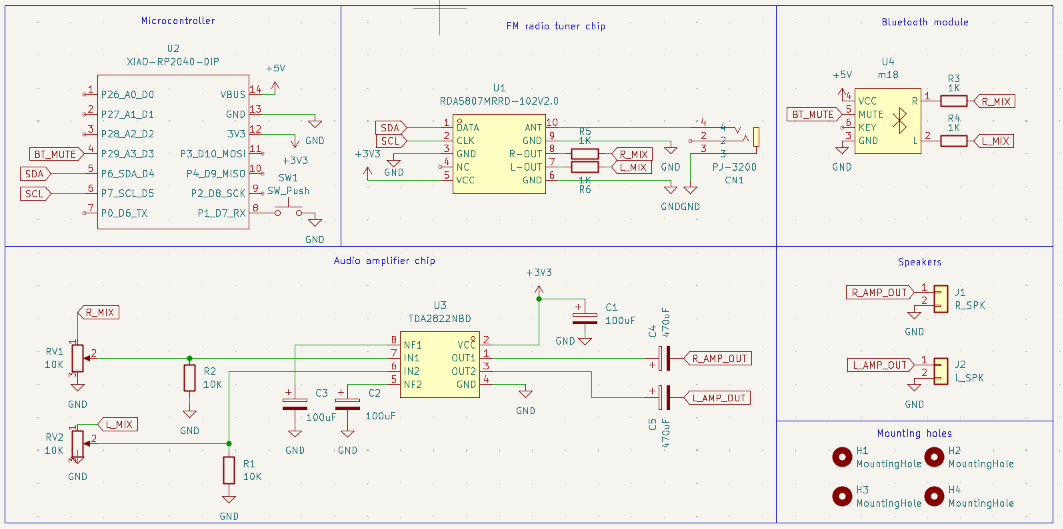
Schematic
Layout
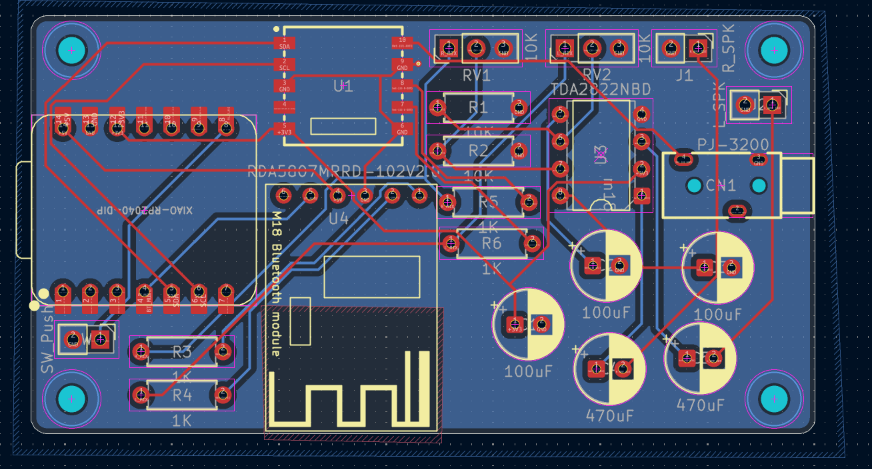
PCB
Runs on CircuitPython using an RDA5807 library wrapper. A code.py script handles I2C tuning for the FM radio, manages the M18 module's mute line via pin A3 (BT_MUTE), and toggles between Bluetooth and FM sources using a push button (SW1).
There's 3 main folders: Firmware, PCB, and Production. The PCB folder contains .kicad_pcb, .kicad_pro, and .kicad_sch. The Firmware folder contains files for the Seeed Xiao code. The production folder will have files for the PCB printing.
Here should be everything you need to make this speaker Most things should be what static sends you except the bluetooth module.
.pcb .pro .sch filesRV1/RV2) and push button (SW1) into place.J1 and J2, and plug a cable into the 3.5mm jack (CN1) to serve as the FM antenna.RDA5807.py library and your code.py script directly onto the board's CIRCUITPY drive.SW1) to switch over to FM radio mode.In Hackpad style - Hi guys
Bye guys
| Qty | Value | Footprint | References |
|---|---|---|---|
| 4 | 1K | Resistor_THT:R_Axial_DIN0207_L6.3mm_D2.5mm_P7.62mm_Horizontal | R3, R4, R5, R6 |
| 4 | MountingHole | MountingHole:MountingHole_2.5mm | H1, H2, H3, H4 |
| 3 | 100uF | Capacitor_THT:CP_Radial_D6.3mm_P2.50mm | C1, C2, C3 |
| 2 | 10K | Connector_PinHeader_2.54mm:PinHeader_1x03_P2.54mm_Vertical | RV1, RV2 |
| 2 | 10K | Resistor_THT:R_Axial_DIN0207_L6.3mm_D2.5mm_P7.62mm_Horizontal | R1, R2 |
| 2 | 470uF | Capacitor_THT:CP_Radial_D6.3mm_P2.50mm | C4, C5 |
| 1 | L_SPK | Connector_PinHeader_2.54mm:PinHeader_1x02_P2.54mm_Vertical | J2 |
| 1 | PJ-3200 | Static:AUDIO-TH_PJ-3200 | CN1 |
| 1 | RDA5807MRRD-102V2.0 | Static:RDA5807 | U1 |
| 1 | R_SPK | Connector_PinHeader_2.54mm:PinHeader_1x02_P2.54mm_Vertical | J1 |
| 1 | SW_Push | Connector_PinHeader_2.54mm:PinHeader_1x02_P2.54mm_Vertical | SW1 |
| 1 | TDA2822NBD | Package_DIP:DIP-8_W7.62mm | U3 |
| 1 | XIAO-RP2040-DIP | Static:XIAO-RP2040-DIP | U2 |
| 1 | m18 | Static:m18 | U4 |

Outdatedcandy92/Radio-Tutorial
An FM receiver board built around the RDA5807 module. It includes a Seeed Xiao RP2040 to control the RDA5807 over I2C.

jibrilsharafi/EnergyMe-Home
Smart energy meter capable of monitoring up to 16 channels. Supports MQTT, REST API, Modbus TCP, InfluxDB, AWS IoT Core. Friendly UI and fully open source (PCB, schematics, components, source code)

OpenShock/Hardware
KiCAD files for PCBs for transmitters and other hardware for OpenShock.


akita11/SoundDropMiniUNIT
PC接続時に現れるドライブ内の"config.txt"で、以下の機能を指定できます。 設定情報は、config.txtの1行目に、以下の7桁の数値を記載します(それ以降は無視される)。 - 1文字目: ボタンの動作。0=再生中に中断可、1=再生中に中断不可、2=リピート再生1、3=リピート再生2、4=ON/OFF、5=常時リピート再生 - 2-3文字目: 音量(00-30) - 4文字目…

It measures 73.2 × 39 mm and has 2 copper layers, 1.6 mm thick.
25 parts, built around the TDA2822NBD and PJ-3200. The full list of its parts is on this page, with links to each part's symbol and footprint where PCBKit's library has them.
From the Jacube1234/Static-Speaker repository on GitHub, at the commit this page was made from: the board is PCB/Radio-Speaker.kicad_pcb and its schematic PCB/Radio-Speaker.kicad_sch. PCBKit opens the board in the browser, with nothing to install.
Its repository states no licence, so its author keeps all rights: ask Jacube1234 before reusing the design.