

2 layers25 × 50 mm
Ember flight recorder
HexDump0/Ember
A cheap, diy model rocket with a flight recorder and everything else you would need to fy it See the guide » Video (Soon) Models Gerber Firmware
19 parts

 HexDump0/Ember
A cheap, diy model rocket with a flight recorder and everything else you would need to fy it See the guide » Video (Soon) Models Gerber Firmware
Ember launch controller is an open-source printed circuit board by HexDump0, from the HexDump0/Ember repository on GitHub. It is a 2-layer board of 75 × 52.5 mm with 19 parts on 9 nets, routed with 88 tracks and 0 vias.
It is built around the BC547 and IRF3205. Its parts include 4 resistors, 4 diodes, 2 transistors, 2 connectors and 2 switches.
[blocked]




A cheap, diy model rocket with a flight recorder and everything else you would need to fy it
See the guide »
Video (Soon) [blocked]
·
Models
·
Gerber
·
Firmware
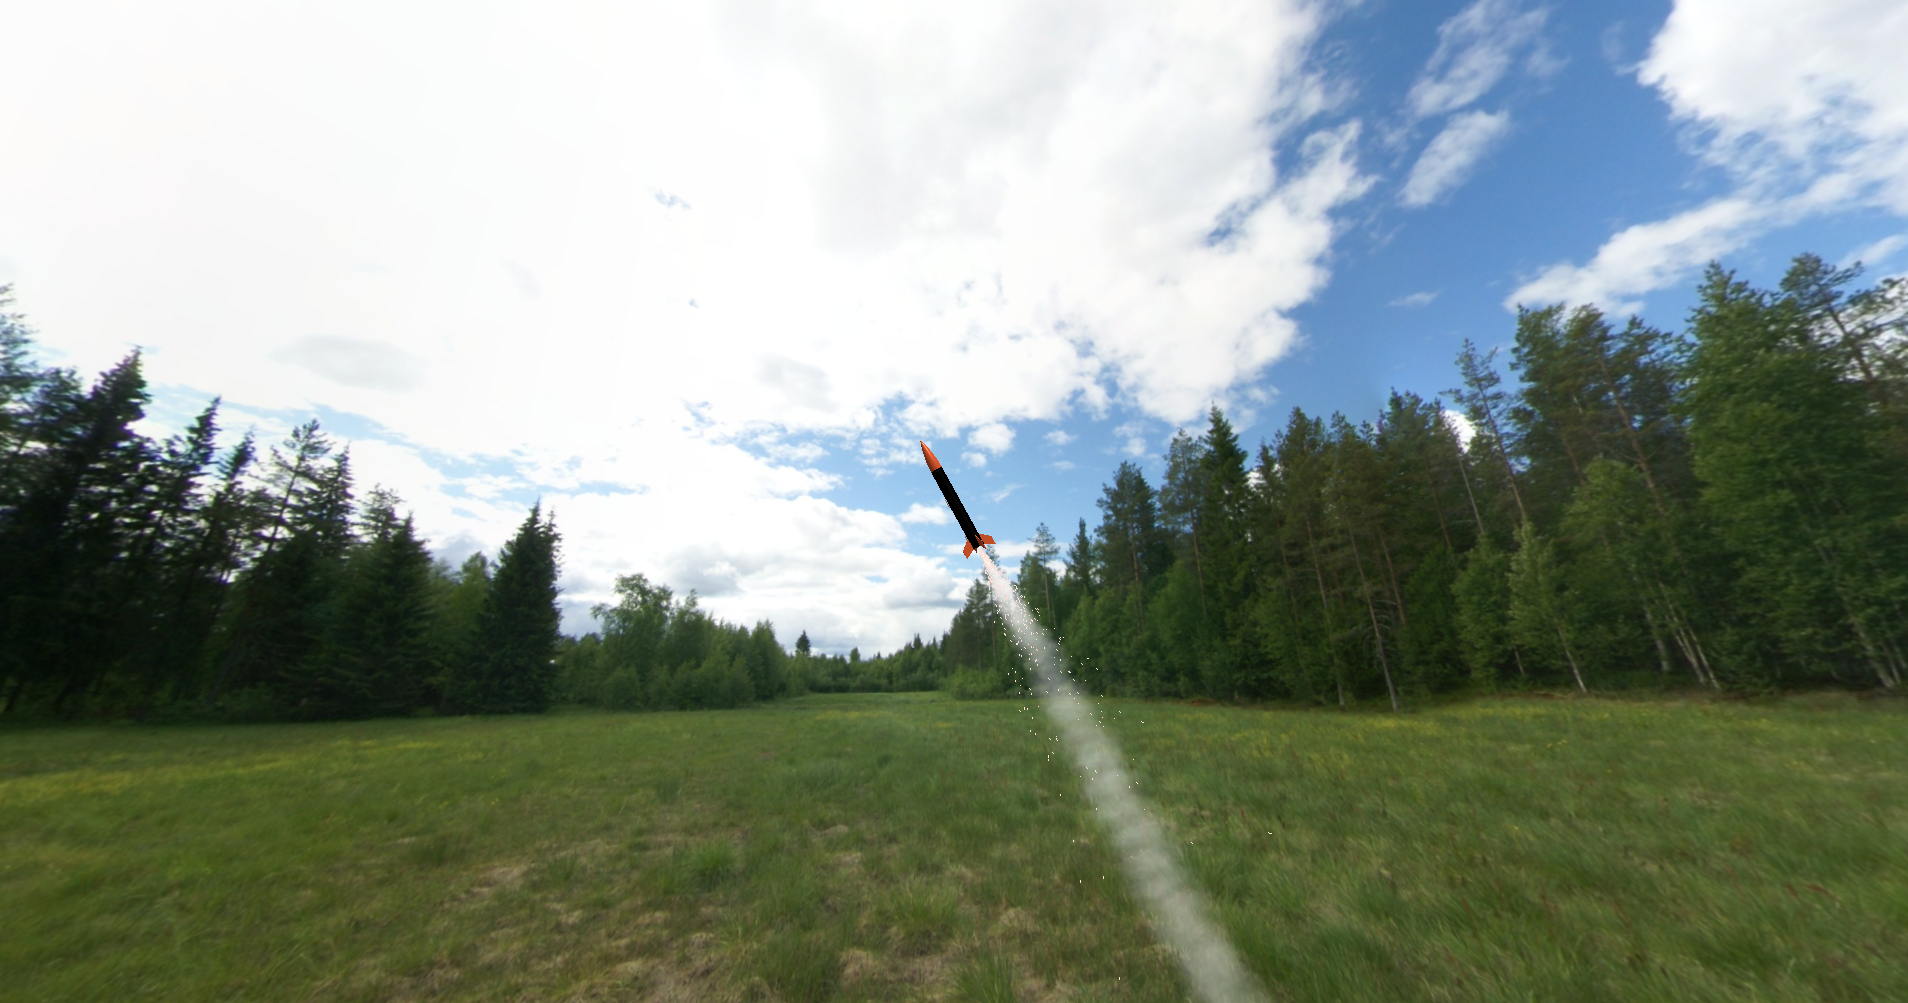
Ember is a diy, cheap and open source model rocket along with everything you would need to launch it + detailed guides on actually building it

 Flight Recorder |  Flight Recorder 3D |  Dashboard |
 Launch Controller |  Launch Controller 3D |
A few of the important parts of the rocket are 3d printed, you could get away with using PLA for them but ABS is better if you have it.
Recommended print settings:
Add normal supports for the lip in the shoulder. It should come off easily
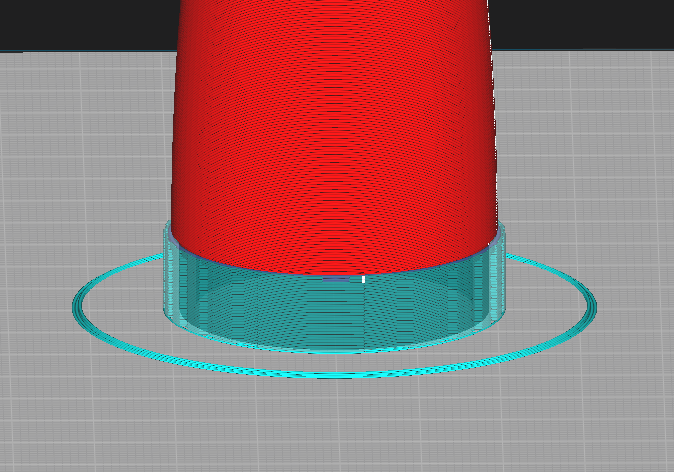
Print it with the fin tab facing the bed and with the Seam corner preference set to Hide Seam
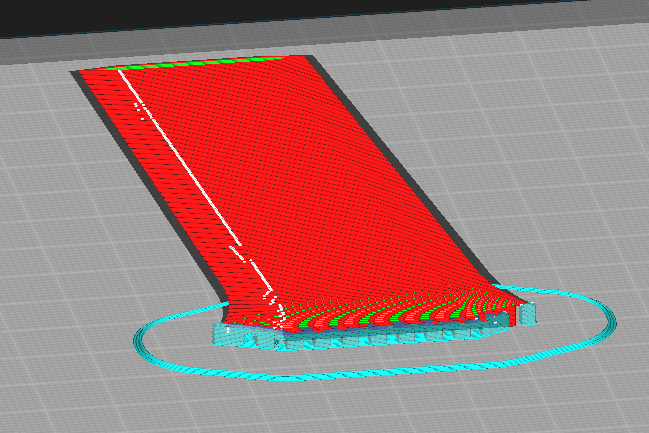
You can just print these with the recommenced settings
The gerber files for both the launch controller and flight recorder are available here
Make sure you would a bit of 22 AWG wires at hand for the panel lights and switches
The Battery is meant to be charged on the bench and then soldered on to the flight recorder
(More detailed guide will come once I get my PCBs)
You need esptool. Install it using
pip install --user esptoolPlug the Super Mini into USB. It should show up as /dev/ttyACM0 on Linux,
/dev/tty.usbmodem* on macOS, and COMx on Windows
Flash the firmware using
esptool --chip esp32c3 --port /dev/ttyACM0 --baud 460800 \
        write-flash 0x0 ember.bin
Once done you should see some logs in serial
# pick one
idf.py -p /dev/ttyACM0 monitor
miniterm /dev/ttyACM0 115200
screen /dev/ttyACM0 115200I (xxx) ember: ember boot
I (xxx) sensors: MPU6050 ready @0x68
I (xxx) sensors: BMP280 ready @0x76 ...
I (xxx) httpd: http server up on :80
I (xxx) wifi_ap: softap up: ssid=ember-XXXXXX ch=1Connect to the open Wi-Fi ember-XXXXXX and visit
http://192.168.4.1 for the dashboard.
Distributed under the Creative Commons Attribution-NonCommercial 4.0. See LICENSE.md for more information.
HexDump0 - @HexDump0 - root@hexdump0.pw
Project Link: https://github.com/HexDump0/Ember
| Qty | Value | Footprint | References |
|---|---|---|---|
| 3 | MountingHole_3.2mm_M3 | MountingHole:MountingHole_3.2mm_M3 | M3, M3, M3 |
| 2 | 10k | Resistor_THT:R_Axial_DIN0207_L6.3mm_D2.5mm_P7.62mm_Horizontal | R2, R4 |
| 1 | 1N4007 | Diode_THT:D_DO-41_SOD81_P10.16mm_Horizontal | D1 |
| 1 | 2.2k | Resistor_THT:R_Axial_DIN0207_L6.3mm_D2.5mm_P7.62mm_Horizontal | R3 |
| 1 | 3A 20mm | Connector_Wire:SolderWire-0.75sqmm_1x02_P7mm_D1.25mm_OD3.5mm | F1 |
| 1 | 440 | Resistor_THT:R_Axial_DIN0207_L6.3mm_D2.5mm_P7.62mm_Horizontal | R1 |
| 1 | Arm Switch | Connector_Wire:SolderWire-0.75sqmm_1x02_P7mm_D1.25mm_OD3.5mm | SW1 |
| 1 | BC547 | Package_TO_SOT_THT:TO-92L_HandSolder | Q2 |
| 1 | Battery 6xAA | TerminalBlock_Phoenix:TerminalBlock_Phoenix_MKDS-1,5-2_1x02_P5.00mm_Horizontal | J1 |
| 1 | Blue | Connector_Wire:SolderWire-0.75sqmm_1x02_P7mm_D1.25mm_OD3.5mm | D4 |
| 1 | Green | Connector_Wire:SolderWire-0.75sqmm_1x02_P7mm_D1.25mm_OD3.5mm | D2 |
| 1 | IRF3205 | Package_TO_SOT_THT:TO-220-3_Vertical | Q1 |
| 1 | Igniter | TerminalBlock_Phoenix:TerminalBlock_Phoenix_MKDS-1,5-2_1x02_P5.00mm_Horizontal | J2 |
| 1 | Integrated Buzzer | Buzzer_Beeper:Buzzer_12x9.5RM7.6 | BZ1 |
| 1 | Push Button | Connector_Wire:SolderWire-0.75sqmm_1x02_P7mm_D1.25mm_OD3.5mm | SW2 |
| 1 | Red | Connector_Wire:SolderWire-0.75sqmm_1x02_P7mm_D1.25mm_OD3.5mm | D3 |
It measures 75 × 52.5 mm and has 2 copper layers, 1.6 mm thick.
19 parts, built around the BC547 and IRF3205. The full list of its parts is on this page, with links to each part's symbol and footprint where PCBKit's library has them.
From the HexDump0/Ember repository on GitHub, at the commit this page was made from: the board is kicad/ember_launch_controller/ember_launch_controller.kicad_pcb and its schematic kicad/ember_flight_recorder/ember_flight_recorder.kicad_sch. PCBKit opens the board in the browser, with nothing to install.
Its repository states no licence, so its author keeps all rights: ask HexDump0 before reusing the design.
HexDump0/Ember
A cheap, diy model rocket with a flight recorder and everything else you would need to fy it See the guide » Video (Soon) Models Gerber Firmware


stancecoke/BionX_Minimal_Translator
Drive your BionX motor with a no-name battery and a Kunteng LCD-display without any further BionX-components


jayanta525/dual-h-bridge
Dual H-Bridge Controller with IRF3205 and IR2104 MOSFET Driver, and with ATMega328P-AU PWM Controller

