
2 layers85 × 115 mm
OSO BOOK B1
joeycastillo/The-Open-Book
For details on how to build, test and use Open Book, I've made documentation available here.
76 parts8.1kCC-BY-SA-4.0

 grahamgrieb/DSi-Robot1
Robot that is remote-controlled by Nintendo DSi. Also streams DSi webcam data to screen on the robot.
Dsi esp is an open-source printed circuit board by grahamgrieb, from the grahamgrieb/DSi-Robot repository on GitHub. It is a 2-layer board of 27.3 × 60 mm with 16 parts on 52 nets, routed with 125 tracks and 22 vias.
It is built around the ESP32-S3-WROOM-1-N8. Its parts include 4 resistors, 2 ICs, 1 capacitor and 1 connector. It belongs with the retro computing and games boards and the ESP32 boards of this library.
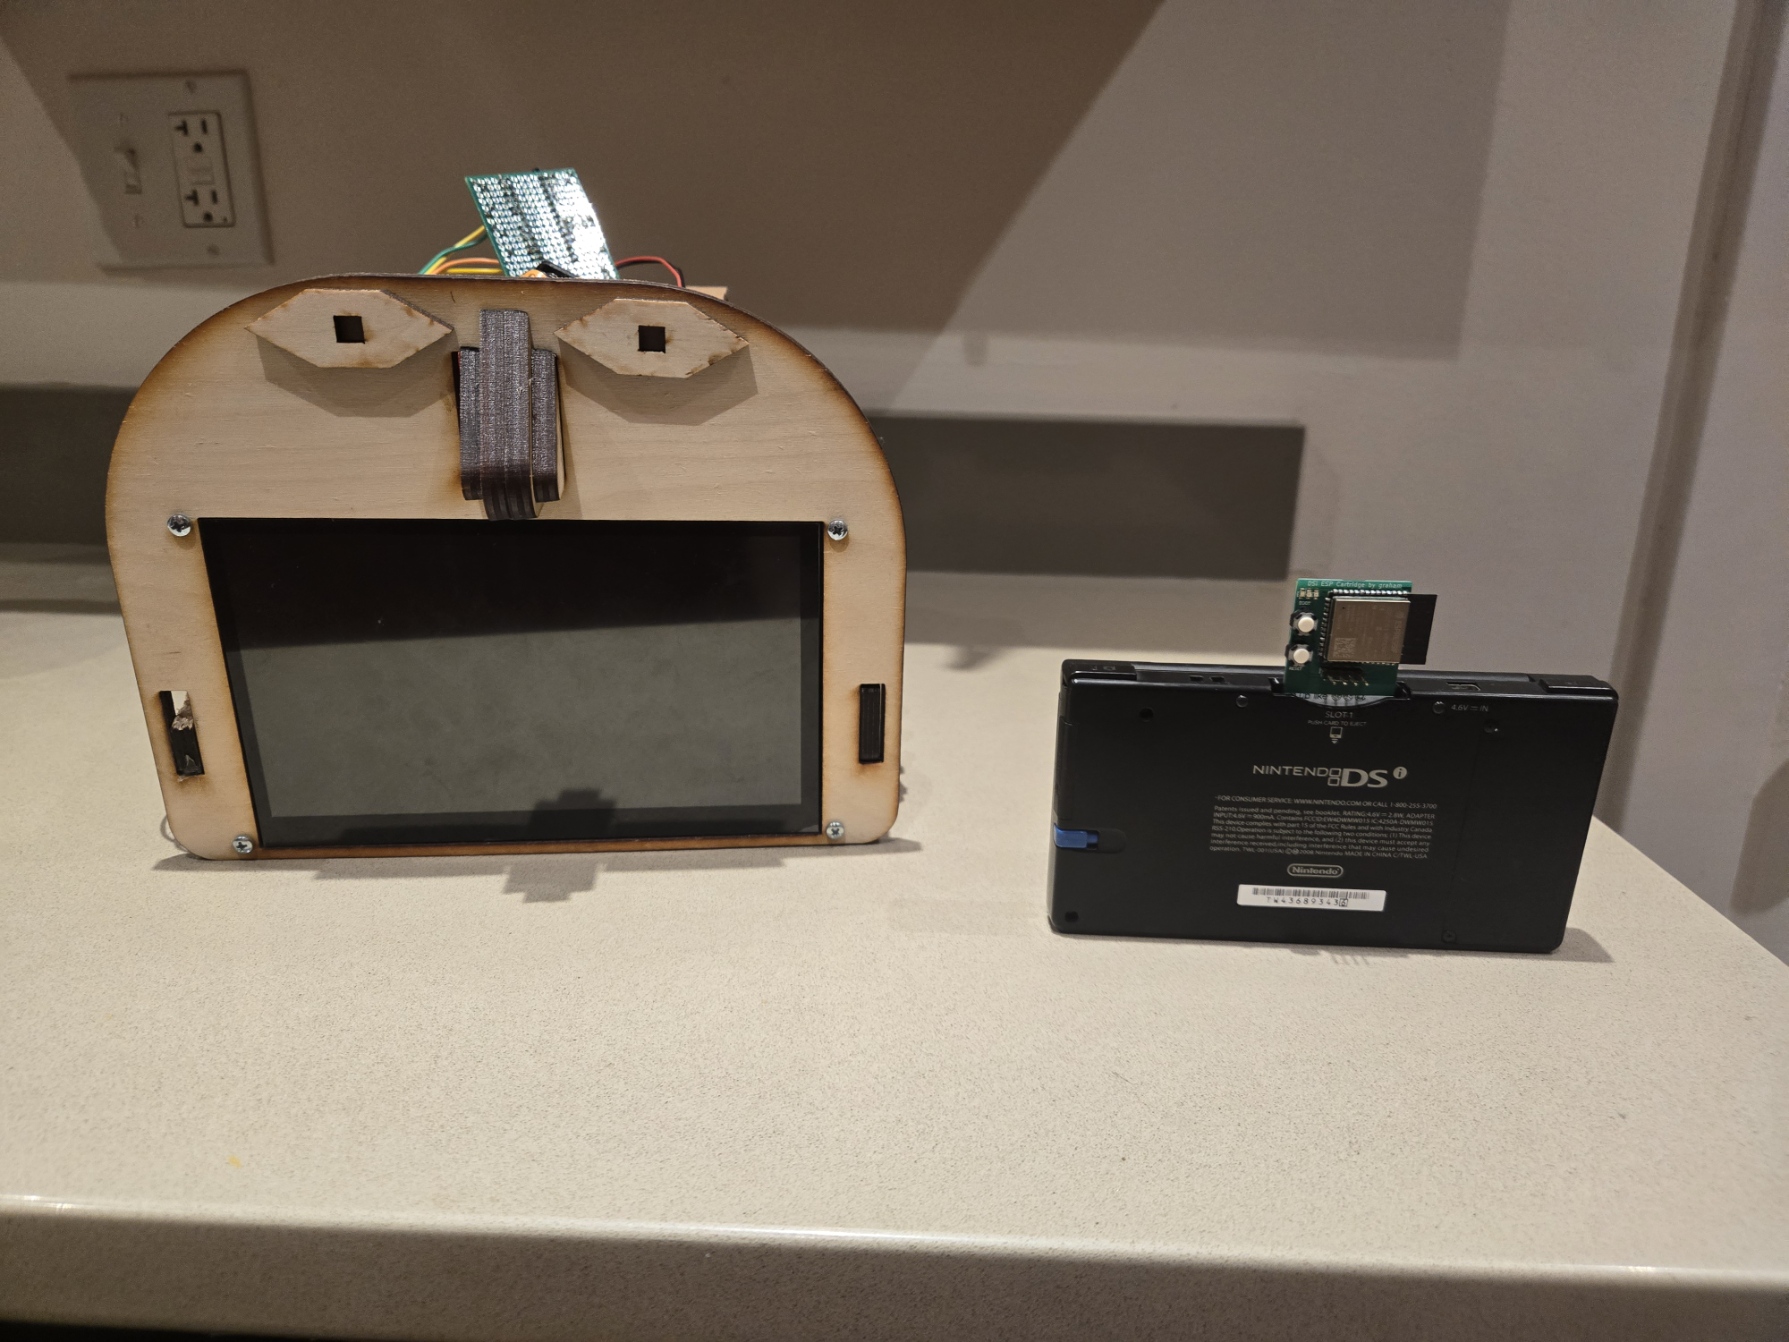
| The robot and the DSi with its custom cartridge slotted in |
|---|
 |
| Block Diagram overview of all the devices in the system |
|---|
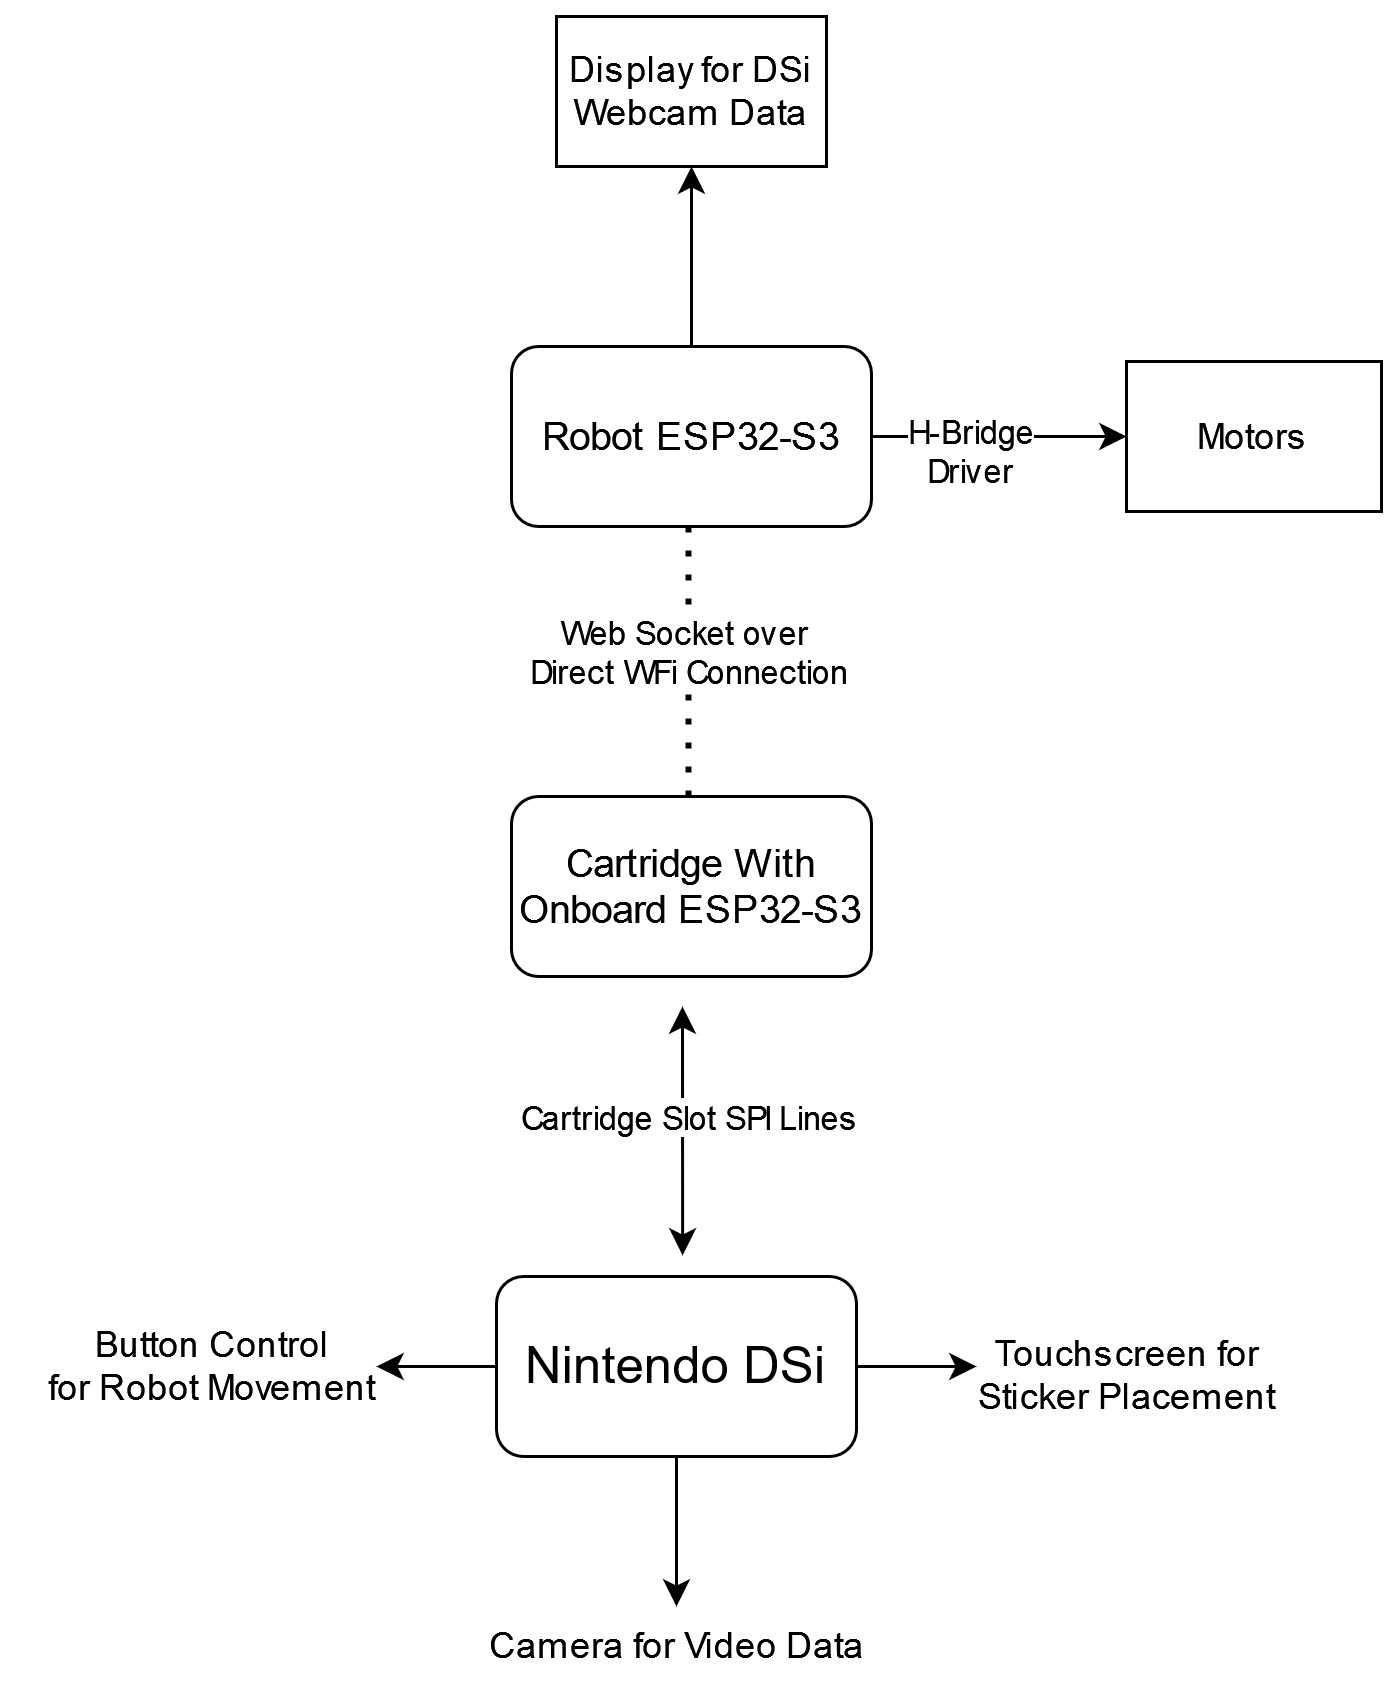 |
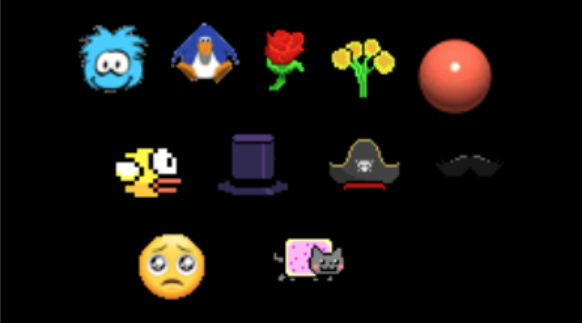
The first part of this project is the Nintendo DSi. The DSi is running handwritten homebrew code (can be found in the ds-app folder). This application display the current DSi webcam data on the top screen. The user is able to place stickers over the webcam footage using the touchscreen. They are also able to switch between the front and back camera of the DSi. The webcam data is sent automatically if the user is in video mode, or whenever the user hits the A button when they are in photo mode.
| DSi Application with all the Stickers Placed |
|---|
 |
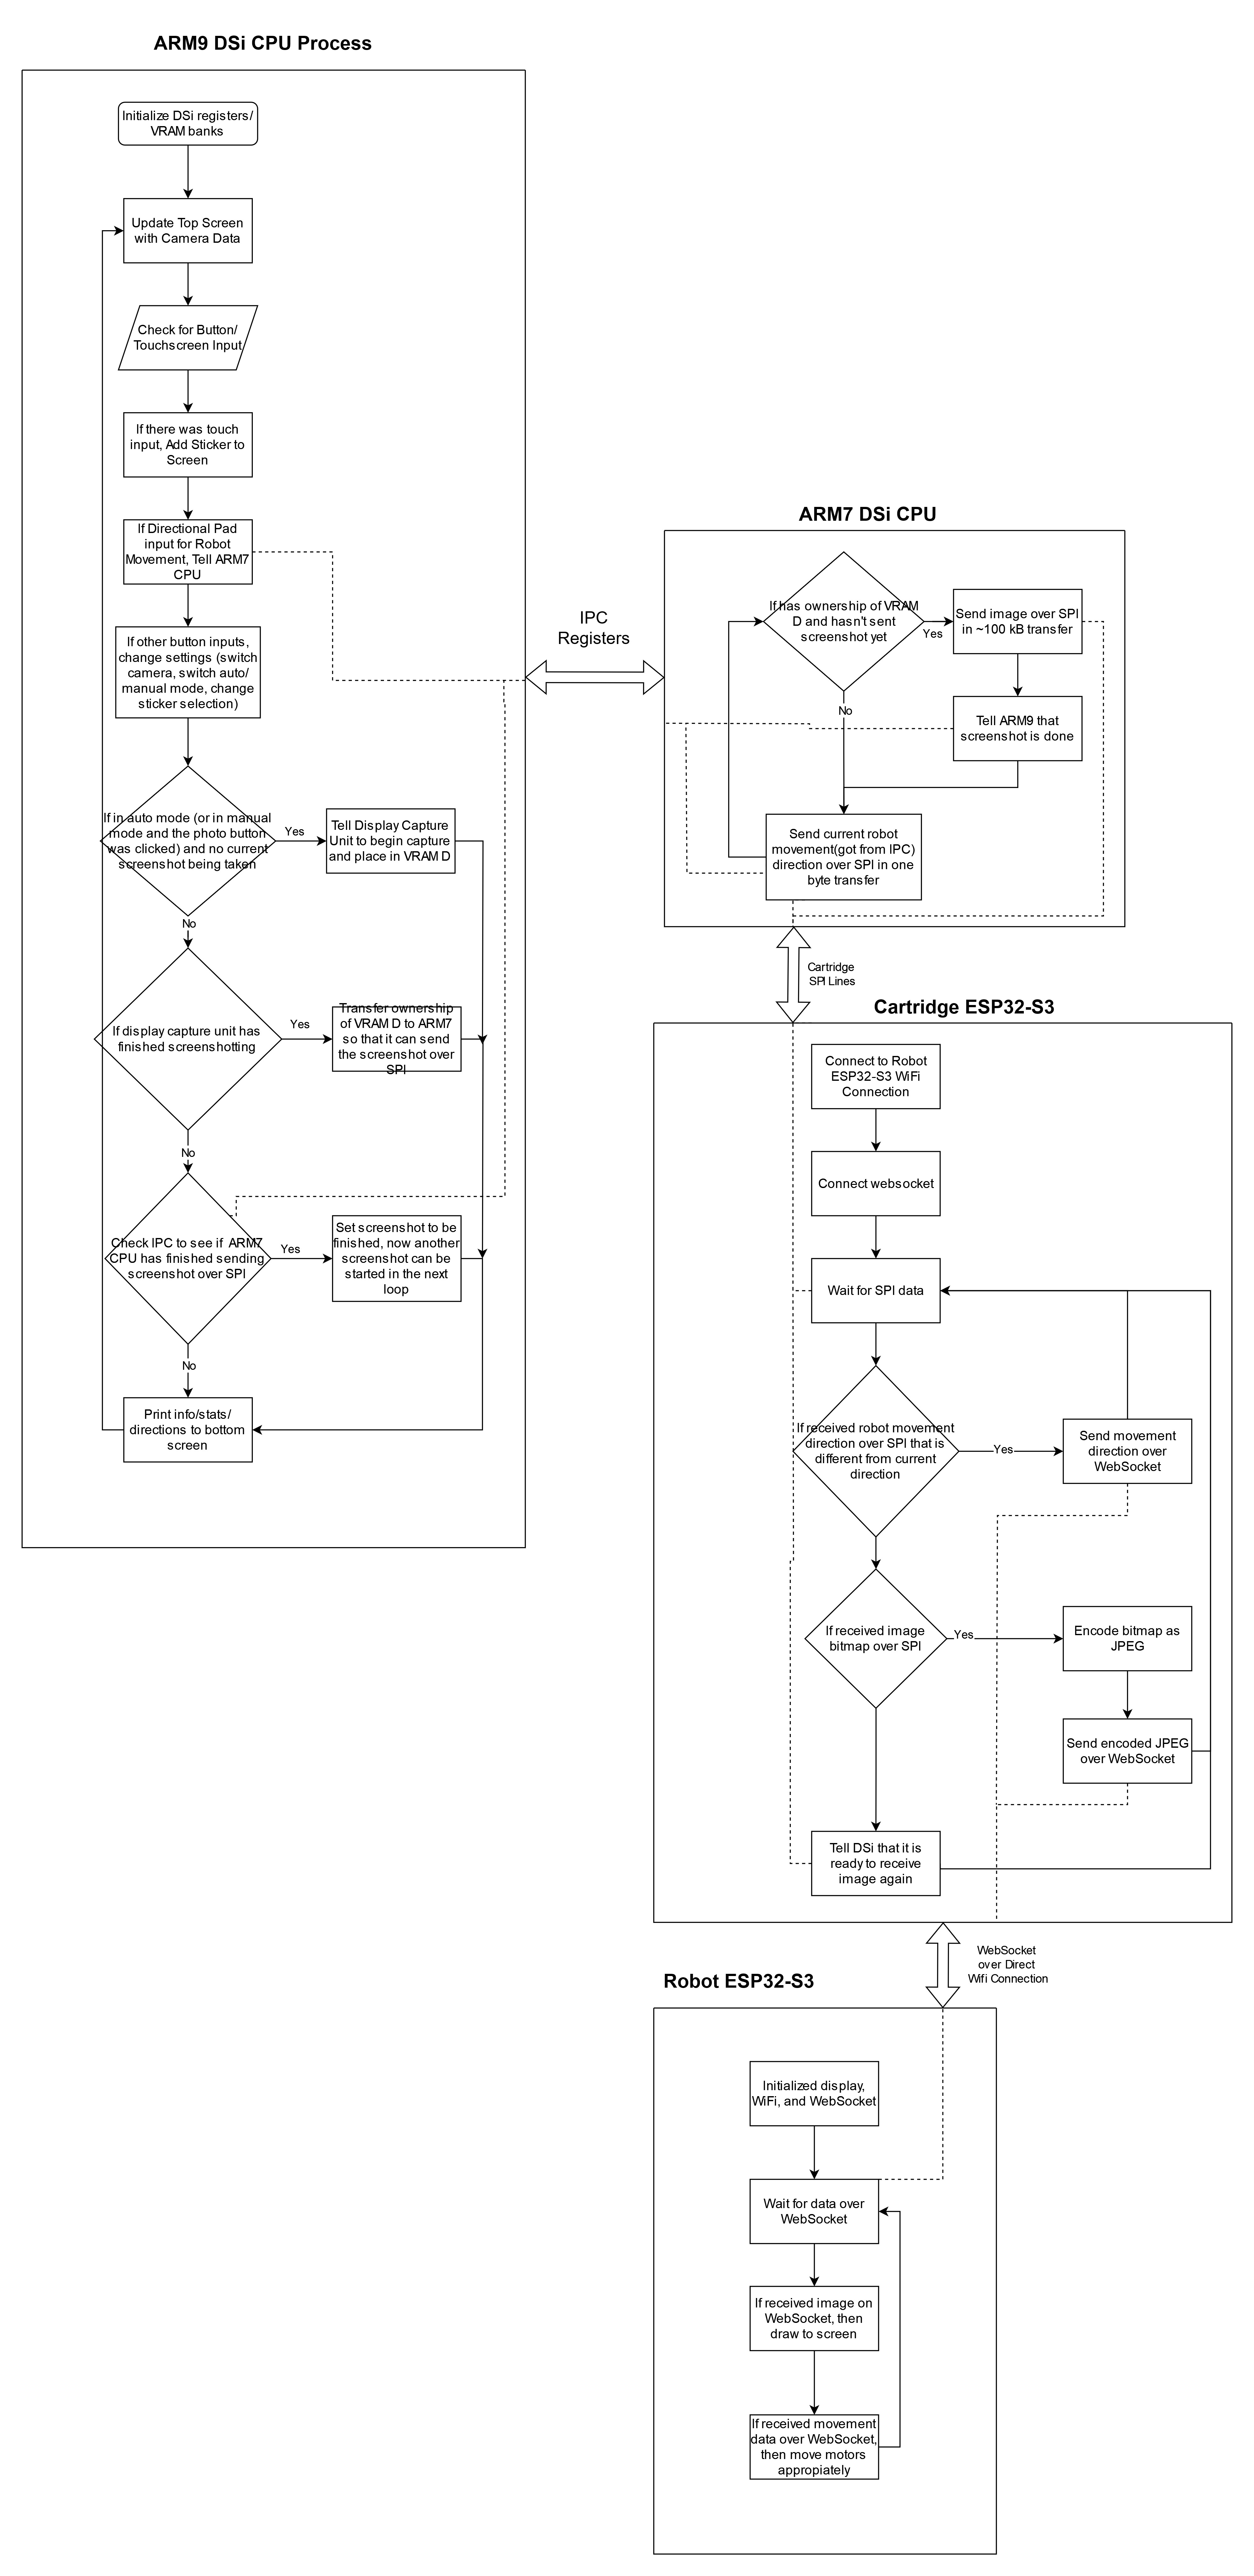
This application takes advantage of the two CPU's on the DSi. The image data is sent out over the SPI lines in the cartridge slot. The ARM9 CPU takes care of the main application, while the ARM7 CPU sends the SPI data in the background. These CPU's communicate with each other using the IPC register.
| Close up of custom DSi Cartridge PCB and screenshots of Gerber files. |
|---|
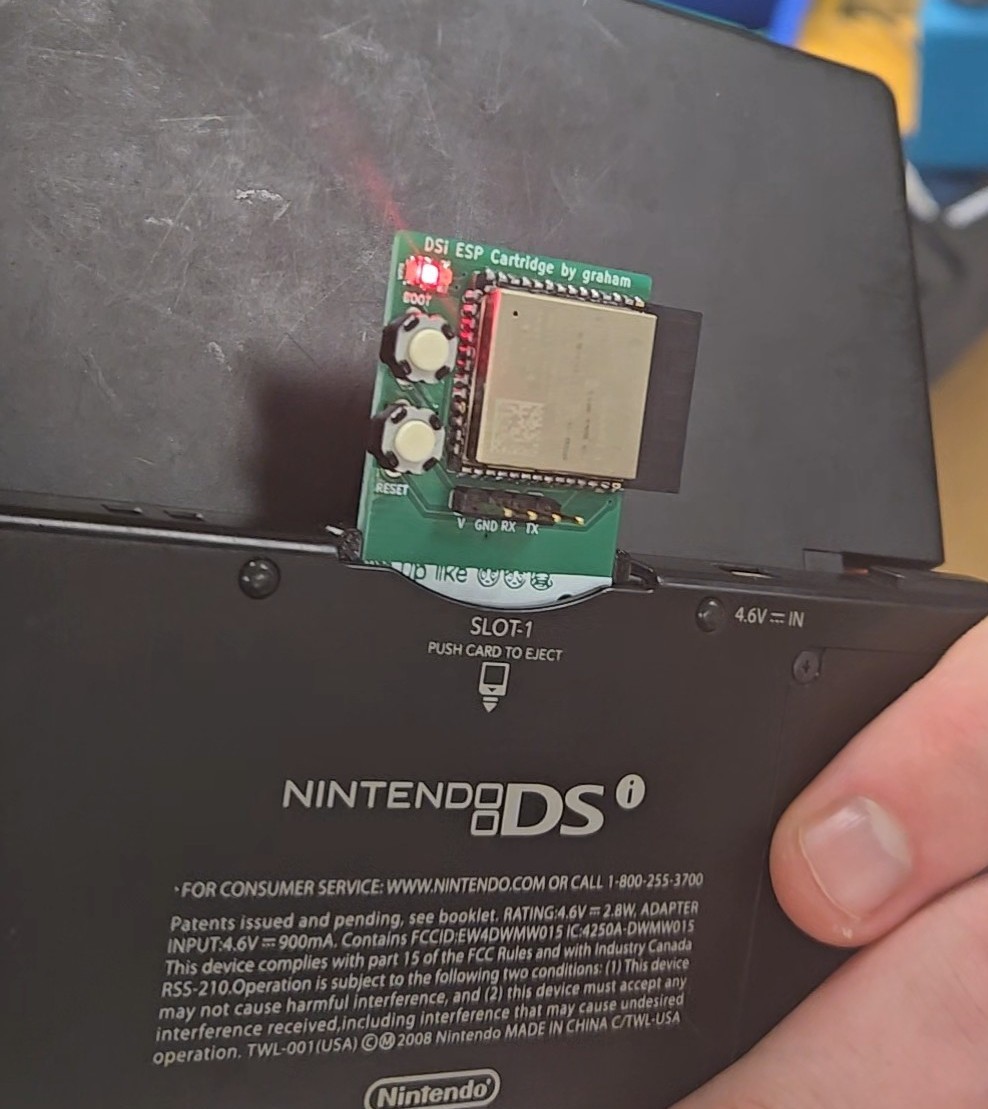 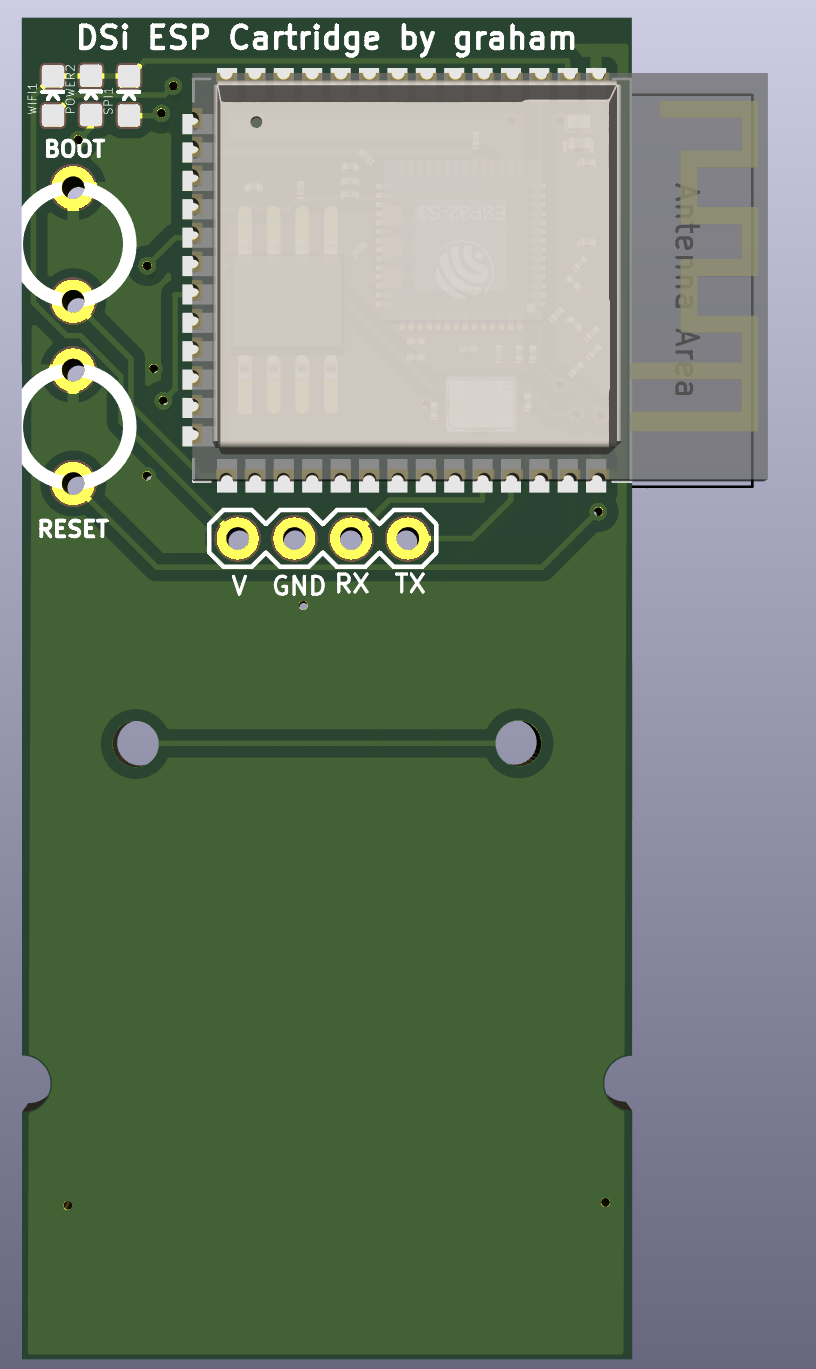 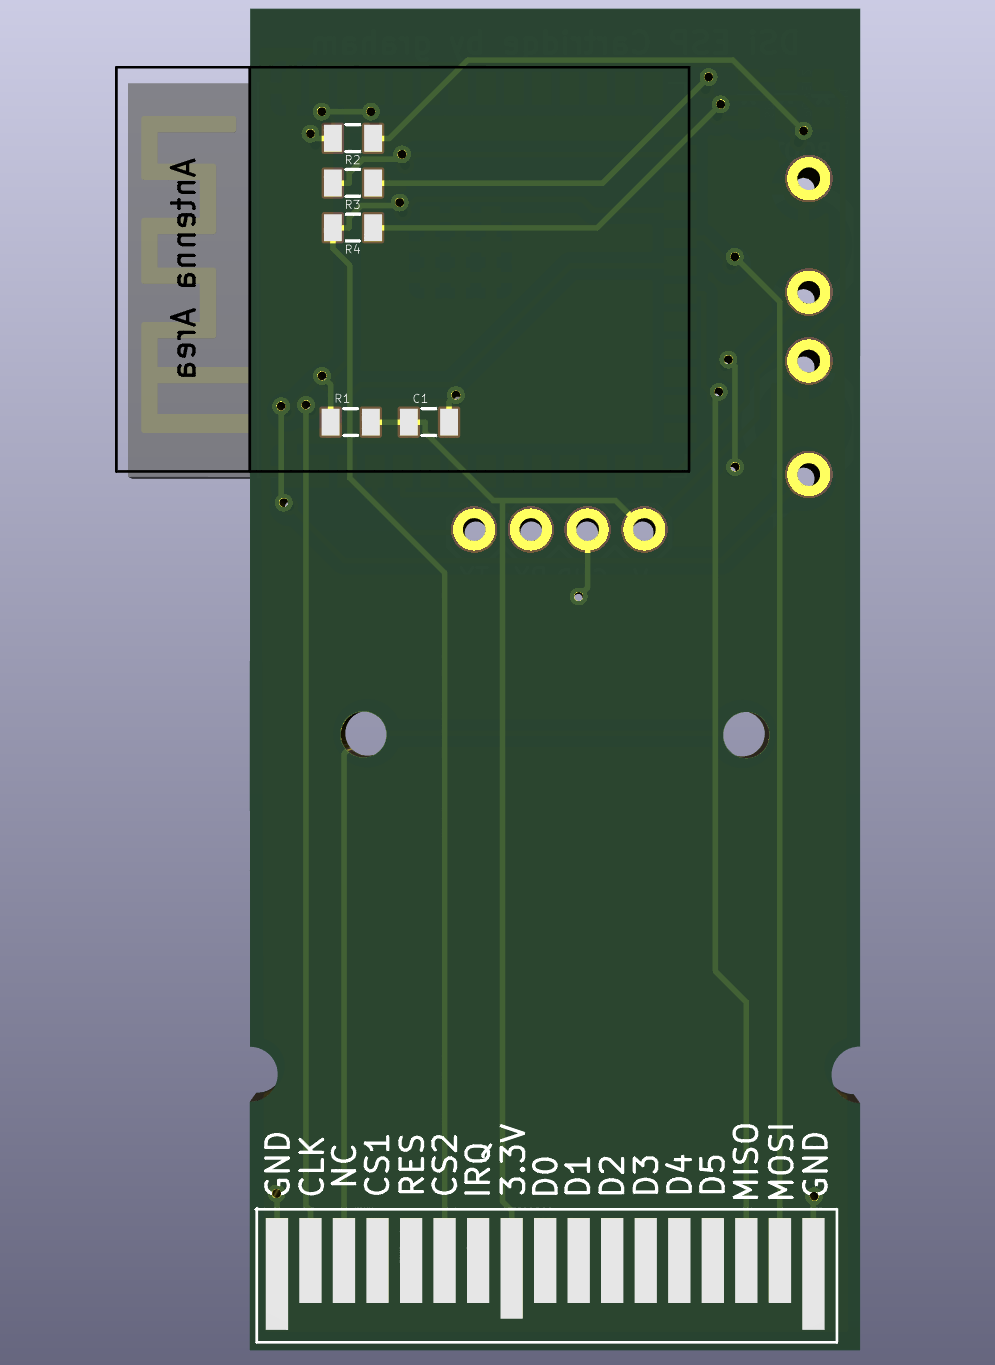 |
The raw bitmap image data is received over SPI on the ESP32-S3 on our custom cartridge PCB. This ESP32 is setup as SPI peripheral. It encodes the image as a JPEG (to reduce its size) and then sends it out over a WiFi WebSocket. It also receives and sends out the movement cortol signals for the robot. The code for this section can be found in esp32-sender folder.
The 7" TFT DIS08070H TFT Display is also powered by an ESP32-S3. The display ESP32 receives the data from the cartridge ESP32 over the direct Wifi connection. When it receives image data, it immediately draws it to the display. When it receives movement control signals, its uses our H-Bridge to appropiately tell the motors how to move. The code for this section can be found in esp32-receiver folder.
| Side View of Robot |
|---|
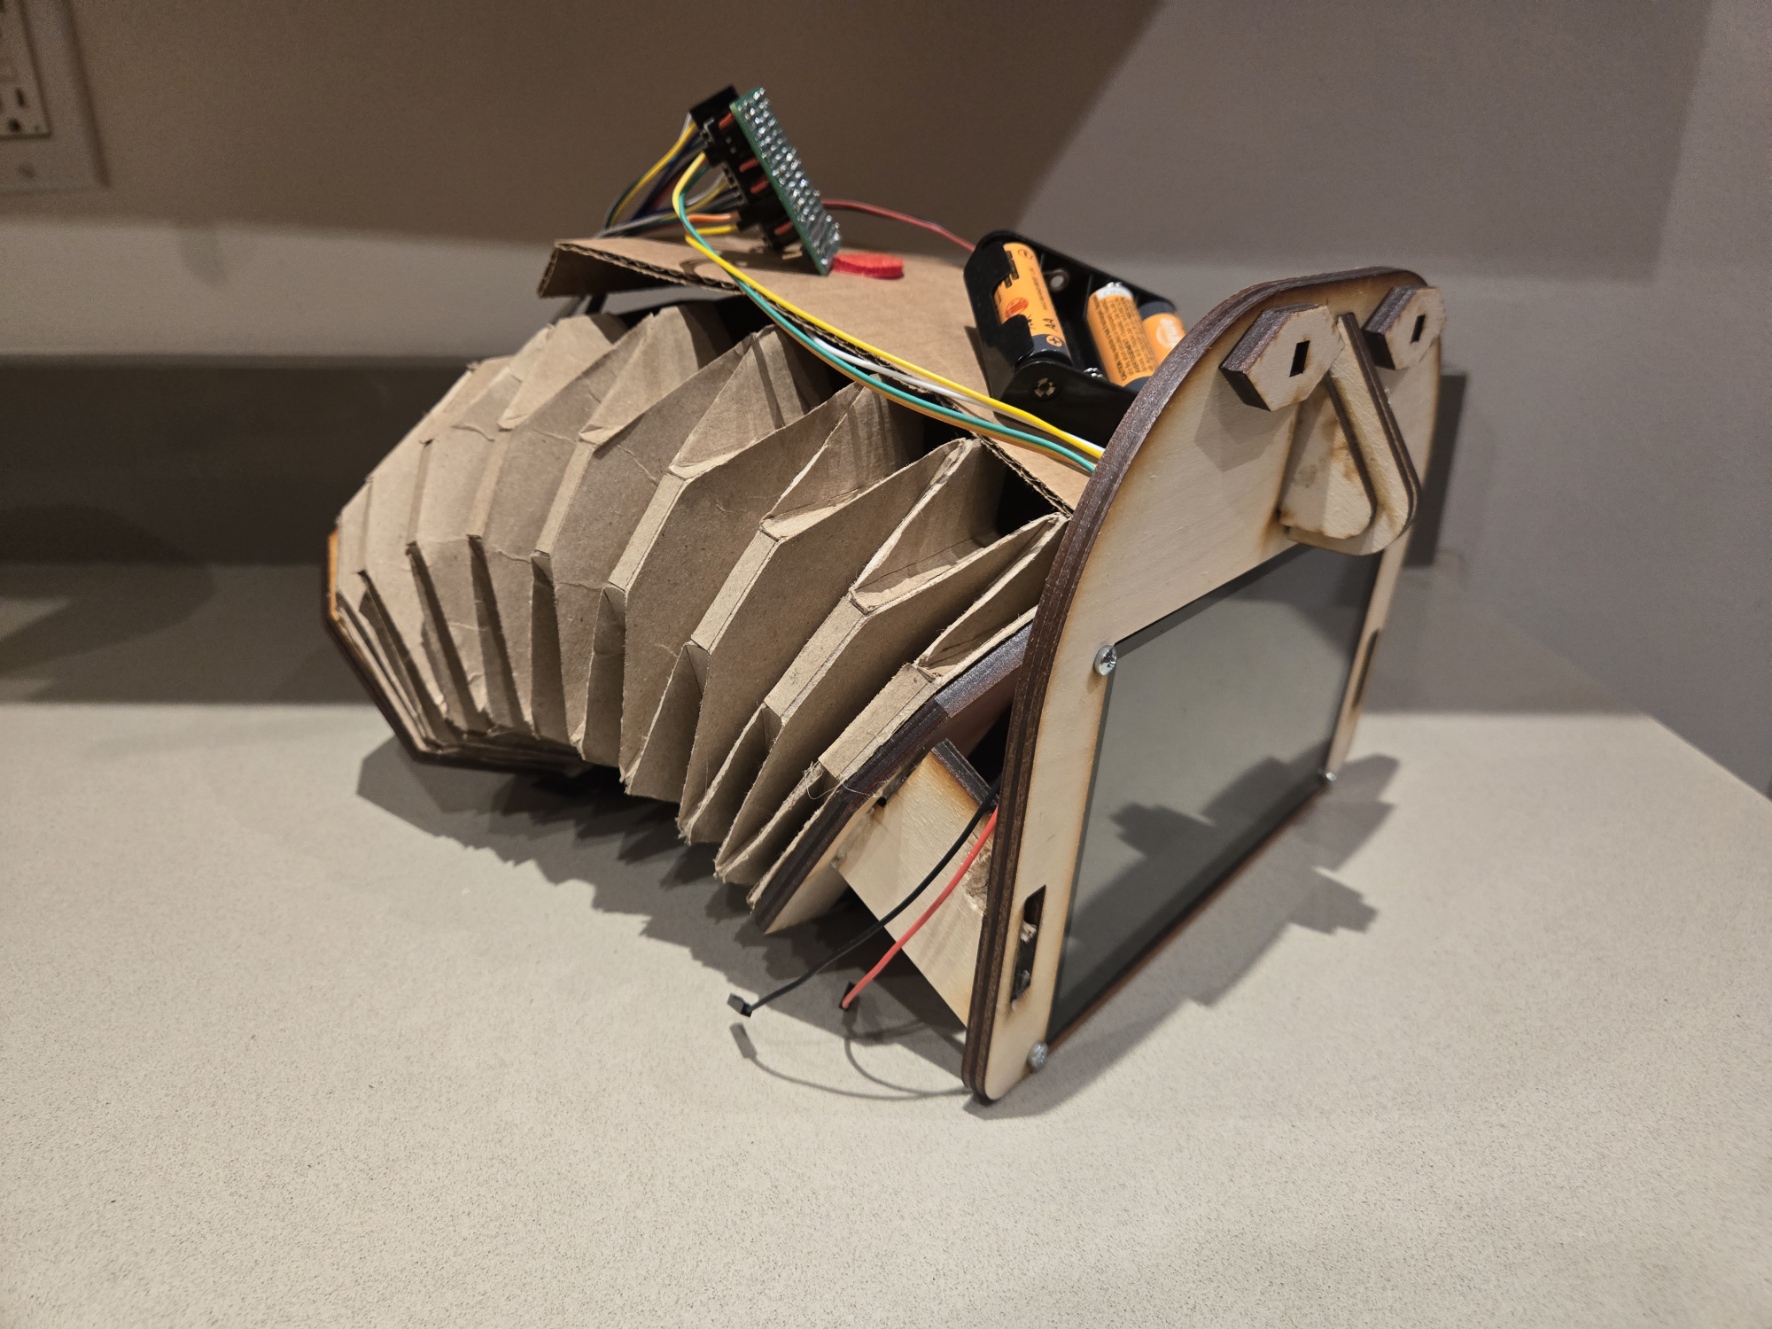 |
For the robot, the design was inspired by a metamaterial soft snake robot built by the University of Southern Denmark. This design uses a Yoshimura Crease Pattern.
The files for the cartridge PCB can be found in the cartridge_pcb folder and the CAD files for the cartridge housing in the cartridge_cad folder. The laser cutting and CAD files for the worm robot can be found in the robot folder.
| Flowchart of the software/algorithm design |
|---|
 |
| Qty | Value | Footprint | References |
|---|---|---|---|
| 3 | 330 | Ilya_Teach:0805 | R2, R3, R4 |
| 3 | LOGO | LOGO | cookie, joe, up |
| 2 | ~ | Ilya_Teach:BTN_2 | BOOT1, RESET1 |
| 1 | 10000 | Ilya_Teach:0805 | R1 |
| 1 | BLUE | Ilya_Teach:LED-0603 | WIFI1 |
| 1 | ESP32-S3-WROOM-1 | PCM_Espressif:ESP32-S3-WROOM-1 | U2 |
| 1 | GREEN | Ilya_Teach:LED-0603 | SPI1 |
| 1 | RED | Ilya_Teach:LED-0603 | POWER2 |
| 1 | ndsPADS | Connector:nds_contact_pads | U1 |
| 1 | ~ | Ilya_Teach:0805 | C1 |
| 1 | ~ | SparkFun-Connectors:1X04 | J1 |
It measures 27.3 × 60 mm and has 2 copper layers, 1.6 mm thick.
16 parts, built around the ESP32-S3-WROOM-1-N8. The full list of its parts is on this page, with links to each part's symbol and footprint where PCBKit's library has them.
From the grahamgrieb/DSi-Robot repository on GitHub, at the commit this page was made from: the board is cartridge_pcb/dsi_esp.kicad_pcb and its schematic Robot/Custom_coil_PCB/coil/coil.kicad_sch. PCBKit opens the board in the browser, with nothing to install.
Its repository states no licence, so its author keeps all rights: ask grahamgrieb before reusing the design.
joeycastillo/The-Open-Book
For details on how to build, test and use Open Book, I've made documentation available here.

hackclub/OnBoard
💡 Join 1,000 teenagers and make your first PCB with a $100 grant!

bitaxeorg/bitaxeGamma
Bitaxe based on the BM1370 from the S21 Pro


hhuysqt/esp32s3-keyboard
USB/BLE keyboard driver based on ESP32S3-WROOM-1

katbinaris/nanofoc_devkit
Compact All-In-One BLDC Controler featuiring ESP32-S3, TMC6300 and Magalpha sensors. Small 35x35mm footprint.

Hack-a-Day/2025-Communicator_Badge
The 2025 Hackaday Supercon RF Communicator Badge