

4 layers70 × 70 mm
 google/makerspace-auth68
Designs for our makerspace access control devices
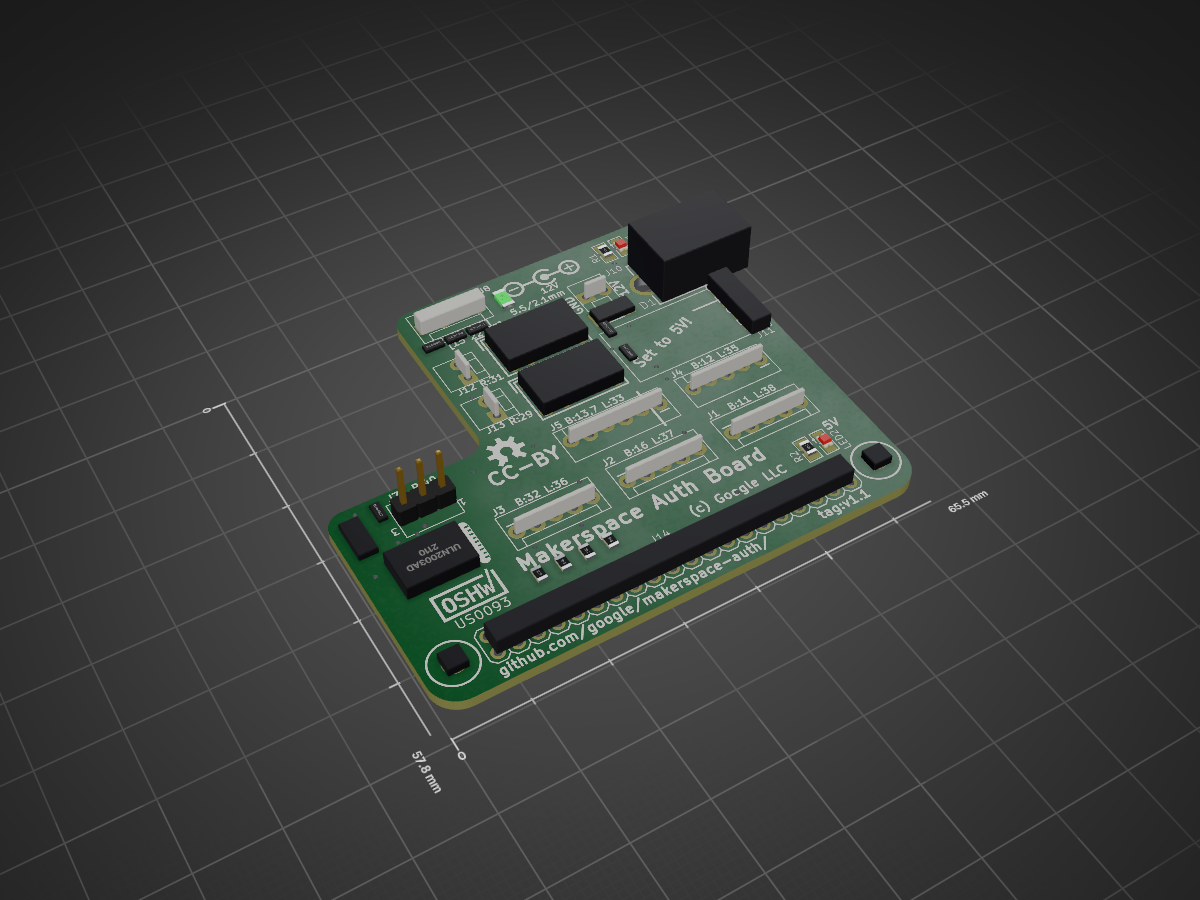
Ms auth breakout is an open-source printed circuit board by google, from the google/makerspace-auth repository on GitHub, published under the Apache-2.0 licence. It is a 2-layer board of 65.5 × 57.8 mm with 41 parts on 67 nets, routed with 349 tracks and 22 vias.
It is built around the ULN2003AD and DMN3023L-7. Its parts include 13 connectors, 6 resistors, 6 diodes, 6 transistors and 1 capacitor. It belongs with the interfaces and adapters boards of this library.
This is an example board that fits a Raspberry Pi. We tried to make it fun enough to assemble as a beginning soldering exercise (yes, even with surface mount!), and not use anything too strange.
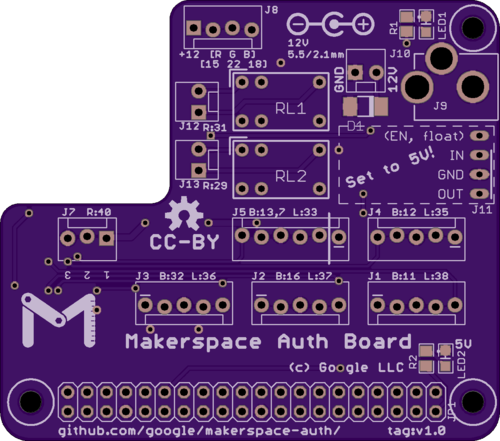
The odd board shape is to preserve easy access to CSI bus in case you're using a camera.
We tested with 2x20 headers both cheap (eBay) and expensive (SFH11-PBPC-D20-ST-BK at $1.97). All fit, barely clearing the holes.
The top hole is intended as mechanical joining, but as in all Pi hats, needs an odd size standoff (M2.5 x 11mm).
You don't need both the 2-pin and barrel supply (in fact, don't power both simultaneously), but having the second set of pads makes probing easier.
The resistor network can be bussed or independent, either will work. 10k appears sufficient to overpower the onboard pulldown on boot, but 4.7k (less common) works too.
The button pinout is (left-to-right with the tab facing down) is (IN, n/c, GND, +12V, Switched GND). It's intended for a light and/or button per
connector. Arcade buttons work fairly well if your enclosure is big enough.
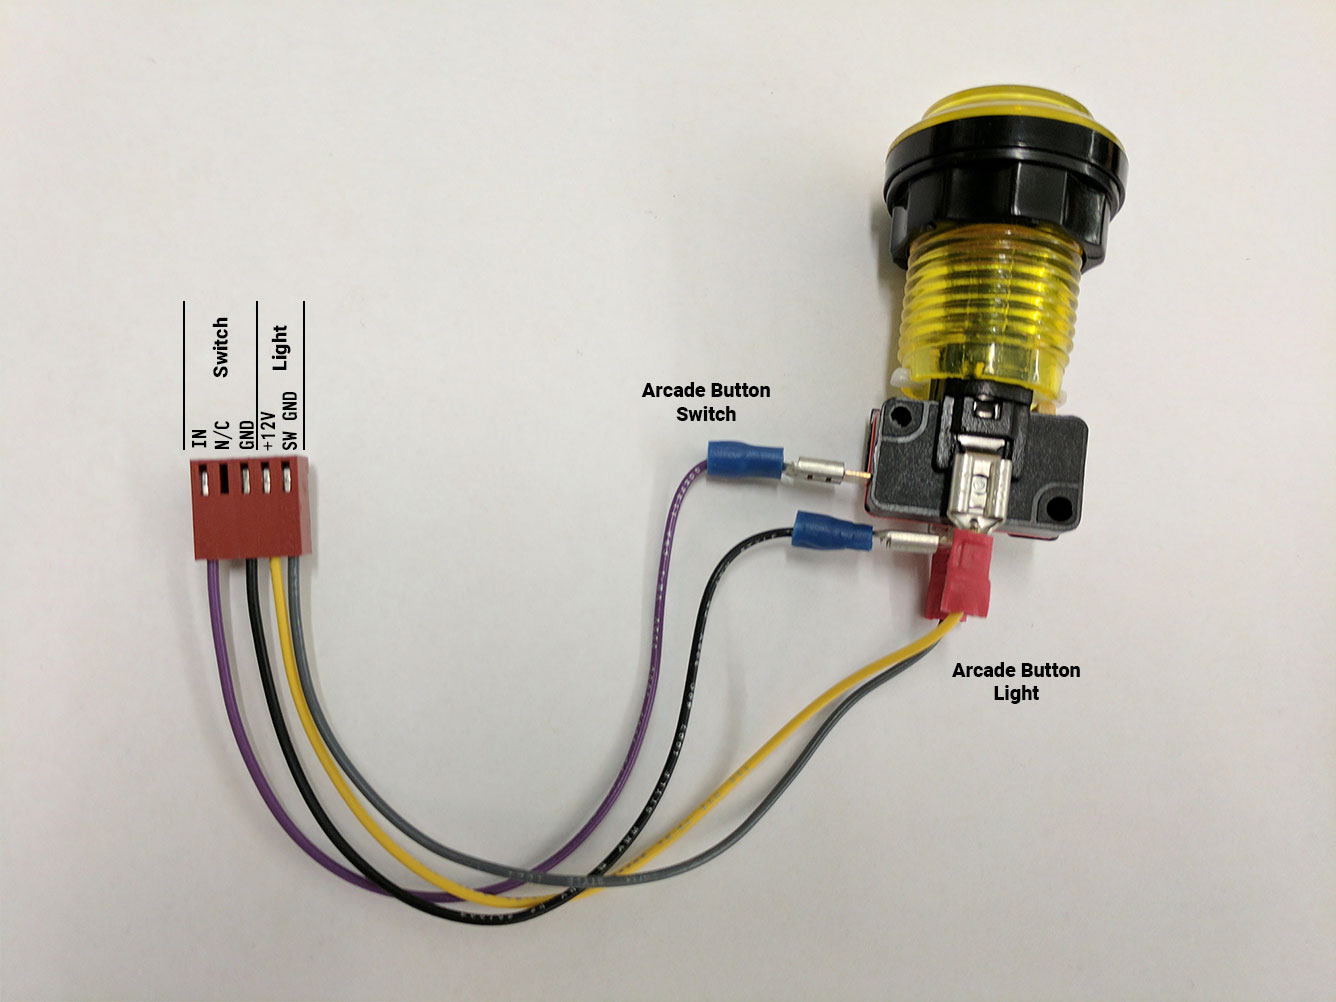
The only connector with a freewheeling diode is the 3-pin one marked high current. It's intended for relay or solenoid use, like for a door. It's fairly easy to blow the driver chip on all the others.
You can crimp or solder the switch and light side; you should crimp the Molex KK side.
The best tool is Molex 63811-8200, but it's very expensive (350 USD). We used a budget crimper SN-2549 (23 USD) for these photos, which is the cheapest we've tried that does OK.
For a walkthrough of this process, University of Manchester has produced a video which details the workflow: https://www.youtube.com/watch?v=8jcfD1UW8SE
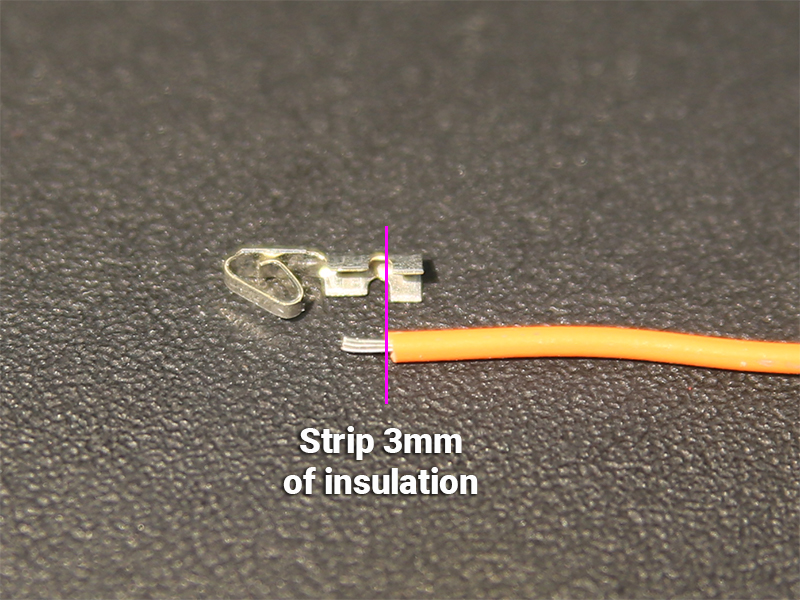
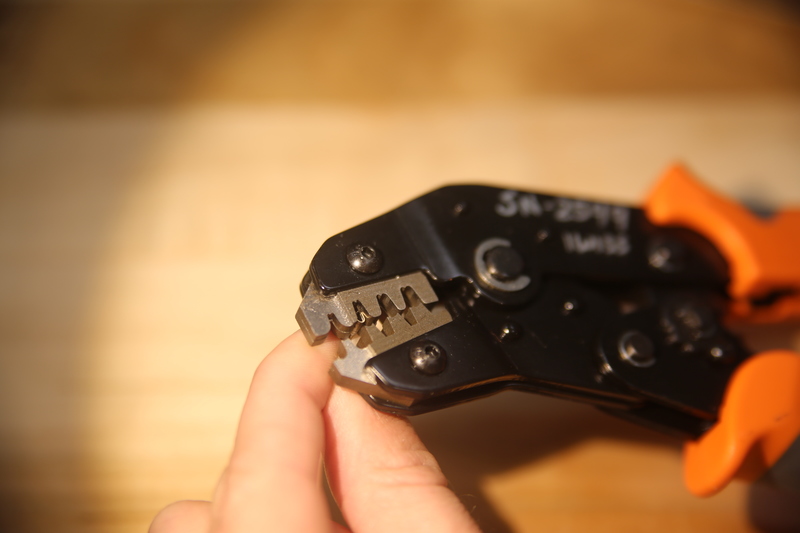 2. Insert into crimper with the open end facing you.
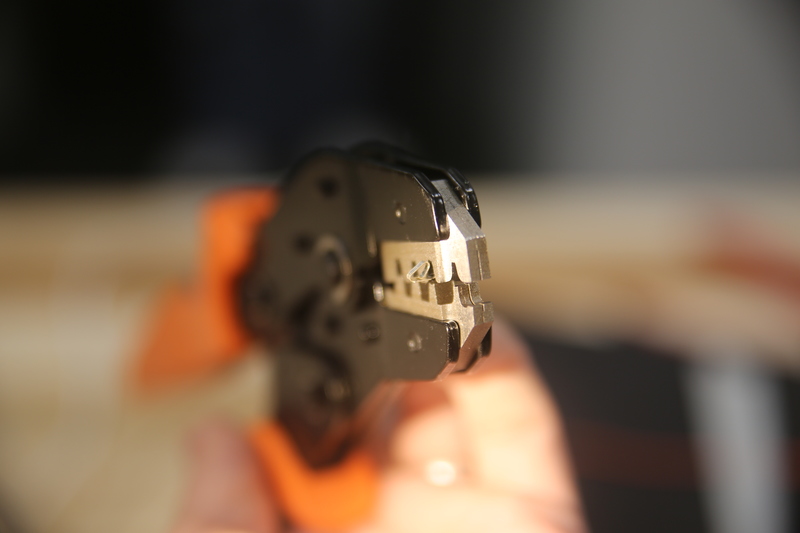 3. Don't crush the spring, which is on the back side, while you close a couple of clicks. Now insert wire from the front and complete the cycle.
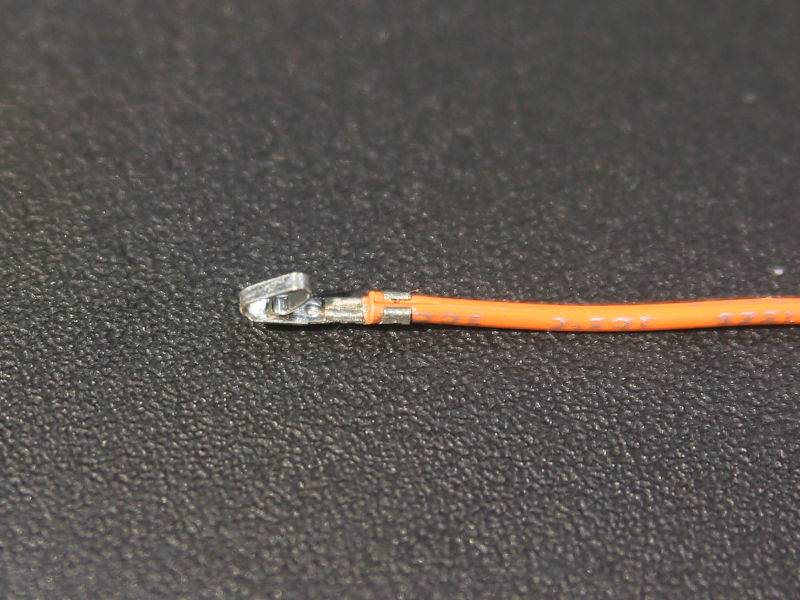 4. This is acceptably crimped. It's not ideal, but acceptable.
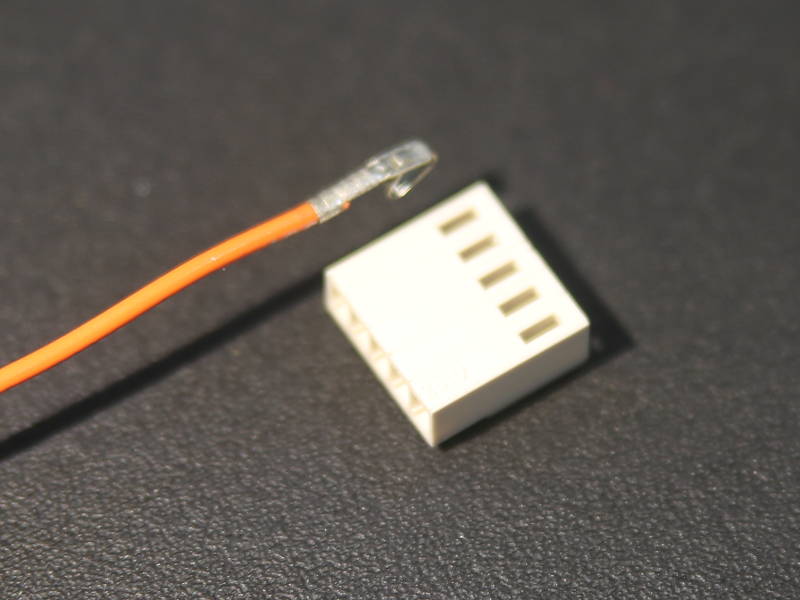 5. Insert into housing with tiny tooth up, and the spring down in this orientation. It should lock.
| Qty | Value | Footprint | References |
|---|---|---|---|
| 6 | DMN3023L | ms_auth_breakout:SOT23-3 | Q1, Q2, Q3, Q4, Q5, Q6 |
| 4 | 10k | ms_auth_breakout:R0805 | R3, R4, R5, R6 |
| 4 | CONN_05POLAR_LOCK | ms_auth_breakout:MOLEX-1X5_LOCK | J1, J2, J3, J4 |
| 4 | DIODE-DO-214AC | ms_auth_breakout:DO-214AC | D1, D2, D3, D4 |
| 3 | @HOLE0, @HOLE1, @HOLE2 | ||
| 3 | CONN_02POLAR_LOCK | ms_auth_breakout:MOLEX-1X2_LOCK | J10, J12, J13 |
| 2 | HFD23_SPDT | ms_auth_breakout:HFD23 | RL1, RL2 |
| 2 | LED | ms_auth_breakout:CHIPLED_0805 | LED1, LED2 |
| 1 | 1k | ms_auth_breakout:R0805 | R1 |
| 1 | 47u | ms_auth_breakout:C1206 | C2 |
| 1 | 560 | ms_auth_breakout:R0805 | R2 |
| 1 | BUCK_MODULEHORIZONTAL | ms_auth_breakout:BUCK_HORIZONTAL | J11 |
| 1 | CONN_03POLAR_LOCK | ms_auth_breakout:MOLEX-1X3_LOCK | J7 |
| 1 | CONN_04POLAR_LOCK | ms_auth_breakout:MOLEX-1X4_LOCK | J8 |
| 1 | CONN_06POLAR_LOCK | ms_auth_breakout:MOLEX-1X6_LOCK | J5 |
| 1 | MS_LOGO | ms_auth_breakout:MS_LOGO_VECTOR | U$1 |
| 1 | OSHW-LOGOM | ms_auth_breakout:OSHW-LOGO-M | LOGO1 |
| 1 | PINHD-2X20 | ms_auth_breakout:2X20 | J14 |
| 1 | POWER_JACKPTH_LOCK | ms_auth_breakout:POWER_JACK_PTH_LOCK | J9 |
| 1 | ULN2003AD | ms_auth_breakout:SO16 | IC1 |
| 1 | US0093 | ms_auth_breakout:CERT-SMALL-SILK | U$2 |
It measures 65.5 × 57.8 mm and has 2 copper layers, 1.6 mm thick.
41 parts, built around the ULN2003AD and DMN3023L-7. The full list of its parts is on this page, with links to each part's symbol and footprint where PCBKit's library has them.
From the google/makerspace-auth repository on GitHub, at the commit this page was made from: the board is hardware/pi-hat-1/ms_auth_breakout.kicad_pcb. PCBKit opens the board in the browser, with nothing to install.
Its repository publishes it under the Apache-2.0 licence: you may reuse it on that licence's terms (keep the author's notice, and for a copyleft licence share your changes alike).


hansenkw/Vu-LED-Meter
This is a decorative LED that shines based on the audio input through the 3.5mm audio jack connector. The design is a 2-layer printed circuit board based on Great Scott Vu LED Meter with few modifications as noted in…

SuperPower/Apollo
All hardware designs and products you can find in this repository is licensed under CERN Open Hardware Licence Version 2 - Weakly Reciprocal

WojciechM98/Home-assistant-ESP32
Home assistand board using ESP32 controlled with MQTT protocol.

dragonlock2/kicadboards
Offsite backup for the miscellaneous KiCad boards that don't fit elsewhere

misko/prompt2device
The separate vNext PCB skill and orchestrator package is available alongside the reference workflow below; existing projects keep their accepted toolchain until an explicit migration.