4 layers40.6 × 17.8 mm

 galvy0/phoenix45_alpha7
Alpha Stagger PCB Design for Phoenix45
Phoenix45 alpha is an open-source printed circuit board by galvy0, from the galvy0/phoenix45_alpha repository on GitHub, published under the Unlicense licence. It is a 2-layer board of 247.7 × 77.5 mm with 139 parts on 90 nets, routed with 544 tracks and 53 vias.
It is built around the ATMEGA32U4-MU and SRV05-4. Its parts include 10 capacitors, 3 switches, 2 resistors, 2 ICs and 1 connector. It belongs with the AVR (ATmega, ATtiny) boards of this library.


Alpha stagger version of Phoenix45.


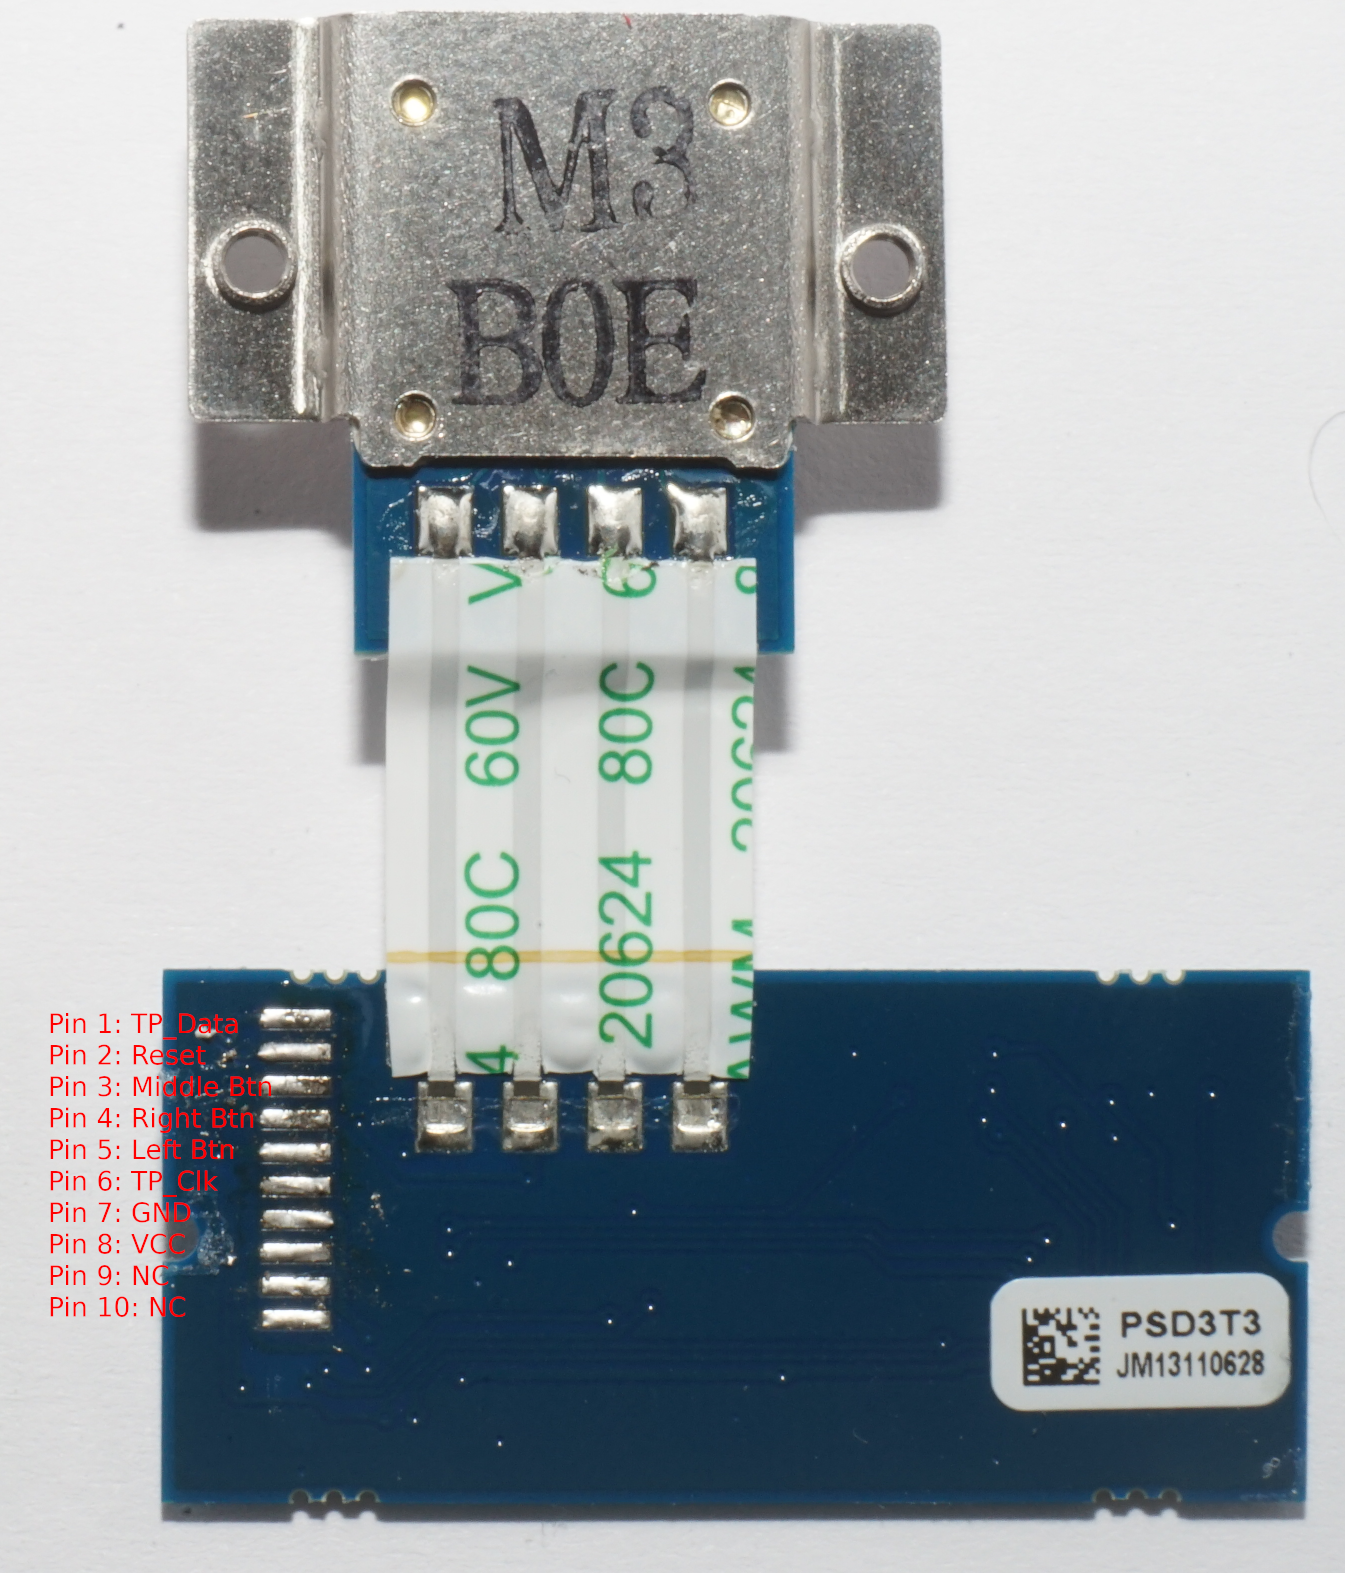
The middle column can be configured with either an OLED or a trackpoint module.
Either case, I provide the files for a cover along with plate option to mount the cover.
Using the cover would help fill/cover up the space between the plate and the top of the case and make the middle column look more flush with the top of the case (a.k.a it's just for aesthetics).
To use the cover, you need M2 screws and standoffs - I find ~6 mm is a good length for the standoffs, though 7 mm also works well and gives enough space for the trackpoint module.
The only TP module compatible with this is the two-piece module found in ThinkPad T440/T450/T460/T470/T480, P52s, X240, X250, X260 X270 (according to https://deskthority.net/wiki/TrackPoint_Hardware).
I just bought some replacement T440/T450 keyboards from Ebay and scavanged the TP modules.
Steps (Very rough - I will try to take some photos for better instructions next time I build this):


https://github.com/galvy0/qmk_firmware/tree/galvy/keyboards/galvy/jd45_alpha
| Qty | Value | Footprint | References |
|---|---|---|---|
| 44 | D | Diode_SMD:D_SOD-123 | D_SPACE1, D_SPACE2, D_SPACE10, D_SPACE11, D_SPACE12, D_SPACE13, D_SPACE14, D_SPACE15, D_SPACE16, D_SPACE17, D_SPACE18, D_SPACE19, D_SPACE21, D_SPACE22, D_SPACE23, D_SPACE24 +28 |
| 44 | KEYSW | MX_Only:MXOnly-1U-NoLED | K_SPACE1, K_SPACE2, K_SPACE10, K_SPACE11, K_SPACE12, K_SPACE13, K_SPACE14, K_SPACE15, K_SPACE16, K_SPACE17, K_SPACE18, K_SPACE19, K_SPACE21, K_SPACE22, K_SPACE23, K_SPACE24 +28 |
| 8 | KEYSW | MX_Only:MXOnly-1.25U-NoLED | K_SPACE33, K_SPACE40, K_SPACE42, K_SPACE45, K_SPACE47, K_SPACE48, K_SPACE57, K_SPACE60 |
| 4 | 0.1uf | Capacitor_SMD:C_0805_2012Metric_Pad1.18x1.45mm_HandSolder | C2, C3, C4, C5 |
| 4 | KEYSW | MX_Only:MXOnly-1.5U-NoLED | K_SPACE7, K_SPACE20, K_SPACE52, K_SPACE53 |
| 4 | KEYSW | MX_Only:MXOnly-1.75U-NoLED | K_SPACE43, K_SPACE44, K_SPACE49, K_SPACE56 |
| 2 | 10k | Resistor_SMD:R_0805_2012Metric_Pad1.20x1.40mm_HandSolder | R1, R2 |
| 2 | 22 | Resistor_SMD:R_0805_2012Metric_Pad1.20x1.40mm_HandSolder | UR1, UR2 |
| 2 | 22p | Capacitor_SMD:C_0805_2012Metric_Pad1.18x1.45mm_HandSolder | C7, C8 |
| 2 | 4.7k | Resistor_SMD:R_0805_2012Metric_Pad1.20x1.40mm_HandSolder | UR6, UR7 |
| 2 | 5.1k | Resistor_SMD:R_0805_2012Metric_Pad1.20x1.40mm_HandSolder | UR4, UR5 |
| 2 | SW_PUSH | Button_Switch_SMD:SW_SPST_SKQG_WithoutStem | SW1, SW2 |
| 1 | 100k | Resistor_SMD:R_0805_2012Metric_Pad1.20x1.40mm_HandSolder | UR8 |
| 1 | 10uF | Capacitor_SMD:C_0805_2012Metric_Pad1.18x1.45mm_HandSolder | C1 |
| 1 | 1M | Resistor_SMD:R_0805_2012Metric_Pad1.20x1.40mm_HandSolder | UR3 |
| 1 | 1uf | Capacitor_SMD:C_0805_2012Metric_Pad1.18x1.45mm_HandSolder | C6 |
| 1 | 2.2uF | Capacitor_SMD:C_0805_2012Metric_Pad1.18x1.45mm_HandSolder | C9 |
| 1 | 4.7uF | Capacitor_SMD:C_0805_2012Metric_Pad1.18x1.45mm_HandSolder | C0 |
| 1 | ATmega32U4-M | Package_DFN_QFN:QFN-44-1EP_7x7mm_P0.5mm_EP5.2x5.2mm_ThermalVias | U2 |
| 1 | AVR-ISP-6 | Connector_IDC:IDC-Header_2x03_P2.54mm_Vertical | J1 |
| 1 | Crystal_GND24_Small | Crystal:Crystal_SMD_3225-4Pin_3.2x2.5mm_HandSoldering | X1 |
| 1 | HRO-TYPE-C-31-M-12 | Type-C:HRO-TYPE-C-31-M-12-HandSoldering | USB1 |
| 1 | OLED | kbd:OLED_v2 | OL1 |
| 1 | Polyfuse_Small | Fuse:Fuse_1206_3216Metric_Pad1.42x1.75mm_HandSolder | F1 |
| 1 | RotaryEncoder_Switch | encoder:RotaryEncoder_Alps_EC11E-Switch_Vertical_H20mm | SW3 |
| 1 | SRV05-4 | Package_TO_SOT_SMD:SOT-23-6_Handsoldering | U1 |
| 1 | TPCLK | TestPoint:TestPoint_THTPad_1.0x1.0mm_Drill0.5mm | TP1 |
| 1 | TPDATA | TestPoint:TestPoint_THTPad_1.0x1.0mm_Drill0.5mm | TP4 |
| 1 | TPGND | TestPoint:TestPoint_THTPad_1.0x1.0mm_Drill0.5mm | TP3 |
| 1 | TPRST | TestPoint:TestPoint_THTPad_1.0x1.0mm_Drill0.5mm | TP5 |
| 1 | TPVCC | TestPoint:TestPoint_THTPad_1.0x1.0mm_Drill0.5mm | TP2 |

galvy0/vault35_ortho
Ortholinear variant of vault35 by projectcain

Malevolti/Lyra
A print at home 70 key split ortho keyboard inspired by the Corne, Lily58 & Sofle. For people who hate layers. This repo is currently a mess but thank you for stopping by.


Cipulot/RGB-HHKB-Controller
HHKB Pro 2 Keyboard Controller Board with RGB strip support.

rominronin/katana60-pro
KiCad project for quick starting 60% keyboard projects.


It measures 247.7 × 77.5 mm and has 2 copper layers, 1.6 mm thick.
139 parts, built around the ATMEGA32U4-MU and SRV05-4. The full list of its parts is on this page, with links to each part's symbol and footprint where PCBKit's library has them.
From the galvy0/phoenix45_alpha repository on GitHub, at the commit this page was made from: the board is phoenix45_alpha.kicad_pcb and its schematic phoenix45_alpha.kicad_sch. PCBKit opens the board in the browser, with nothing to install.
Its repository publishes it under the Unlicense licence: you may reuse it on that licence's terms (keep the author's notice, and for a copyleft licence share your changes alike).