4 layers81.2 × 81.2 mm
 FilMarini/bigbanger10
An ESP32-based Bluetooth-enabled scaling device for climbing training,compliant with the Tindeq Progressor API, with firmware available in Micropython or Rust.
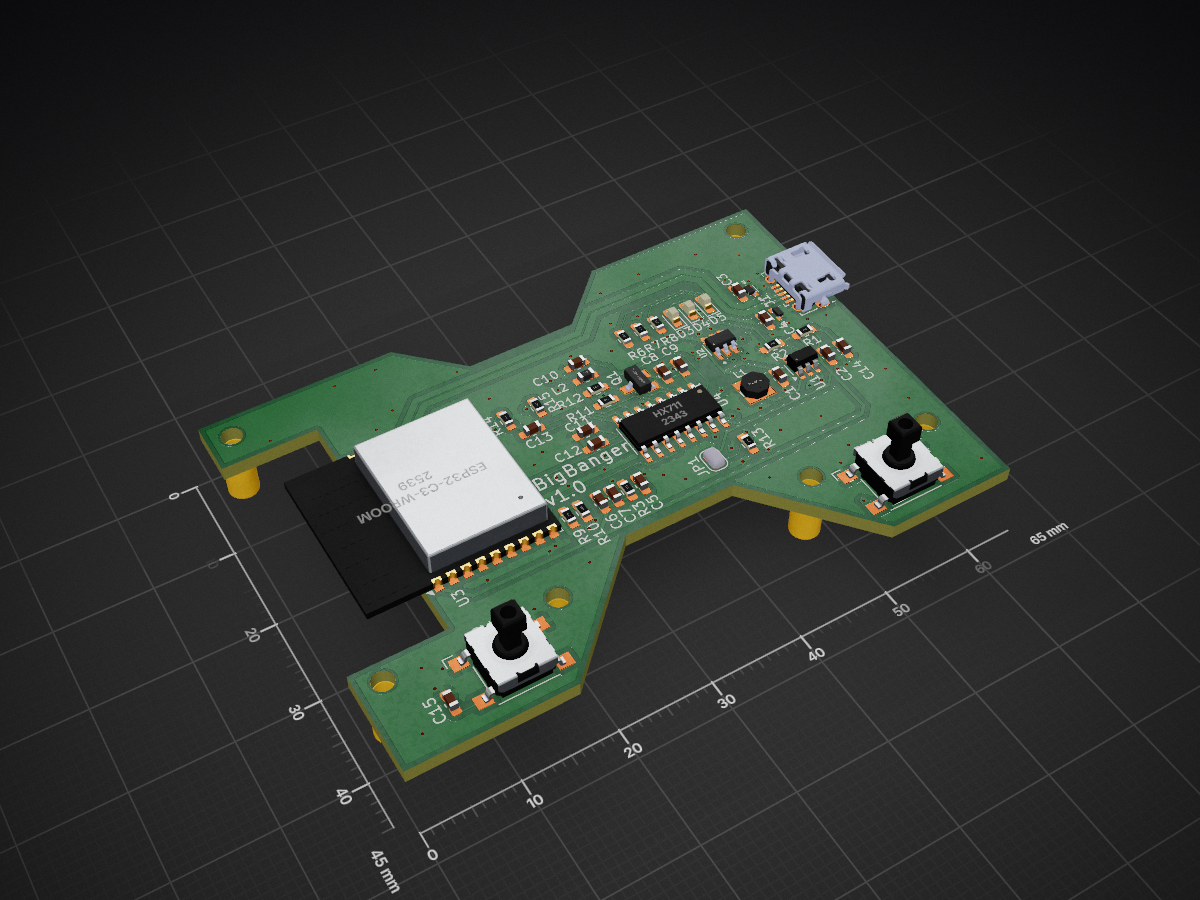
Bb kicad is an open-source printed circuit board by FilMarini, from the FilMarini/bigbanger repository on GitHub, published under the Apache-2.0 licence. It is a 2-layer board of 65 × 45 mm with 57 parts on 42 nets, routed with 414 tracks and 110 vias.
It is built around the ESP32-C3-WROOM-02-H4, HX711 and LESD5D5.0CT1G, with the MMBT4403 among its other parts. Its parts include 15 capacitors, 13 resistors, 5 diodes, 4 ICs and 2 switches. It belongs with the radio and wireless and sensors and measurement boards and the ESP32 and RISC-V boards of this library.


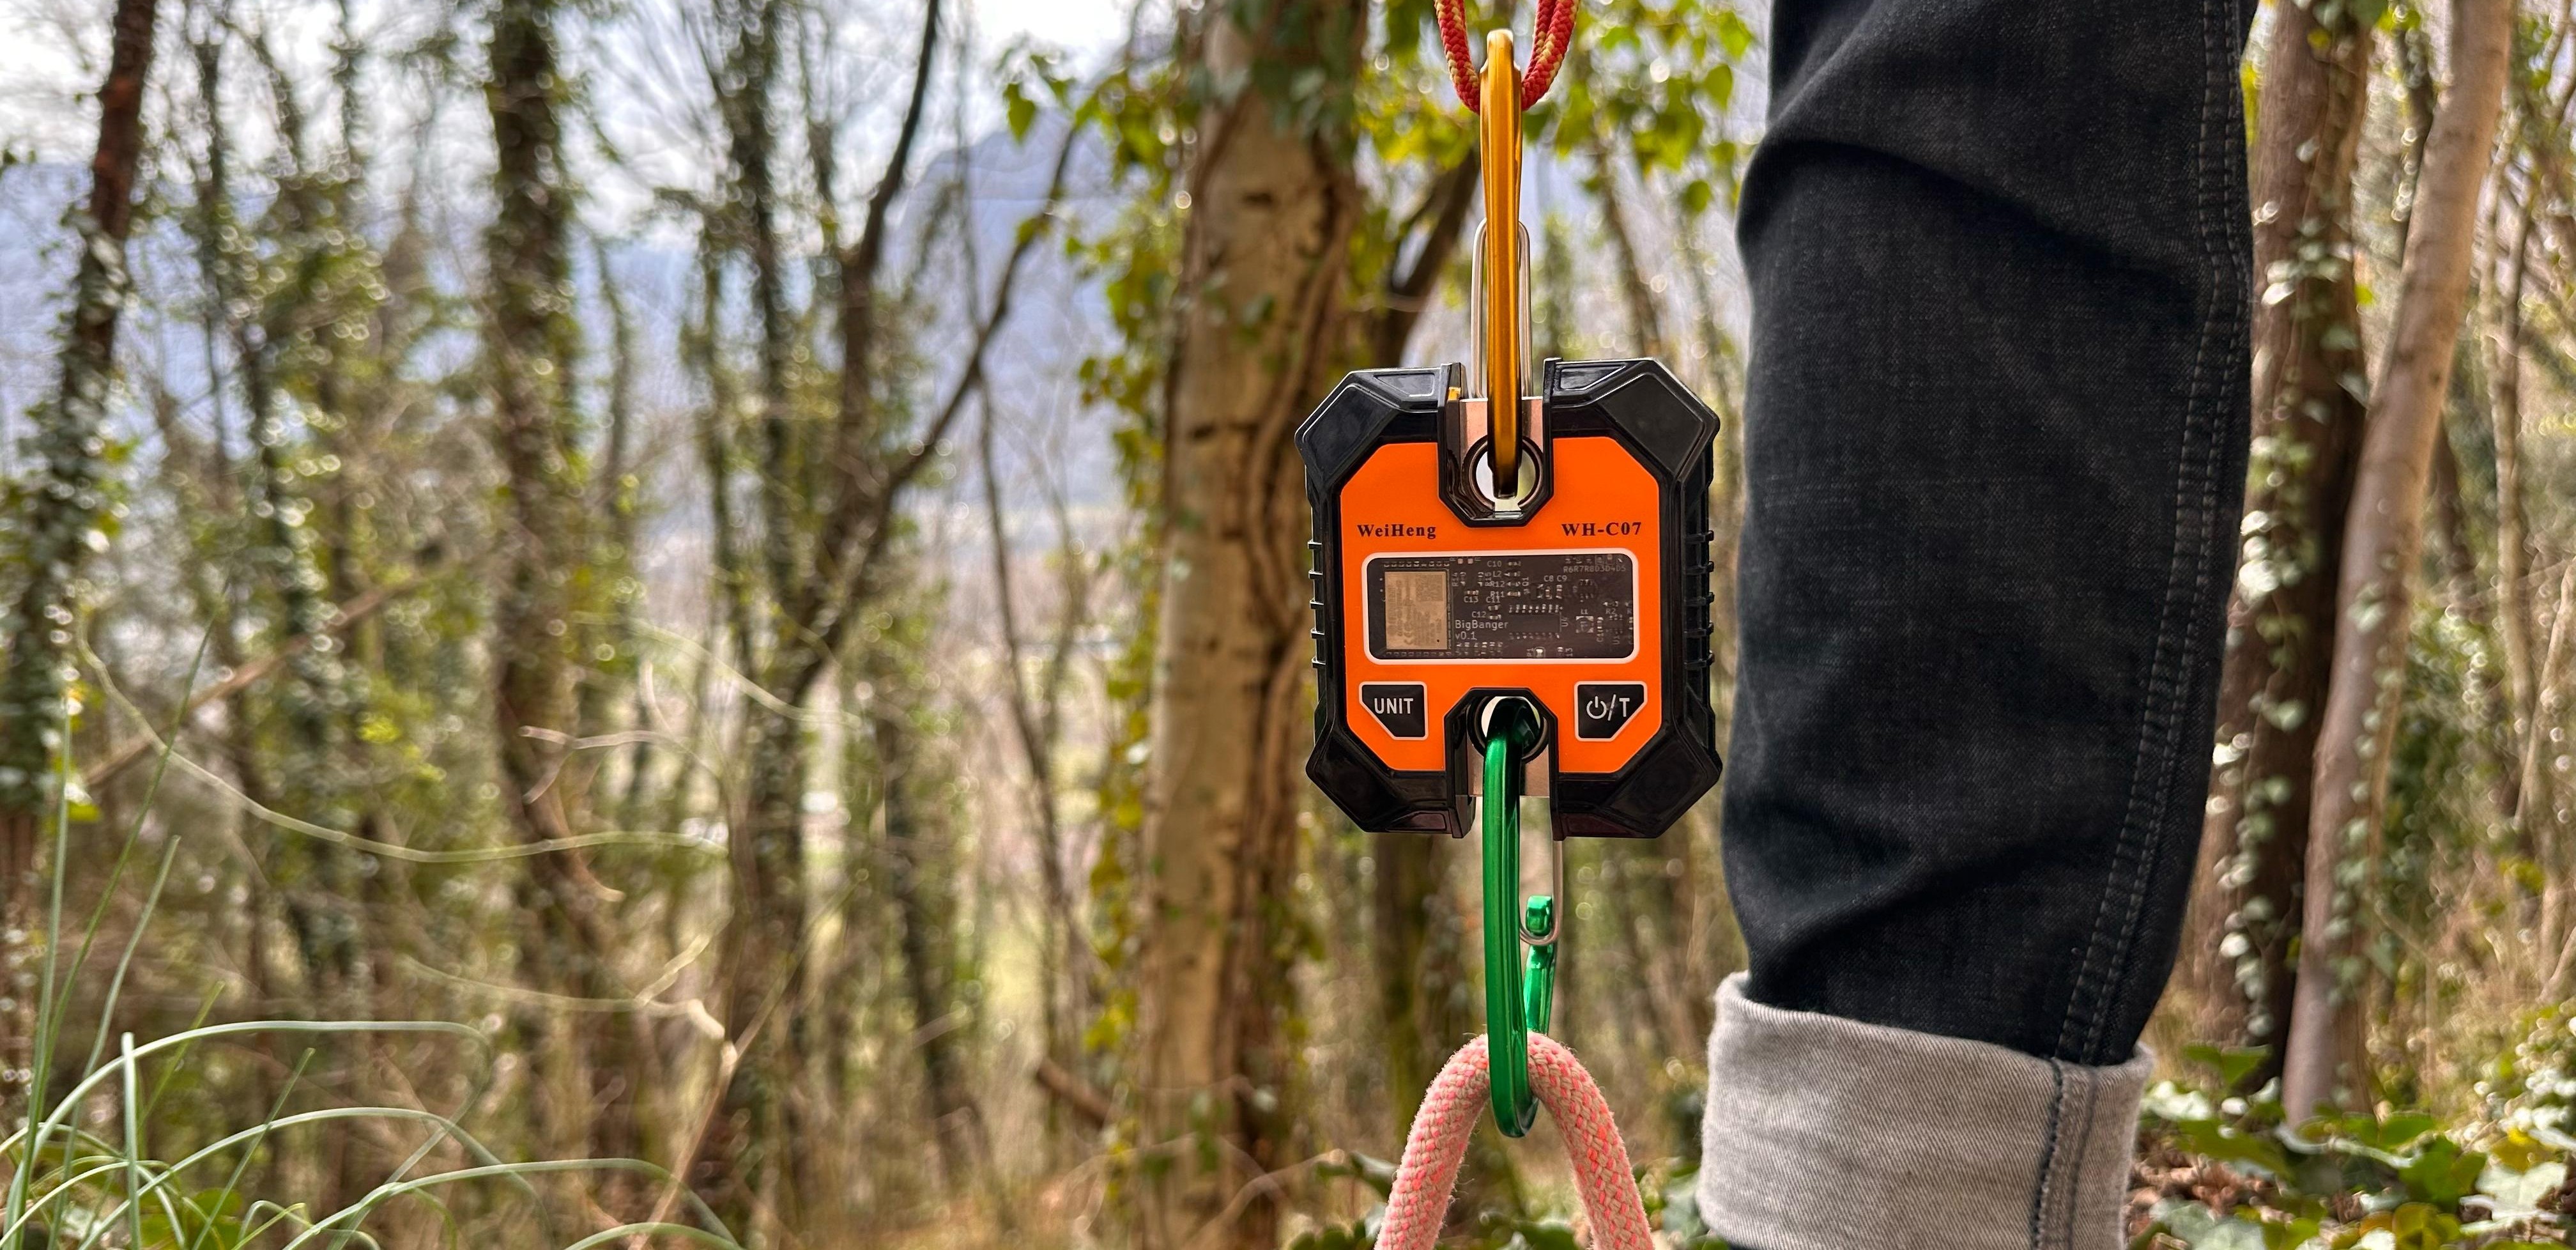
BigBanger is an ESP32-based open-source project that combines firmware and hardware to create a Bluetooth-enabled scale, mainly designed for climbing training.
The firmware can be chosen between micropython, easy to read and customize, but poorer power consumption, or rust, where it gets a bit more complicated but improves the efficiency.
This scale is fully compatible with the Tindeq Progressor API, enabling easy integration with apps that support them, including the official Tindeq Progressor app.
The BigBanger board is designed to exploit the housing of cheap scales that you can buy on Amazon/Aliexpress.
Currently, the supported housing are:
This is not the first open-source Tindeq Progressor-like project. The hangman is a very similar example. BigBanger was developed from scratch as a personal learning experience.
firmware:
hardware: contains the Kicad project for the PCB
Build the PCB from the Kicad project. Design is fully compliant with JLCPCB rules
The JLCPCB gerbers and assembly files are available in the release page
If you assemble the PCB with JLCPCB, go to step 3
Buy the components. Here is a full Digikey list of parts
Get to soldering!
Battery wiring:
Load cell wiring:
Turn on the BigBanger and connect to PC using the microUSB
/dev/ttyACM* or /dev/ttyUSB*Flash the ESP32-C3 micropython firmware. Instructions and firmware files are here
Copy the .py files in the 'firmware/upython' folder into the ESP32. Copy the hx711/hx711_gpio.py file into the ESP32. For this you can use rshell
Modify the main.py file. You need to specify the Bluetooth name for your device (If you want it compatible with the Tindeq Progressor, name must start with Progressor) as well as the crane scale used (Supported values are WH-C07 and WH-C100)
With rshell:
git clone --recursive https://github.com/FilMarini/bigbanger.git
cd bigbanger/firmware
rshell -p /dev/tty<your device> cp bb_gatt_server.py ble_advertising.py config.py hx711_bb.py utils.py hx711/hx711_gpio.py main.py /pyboard # Probably requires sudo privileges
Start training!
Install the rust toolchain for ESP32-C3. Please follow the guide
If you want to modify the Bluetooth advertisement name, change it in firmware/rust/.cargo/config.toml under PROGRESSOR_NAME. Bear in mind that the advertised name must start with Progressor_ in order to be recognized from the Tindeq App.
Once the toolchain is set up, go into the Rust firmware directory and build in release mode:
cd firmware/rust
cargo build --release
With the BigBanger connected, flash the firmware:
cargo run --releaseStart training!
The BigBanger scale comes pre-calibrated, but if for any reason the calibration is lost, you can recalibrate it using the built-in two-point calibration system. This system requires two weight measurements with a 10 kg difference—typically one at zero weight and another at 10 kg.
Turn on the BigBanger scale and ensure it is disconnected from any device.
Press and hold the Unit button until the LED D5 turns on (this takes a few seconds).
When the LED turns on, the scale performs the first measurement (normally at zero weight).
Add 10 kg weight on the scale.
Press the Unit button again. The LED D5 should turn off.
The scale is now calibrated and you can now connect to it.
Huge thanks to Tindeq for improving climbing training for all of us with their innovative product and for making their API available to third-party developers, enabling projects like this one. If you find this useful, consider supporting them by getting one of their products—they’re well worth it!
Special thanks also to kesyog for their excellent open-source project hangman, which provided valuable guidance and inspiration for the Rust firmware implementation. Since I started with zero Rust knowledge, having a working example to learn from was incredibly helpful — some parts of the code resemble the original hangman implementation.
| Qty | Value | Footprint | References |
|---|---|---|---|
| 6 | 100n | Capacitor_SMD:C_0603_1608Metric_Pad1.08x0.95mm_HandSolder | C6, C8, C10, C13, C14, C15 |
| 6 | MountingHole | MountingHole:MountingHole_2.2mm_M2 | H1, H2, H3, H4, H5, H6 |
| 4 | 10k | Resistor_SMD:R_0603_1608Metric_Pad0.98x0.95mm_HandSolder | R3, R9, R10, R13 |
| 4 | 22p | Capacitor_SMD:C_0603_1608Metric_Pad1.08x0.95mm_HandSolder | C3, C4, C11, C12 |
| 4 | TestPoint | TestPoint:TestPoint_Pad_2.0x2.0mm | TP2, TP3, TP4, TP5 |
| 3 | 10u | Capacitor_SMD:C_0603_1608Metric_Pad1.08x0.95mm_HandSolder | C2, C7, C9 |
| 3 | 4k7 | Resistor_SMD:R_0603_1608Metric_Pad0.98x0.95mm_HandSolder | R6, R7, R8 |
| 3 | LED | LED_SMD:LED_0603_1608Metric_Pad1.05x0.95mm_HandSolder | D3, D4, D5 |
| 2 | 100 | Resistor_SMD:R_0603_1608Metric_Pad0.98x0.95mm_HandSolder | R14, R15 |
| 2 | LESD5D5.0CT1G | mod:TVS_LESD5D5.0CT1G | D1, D2 |
| 2 | SW_Omron_B3FS | Button_Switch_SMD:SW_SPST_Omron_B3FS-101xP | SW1, SW2 |
| 1 | 1u | Capacitor_SMD:C_0603_1608Metric_Pad1.08x0.95mm_HandSolder | C5 |
| 1 | 20k | Resistor_SMD:R_0603_1608Metric_Pad0.98x0.95mm_HandSolder | R12 |
| 1 | 3u3 | Inductor_SMD:L_0603_1608Metric_Pad1.05x0.95mm_HandSolder | L2 |
| 1 | 4u7 | Capacitor_SMD:C_0603_1608Metric_Pad1.08x0.95mm_HandSolder | C1 |
| 1 | 562k | Resistor_SMD:R_0603_1608Metric_Pad0.98x0.95mm_HandSolder | R2 |
| 1 | 8k2 | Resistor_SMD:R_0603_1608Metric_Pad0.98x0.95mm_HandSolder | R11 |
| 1 | 976k | Resistor_SMD:R_0603_1608Metric_Pad0.98x0.95mm_HandSolder | R1 |
| 1 | BATTGND | TestPoint:TestPoint_Pad_2.0x2.0mm | TP7 |
| 1 | BATTIN_TP | TestPoint:TestPoint_Pad_2.0x2.0mm | TP1 |
| 1 | ESP32-C3-WROOM-02 | RF_Module:ESP32-C3-WROOM-02 | U3 |
| 1 | HX711 | Package_SO:SOP-16_3.9x9.9mm_P1.27mm | U4 |
| 1 | Jumper_2_Bridged | Jumper:SolderJumper-2_P1.3mm_Open_RoundedPad1.0x1.5mm | JP1 |
| 1 | MAX16054AZT_T | mod:SOT95P275X110-6N | U2 |
| 1 | MCP1640Bx-xCHY | Package_TO_SOT_SMD:SOT-23-6 | U1 |
| 1 | MMBT4403_ | mod:SOT23-BEC | Q1 |
| 1 | SHIELD | TestPoint:TestPoint_Pad_2.0x2.0mm | TP6 |
| 1 | USB_B_Micro | Connector_USB:USB_Micro-B_Amphenol_10118194-0001LF_Horizontal | J1 |
| 1 | WE-TPC_2813 | mod:WE-TPC_2813 | L1 |


SolderedElectronics/Load-cell-ampfilier-HX711-board-hardware-design
Hardware design, BOM, gerbers and 3D files for Load-cell-ampfilier-HX711-board designed by Soldered Electronics.

jvasilakes/mito
A tiny, cheap, hackable, completely open-source force gauge for isometric finger strength training.

EcoApi/EcoApi_BeeHiveMonitoring
describ options with 0R resistors. etc ...

callumsnowden/aero21412_test_rig
AERO21412 Avionics Coursework 1 – Wind Tunnel Test Rig "Black Box"

jmajew/thrust_tool
DIY tool for measurements of thrust, torque, etc., of an electric motor with propeller

It measures 65 × 45 mm and has 2 copper layers, 1.6 mm thick.
57 parts, built around the ESP32-C3-WROOM-02-H4, HX711, LESD5D5.0CT1G and MMBT4403. The full list of its parts is on this page, with links to each part's symbol and footprint where PCBKit's library has them.
From the FilMarini/bigbanger repository on GitHub, at the commit this page was made from: the board is hardware/bb_kicad/bb_kicad.kicad_pcb and its schematic hardware/bb_kicad/bb_kicad.kicad_sch. PCBKit opens the board in the browser, with nothing to install.
Its repository publishes it under the Apache-2.0 licence: you may reuse it on that licence's terms (keep the author's notice, and for a copyleft licence share your changes alike).