2 layers75 × 55 mm
Wellfed bench
Isaac-Duarte/wellfed
Open firmware that runs the PETLIBRO Granary PLAF103 pet feeder on your own Wi-Fi: no cloud, no account. Early and in testing.
93 parts8MIT

 cespinal117/Film-Camera-Lightmeter
A PCB I designed to integrate a light meter onto my film camera
Light meter is an open-source printed circuit board by cespinal117, from the cespinal117/Film-Camera-Lightmeter repository on GitHub. It is a 4-layer board of 55 × 37 mm with 67 parts on 83 nets, routed with 408 tracks and 62 vias.
It is built around the RP2040, VEML7700-TR and W25Q128JVSIQ, with the TPS2116DRL, USBLC6-2SC6 and ABM8-272-T3 among its other parts. Its parts include 25 capacitors, 19 resistors, 8 ICs, 3 connectors and 2 transistors. It belongs with the RP2040 boards of this library.


A PCB I designed to integrate a light meter onto my film camera.
My inspiration for this was when I got my first film camera, a Cannon AE-1, I noticed the built-in light-meter was broken.
For most of my time, I have been using my phone with a light-meter app to adjust my camera settings but that got annoying quick.
Since I wanted to practice more PCB design, I figured the best way to get practice in and solve my issue is to make my own light meter and manufacture a PCB for it.
The PCB is a 2-layer board to minimize cost.
It uses a Raspberry Pi Pico MCU as it was a relatively new board I was trying to learn to use. To power it, you can supply either USB-C for development, or a 3.7V Lipo battery.
It is still a WIP and I hope to have it manufactured soon.
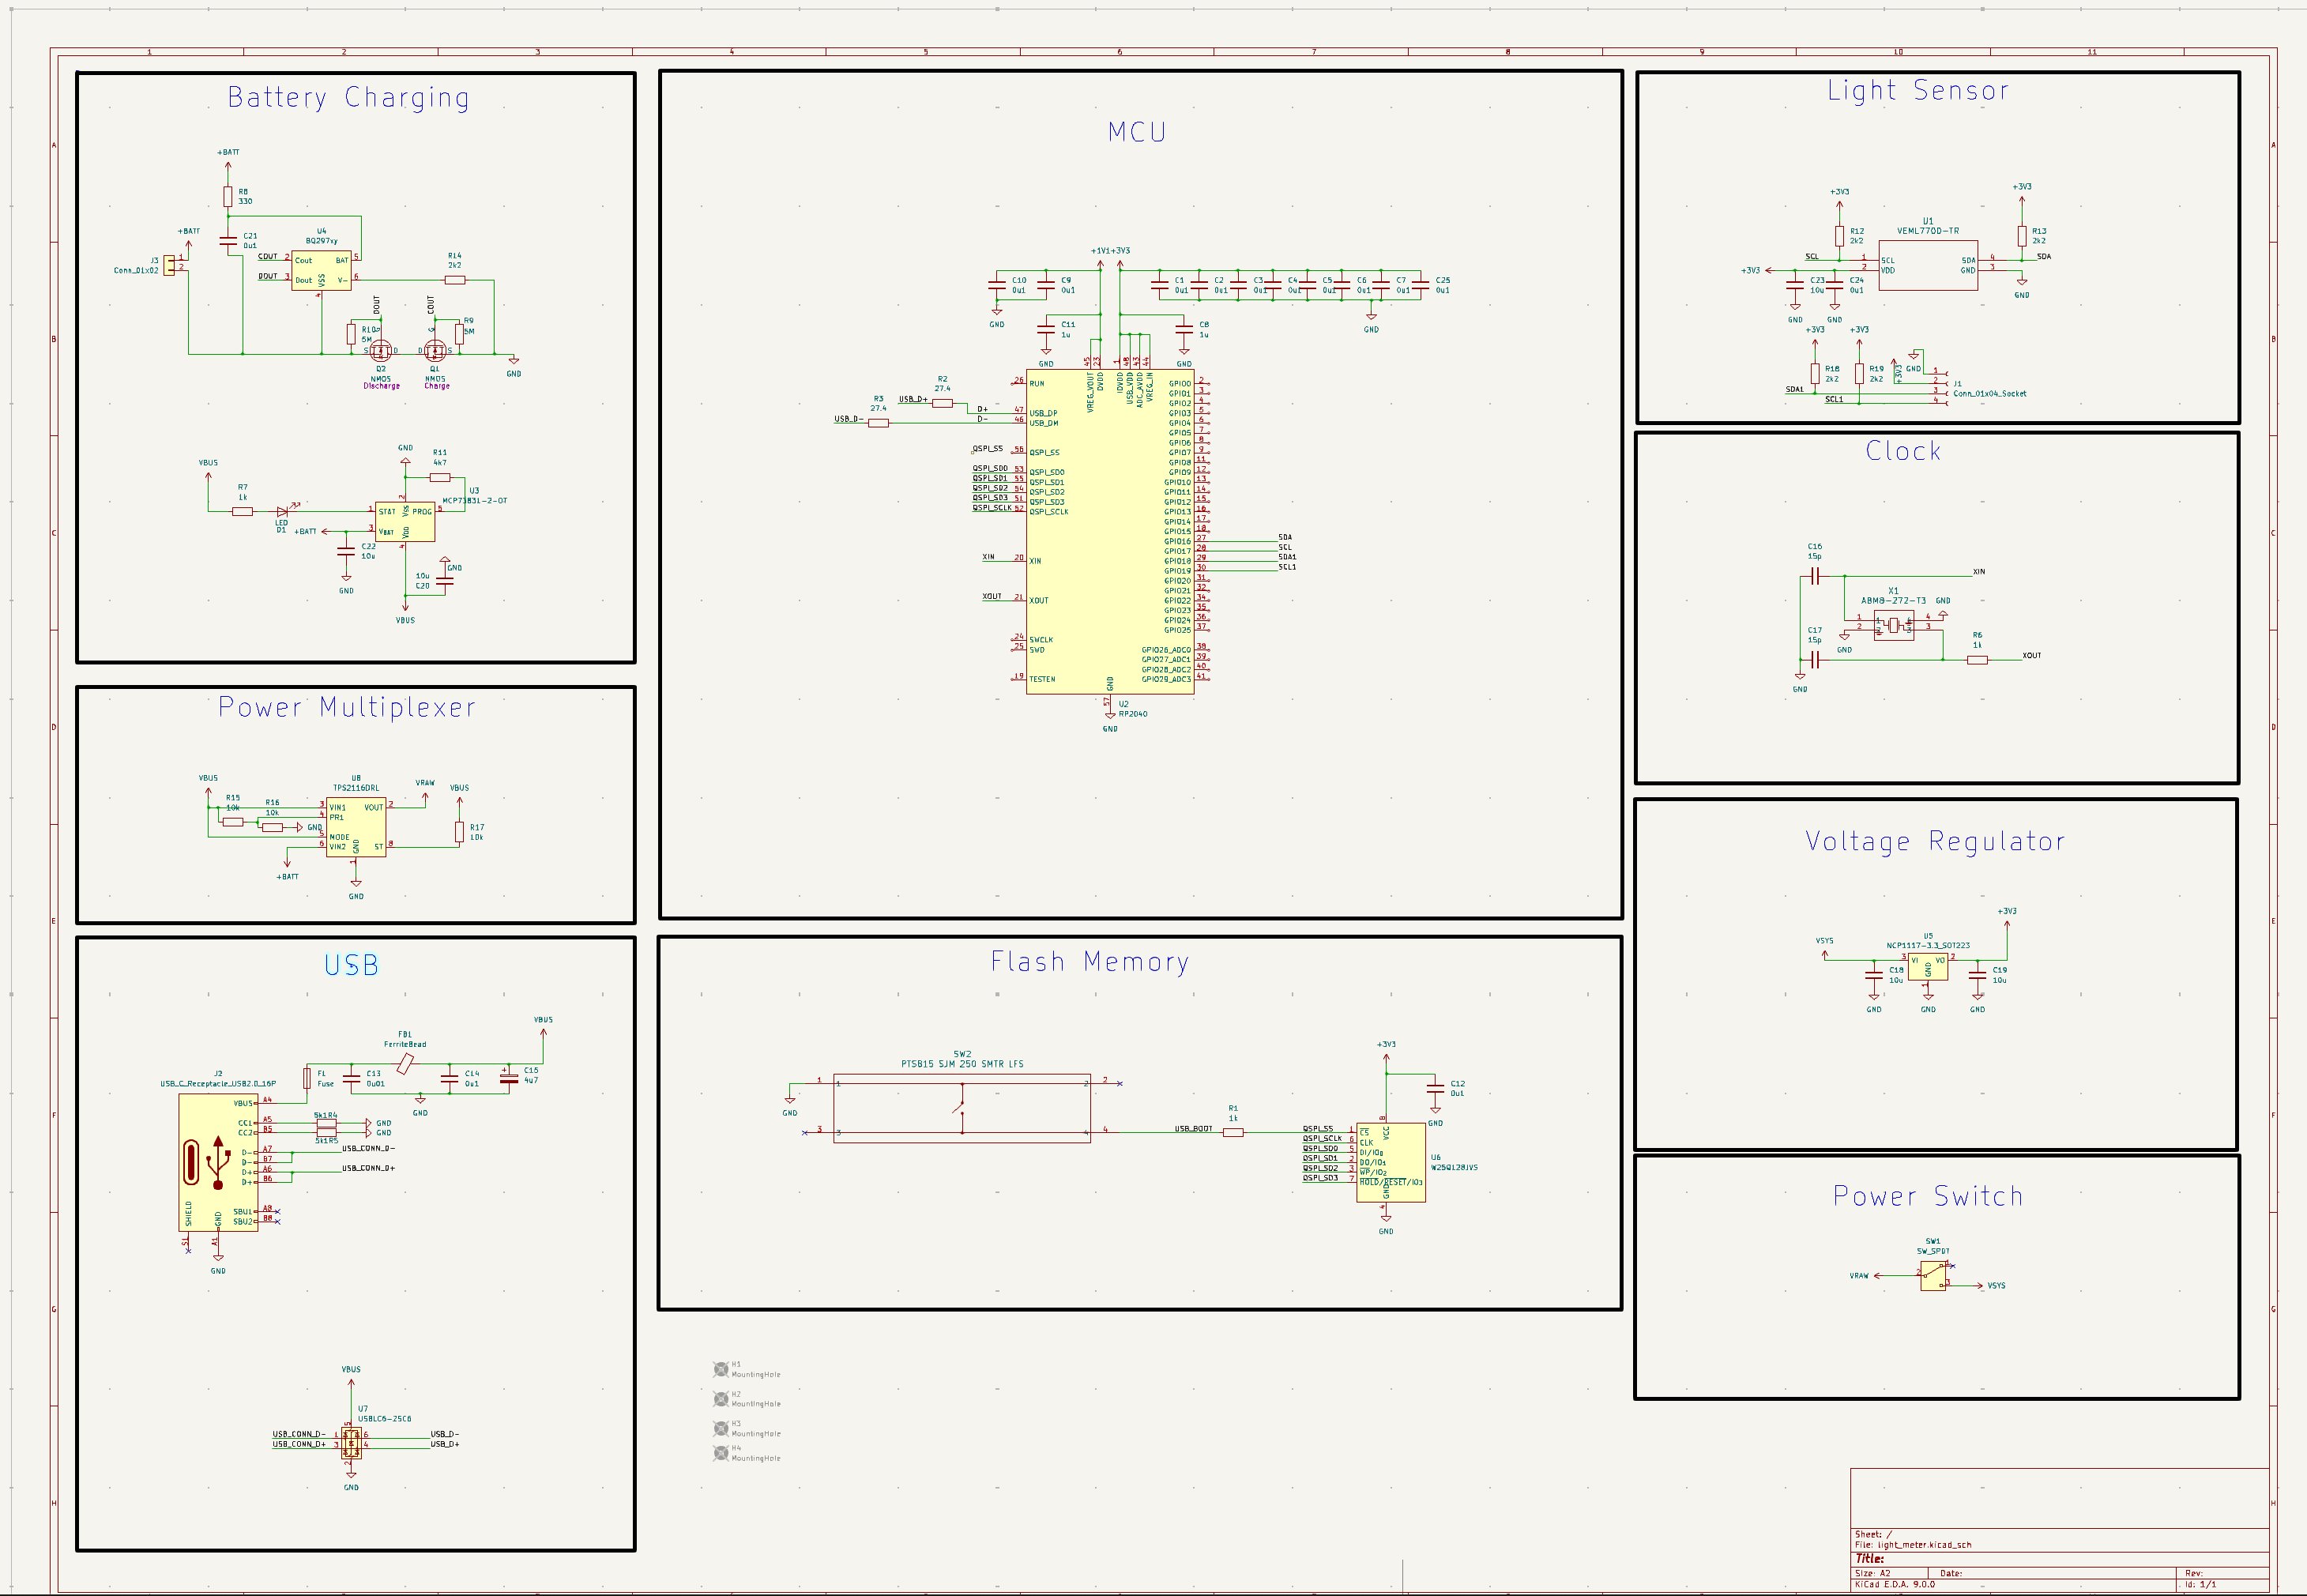
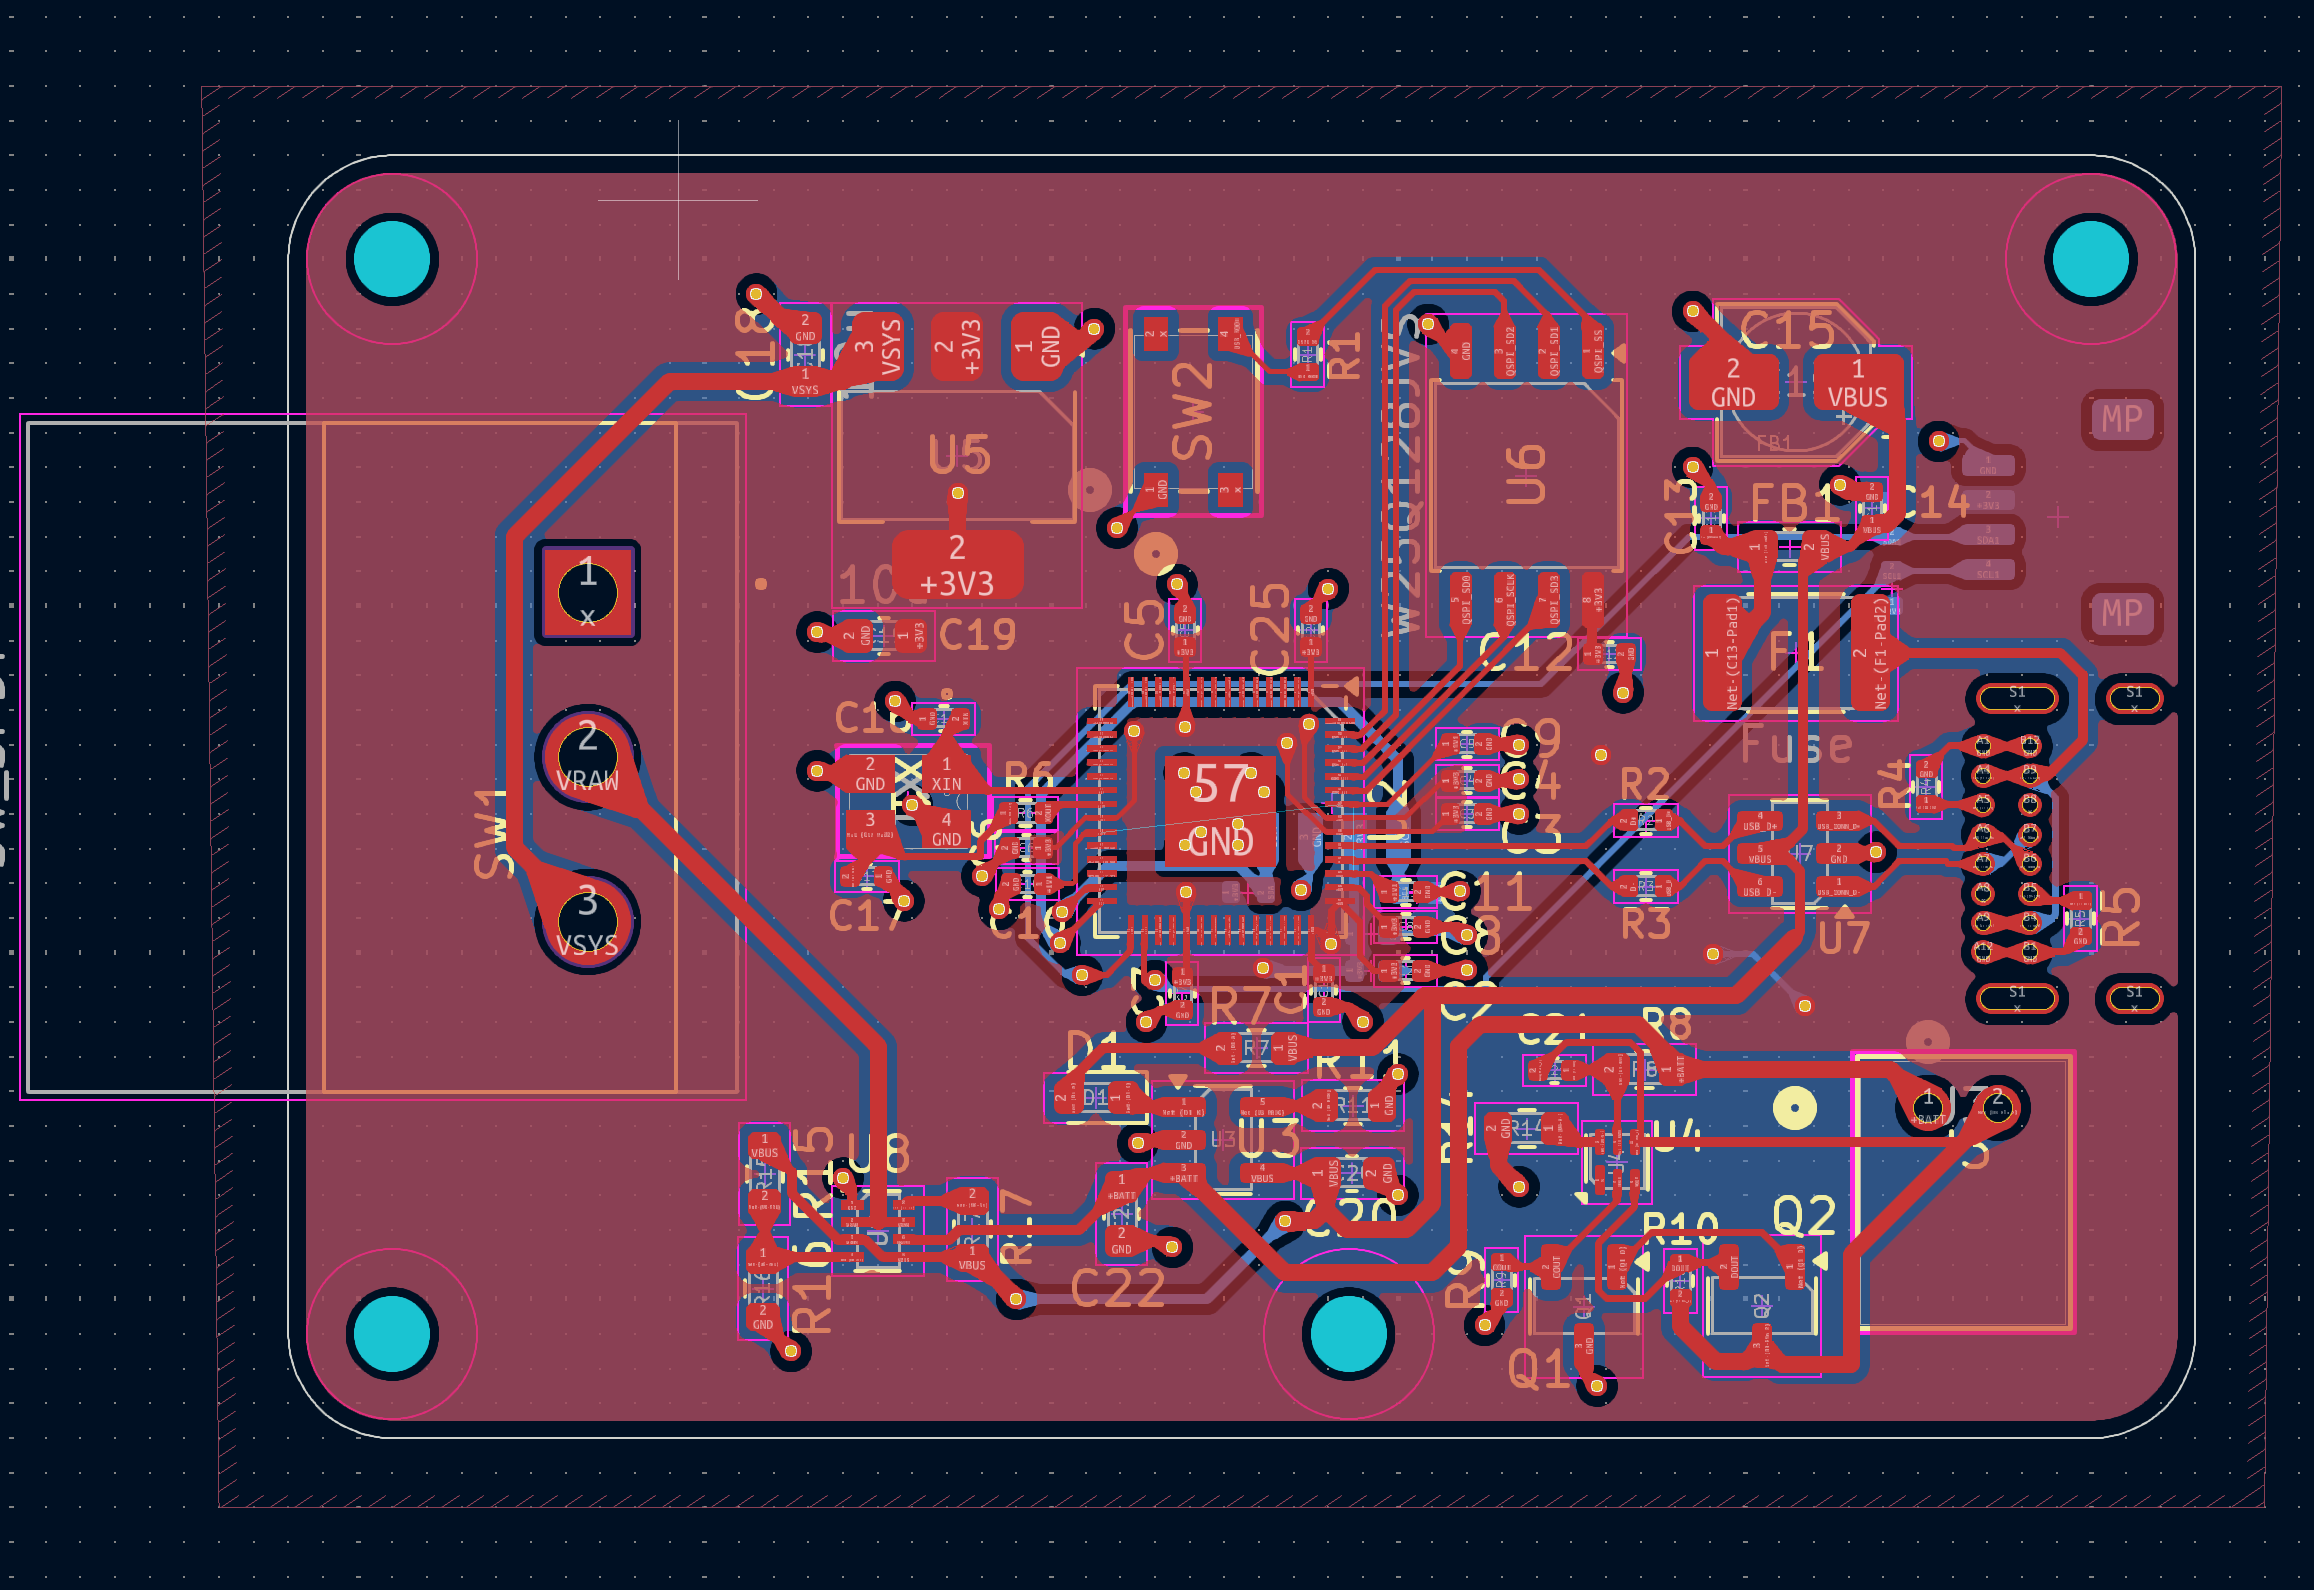
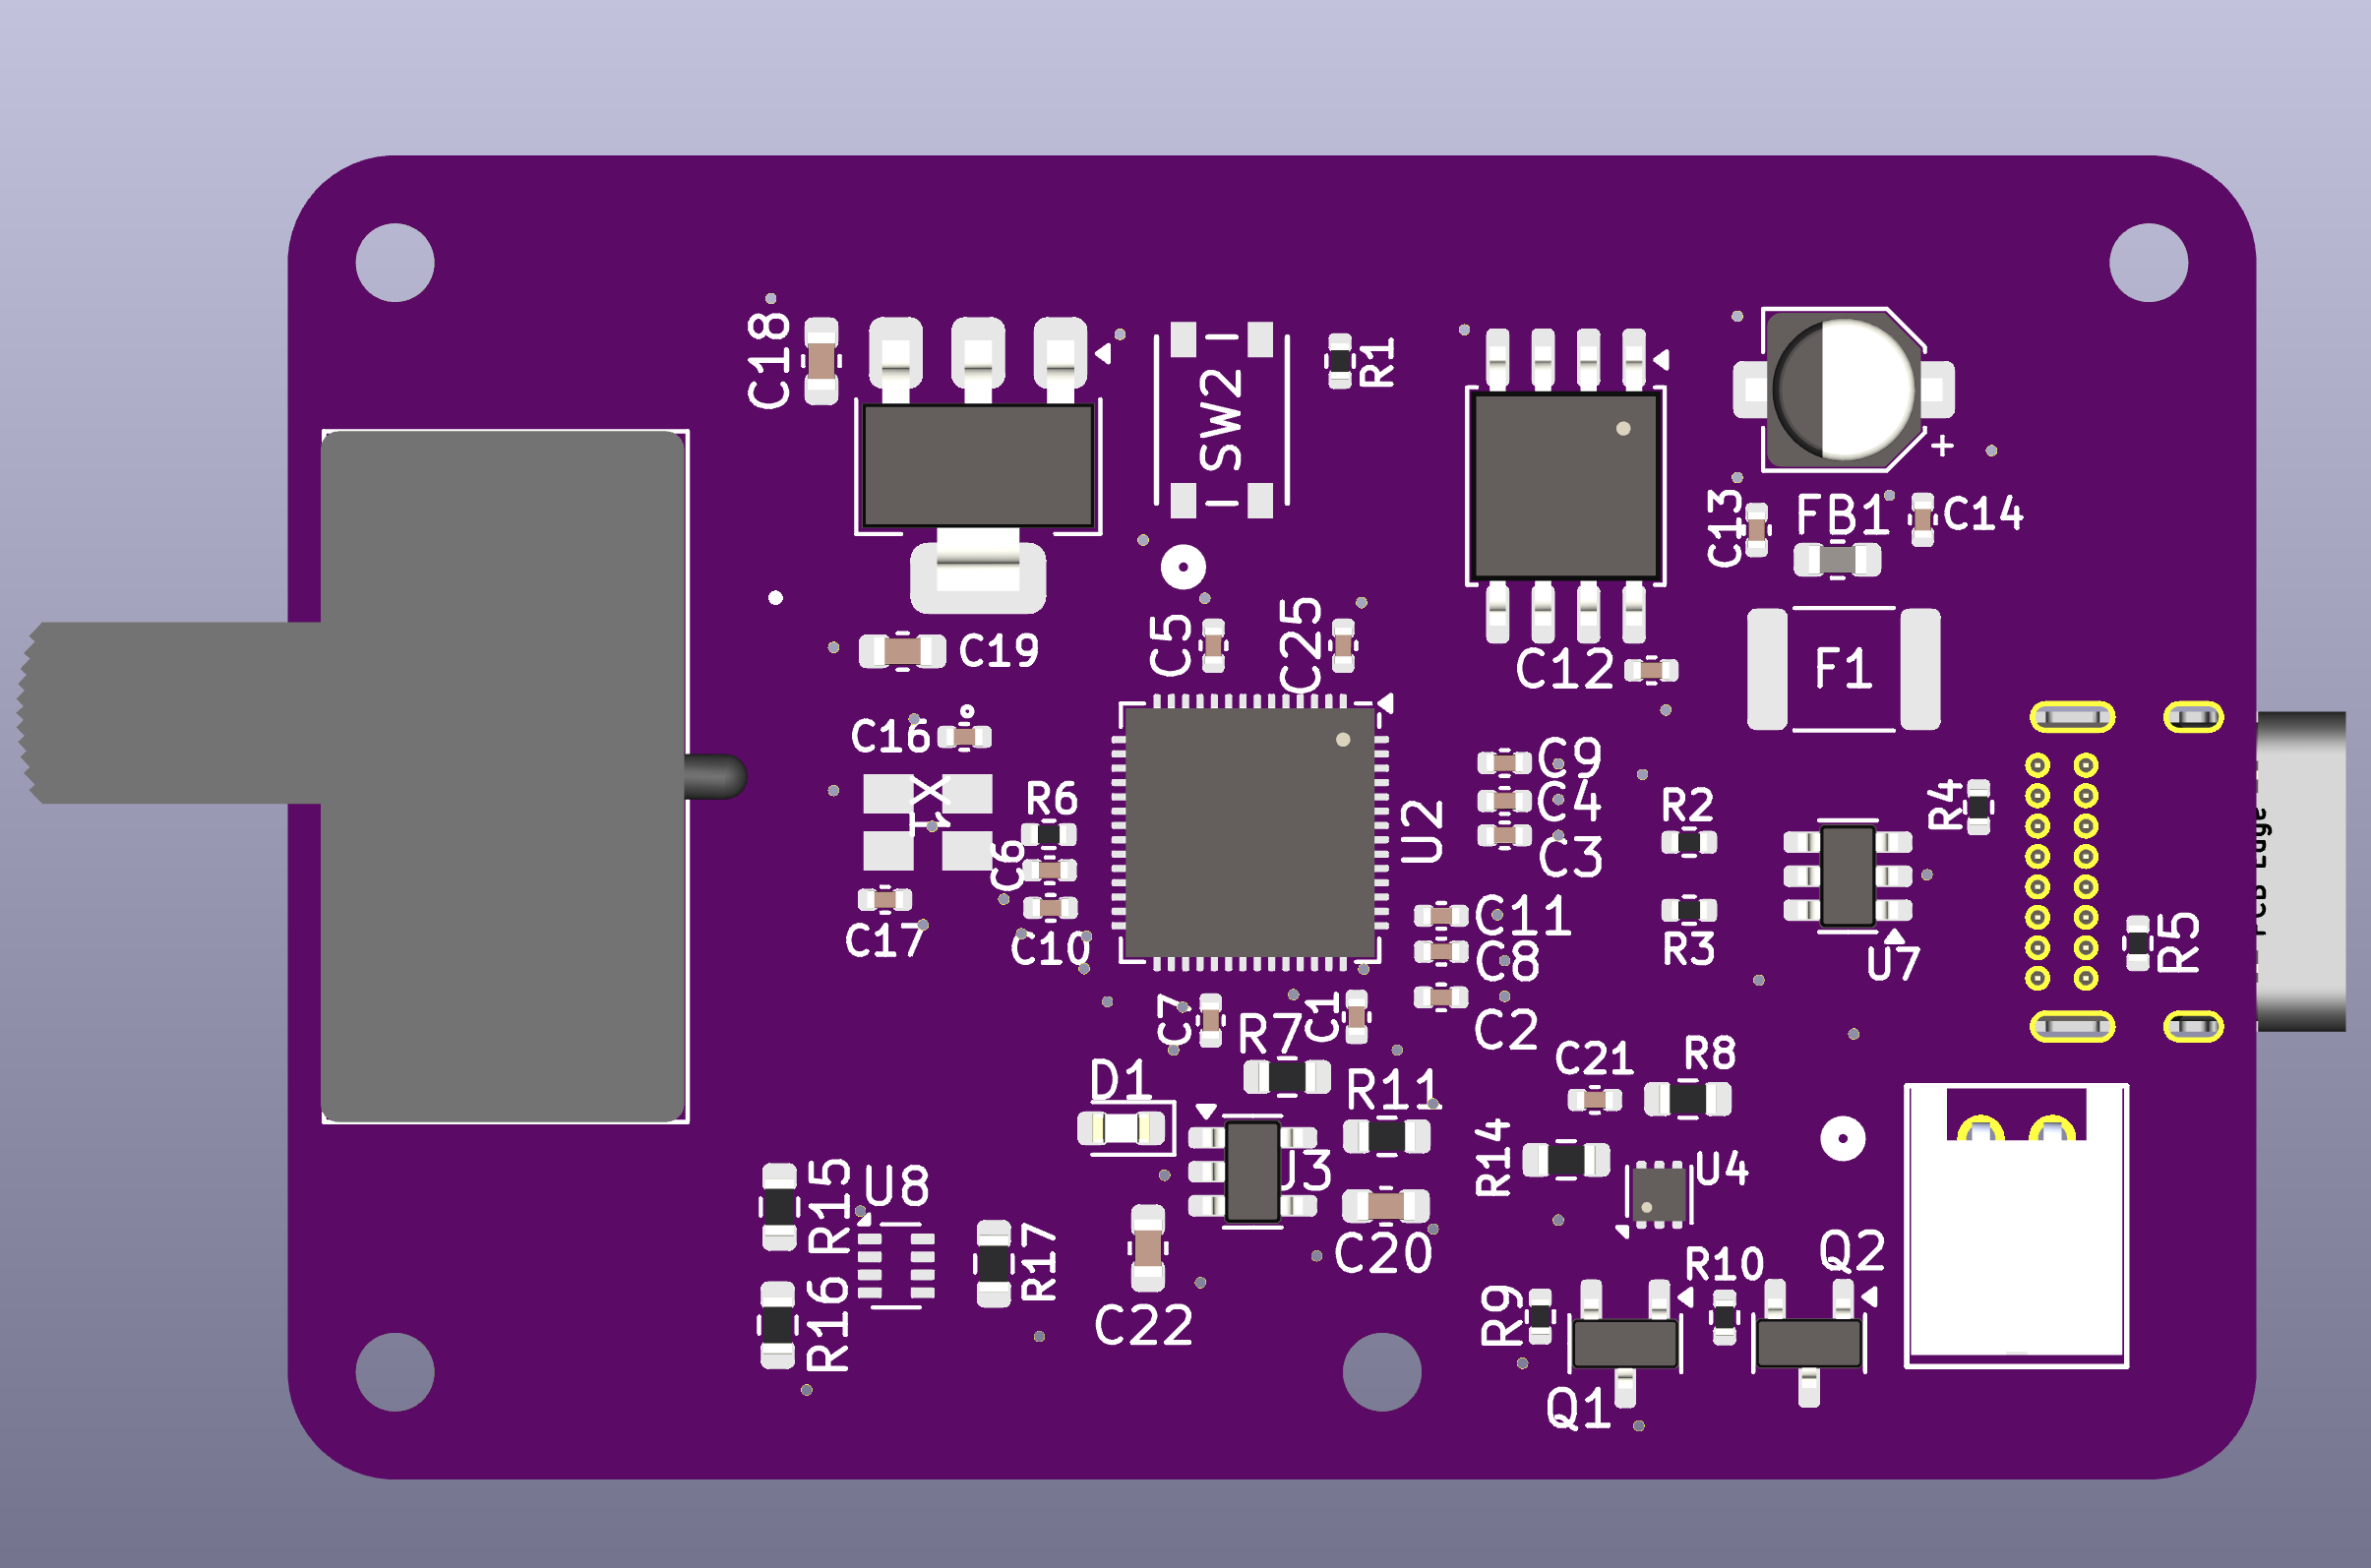
| Qty | Value | Footprint | References |
|---|---|---|---|
| 14 | 0u1 | Capacitor_SMD:C_0402_1005Metric | C1, C2, C3, C4, C5, C6, C7, C9, C10, C12, C14, C21, C24, C25 |
| 4 | 10u | Capacitor_SMD:C_0603_1608Metric | C18, C19, C20, C22 |
| 4 | 2k2 | Resistor_SMD:R_0402_1005Metric | R12, R13, R18, R19 |
| 4 | MountingHole | MountingHole:MountingHole_2.2mm_M2 | H1, H2, H3, H4 |
| 3 | 10k | Resistor_SMD:R_0603_1608Metric | R15, R16, R17 |
| 2 | 15p | Capacitor_SMD:C_0402_1005Metric | C16, C17 |
| 2 | 1k | Resistor_SMD:R_0402_1005Metric | R1, R6 |
| 2 | 1u | Capacitor_SMD:C_0402_1005Metric | C8, C11 |
| 2 | 27.4 | Resistor_SMD:R_0402_1005Metric | R2, R3 |
| 2 | 5M | Resistor_SMD:R_0402_1005Metric | R9, R10 |
| 2 | 5k1 | Resistor_SMD:R_0402_1005Metric | R4, R5 |
| 2 | NMOS | Package_TO_SOT_SMD:SOT-23-3 | Q1, Q2 |
| 1 | 0u01 | Capacitor_SMD:C_0402_1005Metric | C13 |
| 1 | 10u | Capacitor_SMD:C_0402_1005Metric | C23 |
| 1 | 1k | Resistor_SMD:R_0603_1608Metric | R7 |
| 1 | 2k2 | Resistor_SMD:R_0603_1608Metric | R14 |
| 1 | 330 | Resistor_SMD:R_0603_1608Metric | R8 |
| 1 | 4k7 | Resistor_SMD:R_0603_1608Metric | R11 |
| 1 | 4u7 | Capacitor_SMD:CP_Elec_4x5.7 | C15 |
| 1 | ABM8-272-T3 | ABM8:ABM8-272-T3_ABR | X1 |
| 1 | BQ297xy | Package_SON:WSON-6_1.5x1.5mm_P0.5mm | U4 |
| 1 | Conn_01x02 | JST-PH:CONN_S2B-PH-K-S_JST | J3 |
| 1 | Conn_01x04_Socket | Connector_JST:JST_SH_SM04B-SRSS-TB_1x04-1MP_P1.00mm_Horizontal | J1 |
| 1 | FerriteBead | Inductor_SMD:L_0603_1608Metric | FB1 |
| 1 | Fuse | Fuse:Fuse_1812_4532Metric | F1 |
| 1 | LED | LED_SMD:LED_0603_1608Metric | D1 |
| 1 | MCP73831-2-OT | Package_TO_SOT_SMD:SOT-23-5 | U3 |
| 1 | NCP1117-3.3_SOT223 | Package_TO_SOT_SMD:SOT-223-3_TabPin2 | U5 |
| 1 | PTS815 SJM 250 SMTR LFS | push_button:SW4_PTS815 SJM 250 SMTR LFS_CNK | SW2 |
| 1 | RP2040 | Package_DFN_QFN:QFN-56-1EP_7x7mm_P0.4mm_EP3.2x3.2mm | U2 |
| 1 | SW_SPDT | L102021ML04Q:SW_L102021ML04Q | SW1 |
| 1 | TPS2116DRL | Package_TO_SOT_SMD:SOT-583-8 | U8 |
| 1 | USBLC6-2SC6 | Package_TO_SOT_SMD:SOT-23-6 | U7 |
| 1 | USB_C_Receptacle_USB2.0_16P | Connector_USB:USB_C_Receptacle_GCT_USB4085 | J2 |
| 1 | VEML7700-TR | VEML770:VEML7700-TR | U1 |
| 1 | W25Q128JVS | Package_SO:SOIC-8_5.3x5.3mm_P1.27mm | U6 |
Isaac-Duarte/wellfed
Open firmware that runs the PETLIBRO Granary PLAF103 pet feeder on your own Wi-Fi: no cloud, no account. Early and in testing.


ikajdan/katia
A split keyboard with 6 by 3 column staggered keys and 3 thumb keys, based on the Crkbrd design


alph4345/test
TrinketCore puts everything a small rechargeable gadget needs on one 40 × 60 mm board, ready to order assembled from PCBWay:

enkhbold470/kicad-projects
Five KiCad 10 boards (4- and 6-layer): ESP32-S3 industrial gateway, USB-C PD bench supply, RP2040 logic analyzer, FOC motor controller, iCE40 FPGA board.
It measures 55 × 37 mm and has 4 copper layers, 1.6 mm thick.
67 parts, built around the RP2040, VEML7700-TR, W25Q128JVSIQ and TPS2116DRL. The full list of its parts is on this page, with links to each part's symbol and footprint where PCBKit's library has them.
From the cespinal117/Film-Camera-Lightmeter repository on GitHub, at the commit this page was made from: the board is light_meter/light_meter.kicad_pcb and its schematic light_meter/light_meter.kicad_sch. PCBKit opens the board in the browser, with nothing to install.
Its repository states no licence, so its author keeps all rights: ask cespinal117 before reusing the design.