
2 layers140.5 × 30 mm
Type e
google/mozc-devices
Circuit diagrams and firmware source code for Gboard DIY keyboards
16 parts3kApache-2.0

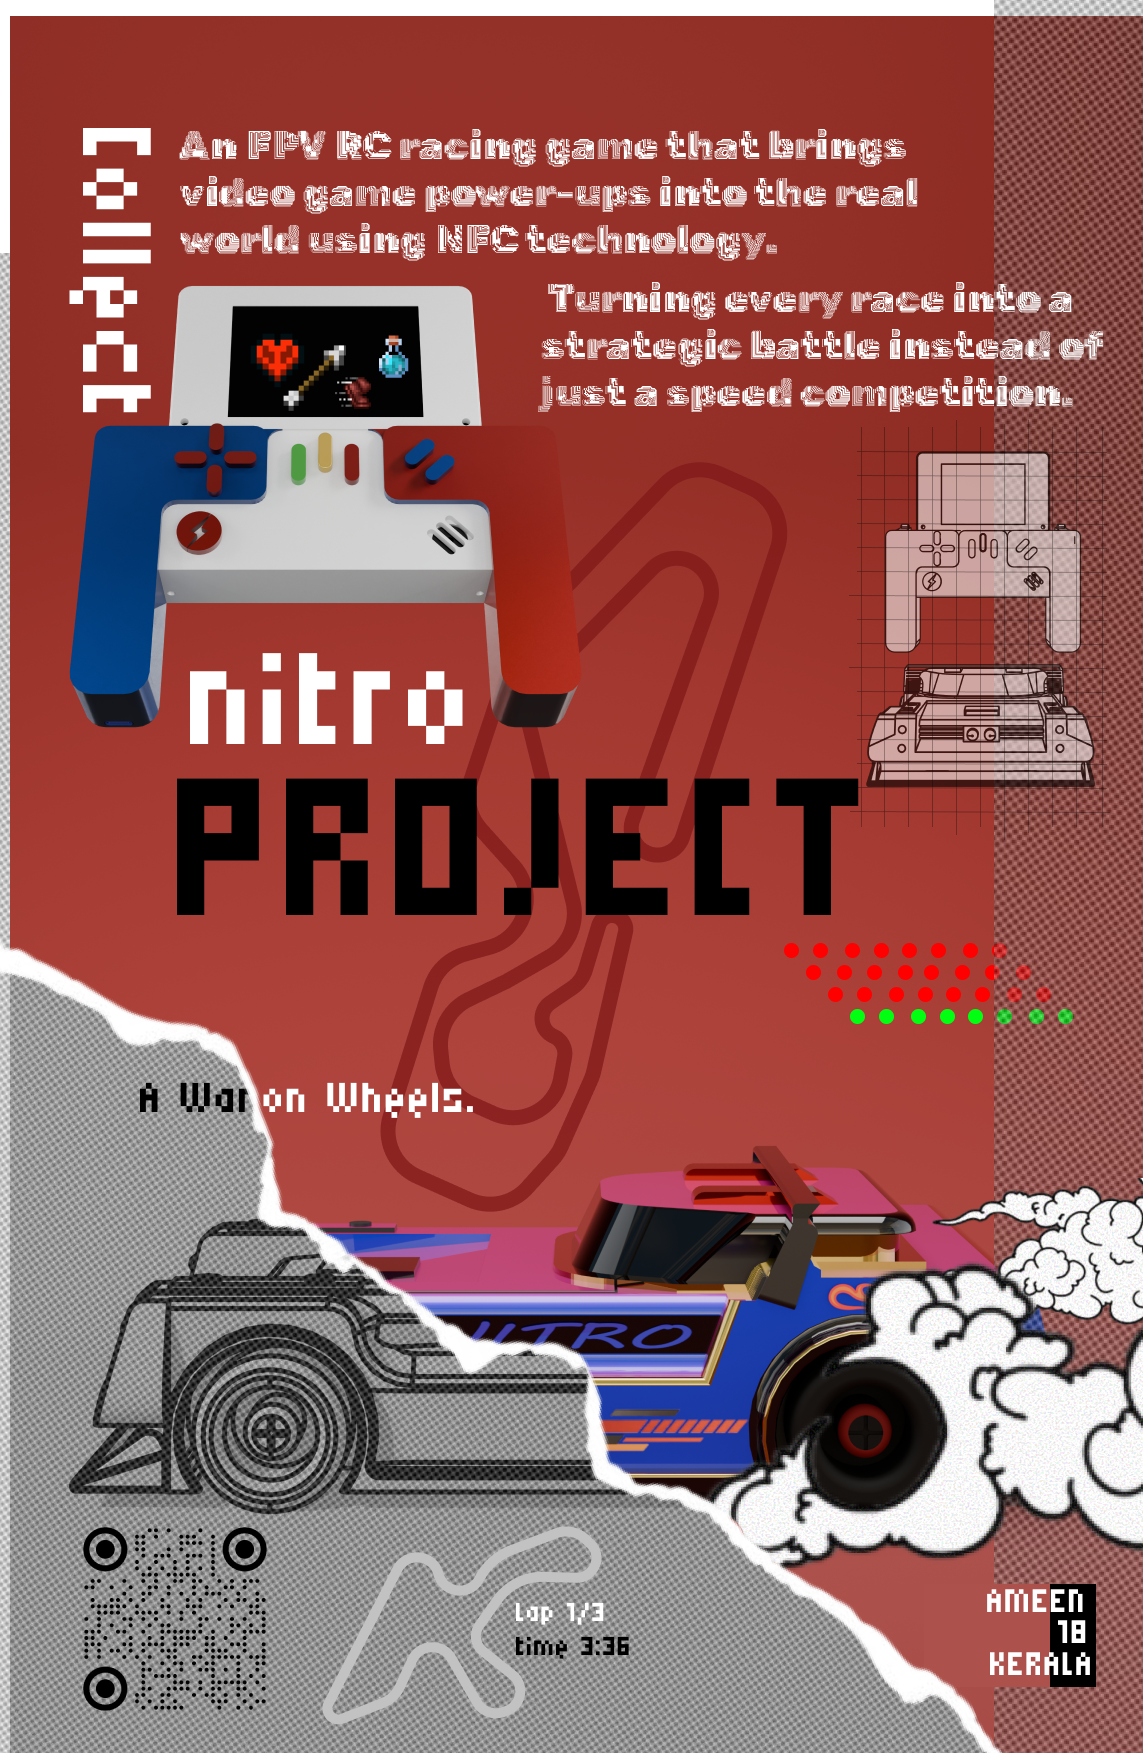
An RC FPV mini racing car with special effects like in games
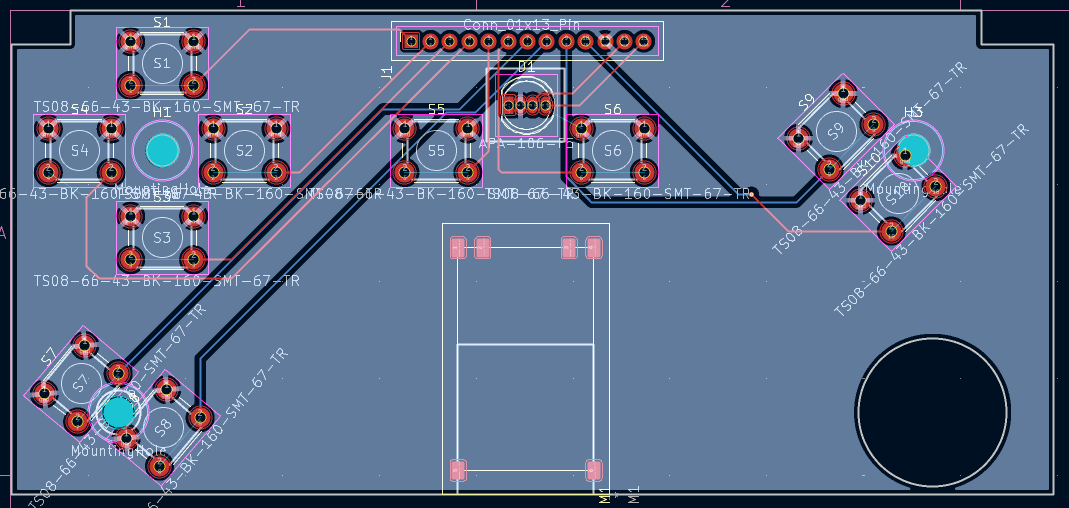
Remote is an open-source printed circuit board by amionearth, from the amionearth/Project-Nitro repository on GitHub. It is a 2-layer board of 107.5 × 50 mm with 16 parts on 20 nets, routed with 39 tracks and 1 via.
Its parts include 10 switches, 1 diode and 1 connector.
Have you ever wondered about having a FPV RC Racing Car with games effects such as:
I have always wondered to play RC car like in games with boost, power, win, health etc.. because that all make more fun for the world and playing with friends makes it even more fun. So I built this car - it will give you a game vibe with RC FPV cars in real life, bringing more fun and joy to the world!## How to Build 🛠️
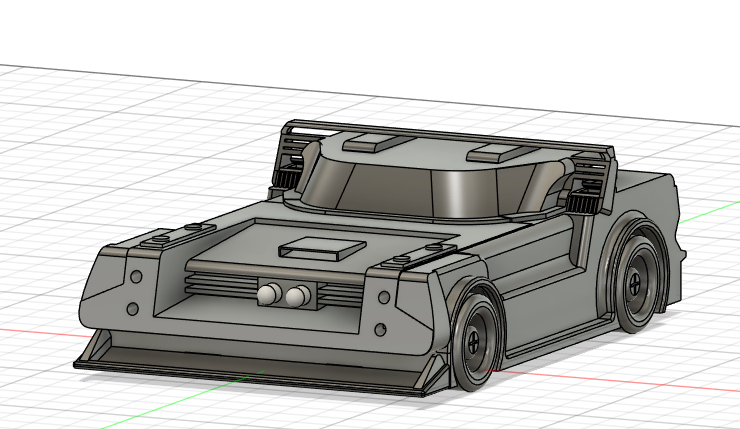
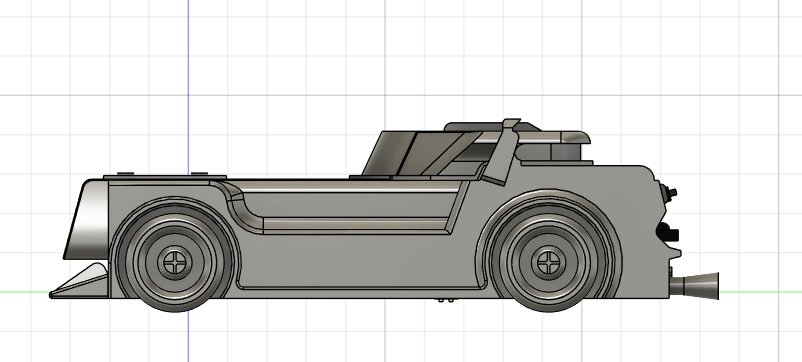
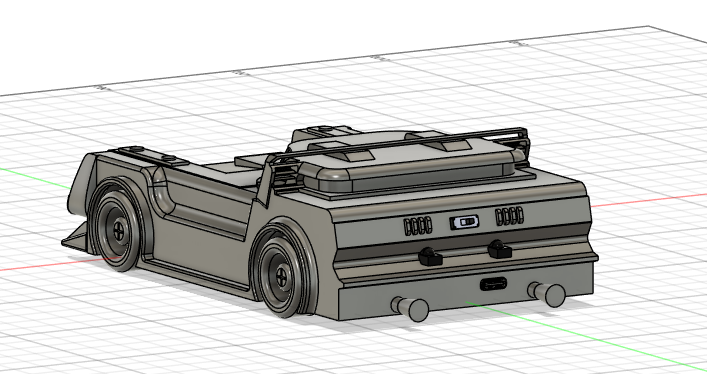
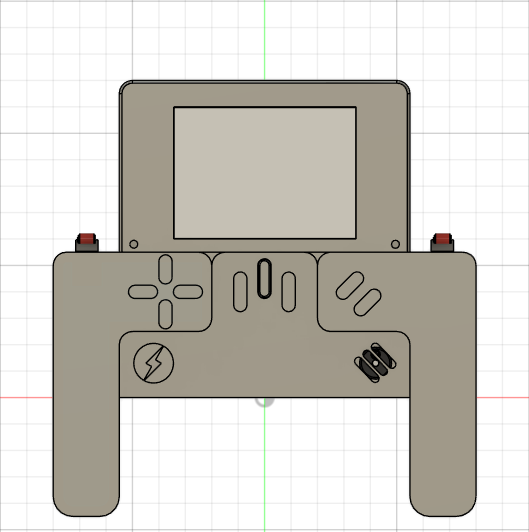
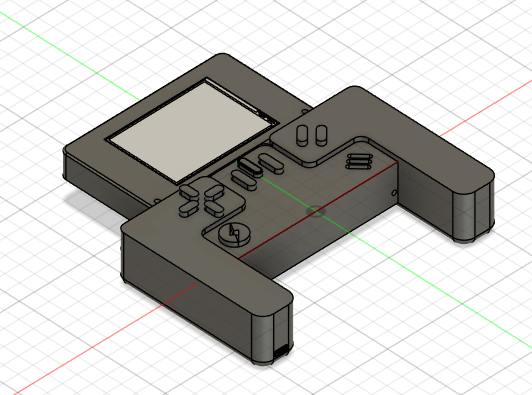
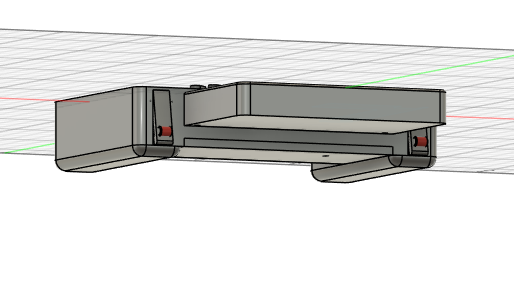
add screw and heat sink here:
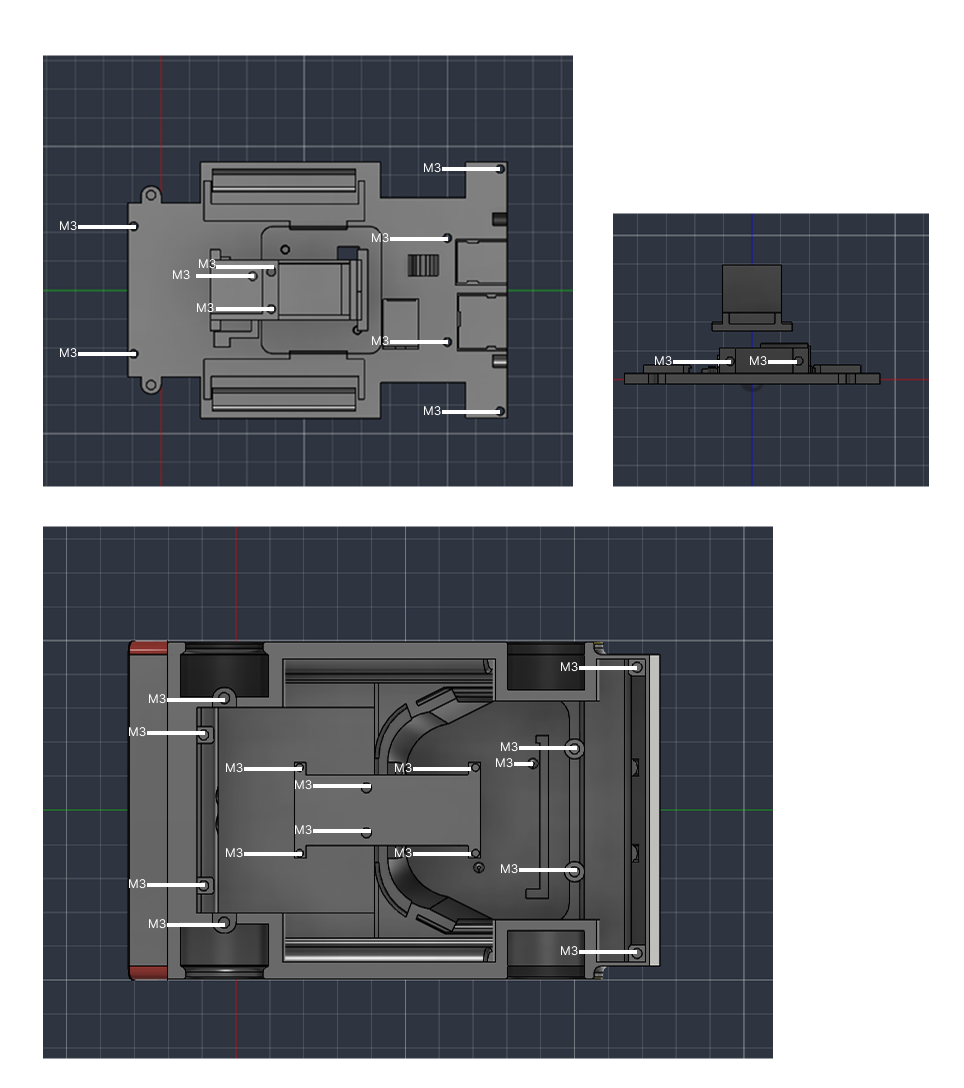
After 3D printing, check the tolerance of each part and sand it smoothly for better look and placement. Then solder everything with wires, place each component in its designated position as shown in the .step & .f3d files,with the screw and glue. glue the IR receiver , transmitter and batteries in their places, place ESP32 on the ESP tray and screw it well, then mount to the car body as shown.## Car Assembly
/cad/car./cad/remote.when you turn on the remote and car, it will connect (if it's your first time,you may need to pair them with car) You'll get a web interface in phone or laptop for FPV.Once connected you have two modes:
You can drive it as normal RC car without any special features.
In this mode, you need an opponent to play with. One of you will host the game and that person's car becomes the controller of the game also. The remote looks for players when a player is found:
All bad effects can be cleared by going to your own pit lane. ## How It Works ⚙️
This all works with ESP-NOW protocol. The host's car maintains the rules and everything:
car ↔ remote - Direct communication between each unitcar(host) ↔ car(client) - Host communicates with client carscamera → WiFi web → phone, laptop... - Video stream to viewer devicescad/
|- car/
| |- car.step
|- remote/
| |- Remote.step
|- nfc/
| |-nfc tag sticker.step
firmware/
| - car/
| |-Car firmware
|- remote/
| |-Remote firmware
|- camera/
| |-FPV camera firmware| Item | Number | Price | Links |
|---|---|---|---|
| 5mm 940nm IR Emitter Transmitter | 2 | ₹140 | Amazon |
| MPU6050 IMU | 1 | ₹174 | Amaz |
| PN532 NFC RFID Module | 1 | ₹425 | Robokit |
| ESP32S3-Sense | 1 | ₹1800 | SeeedStudio |
| ESP32 WiFi Bluetooth | 1 | ₹299 | Amazon |
| 6V N20 600 RPM Motor | 1 | ₹149 | Robocraz |
| 3.7V 2500mAh 18650 Li-Ion Battery | 2 | ₹500 | Robocraze |
| TP4056 Type-C Mini Charger | 1 | ₹49 | Robocraz |
| LM2596 DC-DC Buck Converter | 1 | ₹79 | Robocraze |
| SG90 Micro Servo Motor | 1 | ₹99 | robocraze |
| DRV8833 2-Channel Driver | 1 | ₹99 | Robocraze |
| TSOP38238 IR Receiver Diode | 2 | ₹50 | QuartzComponents |
| M3x4mm Heat Set Inserts | 20 | ₹80 | Robu |
| M3 x 6mm Screw | 20 | ₹60 | RoboticsDNA |
| Item | Number | Price | Links |
|---|---|---|---|
| ESP32 WiFi Bluetooth | 1 | ₹299 | Amazon |
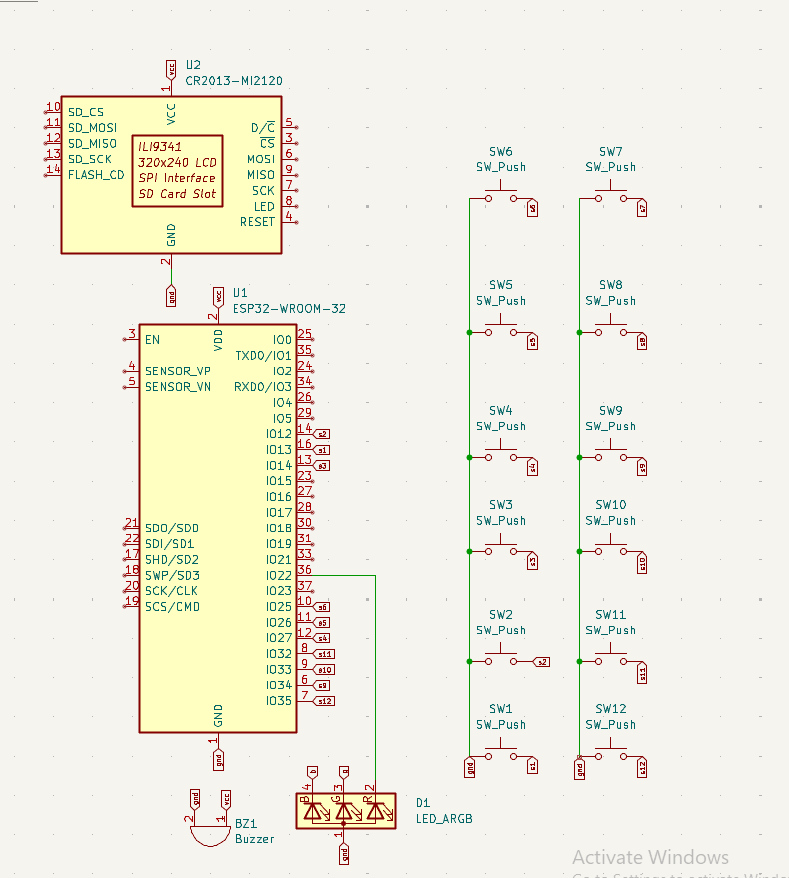
| Tactile momentary push button | 12 | ₹36 | amazon |
| 3.7V 1500mAh LiPo Rechargeable Batery Model | 1 | ₹350 | robocraze |
| TP4056 Type-C Mini | 1 | ₹49 | robocraze |
| 3.3V Small Piezo Buzzer | 1 | ₹30 | https://robocraze.com/products/3-volts-buzzer-small |
| 5mm RGB LED | 1 | ₹15 | robocraze |
| 2.8 Inch tft LcD display | 1 | ₹780 | robocraze |
| m3x4mm heatset inserts | 12 | ₹80 | Rubu |
| M3 x 6mm screw | 12 | ₹60 | RoboticsDNA |
₹1700
| Part | Cost |
|---|---|
| Car | ₹4000 |
| Remote | ₹1700 |
Thats it for now.> NOTE: you need to place a black transparent plastic thin sheet or something on the front window where the camera is placed and in the remote for the switch you can either use this Prototyping PCB or you can custom print a pcb board everything on car and remote is either snap fit or screwable and only the led , ir and batter need glue-gun/tap
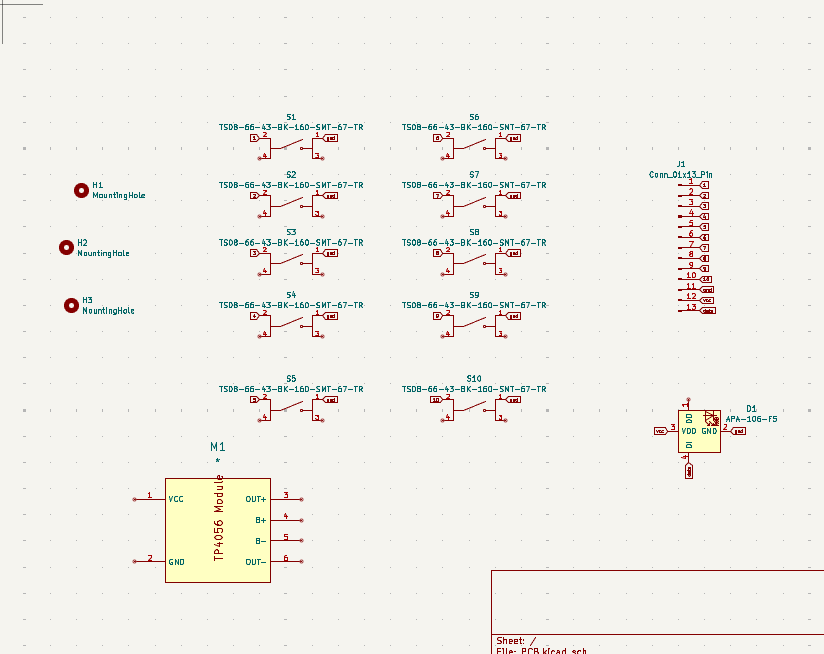
| Qty | Value | Footprint | References |
|---|---|---|---|
| 10 | TS08-66-43-BK-160-SMT-67-TR | Button_Switch_THT:SW_PUSH_6mm | S1, S2, S3, S4, S5, S6, S7, S8, S9, S10 |
| 3 | MountingHole | MountingHole:MountingHole_3mm | H1, H2, H3 |
| 1 | * | Module:tp4056 | M1 |
| 1 | APA-106-F5 | LED_THT:LED_D5.0mm-4_RGB | D1 |
| 1 | Conn_01x13_Pin | Connector_PinSocket_2.00mm:PinSocket_1x13_P2.00mm_Horizontal | J1 |
It measures 107.5 × 50 mm and has 2 copper layers, 1.6 mm thick.
16 parts. The full list of its parts is on this page, with links to each part's symbol and footprint where PCBKit's library has them.
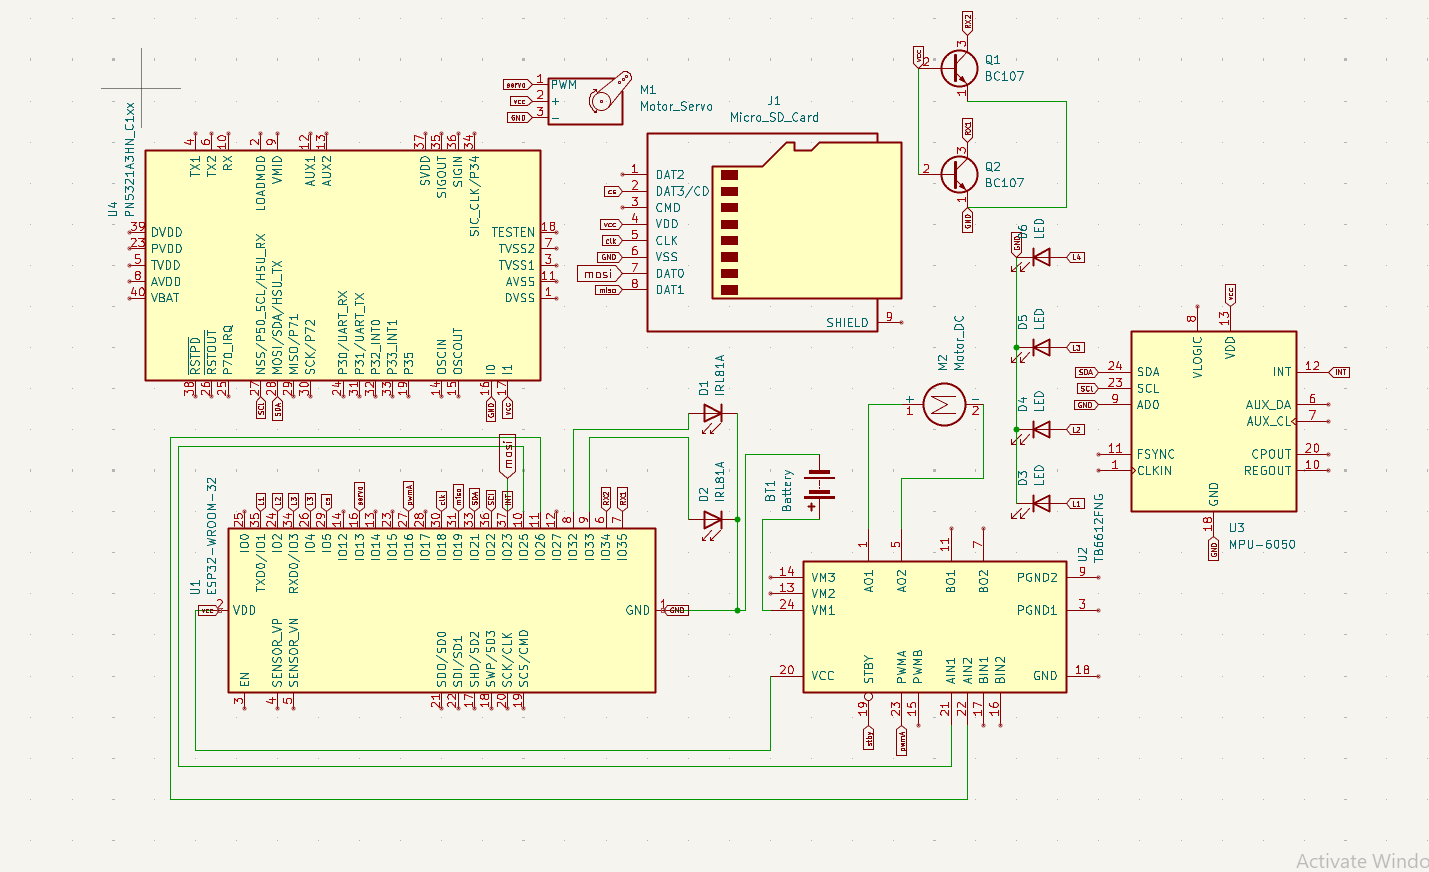
From the amionearth/Project-Nitro repository on GitHub, at the commit this page was made from: the board is pcb/remote/PCB/PCB.kicad_pcb and its schematic circuit/car/car.kicad_sch. PCBKit opens the board in the browser, with nothing to install.
Its repository states no licence, so its author keeps all rights: ask amionearth before reusing the design.
google/mozc-devices
Circuit diagrams and firmware source code for Gboard DIY keyboards

conorpp/u2f-zero
U2F USB token optimized for physical security, affordability, and style

rusefi/rusefi
rusefi - GPL internal combustion engine control unit

VoronDesign/Voron-Hardware
Cool Hardware designed by the Voron Design group

hoglet67/RGBtoHDMI
Bare-metal Raspberry Pi project that provides pixel-perfect sampling of Retro Computer RGB/YUV video and conversion to HDMI

hackclub/OnBoard
💡 Join 1,000 teenagers and make your first PCB with a $100 grant!

